Prison tiles
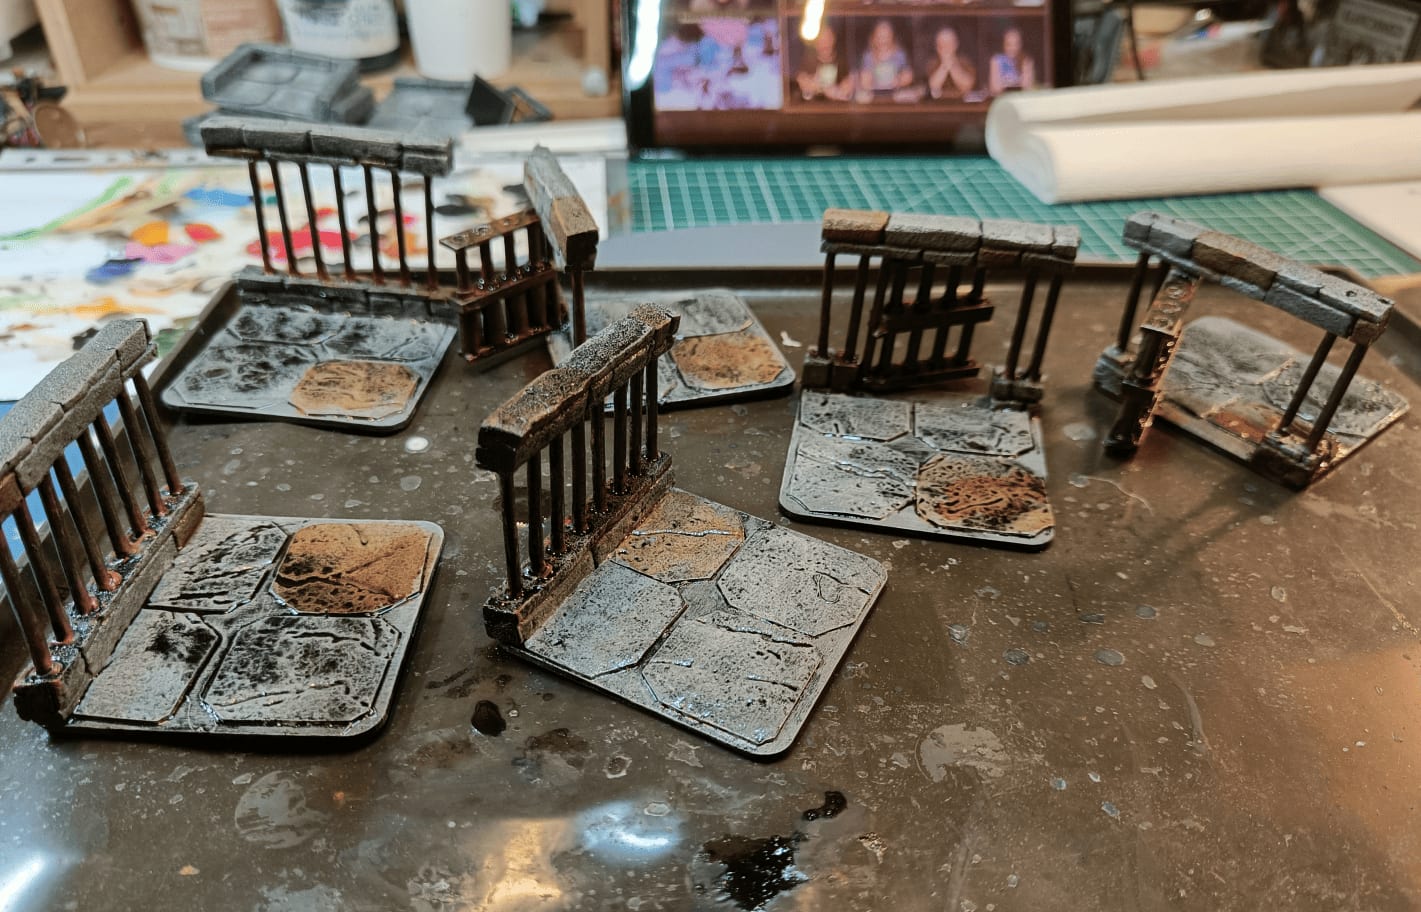
Once again, for my scenario in the asylum where the character starts locked in prisons in the basement, I obviously needed prisons for that. At that time, I thought doing everything with tiles was a good idea so I followed that format, I made tiles that contain prison bars.
In hindsight, I realize they're not the easiest things to work with. I'd prefer now to just have a wall prop with bars that I can position wherever I want. That's not what I did though. I integrated them directly onto the tile and we'll see how I made that.

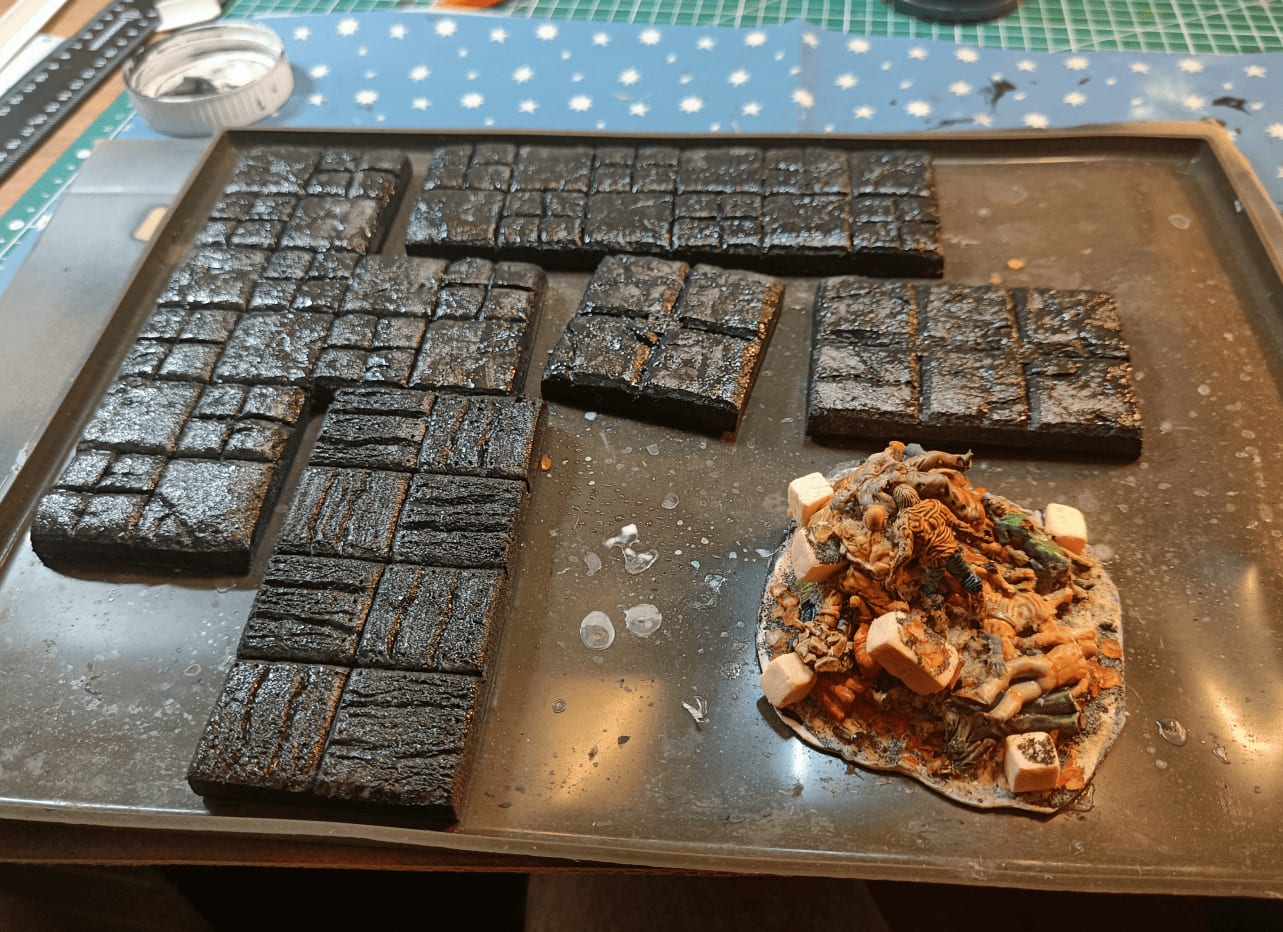
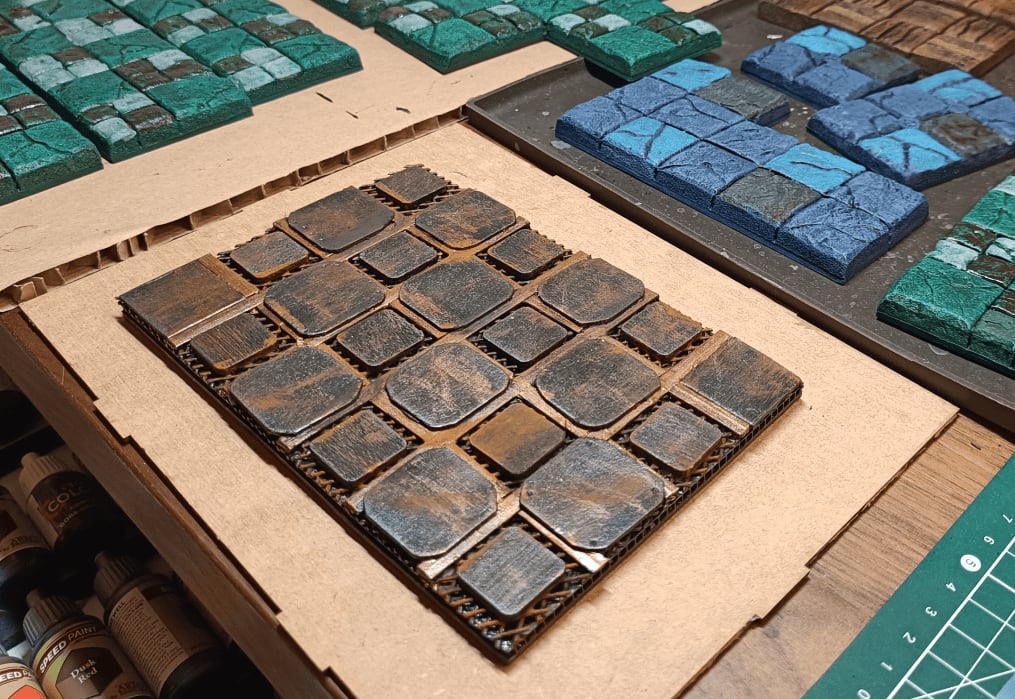
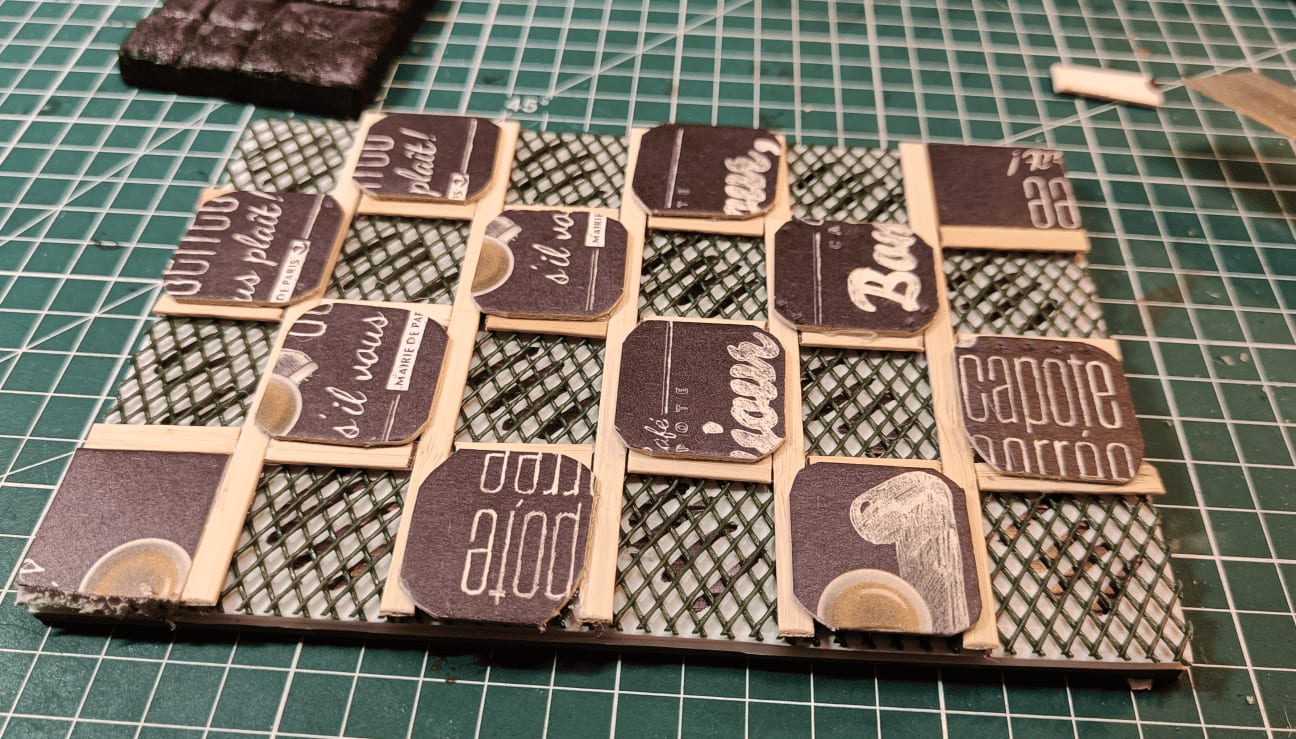
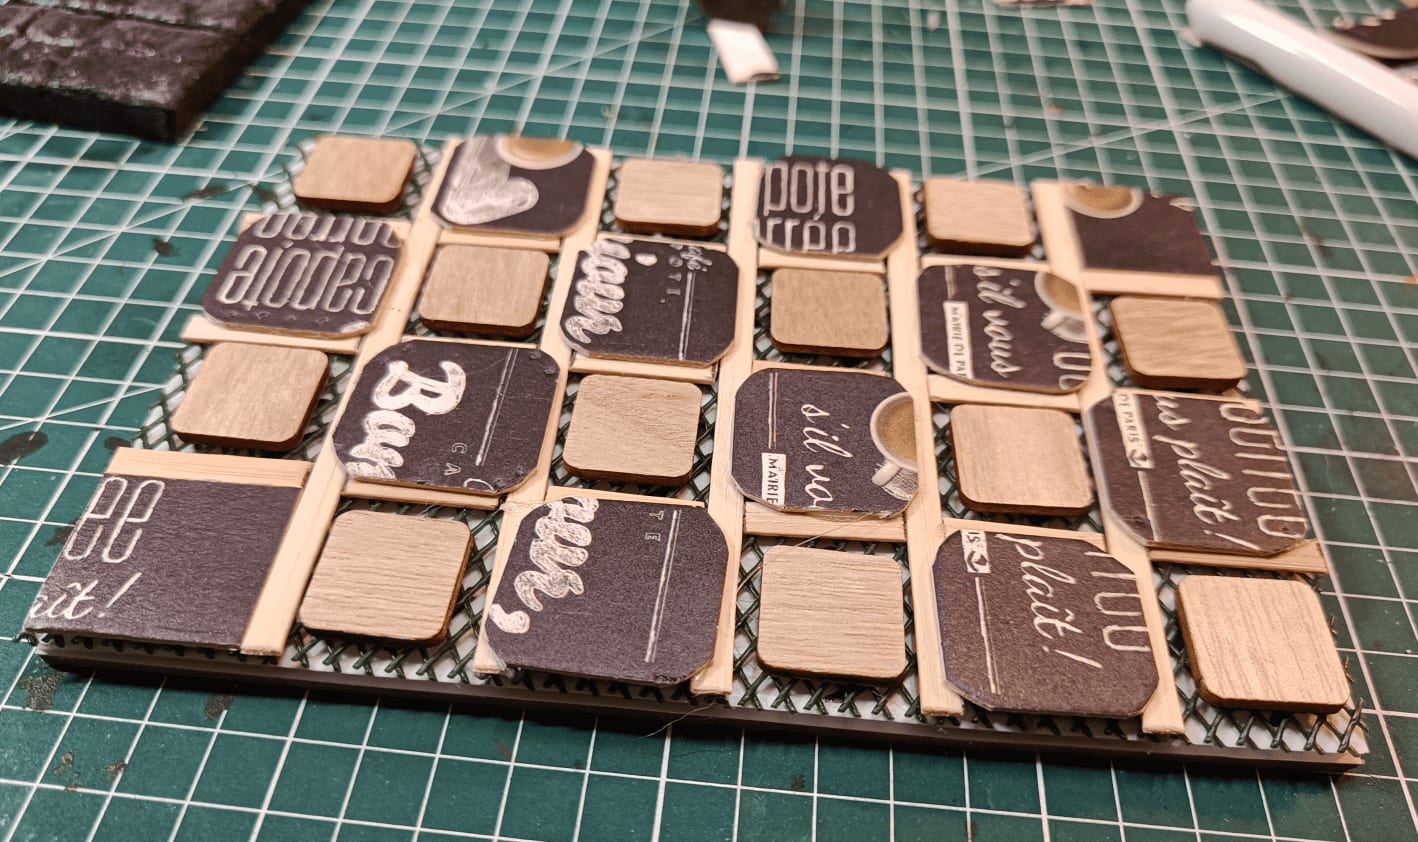
Here's what the foundation looks like. The structure is made of square wood pieces that I ordered by the hundreds on Aliexpress. The advantage is they all have exactly the same dimensions, so I don't have to worry about measuring, and it lets me make tiles where each square is 3cm x 3cm.
On top, I'm using textured wallpaper that I cut into squares and glue down. For the bars themselves, I take a strip of polystyrene, stick toothpicks into it, and put another strip of polystyrene on top.
Some of them have working doors. You can see the gray ones are actually made with Lego pieces stacked on each other. I trimmed off the little studs on top and only glued them on one side to one of the toothpicks, so the door can actually open.

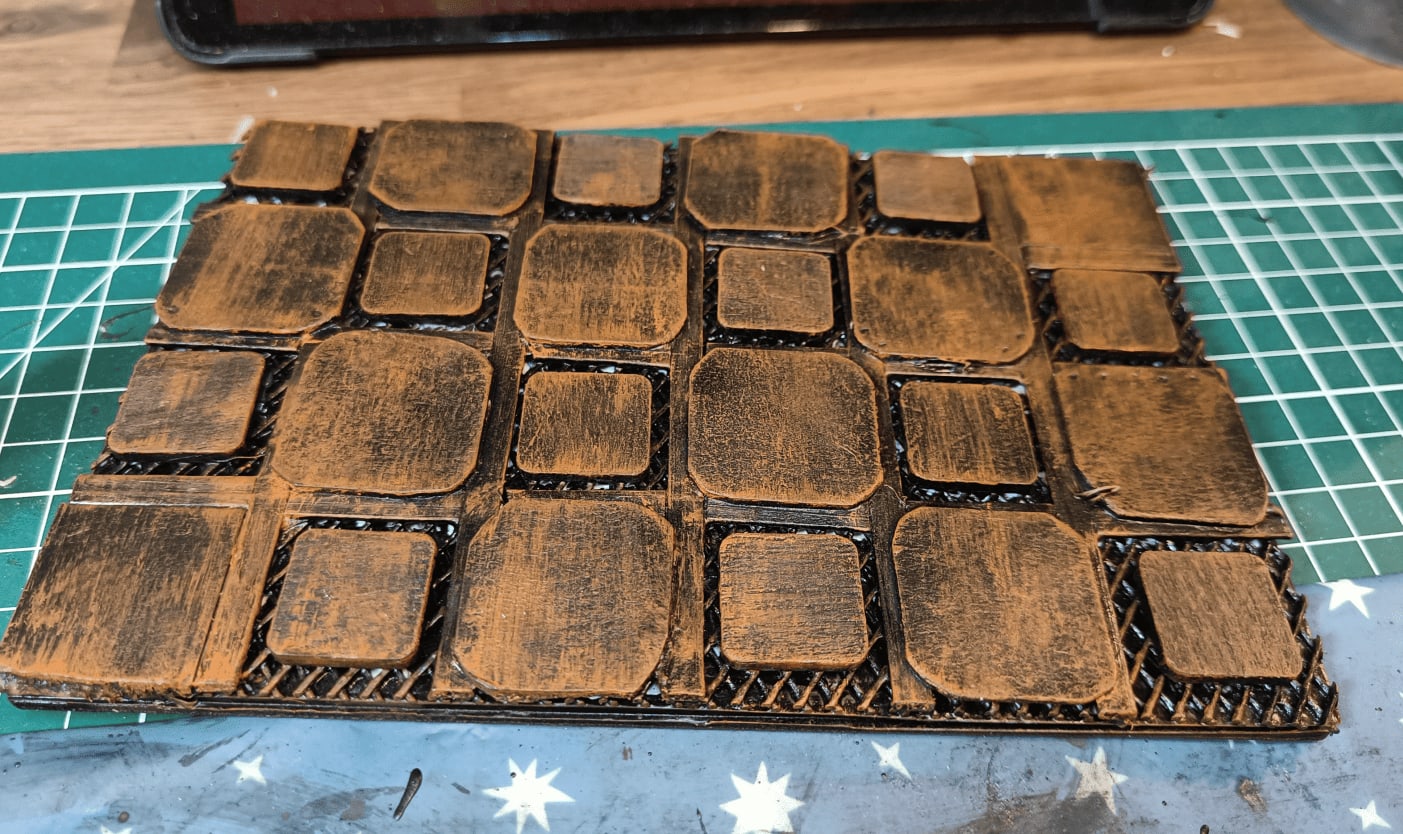
And there you have it! After a first coat of classic stone paint on the floor and on the top and bottom of the bars, and rust made with orange on the bars themselves.
Pile of corpses

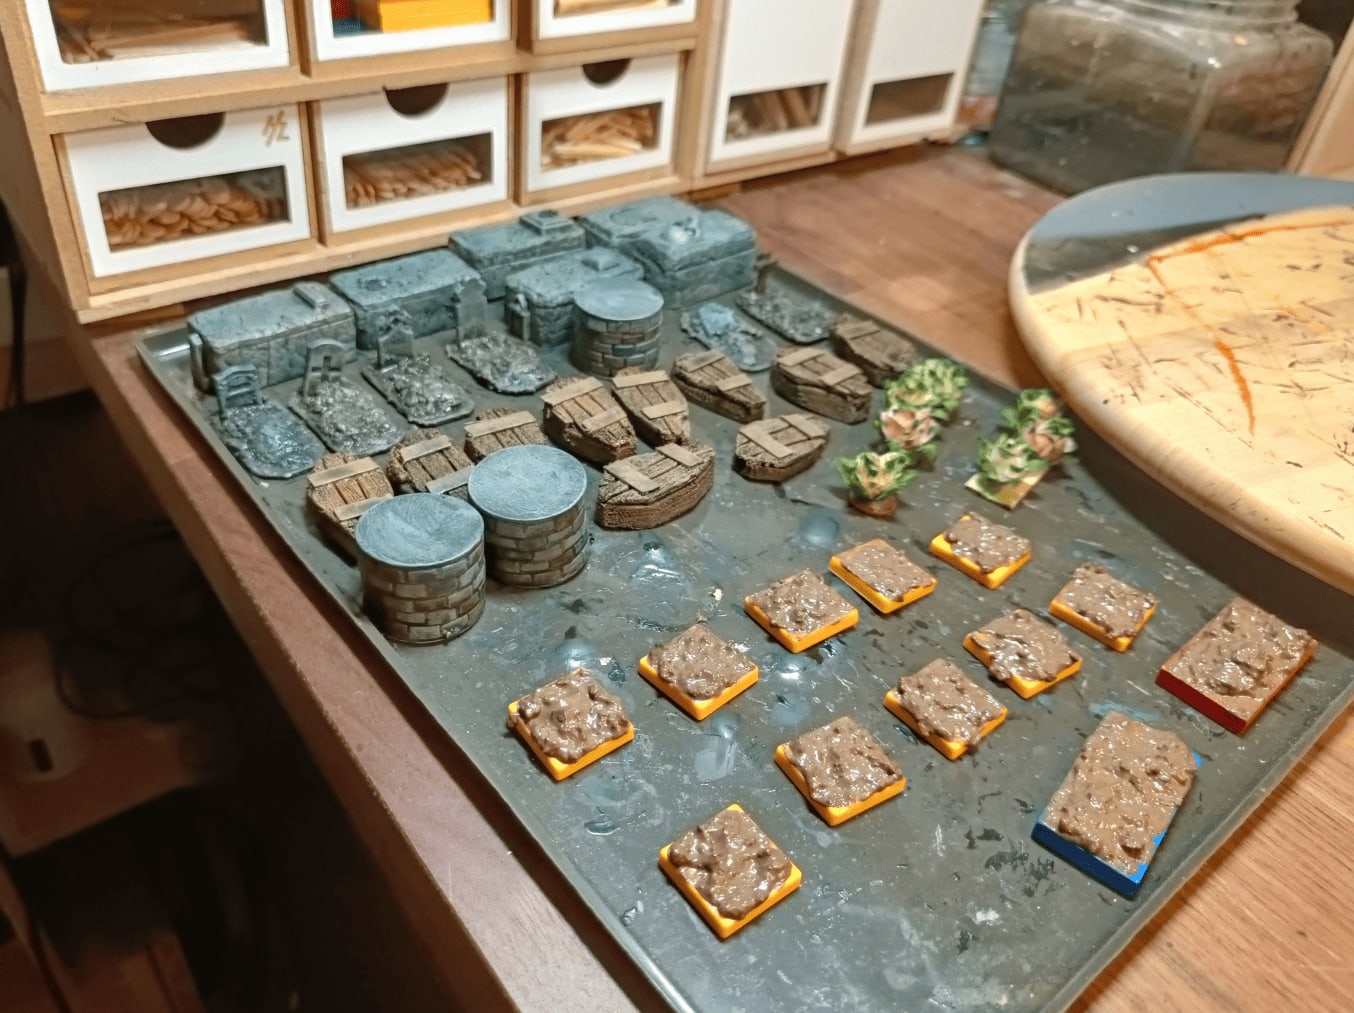
Here is one of the most disgusting terrains I've probably ever had to make, but it's for the introduction scene of the scenario in Briarstone.
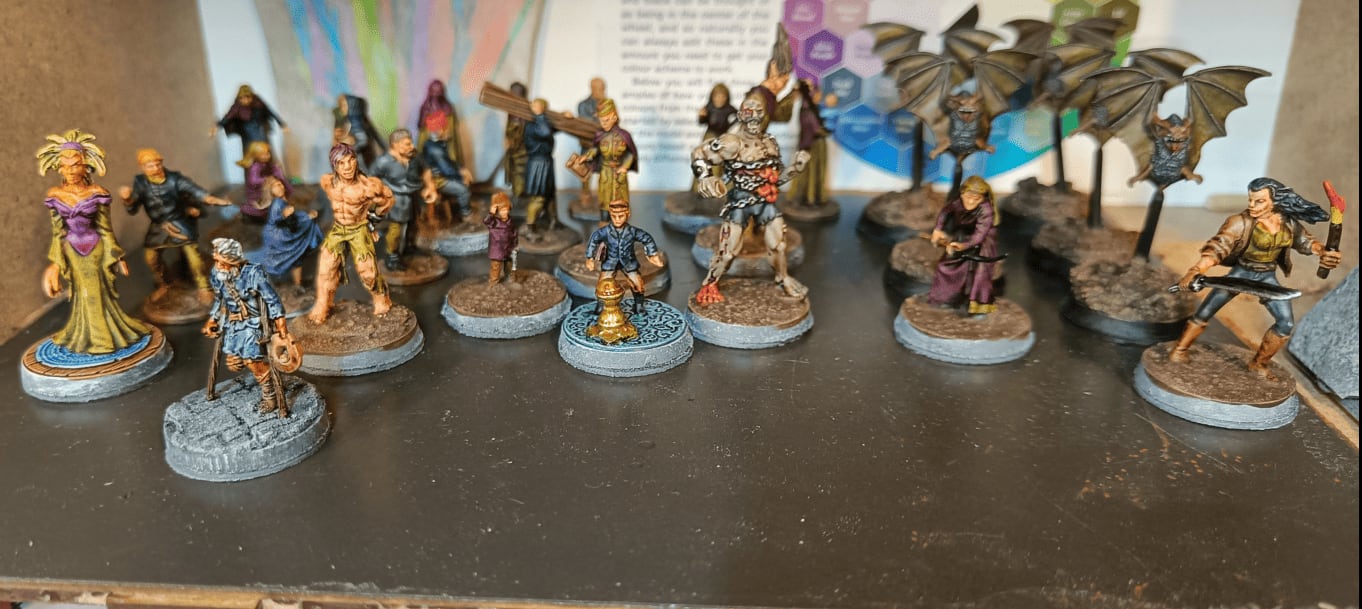
The players have to climb a pile of corpses to be able to get out of the basement, and I wanted to make that element. So I gathered a bunch of old miniatures that I don't use and tried to make a pile out of them.

So I started digging through my pile of old useless miniatures. It's a mix of stuff I bought already painted at flea markets (which I don't really like since I prefer painting my own), things I painted myself ages ago, plastic miniatures like Heroclix with pretty rough sculpting, and random little plastic toys that might be the right scale but with ugly sculpts. I was looking to see if I could find enough pieces large enough to use and roughly the right scale.

And there you have it, that's what I managed to find. It's not a huge pile but I figured it would probably be enough for what I wanted to do.


To save on miniatures, I started making the majority of the pile with just a ball of aluminum foil and glued the miniatures on top. To get them to bend enough so they'd conform to the shape and not be too rigid, I used a hair dryer to heat the plastic. This let me twist the miniatures slightly before gluing them in place.
I cut off protruding arms and legs to keep the idea of a big shapeless mass of corpses, and then I glued those cut off pieces back in other places.

I added glue on the areas where there were no bodies and sprinkled sand and slightly larger pebbles. I added plenty of glue and water mixture on top to keep it all in place, and it helps show the impression of having a rockfall with bodies emerging from it.
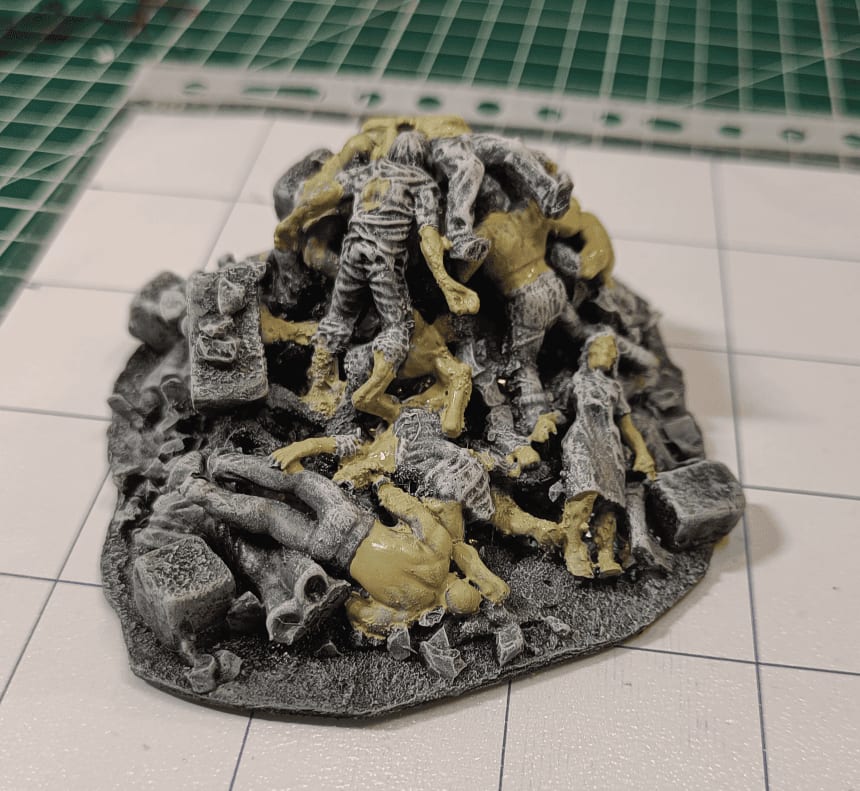
I started with the flesh parts using Necrotic Flesh. For everything else, I'll be using speedpaints.


Old Stuff
This post is going to be about some photos I took when I first started crafting. It was already a few years ago, back in 2021. I remember thinking at the time, "I've wanted to do this since I was a teenager, and now I'm finally going to do it for real." So I followed tutorials and started making stuff.
These are photos of the very first things I made. I was super proud of them back then, but honestly, they look a bit cheap to me today.
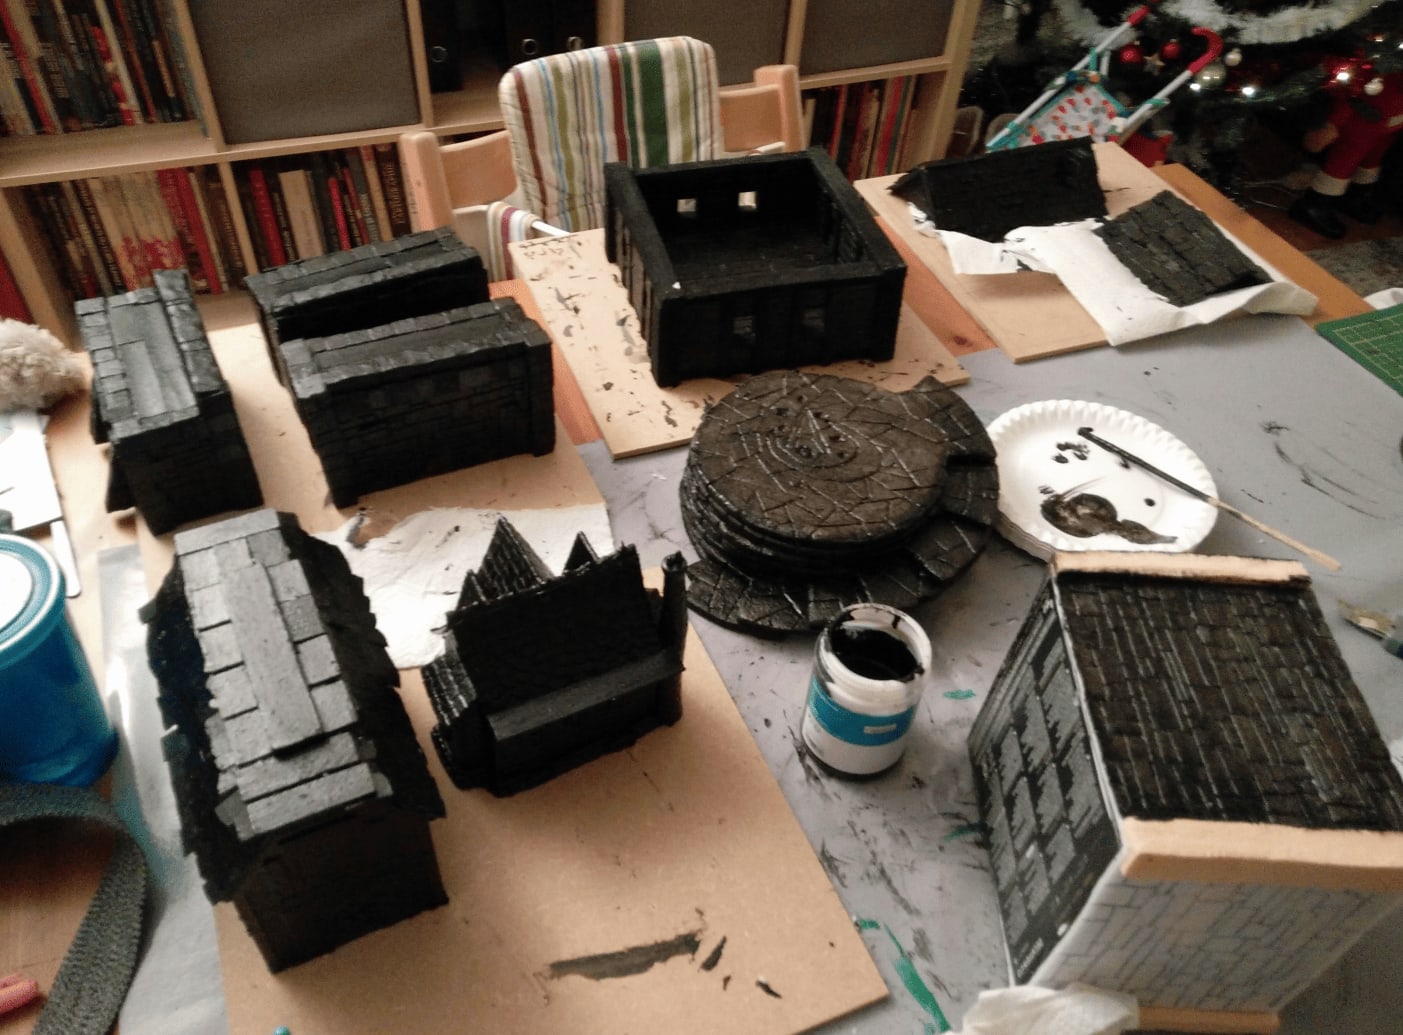
Here's my table from back then. I didn't really have a dedicated space, so I had to use the living room table. Every evening when I wanted to work on stuff, I'd put down a tablecloth and paint. I did everything in batches, so all the pieces I had built got batched with Mod Podge and black paint together.
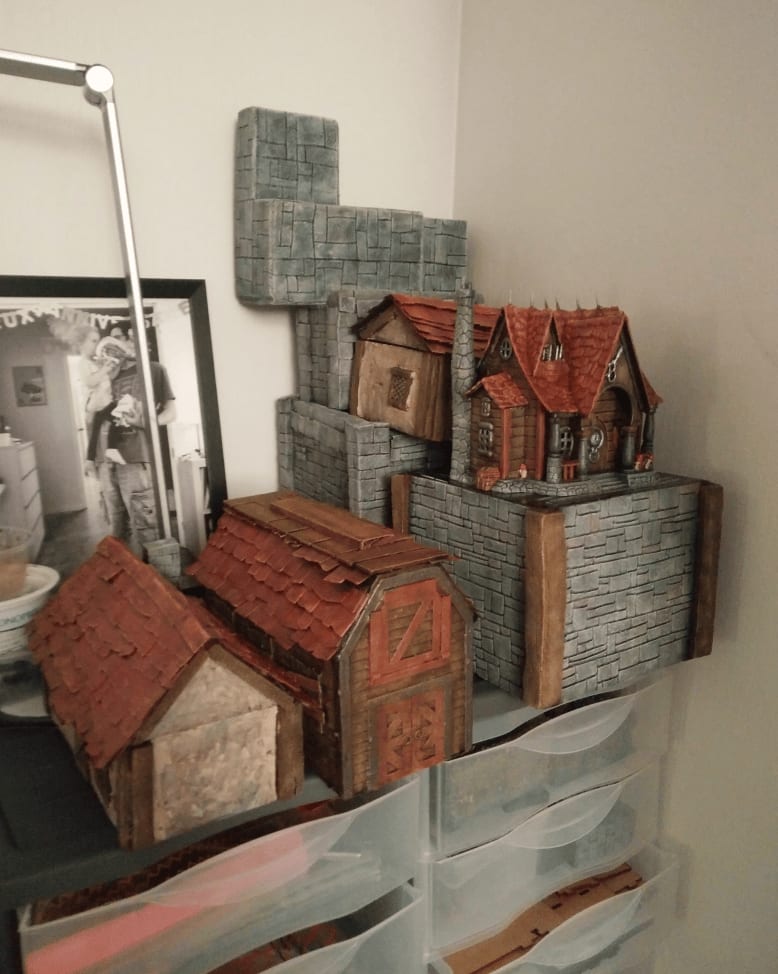
Back when I first started with this hobby, I stored all my constructions in the living room. I had requisitioned some shelves and squares of our IKEA furniture to organize everything. I kept my things in boxes and took them out one by one to work on them, which was a lot of effort.
Once I finished with the projects, I would stack them in a corner of my desk (actually still in the living room corner). Now I finally have a dedicated workshop space for this, and it's so much more pleasant to work with.
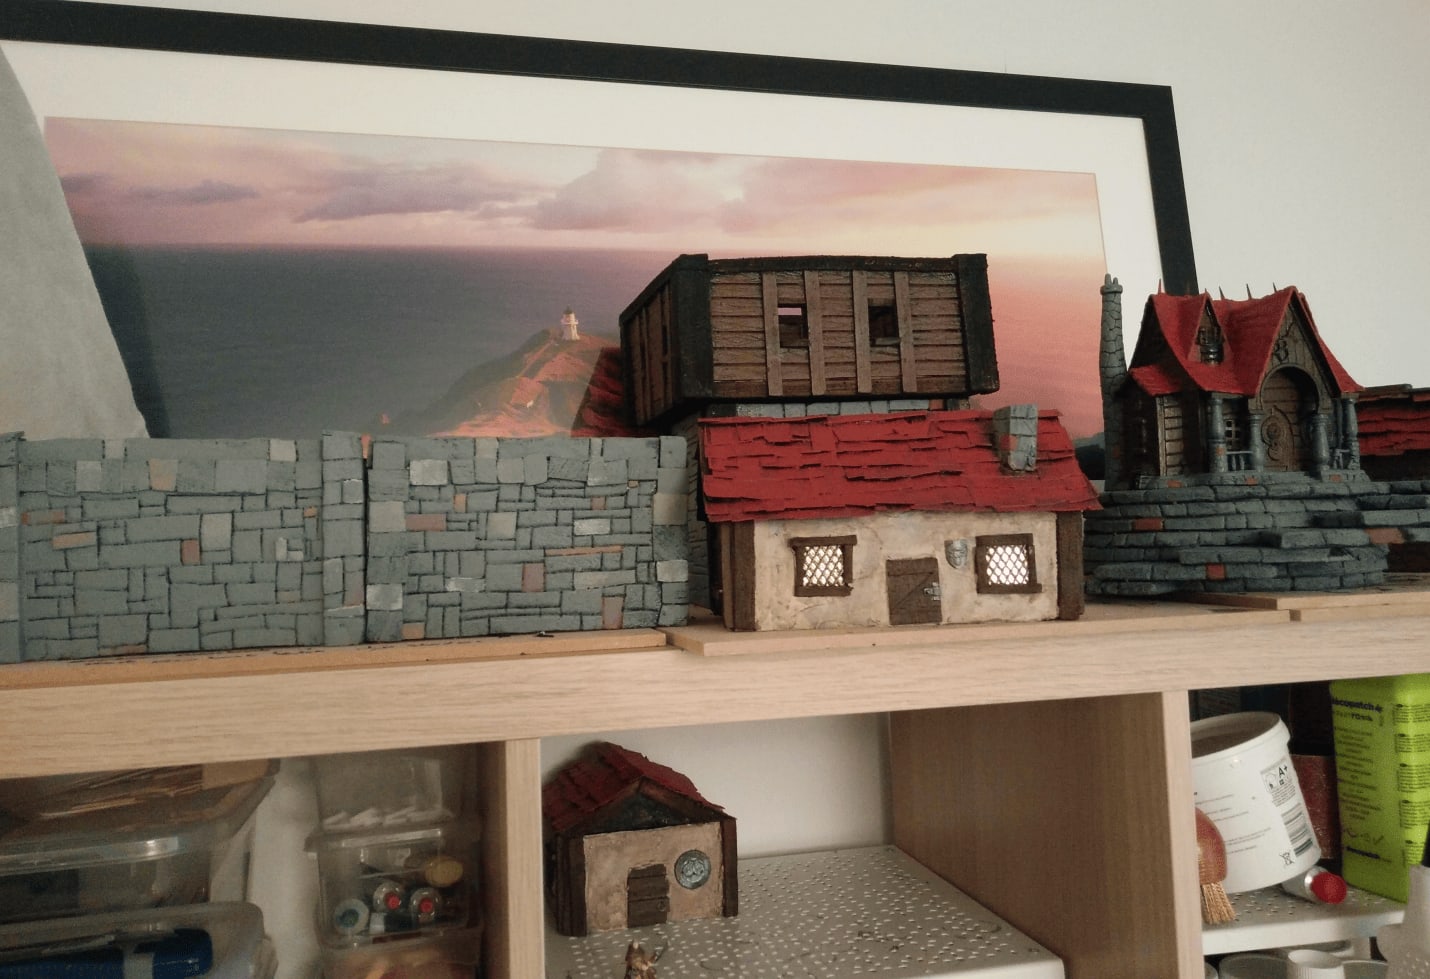
During this time I discovered that flocking is actually a secret weapon for creating scenery. First, it helps fill in gaps and hide spots where we didn't do the work properly. But on top of that, just adding a bit of grass or a few leaves instantly gives an impression of scale and makes everything feel alive. The transformation between without flocking and with flocking was magical to me.
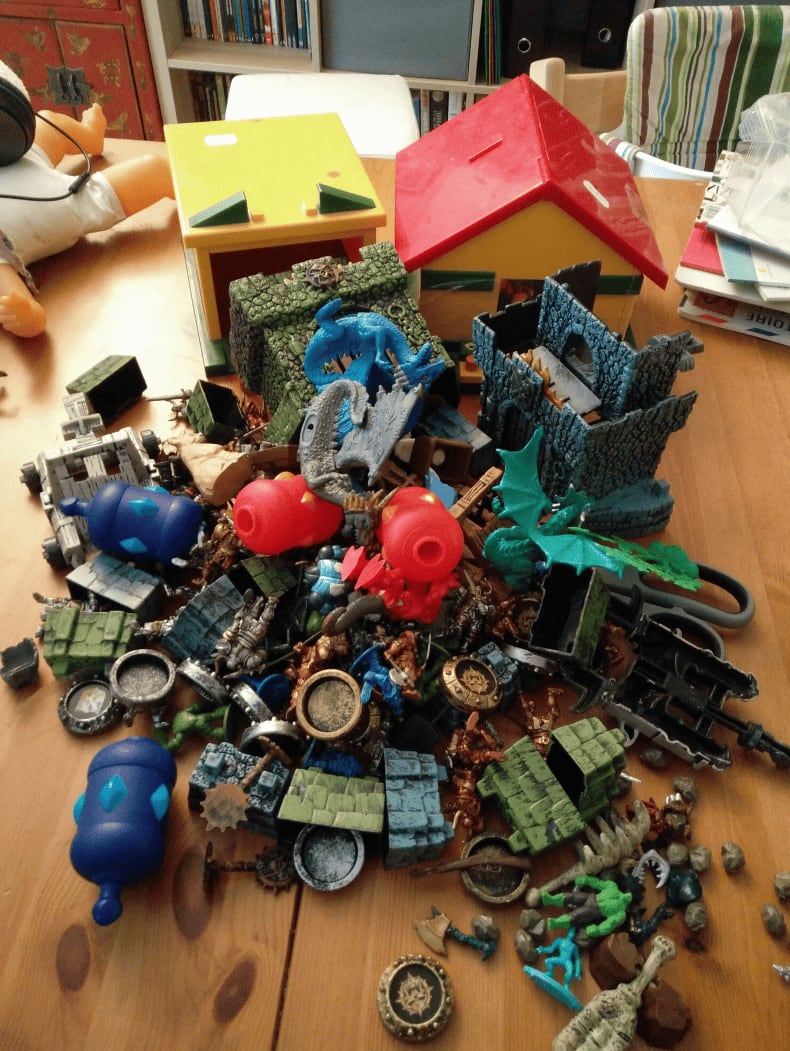
This is a bunch of stuff I picked at a yard sale! Let me tell you what I did with it all.
- Starting with the red-roofed house: honestly couldn't do much with it since it was already in pretty rough shape and didn't hold together well. Pretty sure I just ended up trashing it.
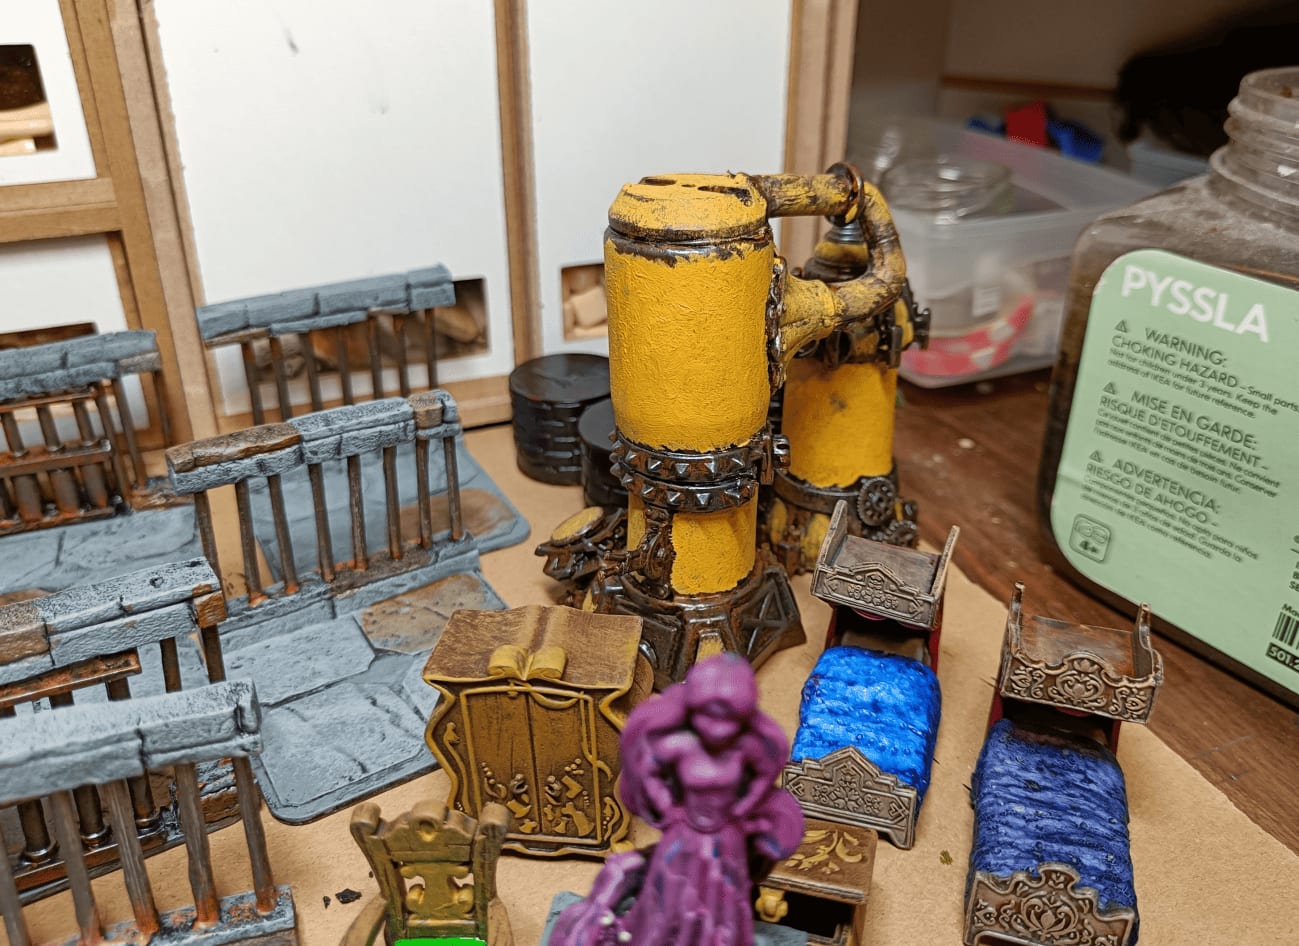
- The yellow-roofed house was actually a garage, and I turned that into a forge! Used the base and added a bunch of bricks around it. Came out pretty cool.
- All those dragon pieces you see? I reassembled them into complete dragons and painted them.
- For the green and blue building parts, I used one to make my necromancer tower. The other one is still sitting in a box waiting for a project.
- The blue and red cylindrical pieces became boilers and various other things.
- There are some figurines that I might have repainted. Everything else is still sitting in my bits box.
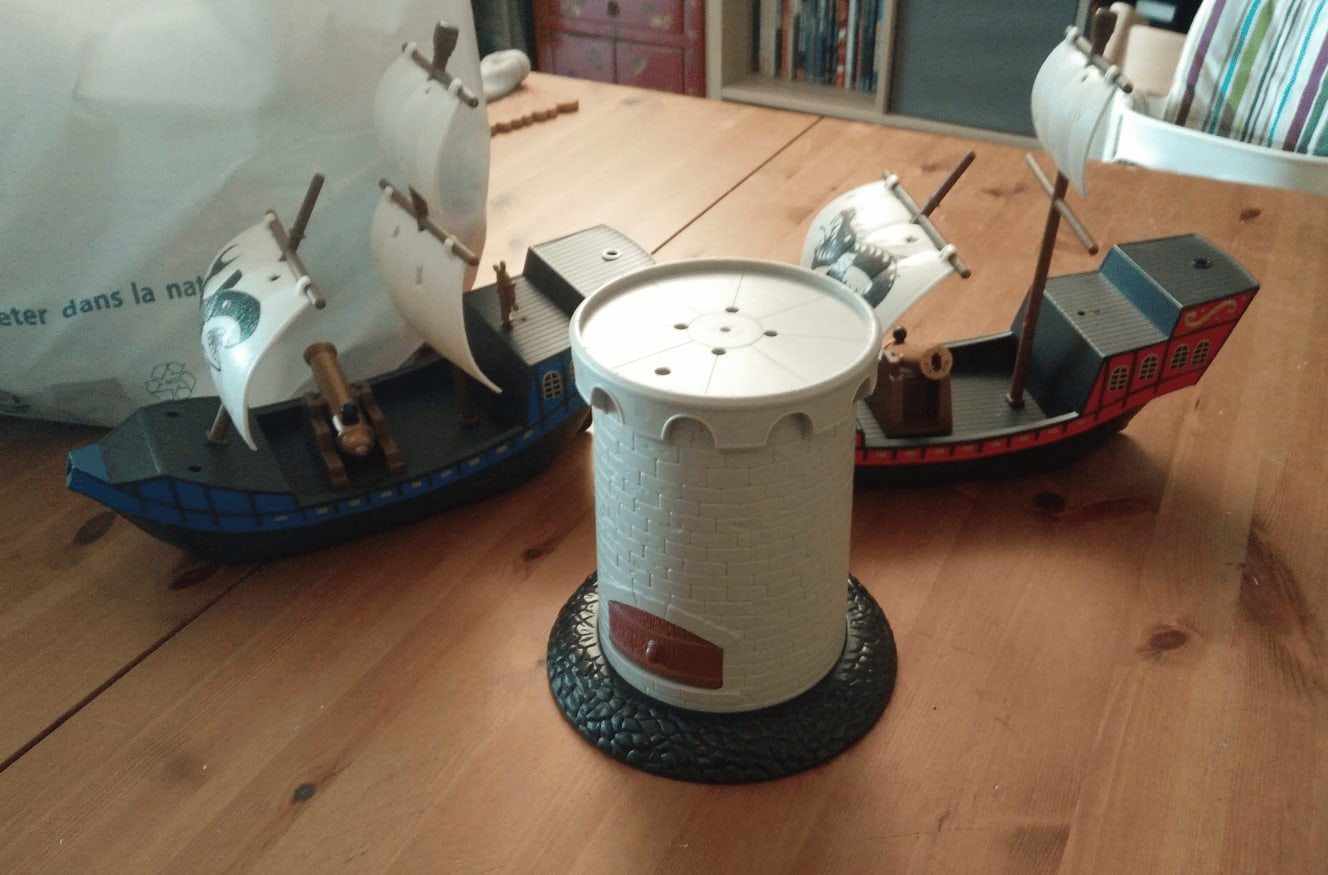
That all came from a board game. I recovered everything because the sculpt on the tower is really quite good, and it's already a tower without much effort.
I recovered the boats thinking that one day I could use them as a framework to make my own boat myself, which has still never happened. I still have those pieces years later.
The thing is, I only do role playing games and not really wargaming, so having a tower isn't that useful. But I don't give up hope of one day finding a group to do wargaming and being able to use it.
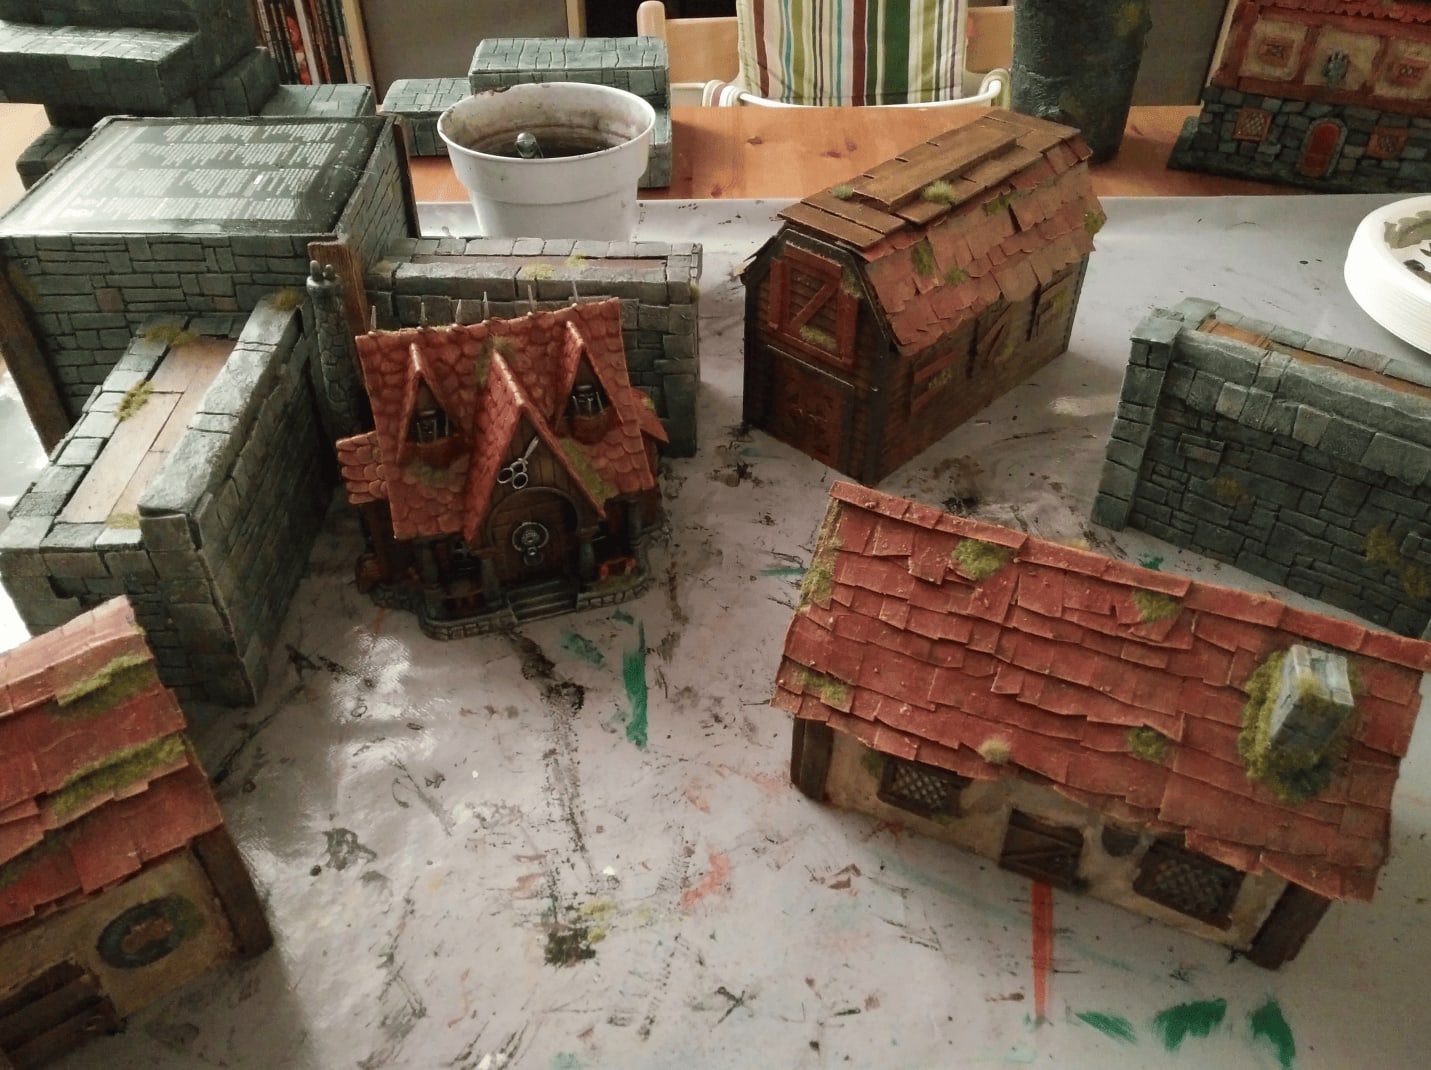
Here are a few photos of work in progress projects. In the second photo, you can clearly see the black garage I mentioned earlier that I managed to transform into a forge.
Then the house with the stairs running around it, I never ended up doing anything with it in the end. I'm even not sure if I kept the piece.
And for the arch, I initially wanted to make a large scene with an arch and a menhir in the middle. I ended up just putting the two parts of the arch on individual bases and it's much more useful that way.
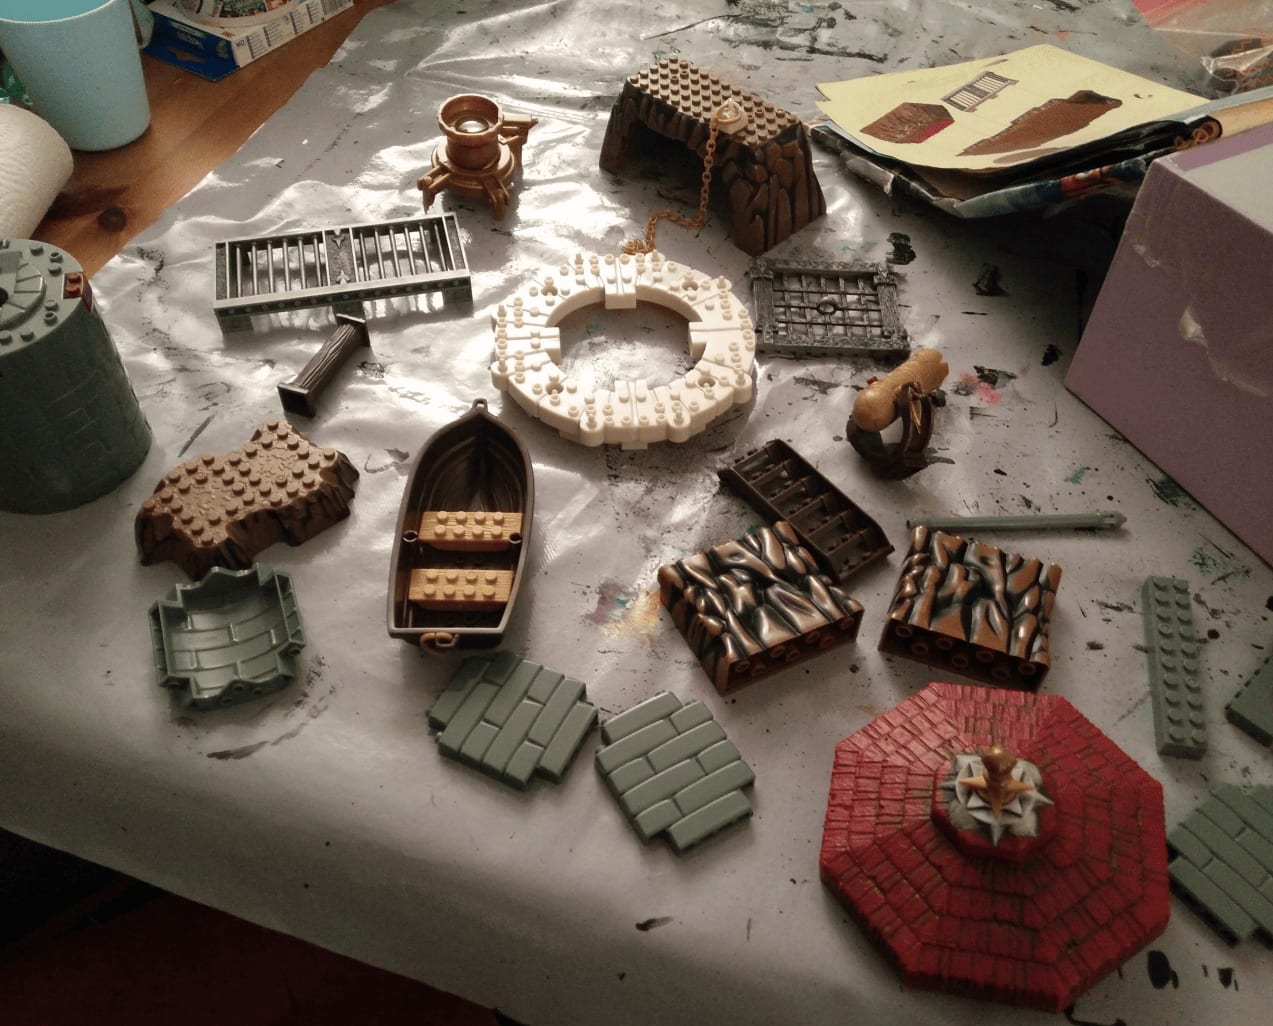
Here's a potentially useful set of pieces I recovered from a Megablocks game, I think. There are some things I have used to make bases, and others that I kept because I found the texture interesting.
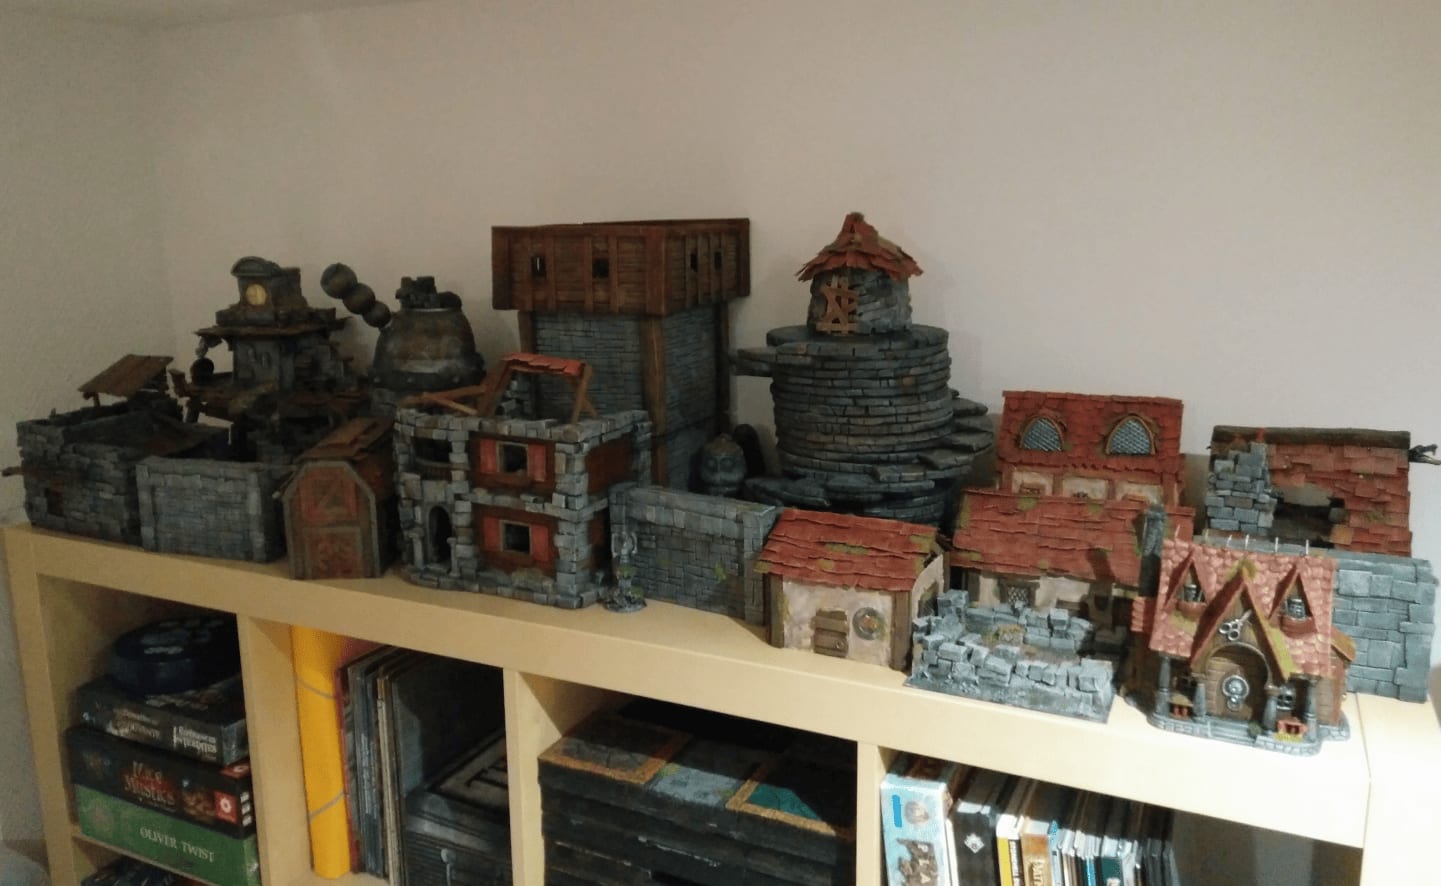
And here is my complete collection of scenery at the end of 2021, when I moved into my new house where I had more space to display them.
Misc 2024
For once, this post will be a mix of many things. Lots of photos I took as I went along crafting, without there really being an underlying theme above it all. But I wanted to share a little bit of the state of my workshop throughout the different productions of 2024.
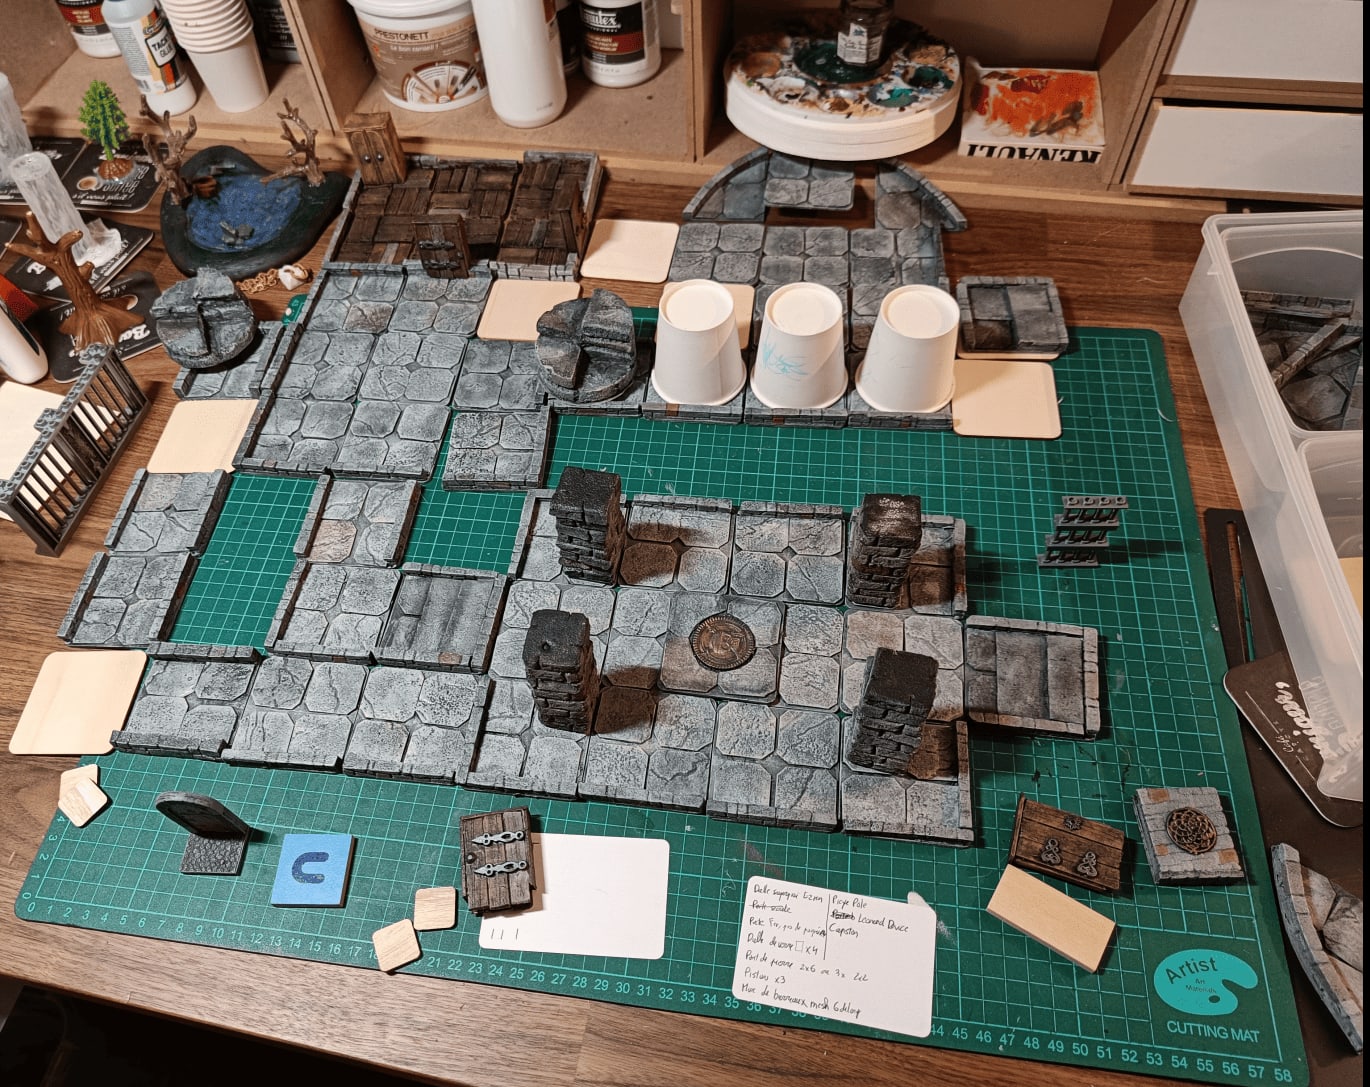

Here is a test run of a dungeon I created for my players to wrap up a campaign we had in Magnimar. It's heavily inspired by and very slightly adapted from Jelinda's Gauntlet, which was made by Wyloch. It's a dungeon that plays with time travel mechanics.
The players go through the dungeon twice: once in the present and then once in the past, where the events they witnessed previously now impact what they're doing in that moment. I wanted to test if I had enough tiles to pull it off. I had almost everything, but still needed to craft a few more pieces.
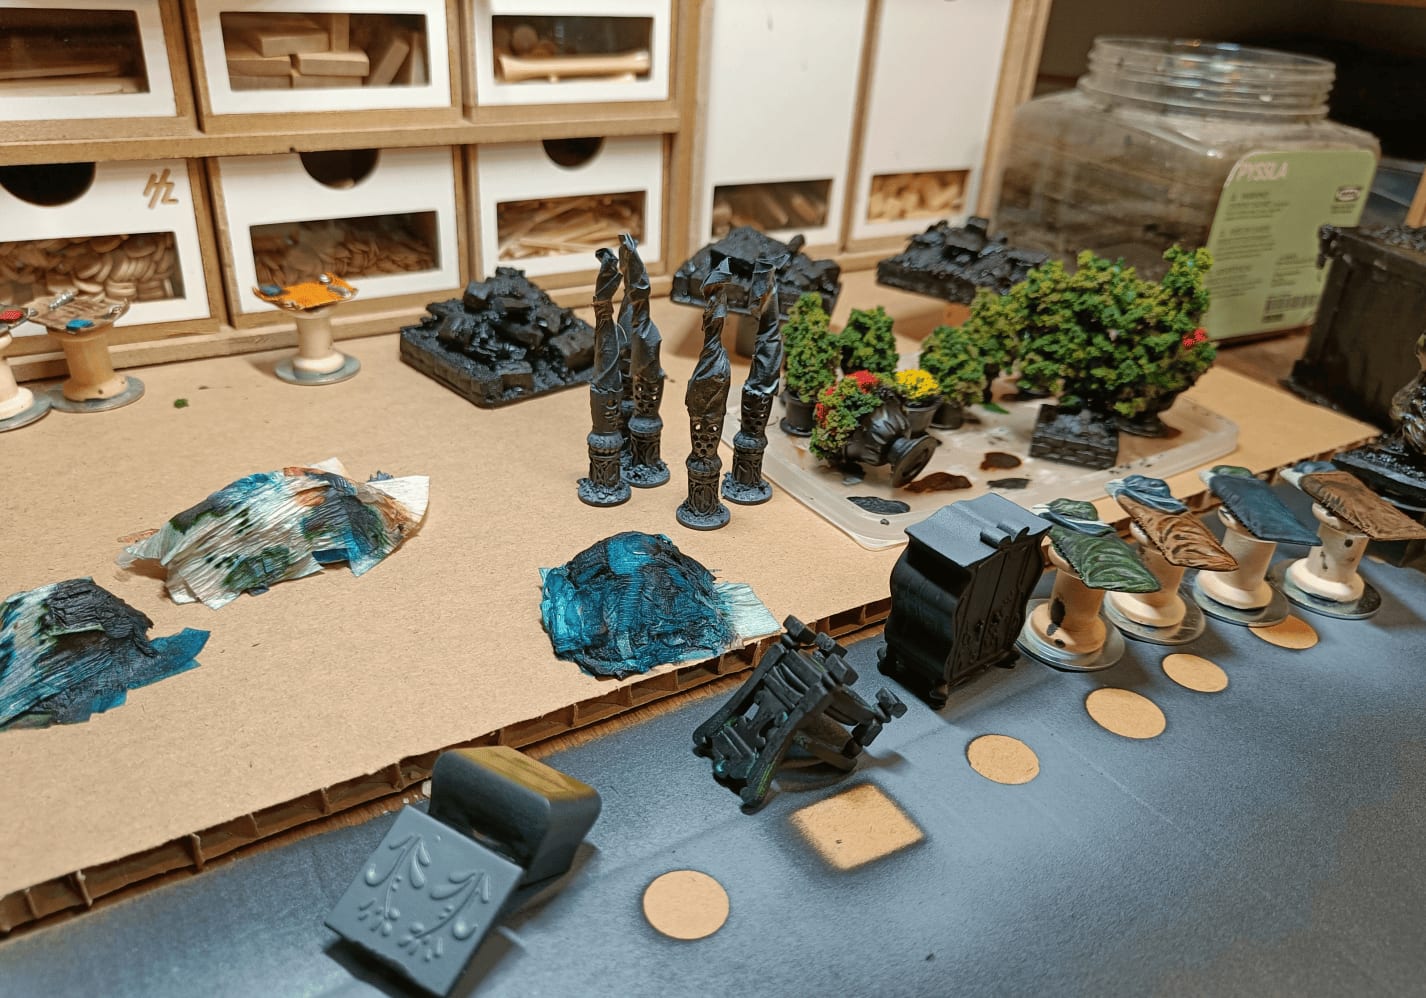
This time it's a set of tiles and scenery pieces that I made for a different campaign, the one where they're in the Briarstone Asylum. I painted tons of stuff from Mantic Crates. My workbench was packed with a mix of things I was actively building and pieces in the painting stage.
Once again, a very eclectic side here. I've got tiles I made for the different corridors of the asylum, and then there's something the players discover in one of the very first rooms: a pile of corpses they have to climb over to get out of the basement. They only encounter it once, but I figured whether for a role-playing game session or for wargames, a pile of corpses is something that should come in handy pretty often.
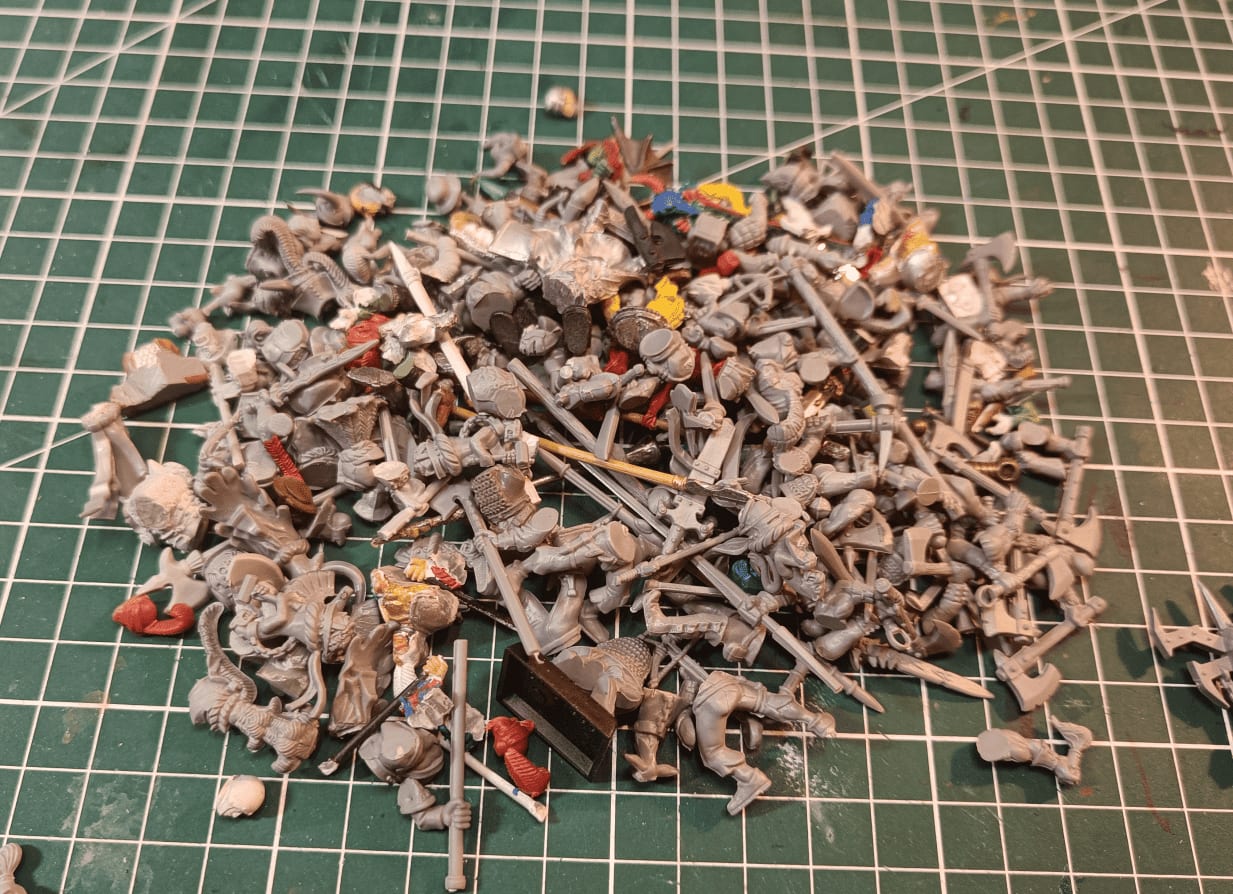
I also spent a little bit of time organizing my Bitsbox. It was full of plastic pieces that I had salvaged from Warhammer miniatures that I had when I was a teenager. At some point in my early twenties, I started trying to paint them again but I wanted to only do conversions, meaning cutting an arm from one place to glue it to another, etc. So I had dismantled a bunch of miniatures and that's pretty much everything I had salvaged. But since it was a mess, I spent some time sorting it into a box with a compartment for heads, a compartment for legs, a compartment for torsos, etc.
Today I realized that back then, I really enjoyed the creative aspect of converting miniatures using parts from different models. It was something I loved doing.
Nowadays though, I find it much easier to just get miniatures directly. I find plenty at garage sales, and the overall quality has improved so much. There are way more sellers than just Games Workshop now, and I can get really good miniatures for cheap. So I'm less motivated to build custom ones.
I don't really do those sessions anymore where I'd swap arms and parts between different miniatures to create something unique. But I know that feeling might come back someday, so I'm keeping all those extra bits just in case.
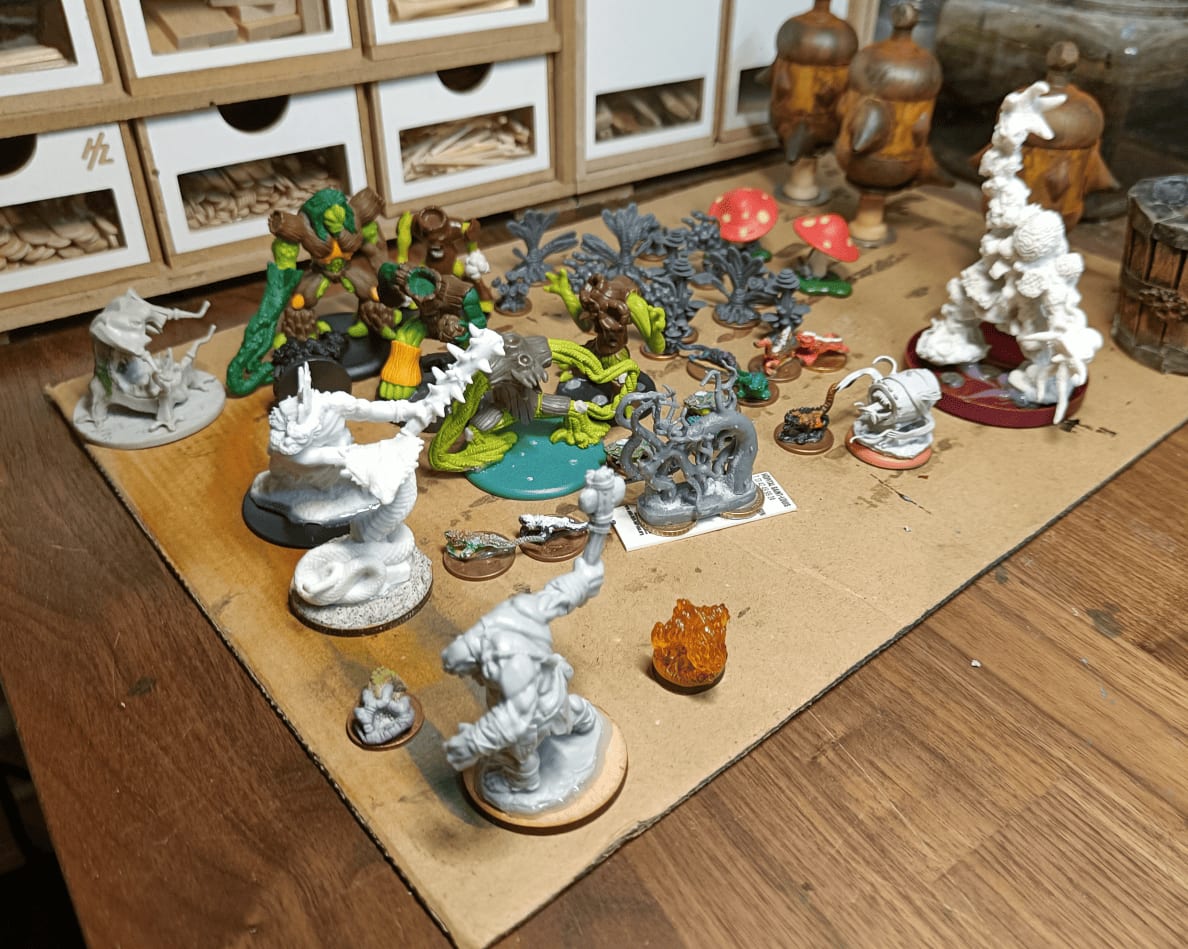
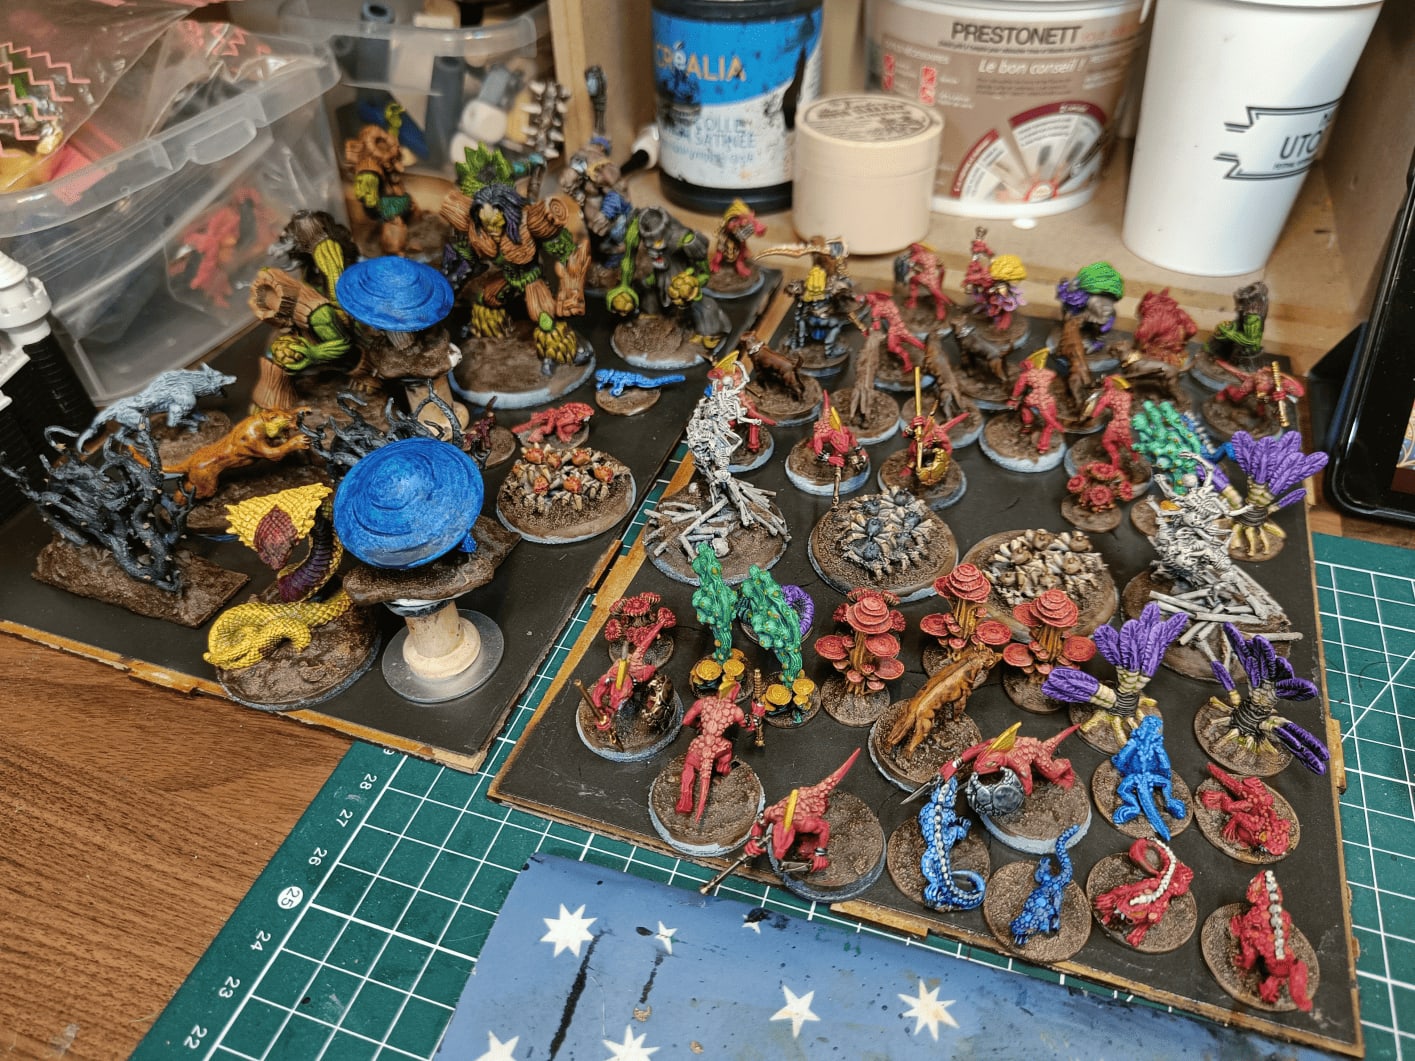
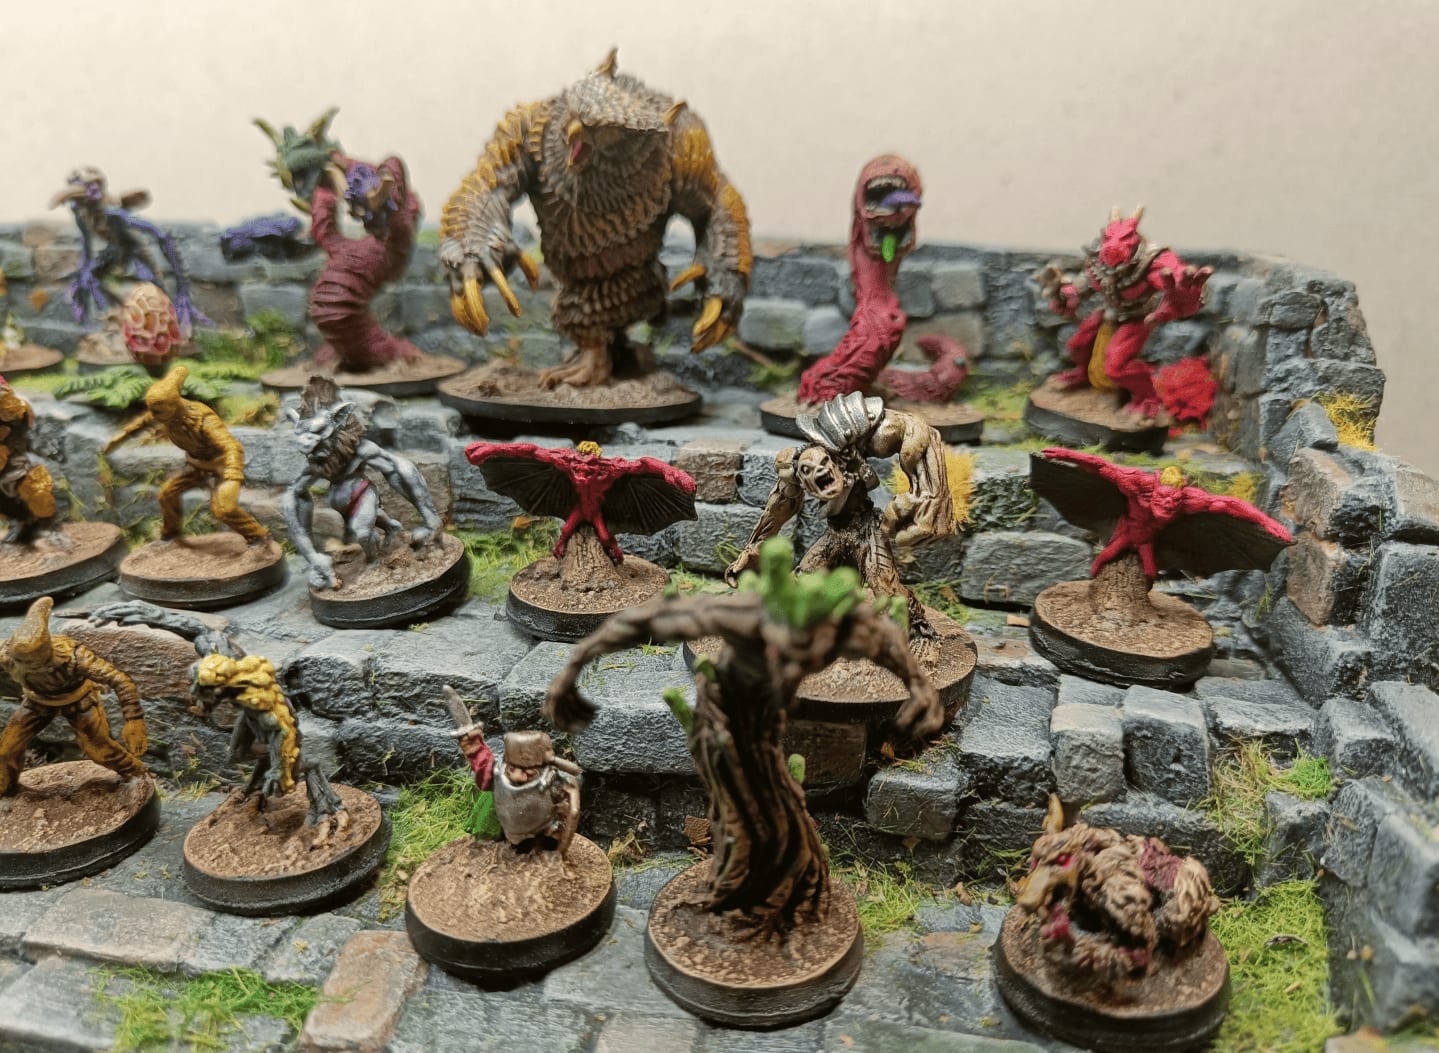
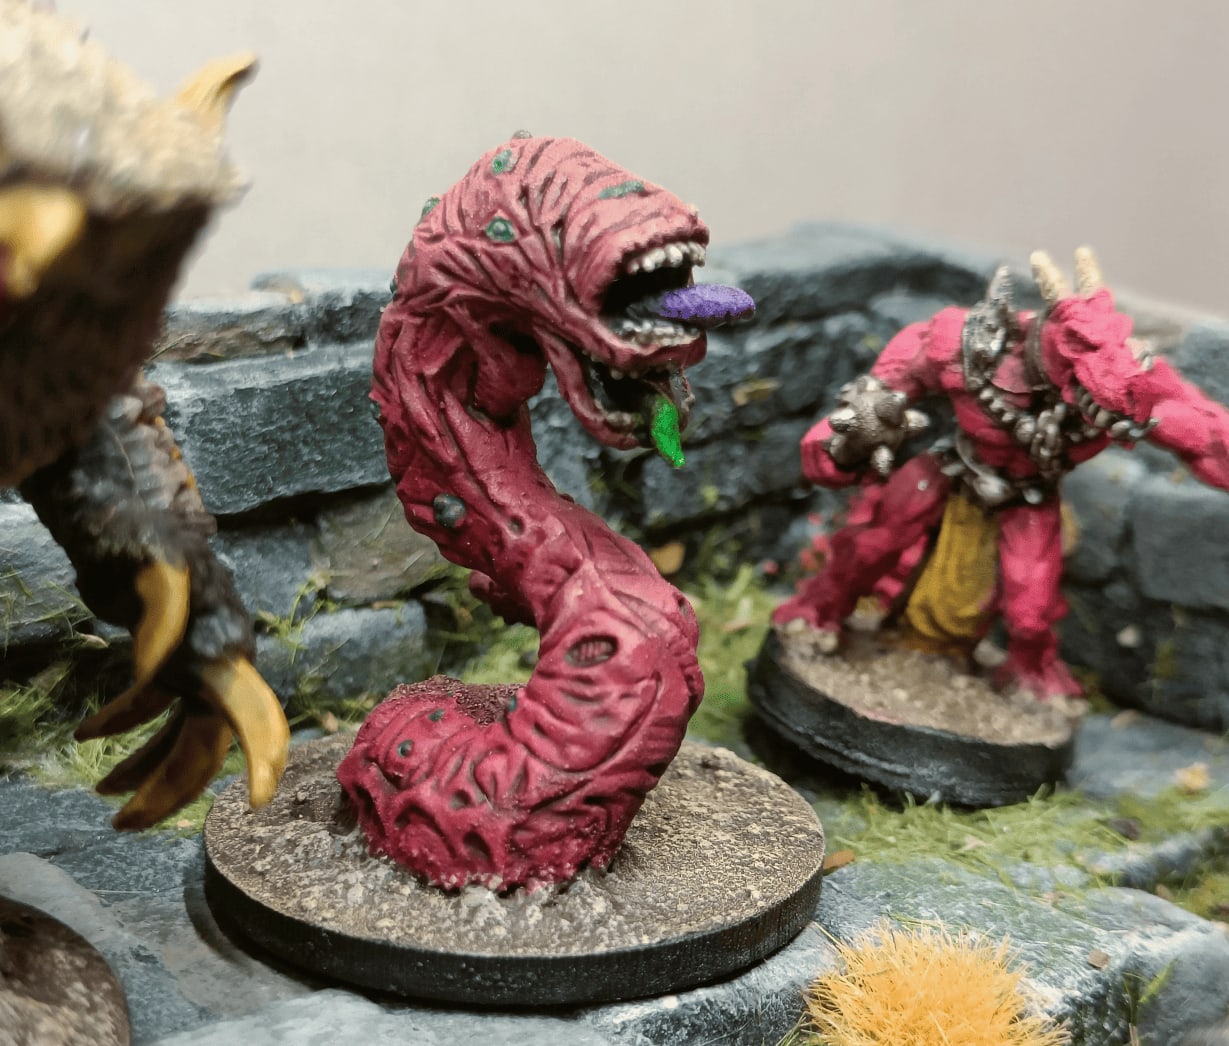
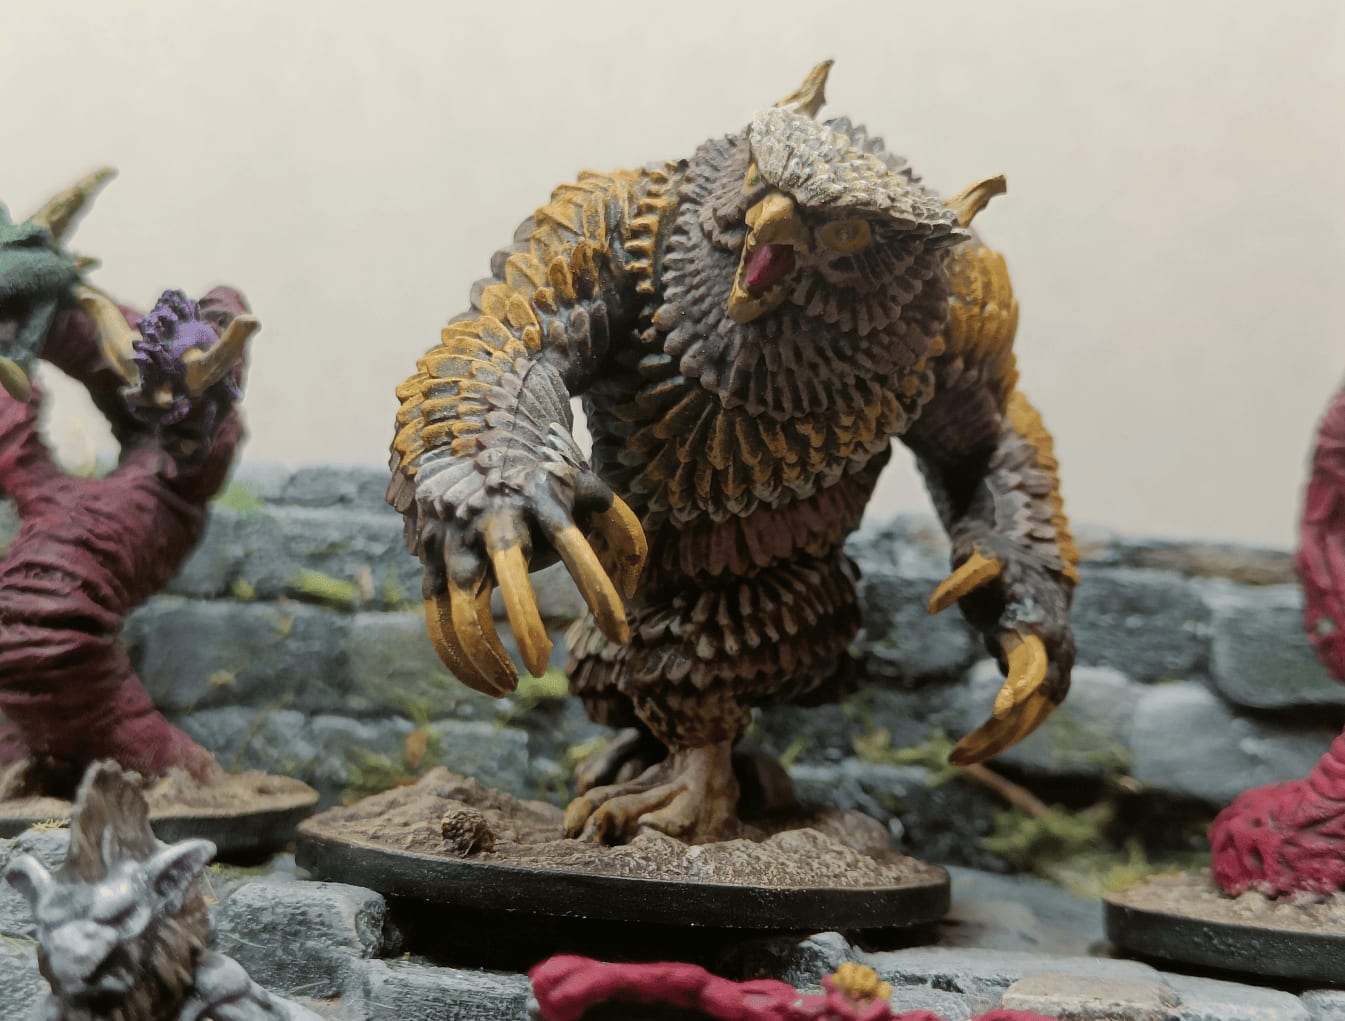
A lot of different minis. I actually just discovered speedpaints when I took this picture and it made me want to paint lots of things. So there are plastic Gormiti figurines, things from different publishers, old figurines I'm repainting. I tried everything basically. It became so easy to give a second life to anything through speedpaints that I just went to work on everything I had.
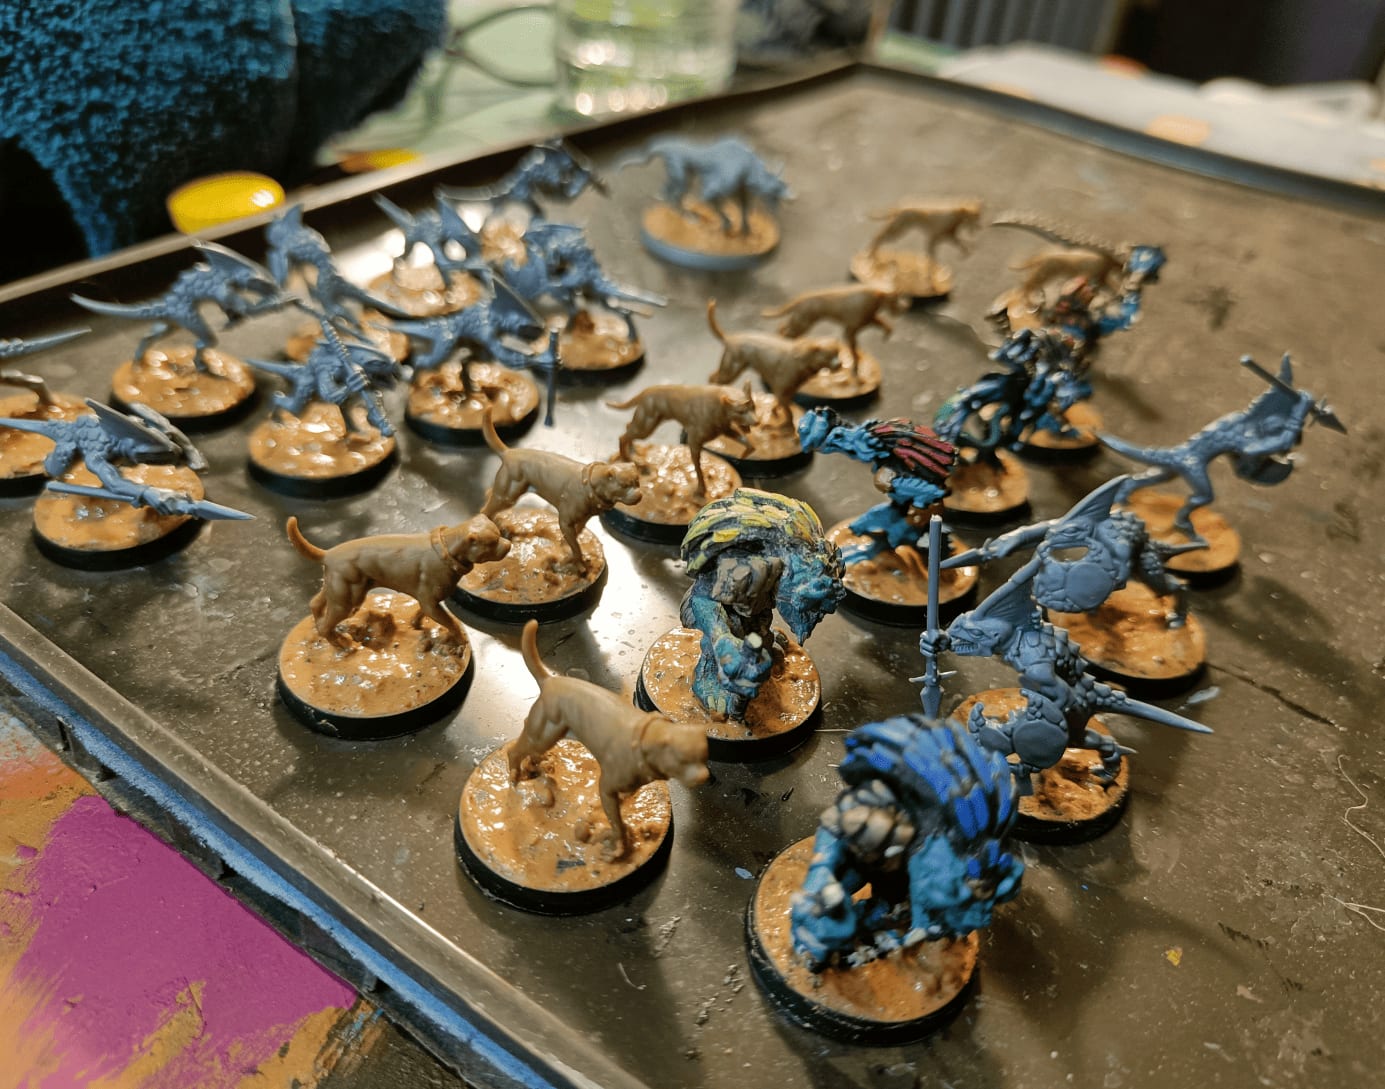
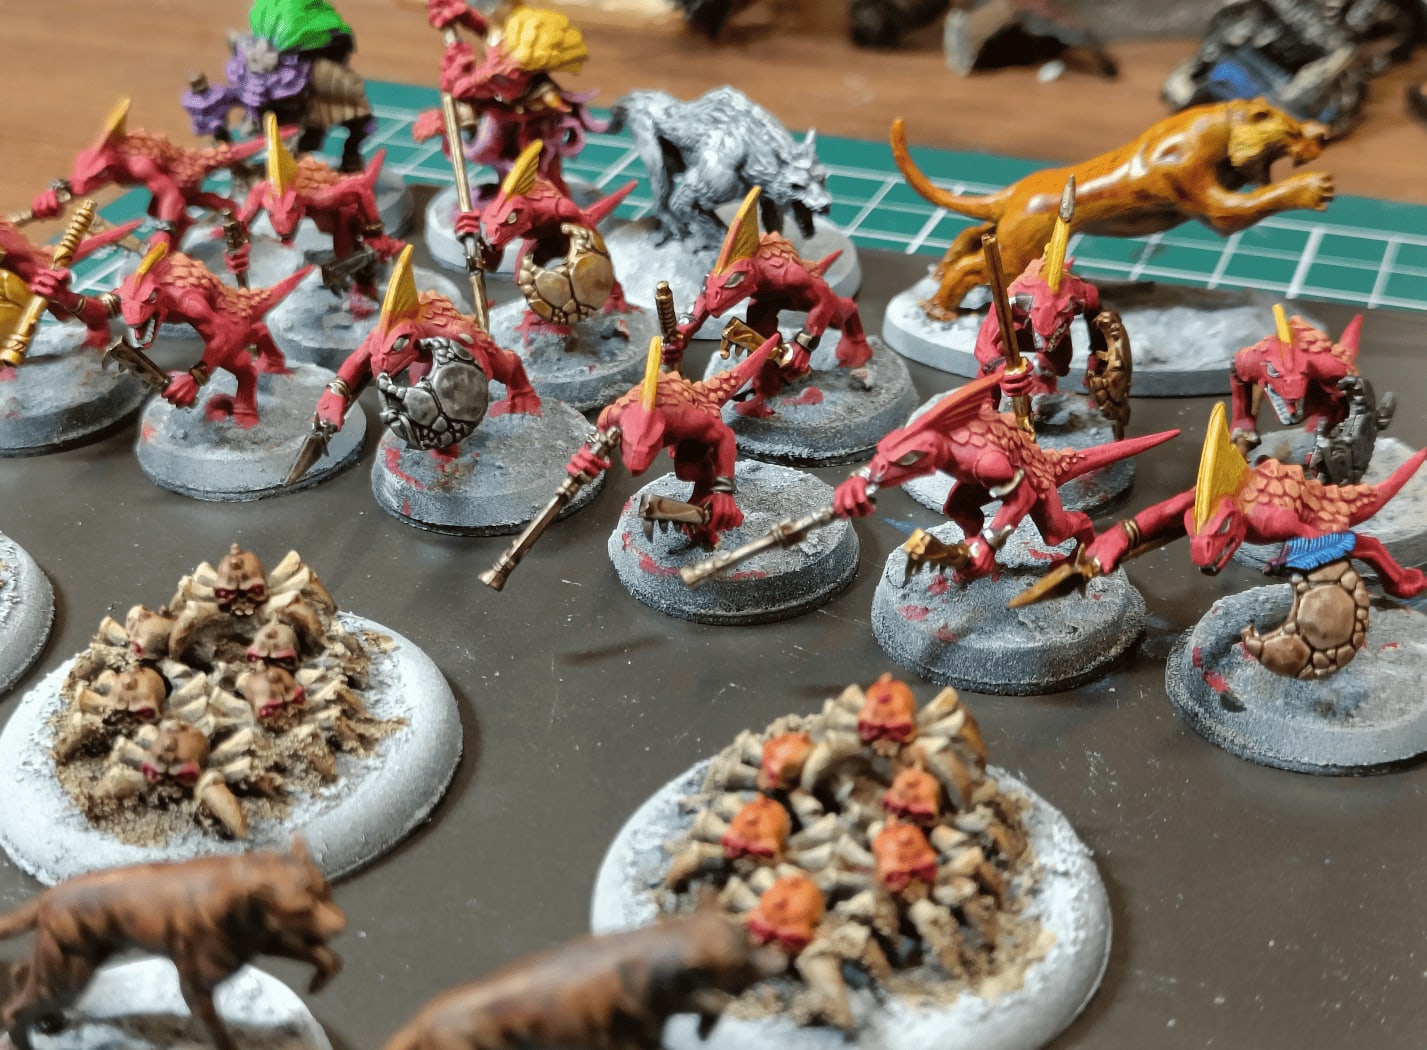
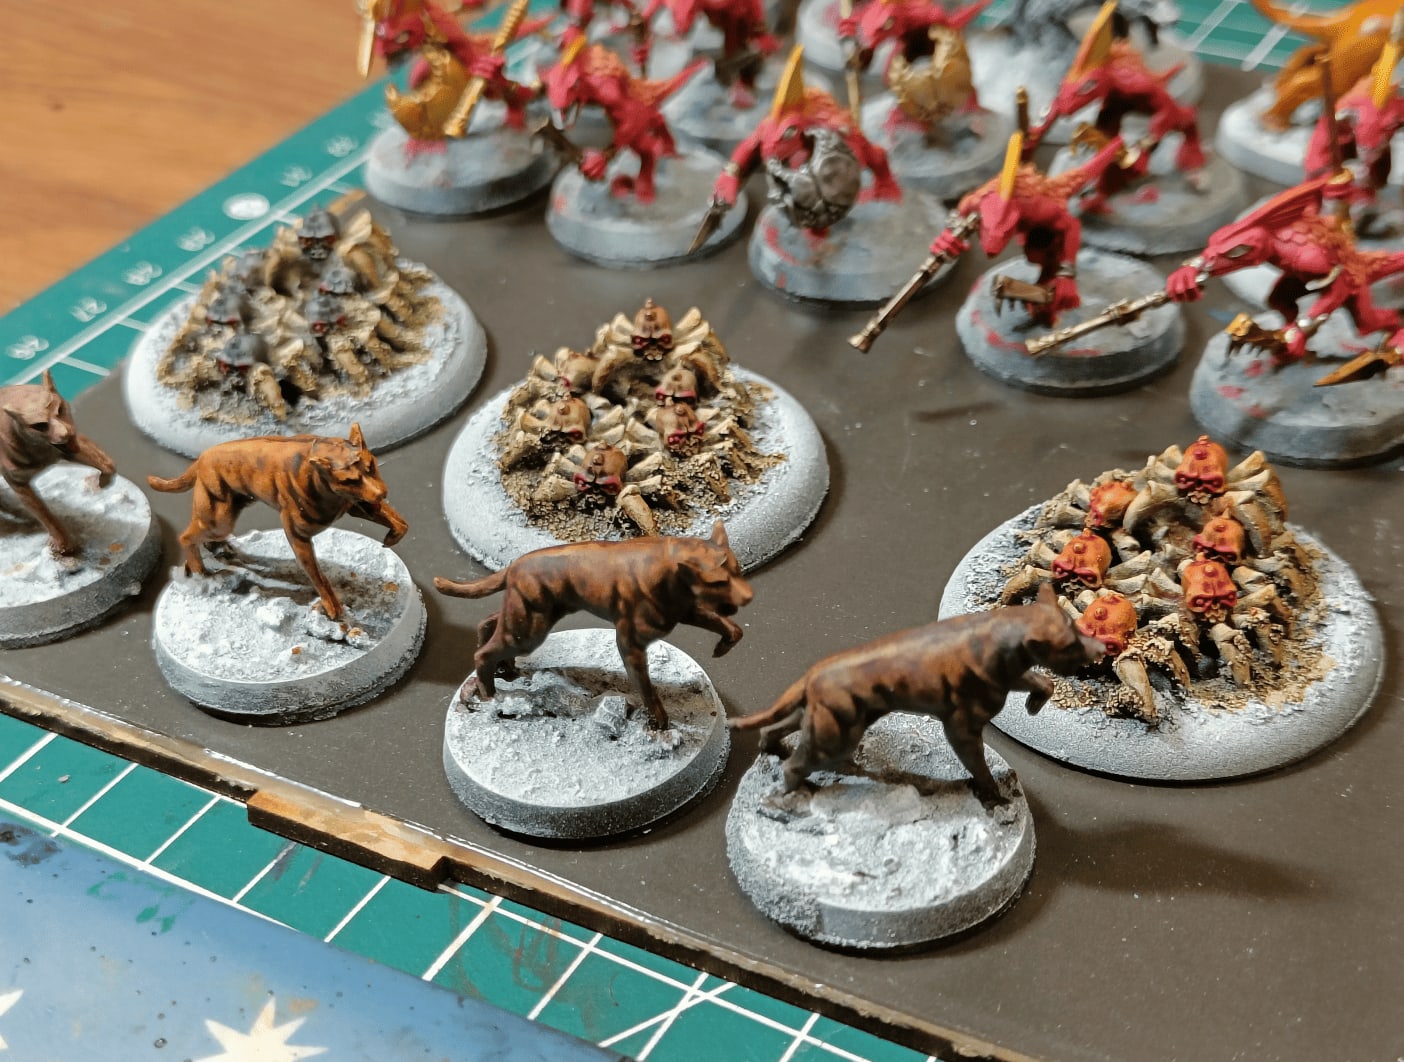
Here are some photos of my painting steps! I started painting kobolds using skink miniatures from the lizardmen army. The speedpaints made this pretty easy to do, and I was really proud of the idea to use skinks for kobolds. I think it works pretty well. Painting the dogs directly with speedpaints works very well too.
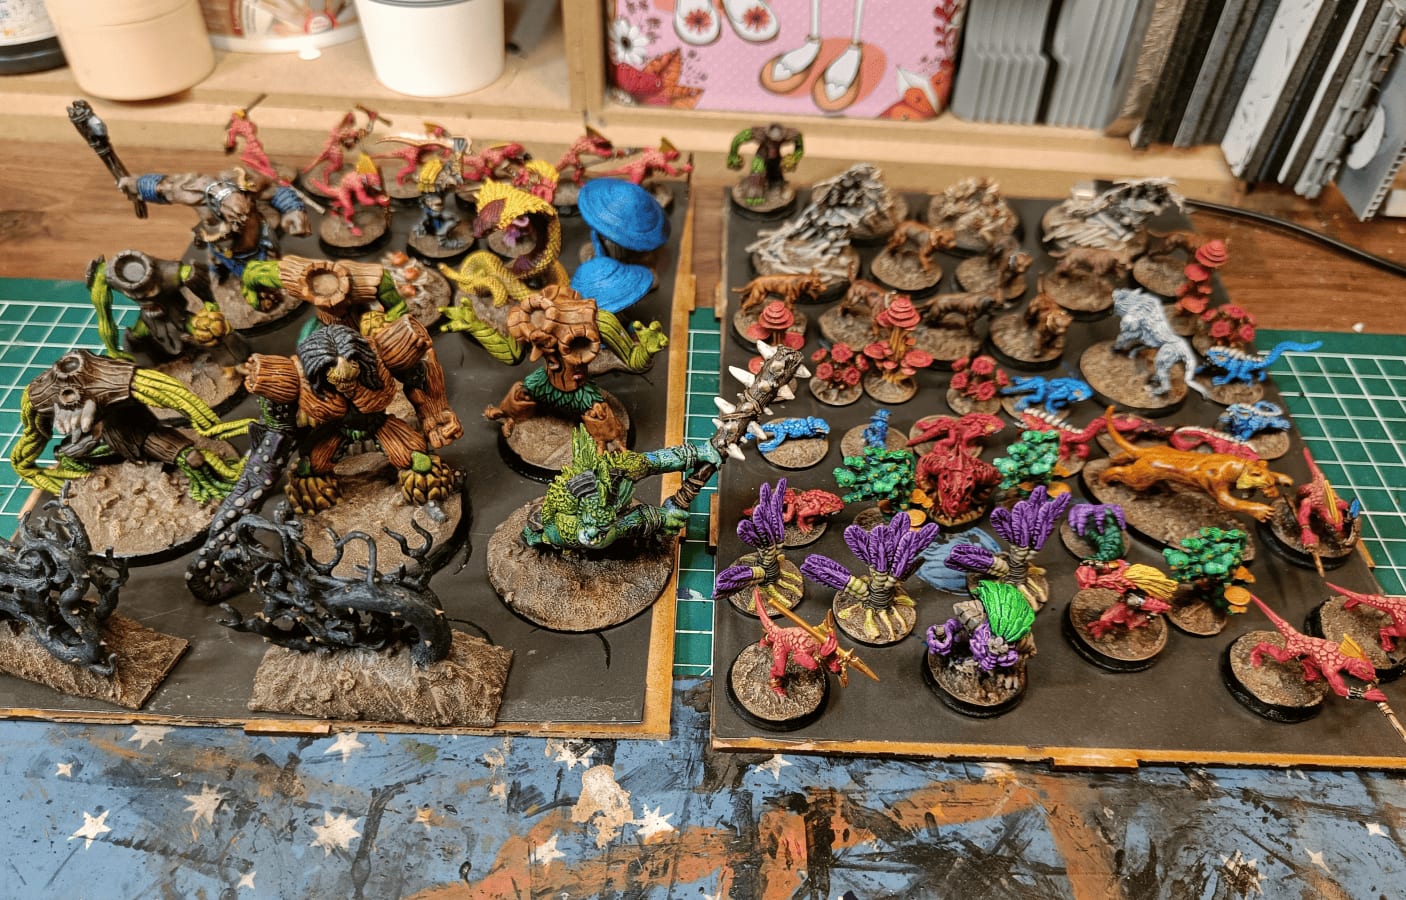
And it looks so good once everything is painted! I was really amazed by the quality of what you can do with speedpaints.
Painting all that took me about a week, working two or three hours in the evening after work. I was able to finish all these miniatures, but it would have taken me a year, maybe even more, before speedpaints. And the quality is totally acceptable.
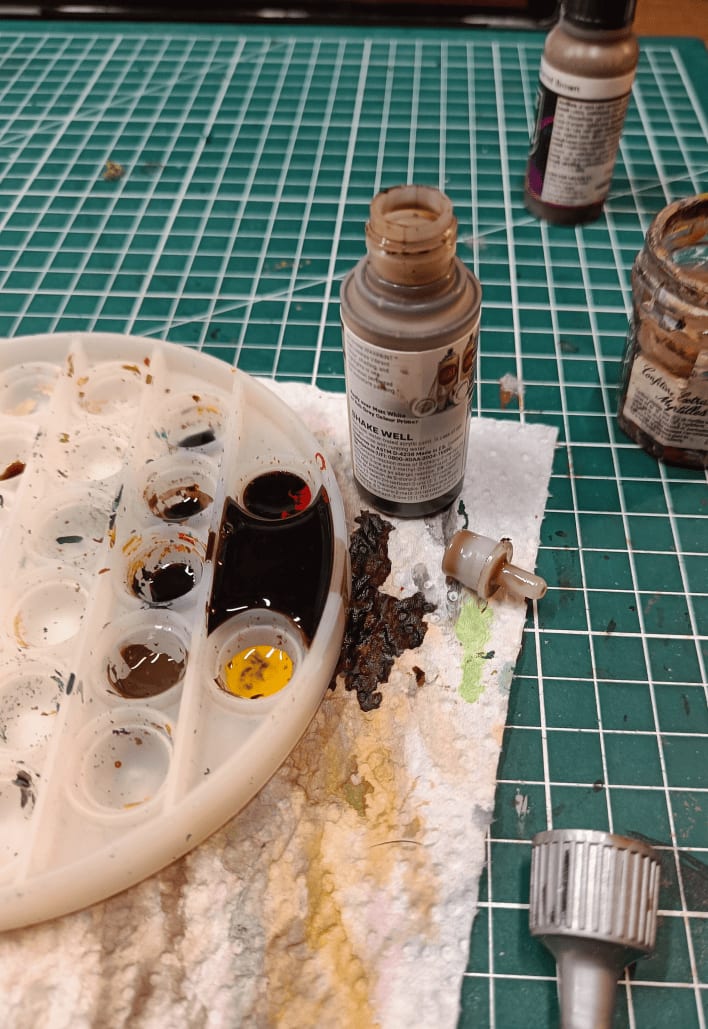
Well, what was bound to happen finally happened. I spilled a bottle of speedpaint everywhere.
The paint wasn't coming out, so I kept pressing harder and harder and harder until the whole cap popped off. Turns out the ball bearing inside that helps mix the paint was stuck in the opening.
In those cases, you're not supposed to press harder, you just shake the bottle so the ball bearing moves somewhere else. I didn't know that before creating this mess, but now I do!
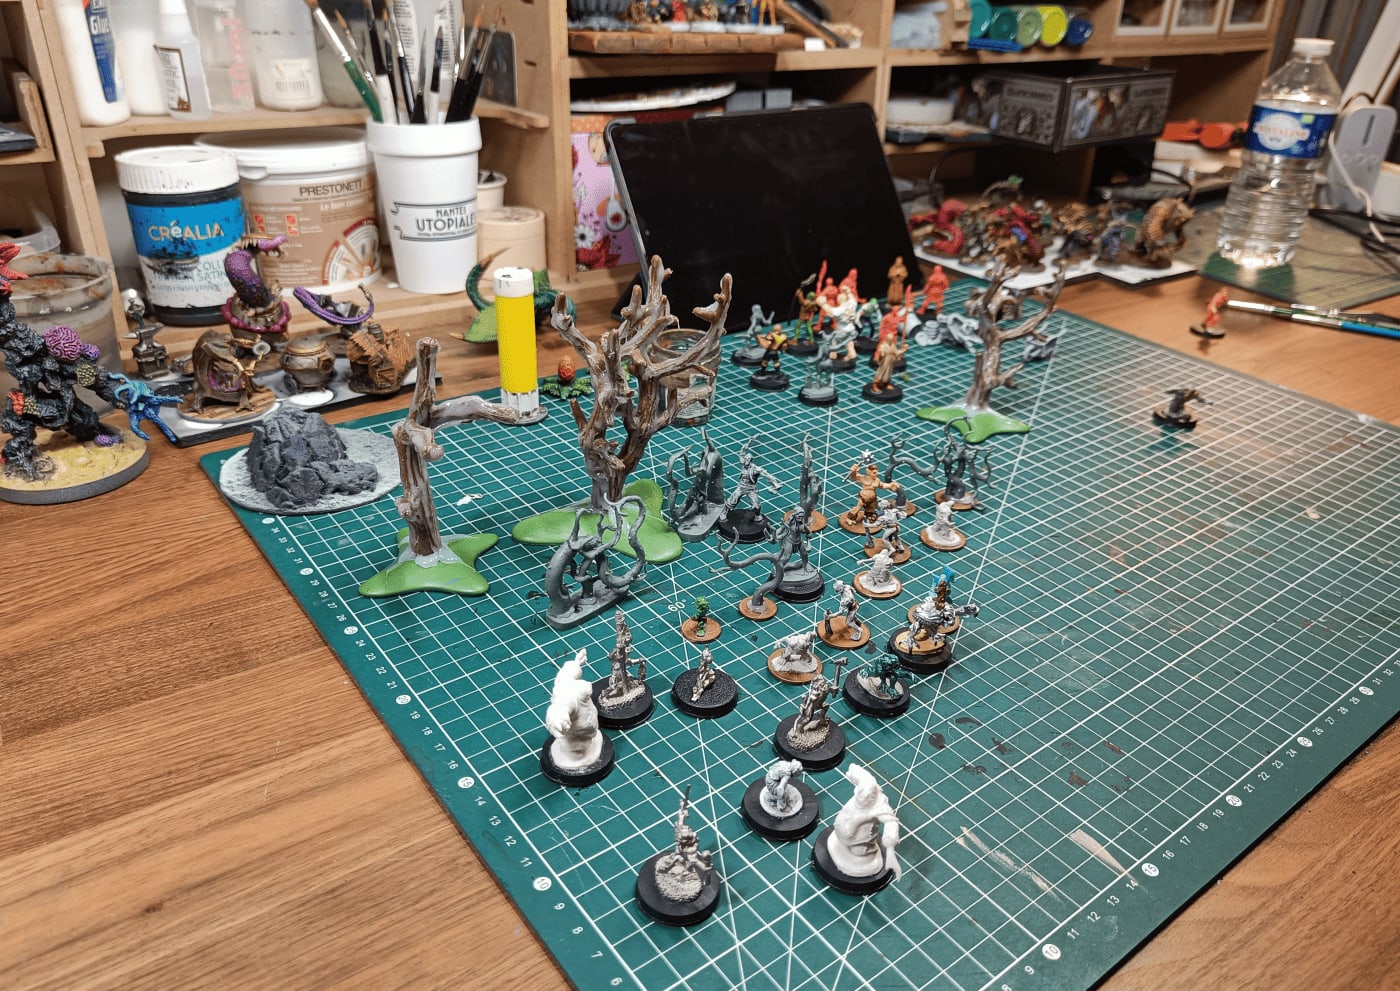
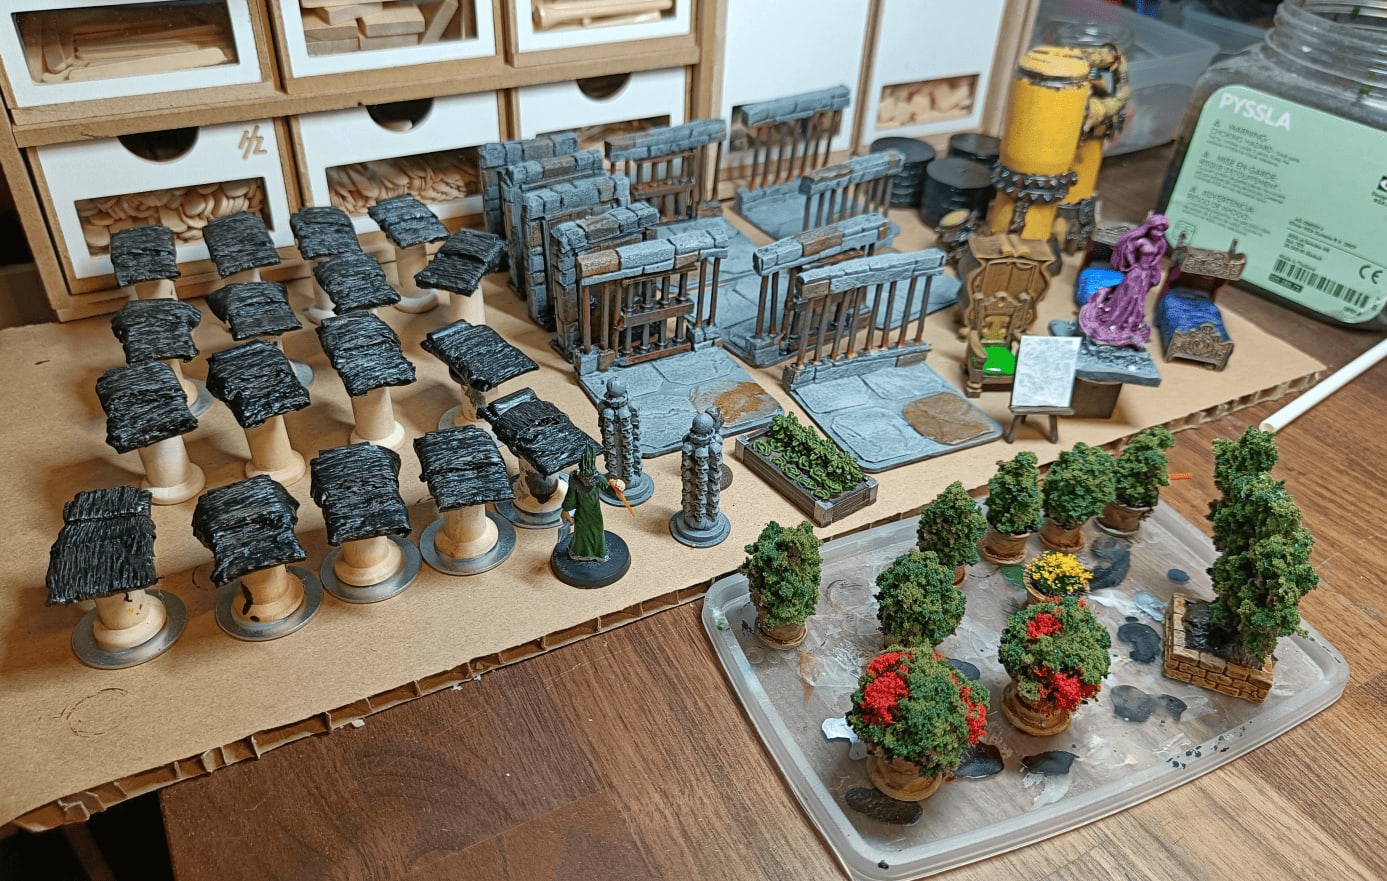
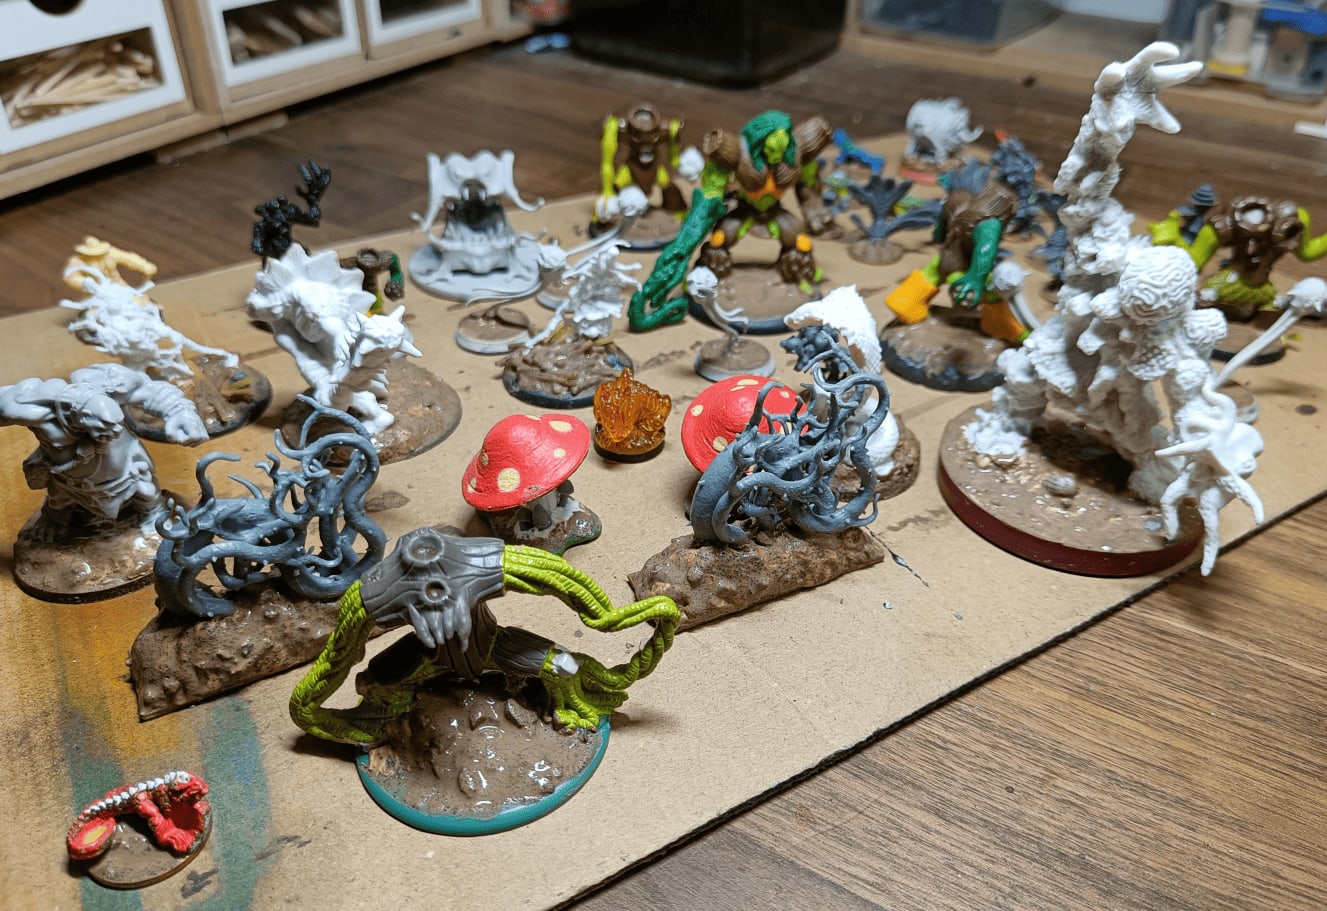
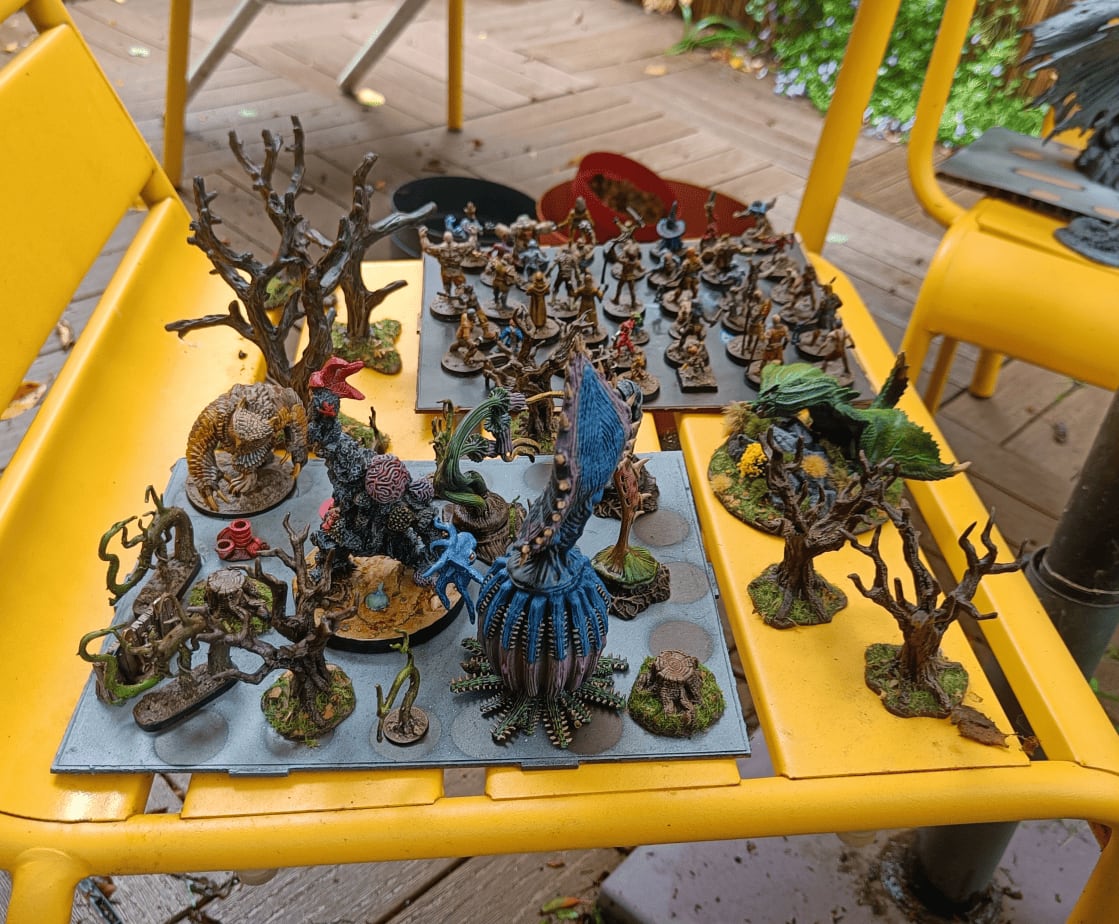
Here's another photo of my workbench showing different creatures at various stages of completion. It's a mix of scenery work with trees, some miniatures that are almost done (like the mimics in the background), and others just starting out where I've only glued them to the base and haven't even primed them yet.
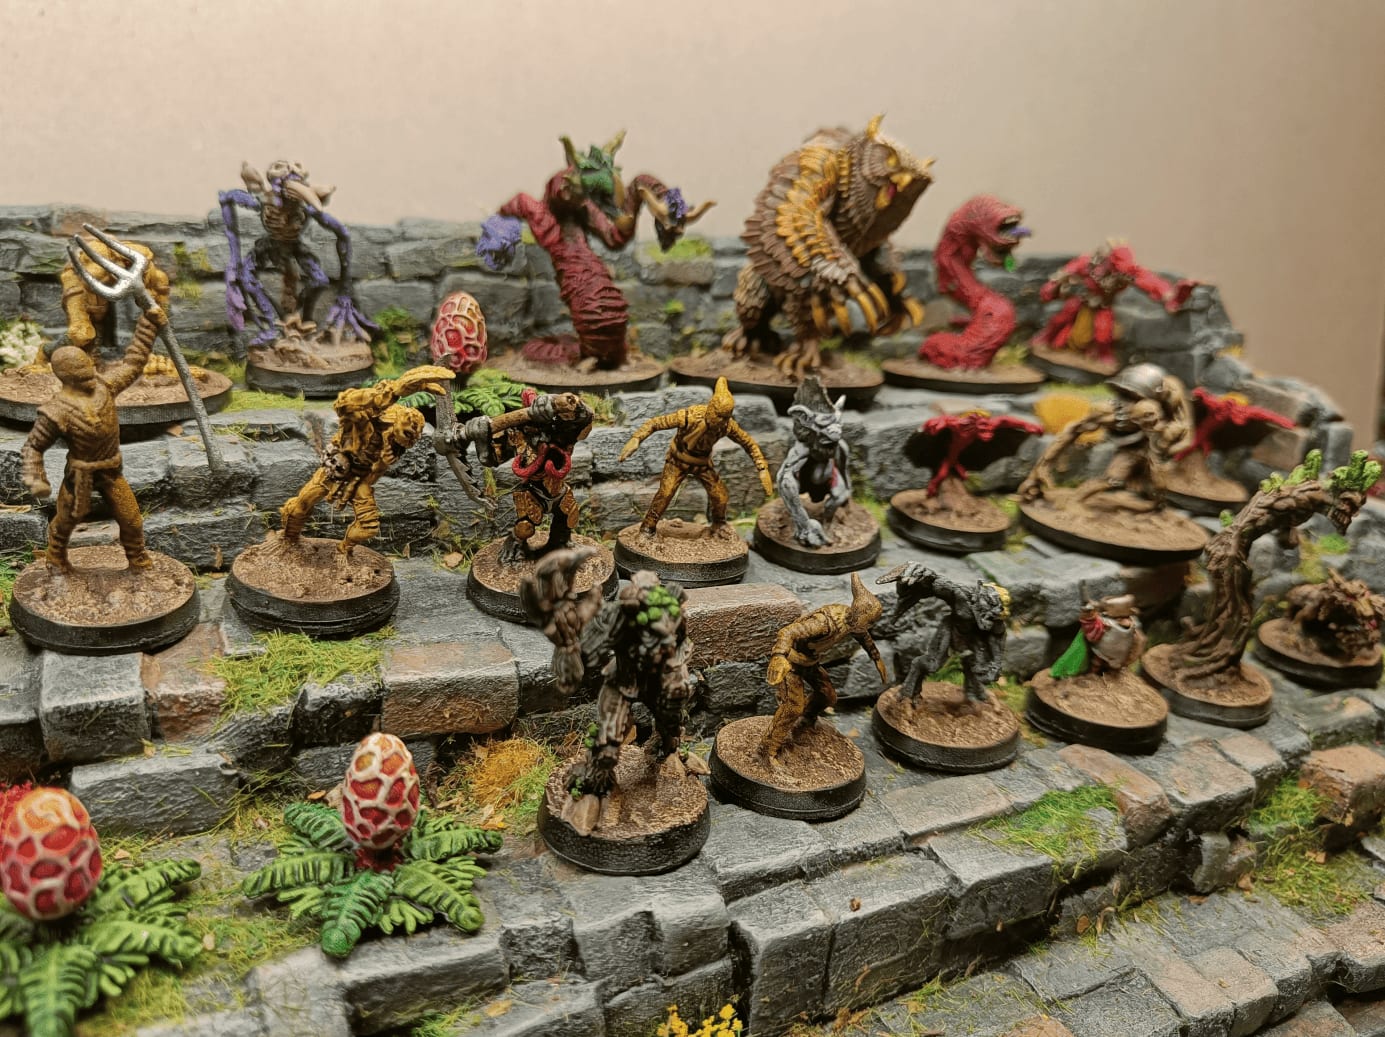
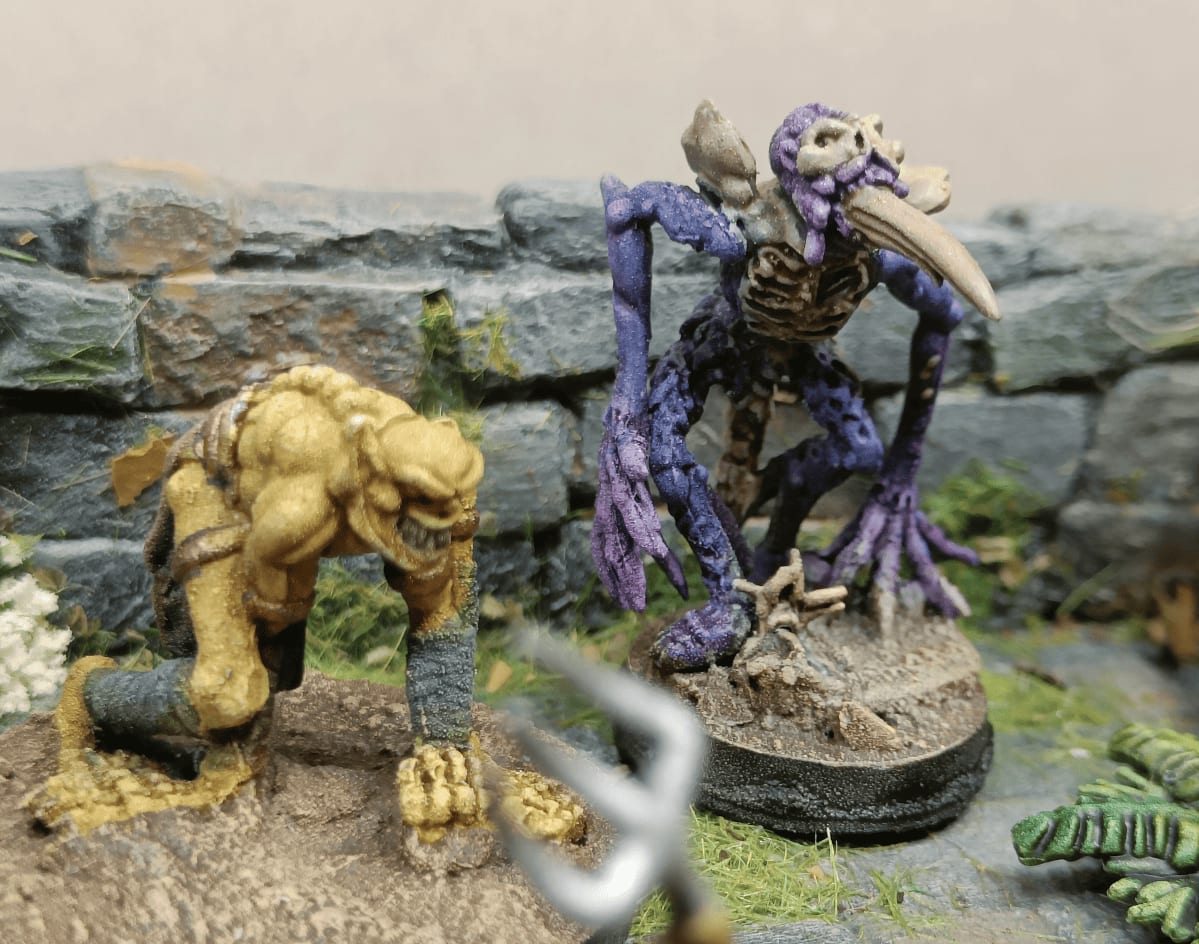
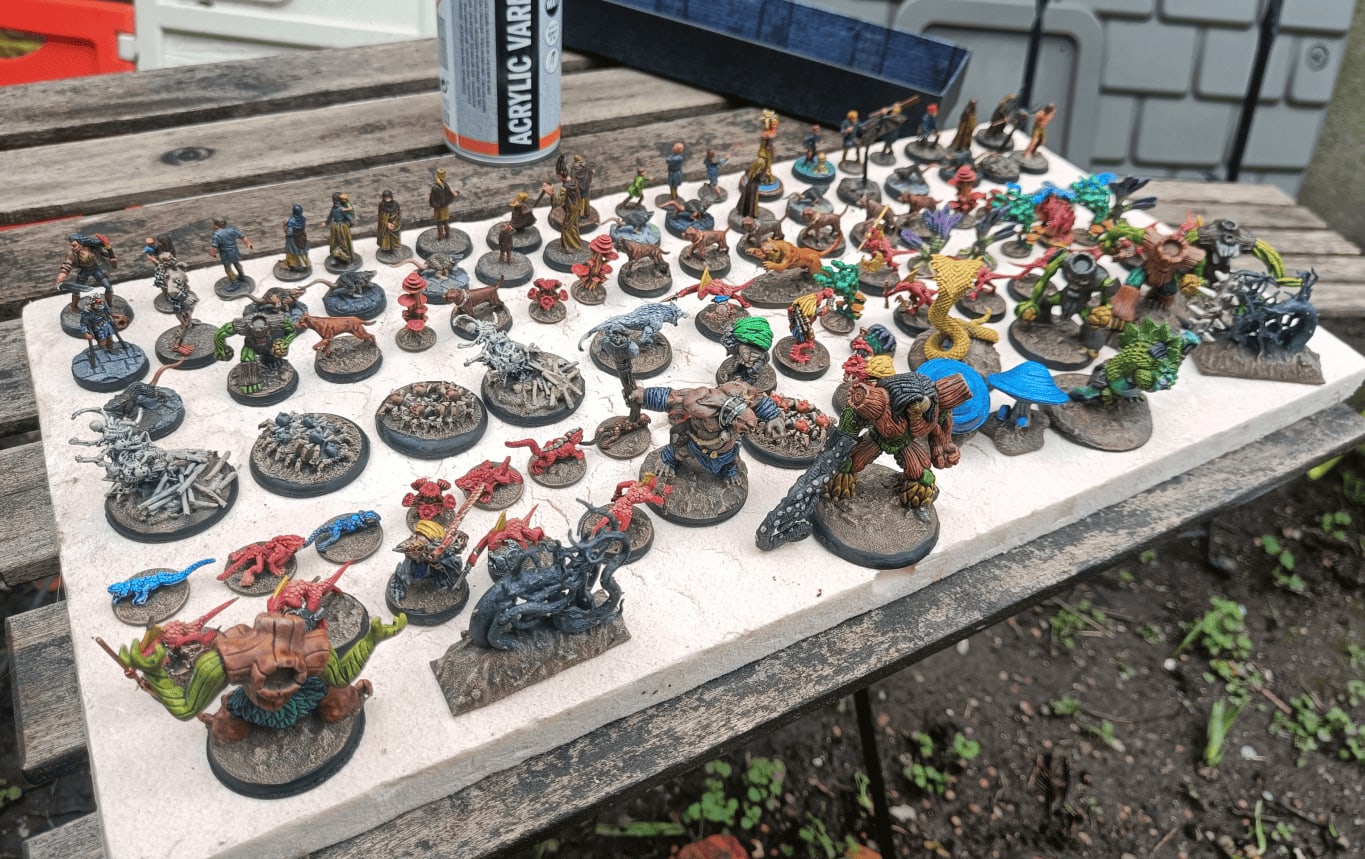
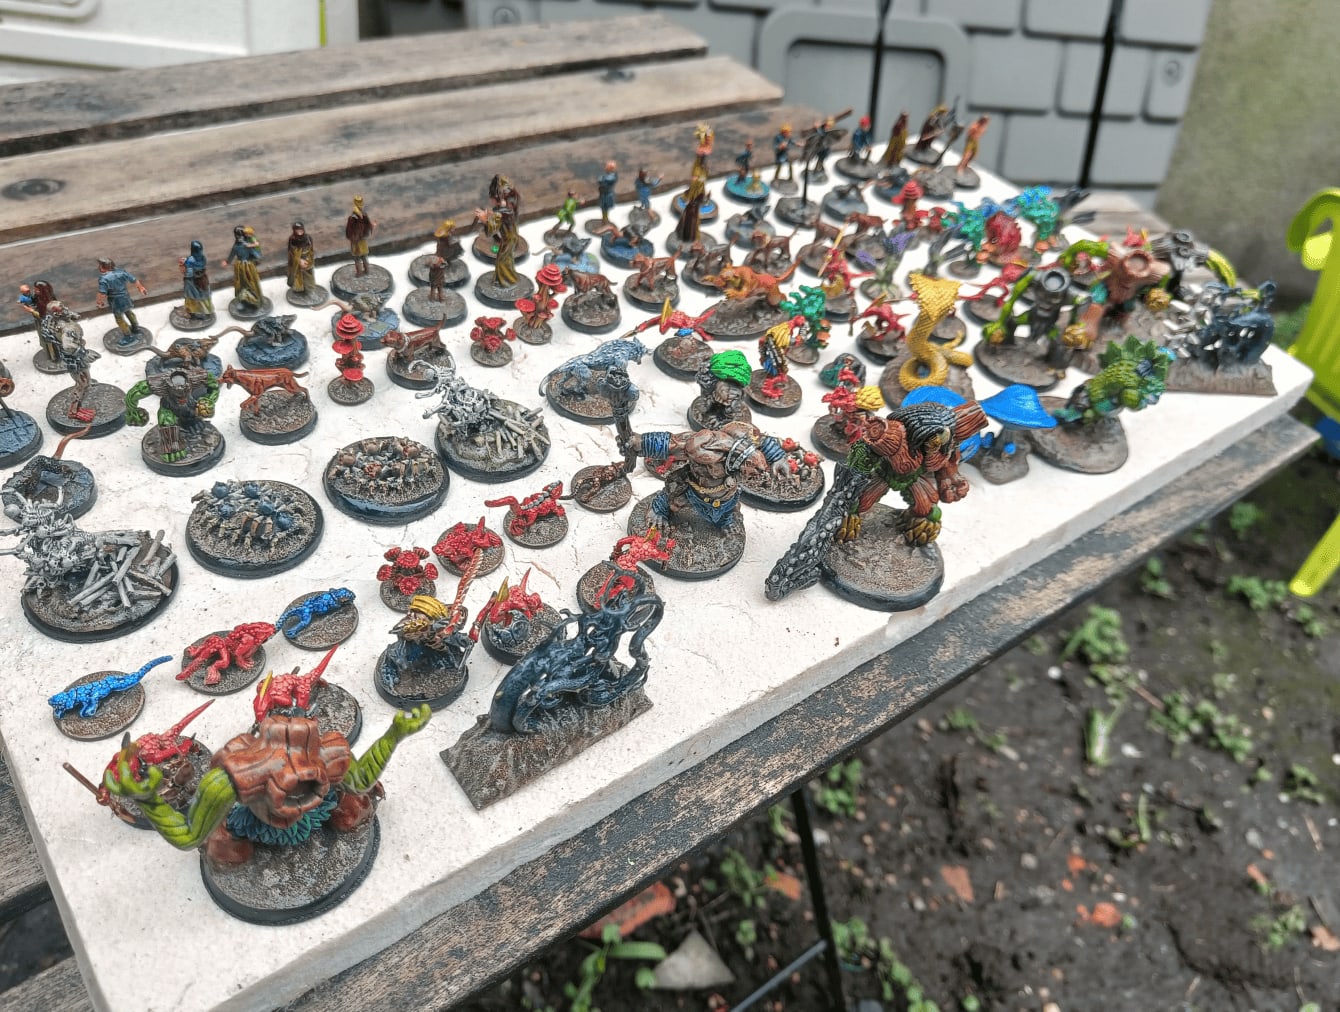
Some other family photos and other creatures, once again painted with speedpaints. I realize that really the technique that changed everything for me with speedpaints is that the first time I used them, I didn't know you had to do speedpaints on a rather light undercoat. And so I had done it on miniatures that I had undercoated either in black or in gray, and it hadn't worked very well.
This time however, it's my second big batch of speedpaints, and really the mass effect works just by using the speedpaints directly. The quality of what it produces is really superior to what I would have been able to paint without speedpaints.
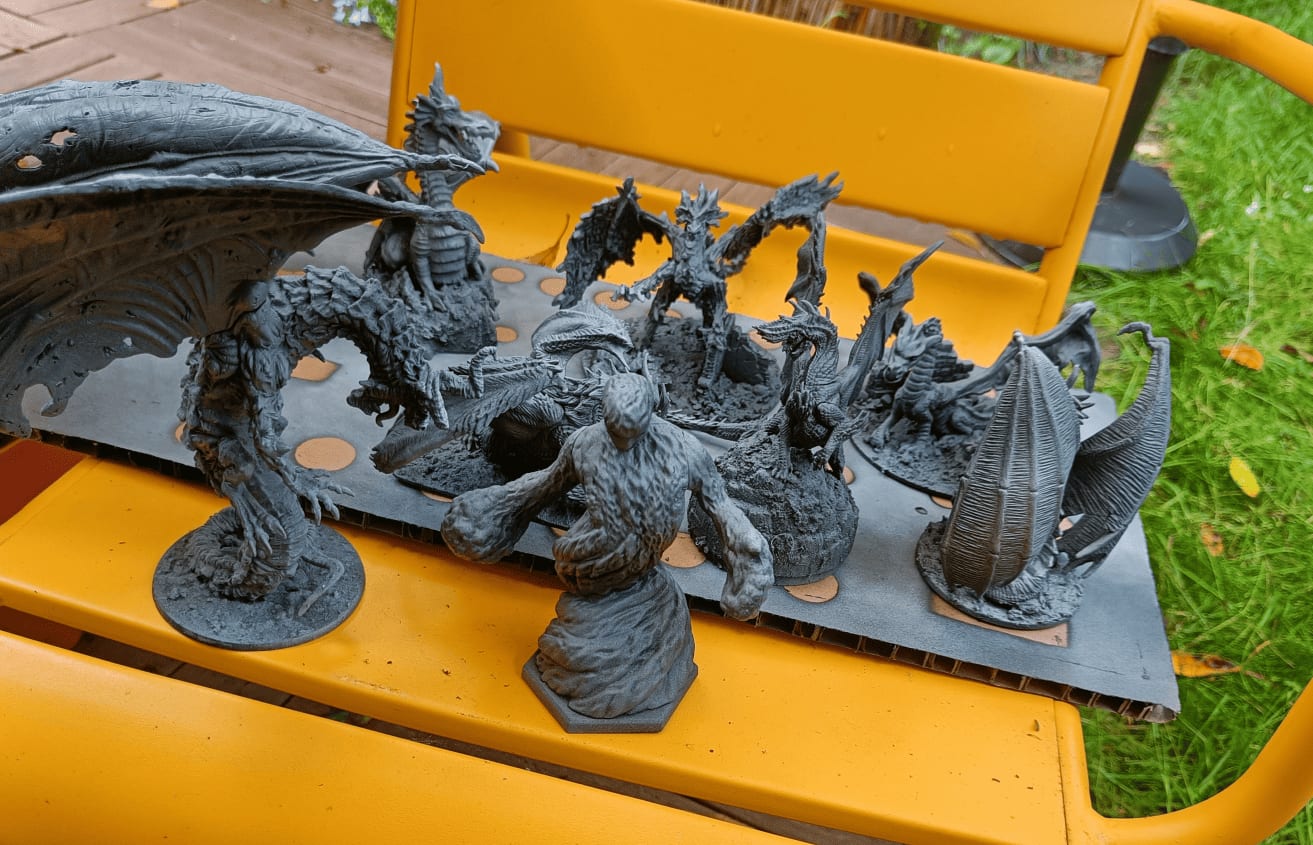
Taking advantage of the nice weather to both varnish the minis I've finished painting and prime the ones I'm about to start. The dragons you see in the photo, I've painted about half of them. The other half is still in this state, even two years later.
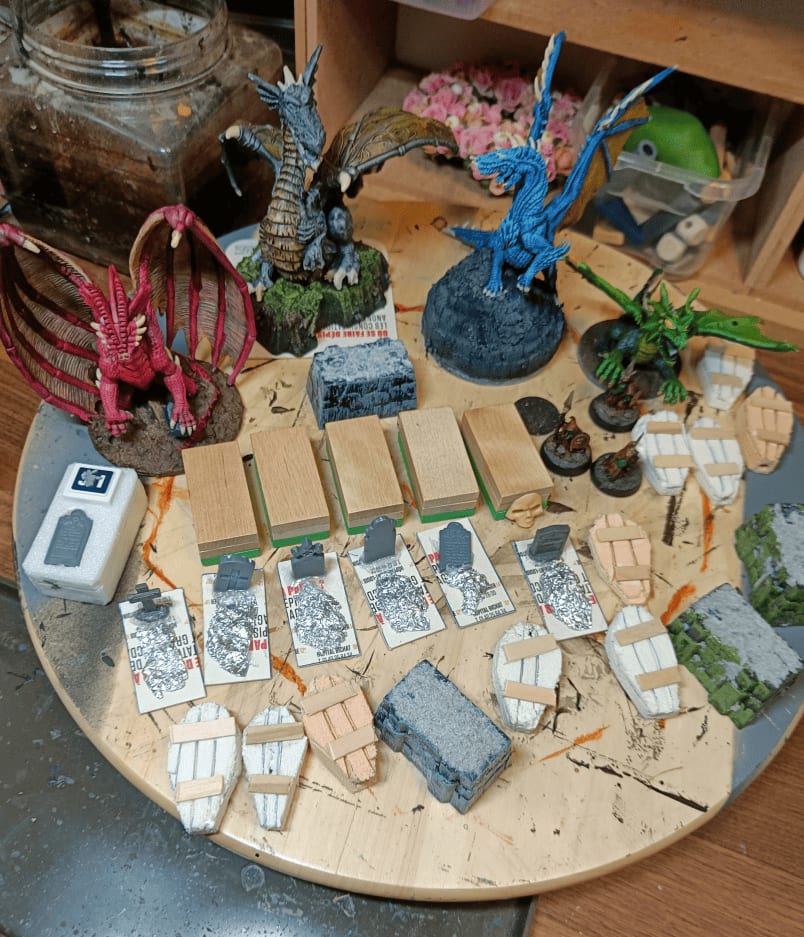
Here I worked on scatter terrain for catacombs and cemeteries. I wanted to create outdoor tombstones, coffins, and those sarcophagi you find in crypts. These are pretty classic elements for RPG sessions, especially the sarcophagi. Plus they work great as scenery elements that players can hide behind or climb on, so I needed some.
I figured the coffins could be useful scenery too, and we actually ended up using them in a campaign where the players had to transport a corpse from one place to another. I haven't used the tombstones much yet, but I'm still happy to have them ready.
Metallic Tiles
In the Strange Aeons asylum map, there's this machine room where the floor is made of metal. It makes noise when you walk on it, so I wanted to create a tile that represented that feeling.
In the end, I think my players never actually went there, but I had fun experimenting with how to make a tile that gives you the sensation of walking on metal.
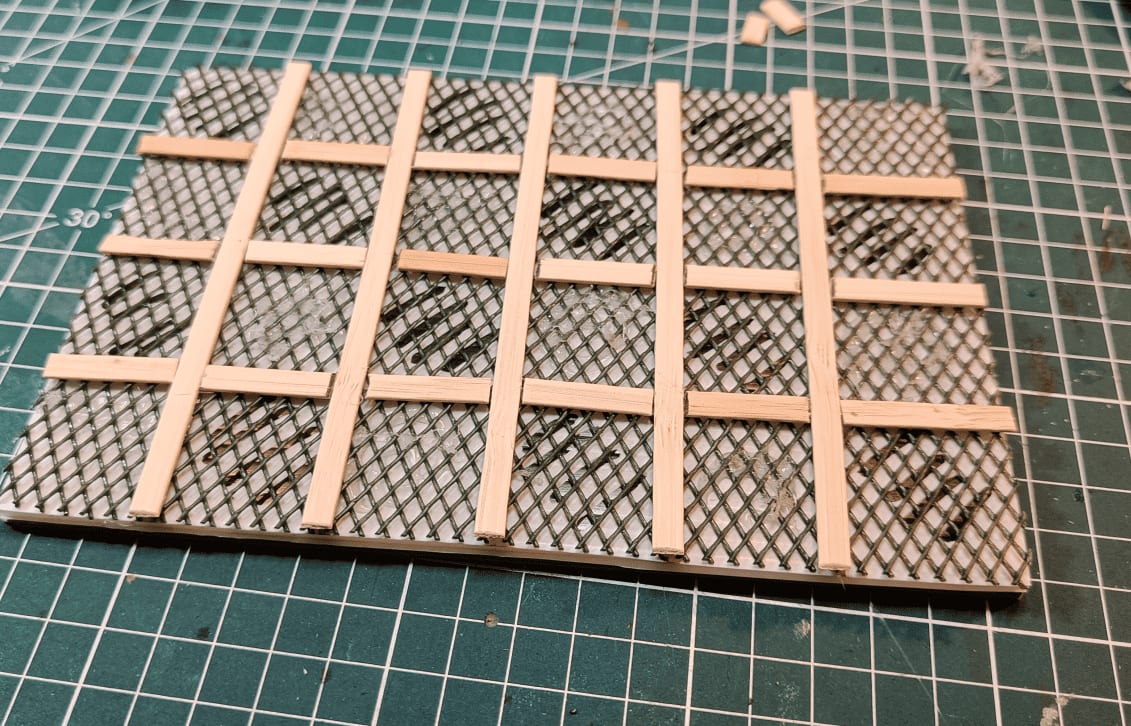
For the base, I didn't use the same cardboard as for the other tiles because I wanted them to have similar thicknesses. Instead, I used corrugated plastic sheets on which I glued a large sheet of chicken wire. I colored the different squares to have an indication of which tiles I was going to fill and which tiles I planned to leave the wire mesh as is. I also made walkways and pathways, which will become metal planks, but for now I made them with small pieces of wood.
I stuck cardboard tiles in a somewhat checkerboard pattern at different places so there would be tiles at different heights.
And in the others I put smaller tiles. The idea for me was to manage to create something where we can continue to see the mesh underneath.
And then black and an orange dry brush to create the rust effect. I think I added another silver drybrush after this one.
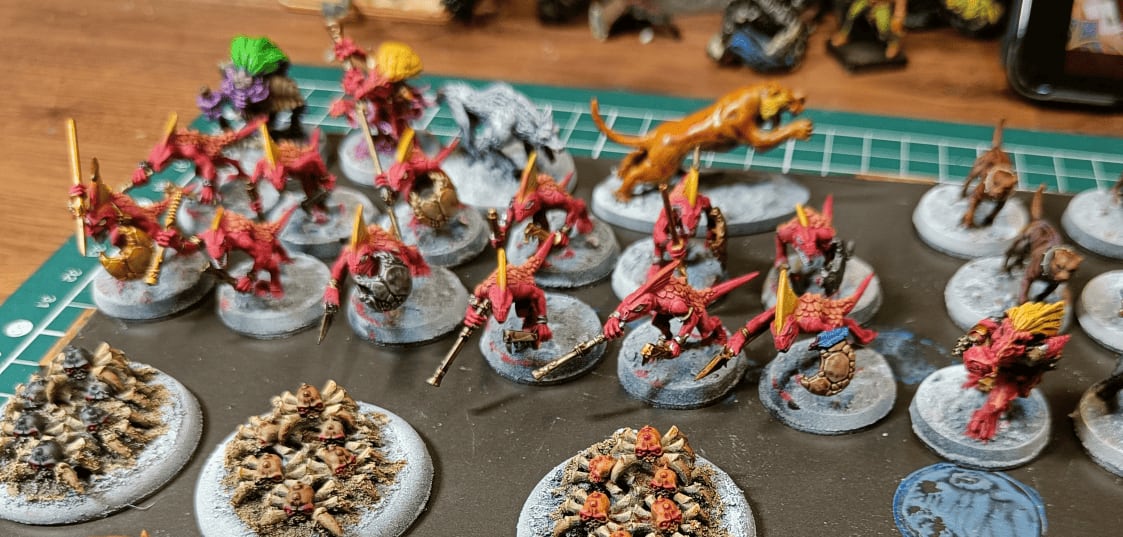
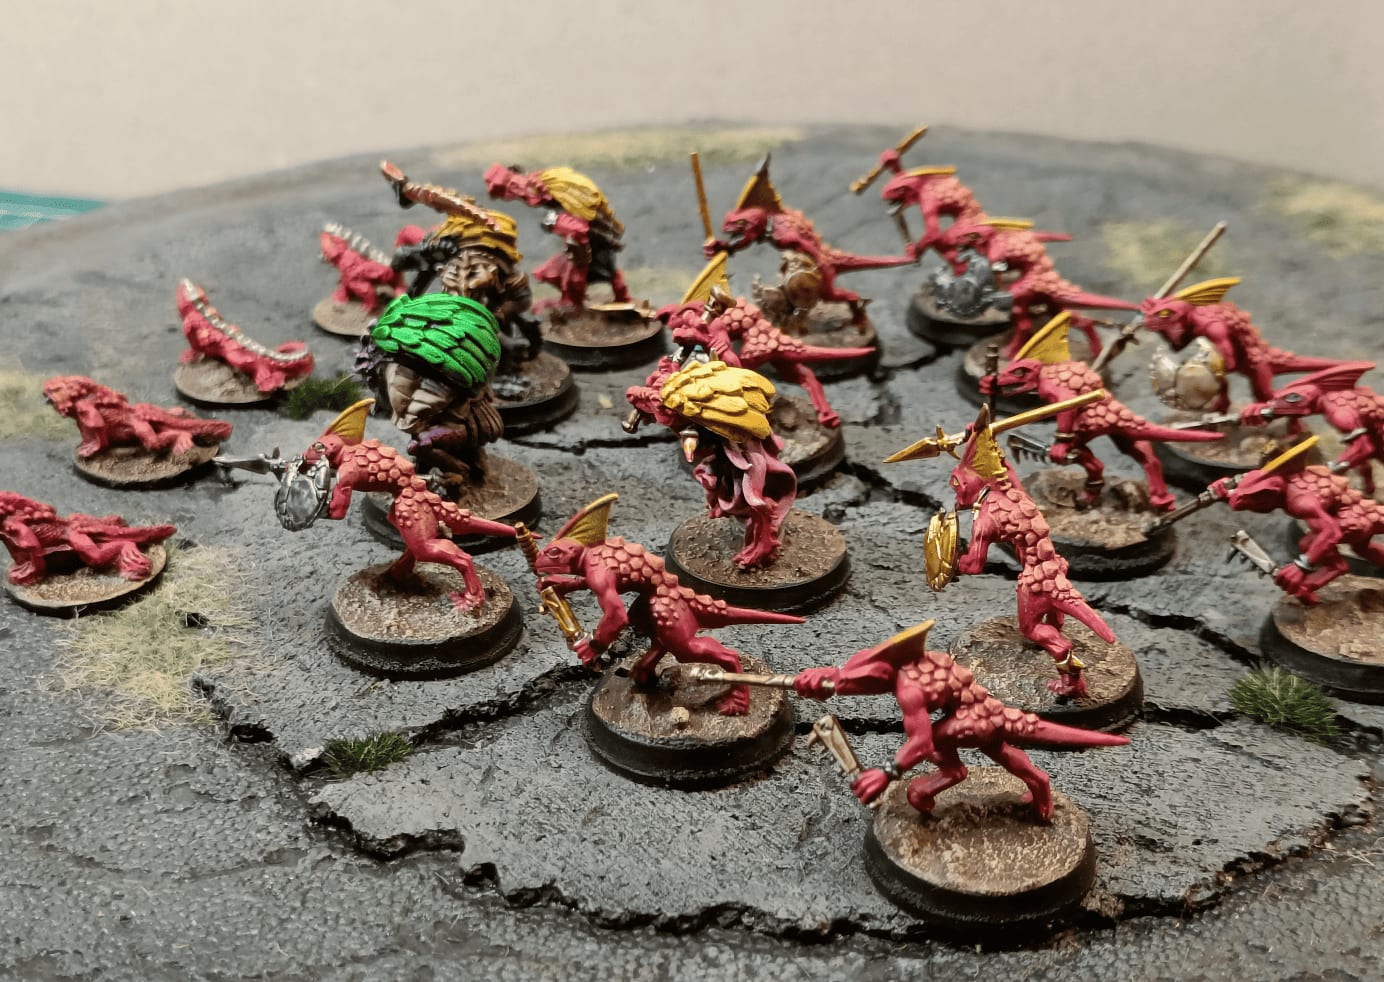
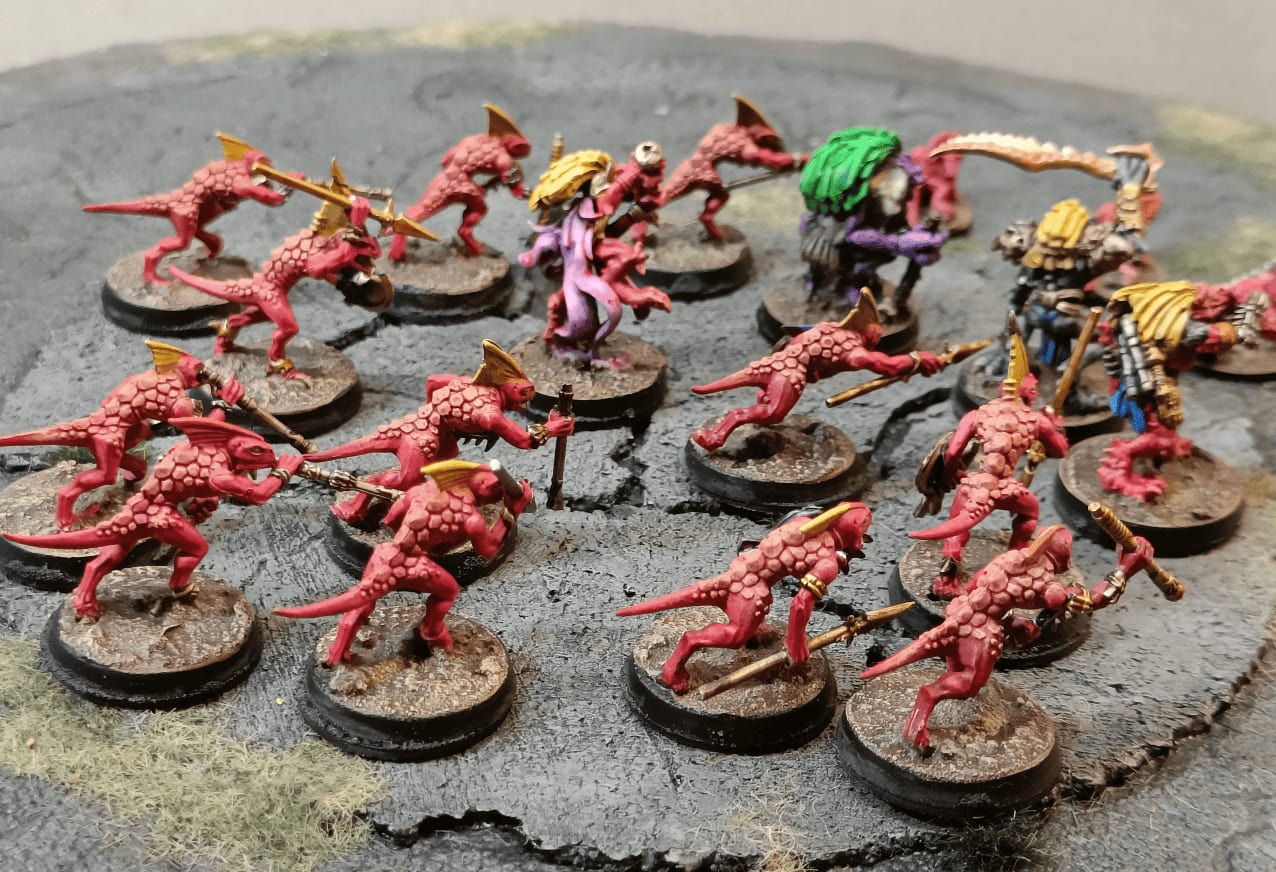
Kobolds
Here's a group of kobolds I painted for when we were playing Kingmaker. At one point, right at the beginning, there's the possibility of going into two different dungeons. One is a kobold dungeon and the other is more of a gremlin type dungeon.
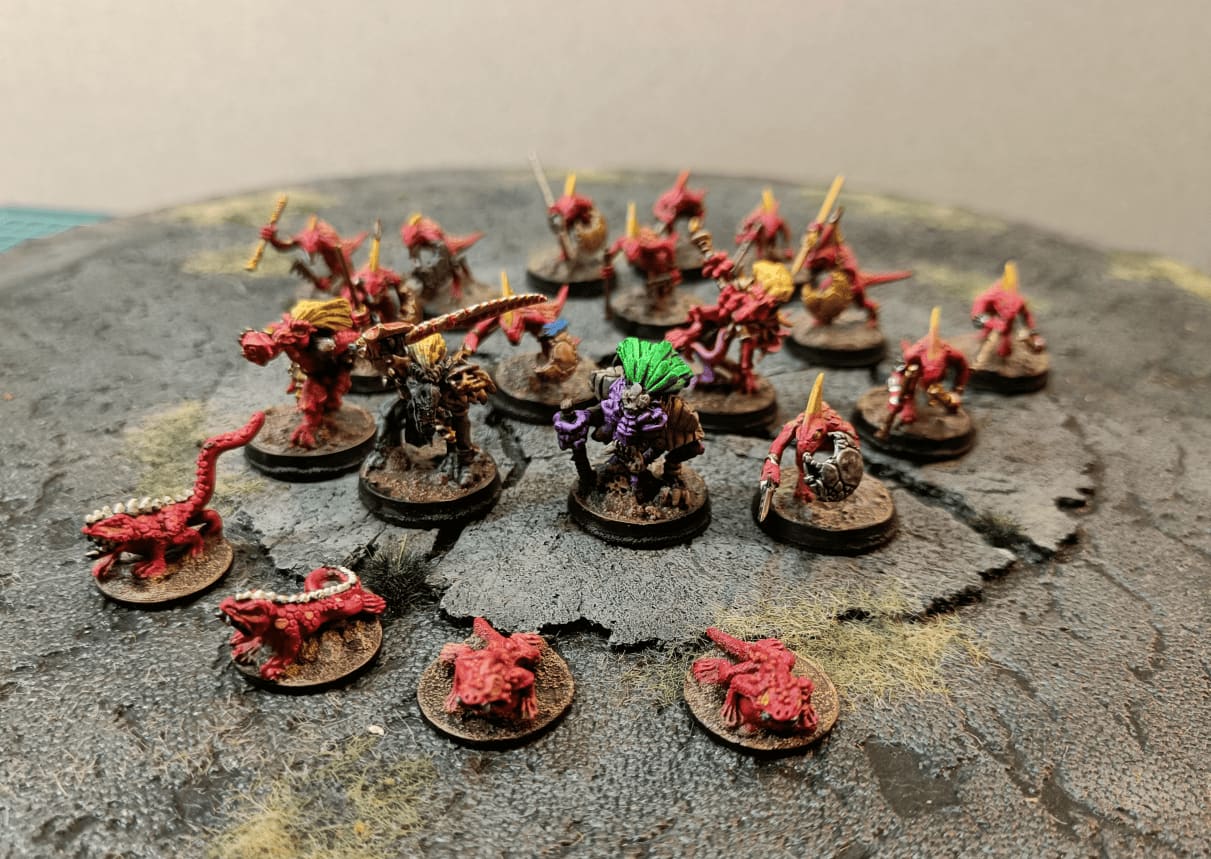
I didn't really have any kobold miniatures. The one I had was the basic Reaper Bones one, but they're really tiny. So what I did was use skink miniatures from Games Workshop. I assembled enough of them and painted them red to make myself a unit of kobolds.
For the special characters, the shamans and the captains of the kobold unit, I used Heroclix miniatures that I painted either in the same types of colors, or with entirely different colors to make them stand out from the others.
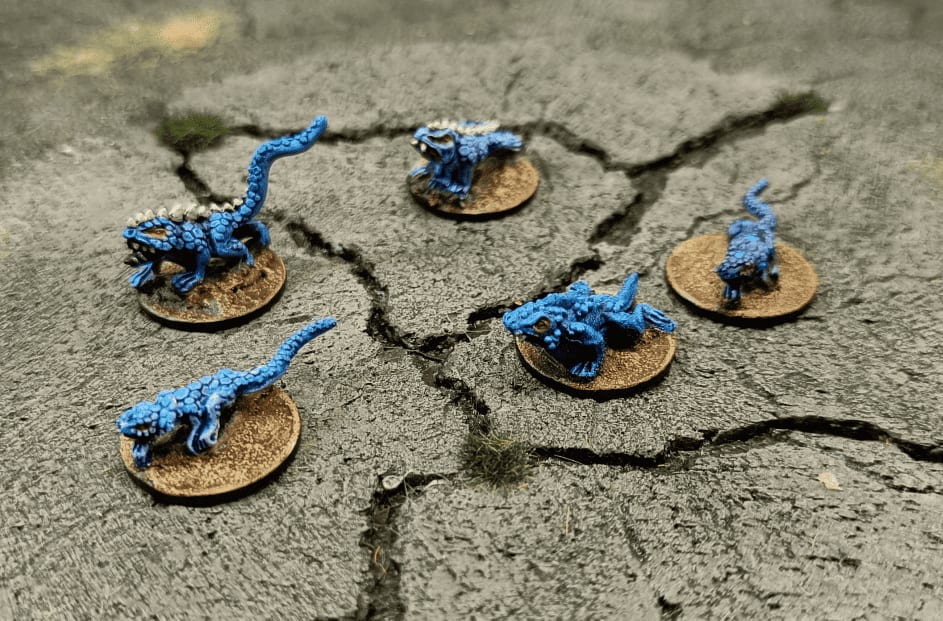
And as a little pet, I used lizards from an old sprue, an old Games Workshop blister of lizardmen from the 90s, that I still had from when I was doing a lizardmen army.

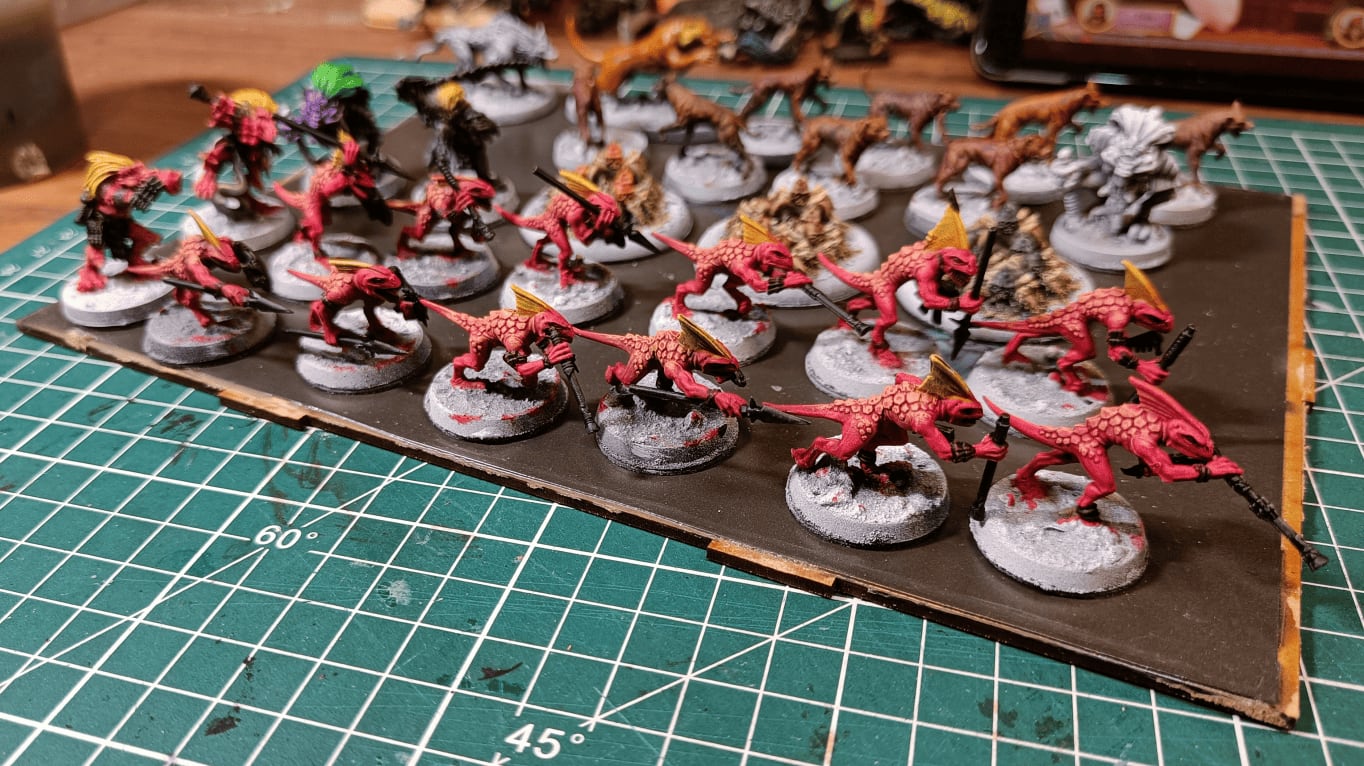
I started by applying an almost complete coat of red speedpaint (I think it's poppy red) and then I applied a slightly orange dry brush on the scales on top, very light. It doesn't matter if it overflows a little bit. I painted the crest in yellow. Then I covered all the metallic parts in black to add metallic paint on top later.
For the weapons, I tried to vary the different types of metals a little bit, mostly because I wanted to test what I could do with speedpaints. My technique was to start with a first layer of silver and then add different speedpaint colors on top to tint that silver with different things. With certain colors, it makes bronze, with others, it makes different types of metal. I found that it worked quite well for them.
I don't remember exactly which color corresponded to which version, but I tried to mark it on my paint pots. I wrote a small M with a marker to remind myself what they do for metal that looks good so I can try it again later.
Obviously, as is often the case in campaigns, my players never actually made it to this dungeon. They were heading that way, but along the way they got jumped by a kobold patrol that really messed them up and scared them pretty badly. So they decided to put off exploring the dungeon and come back later. But then the adventure took them in completely different directions, and they just never ended up going back there.
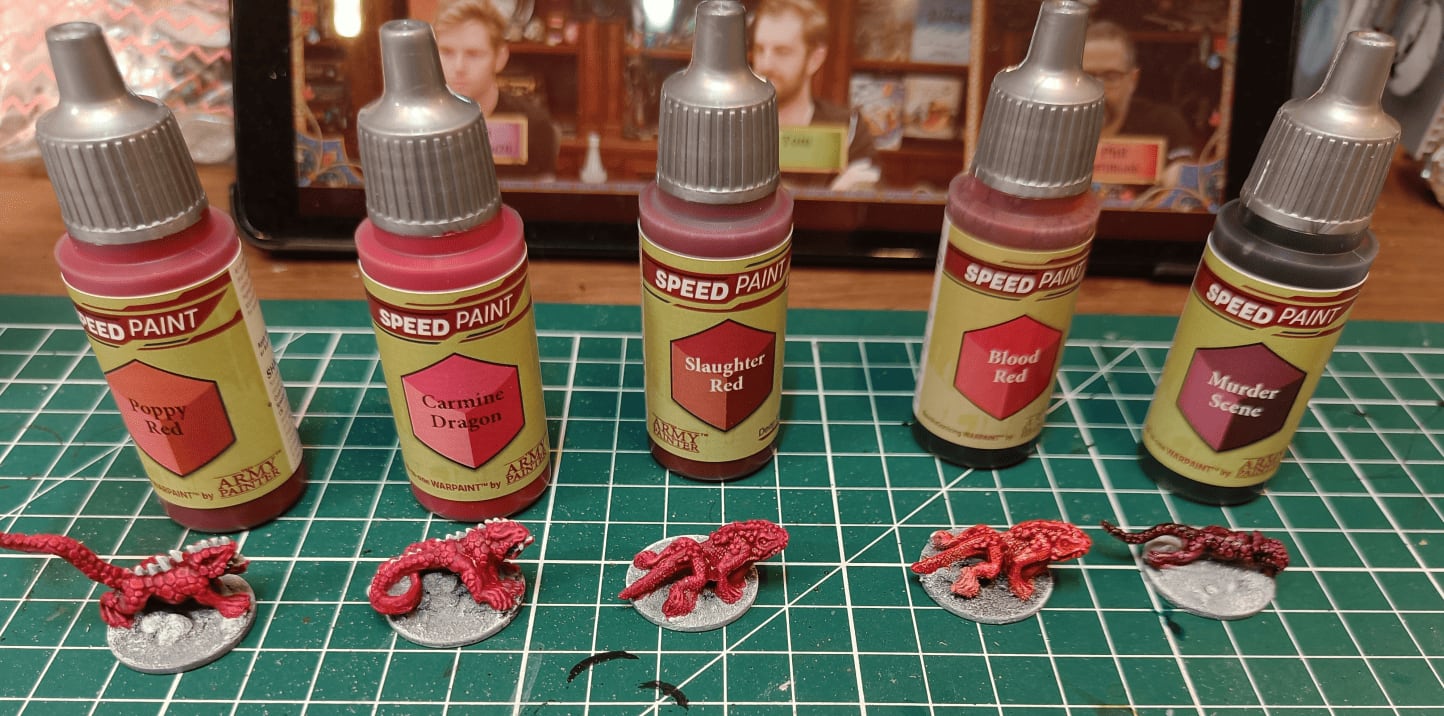
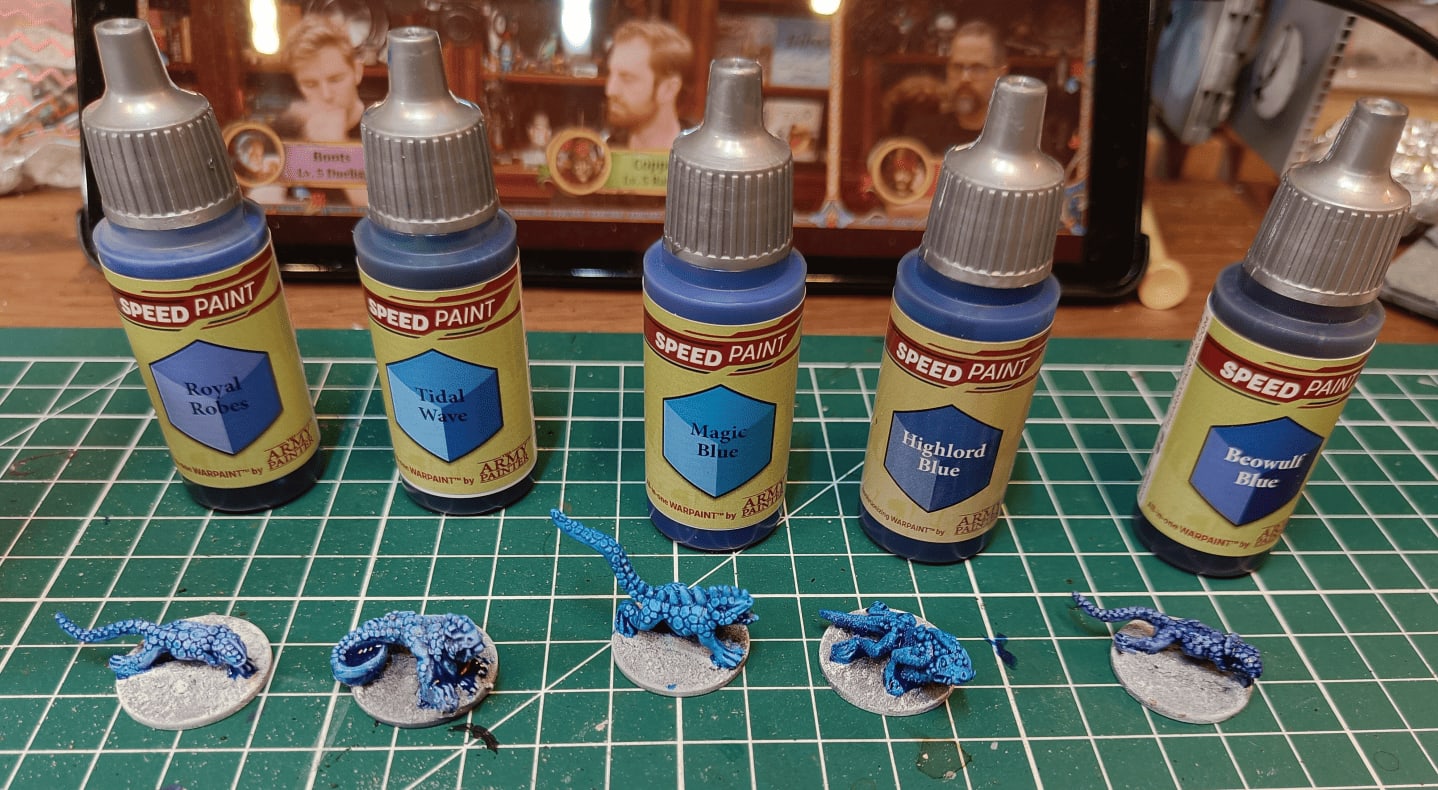
For the lizards, I documented the different speedpaints I used on them to test the various reds and blues. The basic speedpaint box has a lot of different reds and blues, and it's hard to get a sense of what each color looks like just by looking at the bottle. So I took photos of each one I tested.
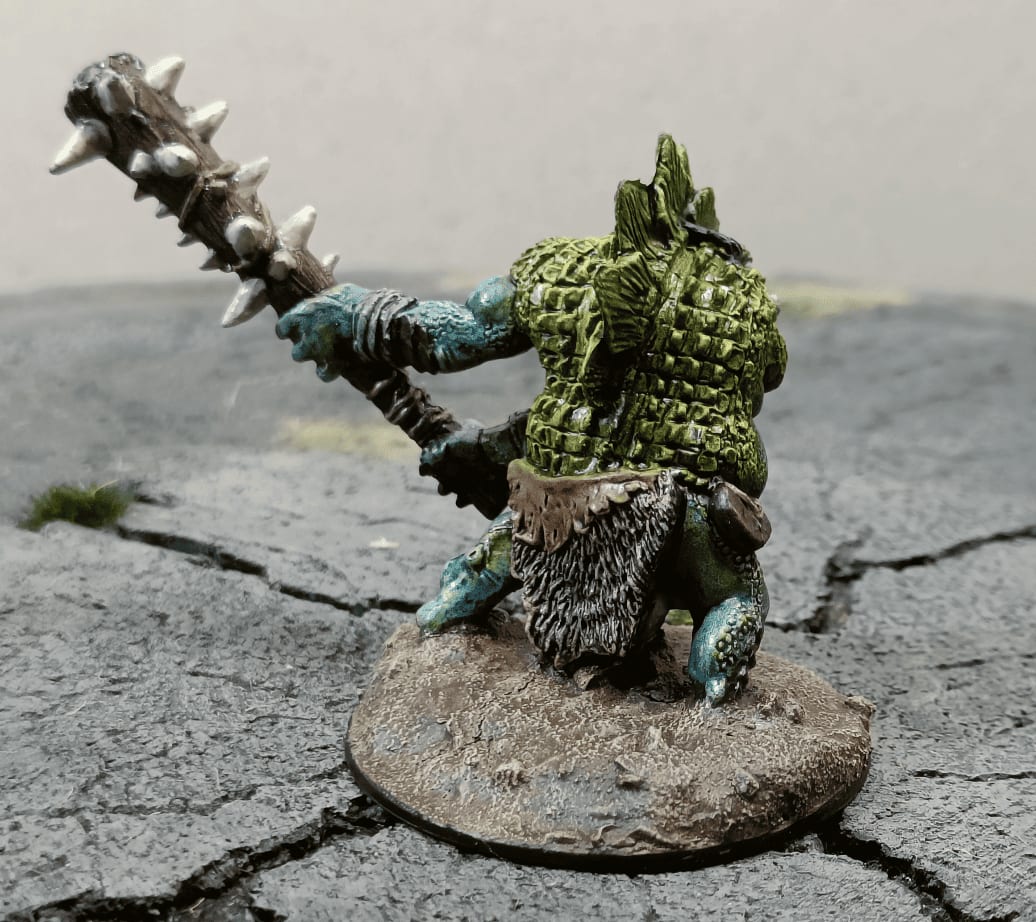
Hargulka
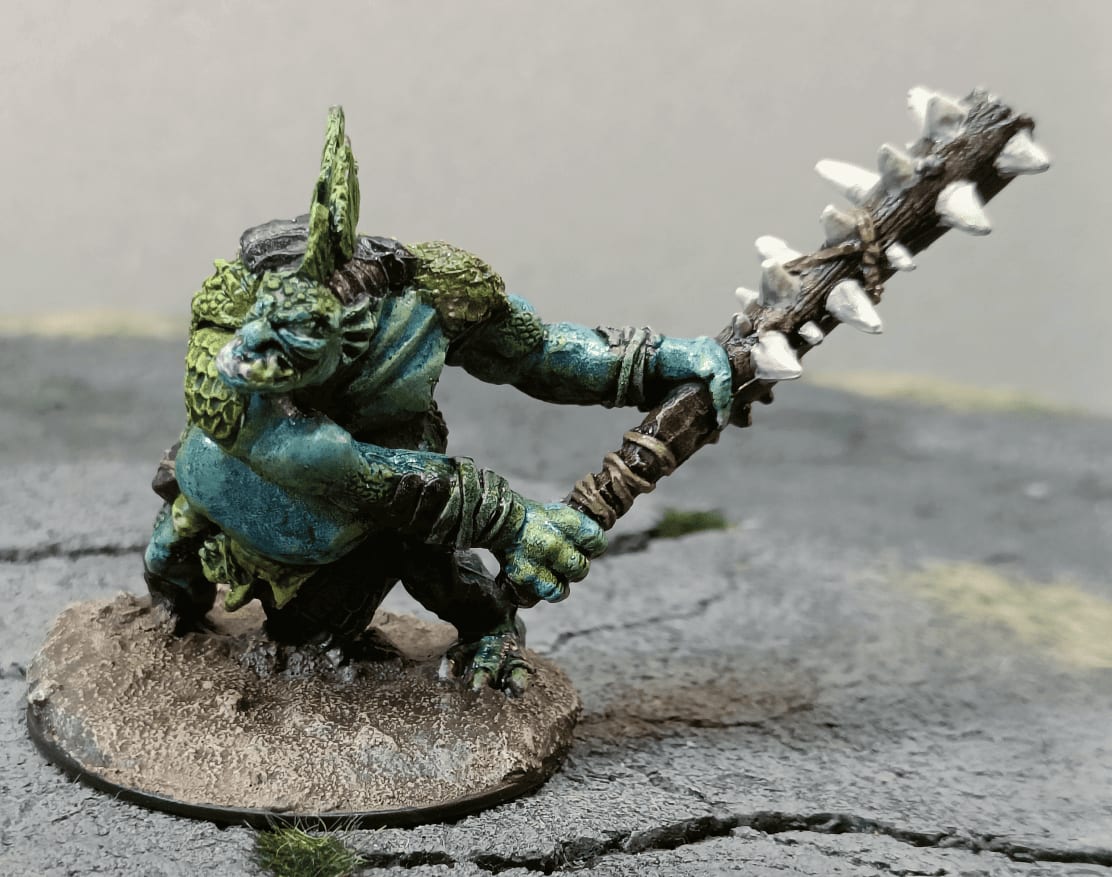
This is Hargulka. She's a troll, I think I based her on one of the encounters that are in the Kingmaker Adventure Path.
The miniature comes from Reaper Bones. I think I painted it before I knew about Speedpaints. There was a strange reaction with the paint or with the Reaper Bones, but once I applied the varnish it became a little bit sticky. I don't know exactly why.
Asylum NPCs
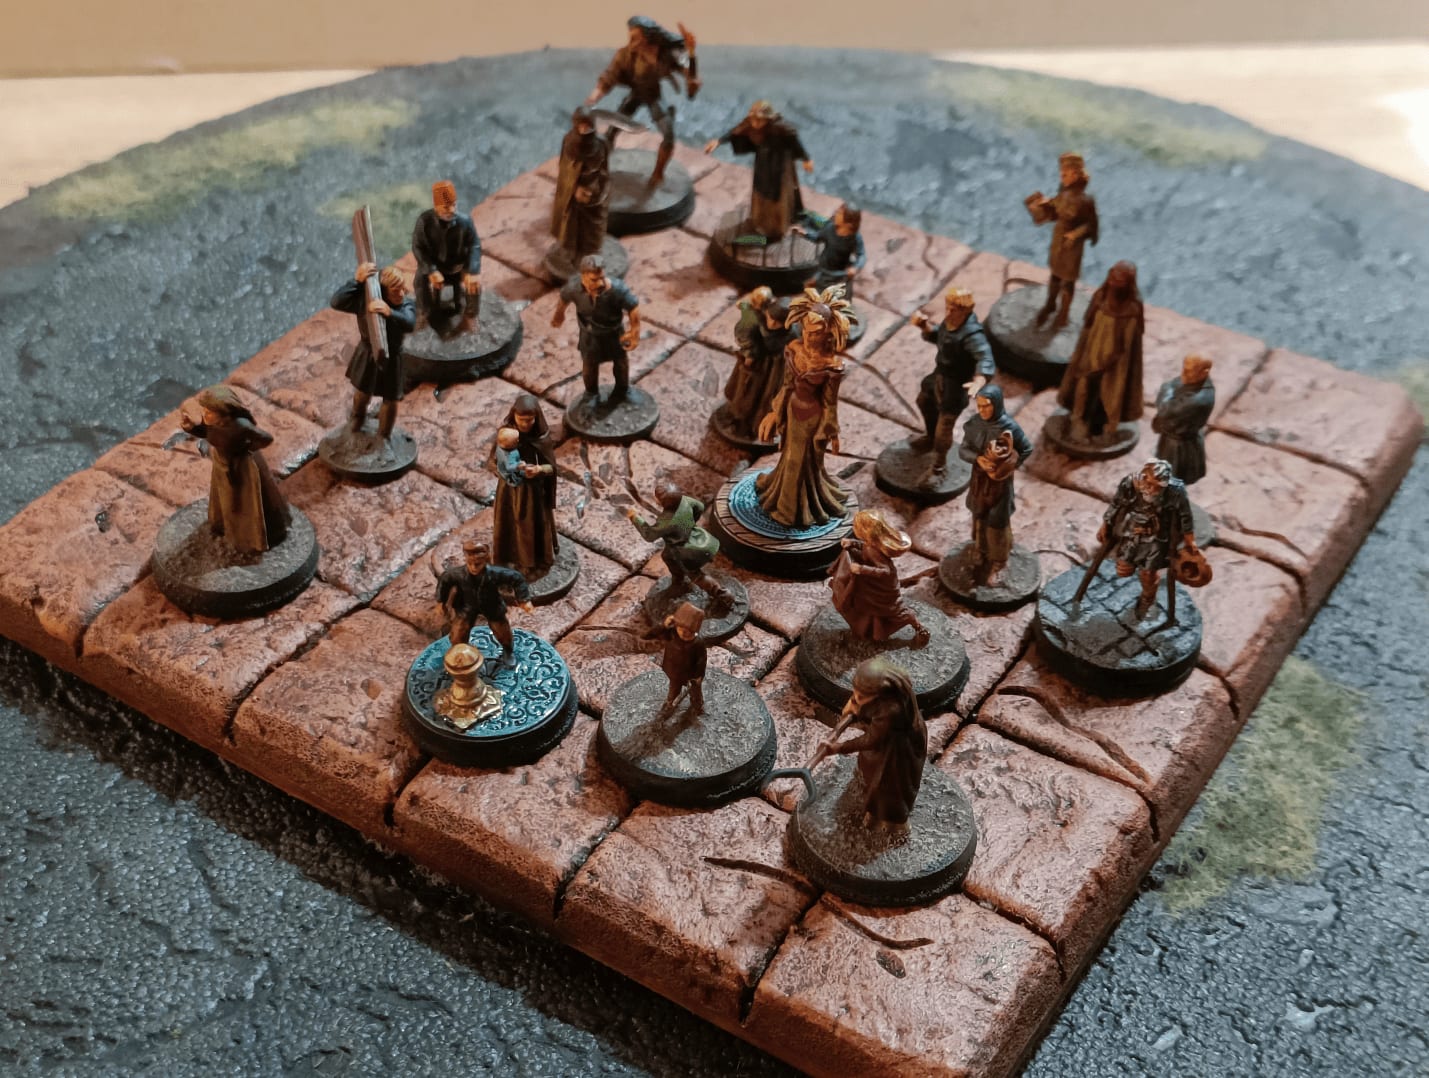
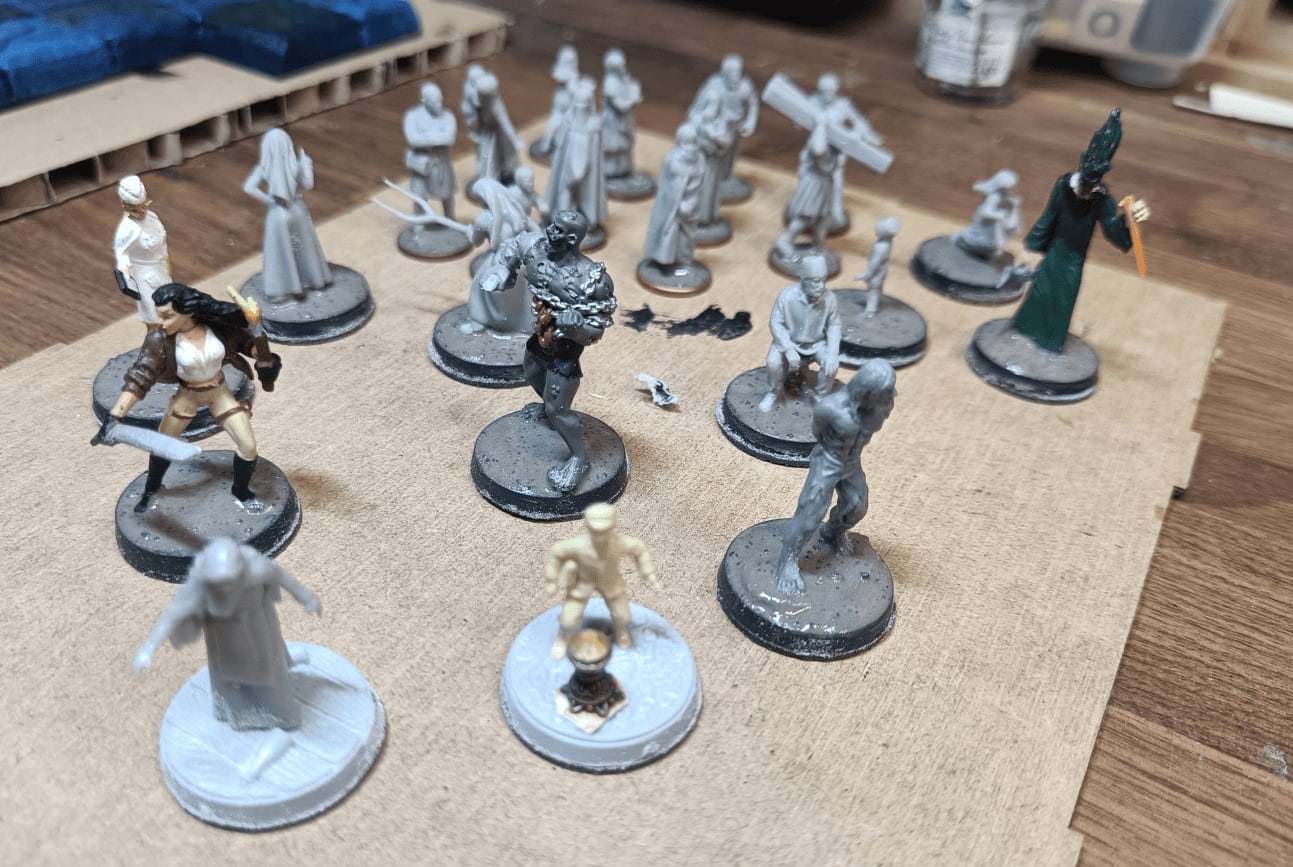
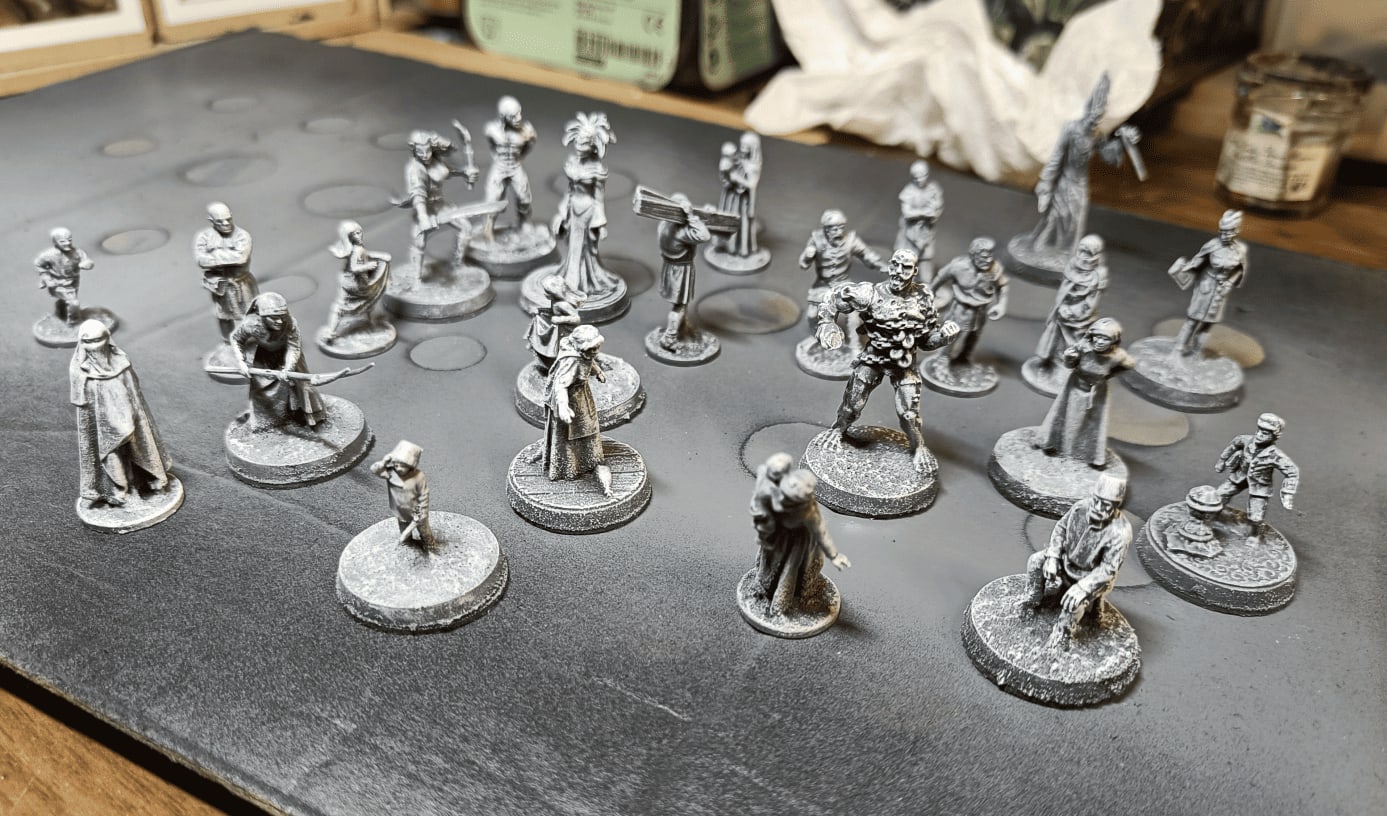
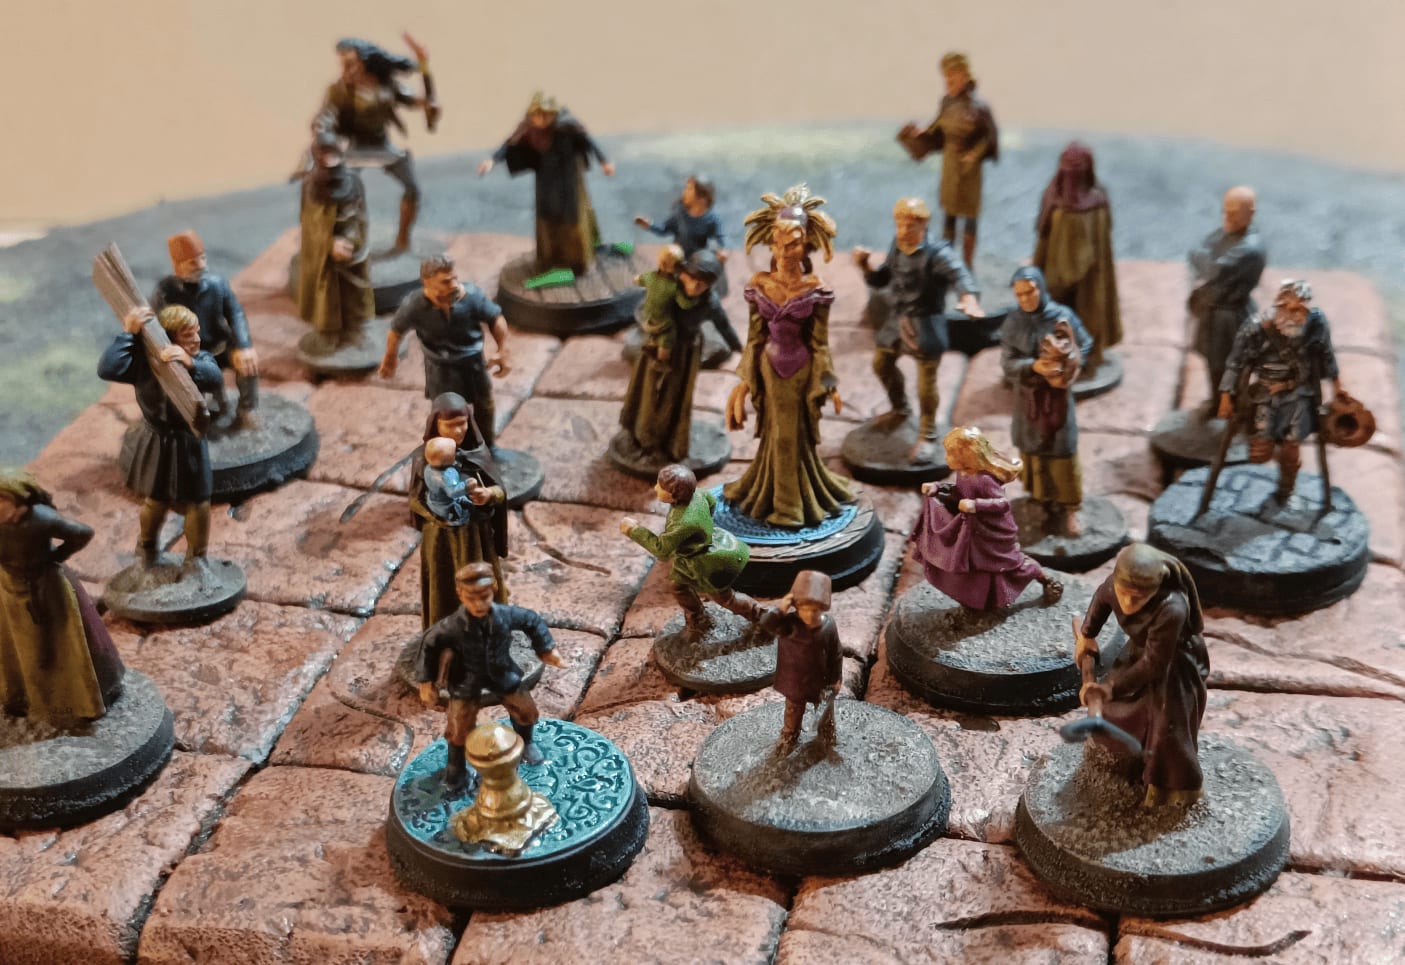
For the first Strange Aeons scenario, there's a whole area with lots of survivors from the psychiatric asylum who are sequestered. I needed quite a few miniatures to represent all these NPCs that the players will have to protect and save.
There are some named NPCs that they can interact with who have an impact on the story, and there are others who are more there for local color. So I tried to make different types of small bases made with 1 cent coins for those who are just there for local color, and slightly larger ones for those with whom the NPCs can interact.
In hindsight, I realize that wasn't necessarily needed. I often use these characters more in scenes, they're almost like scenery elements. So the small base in the form of a 1 cent coin is pretty good. It allows to differentiate them from the others who are really potential threats.
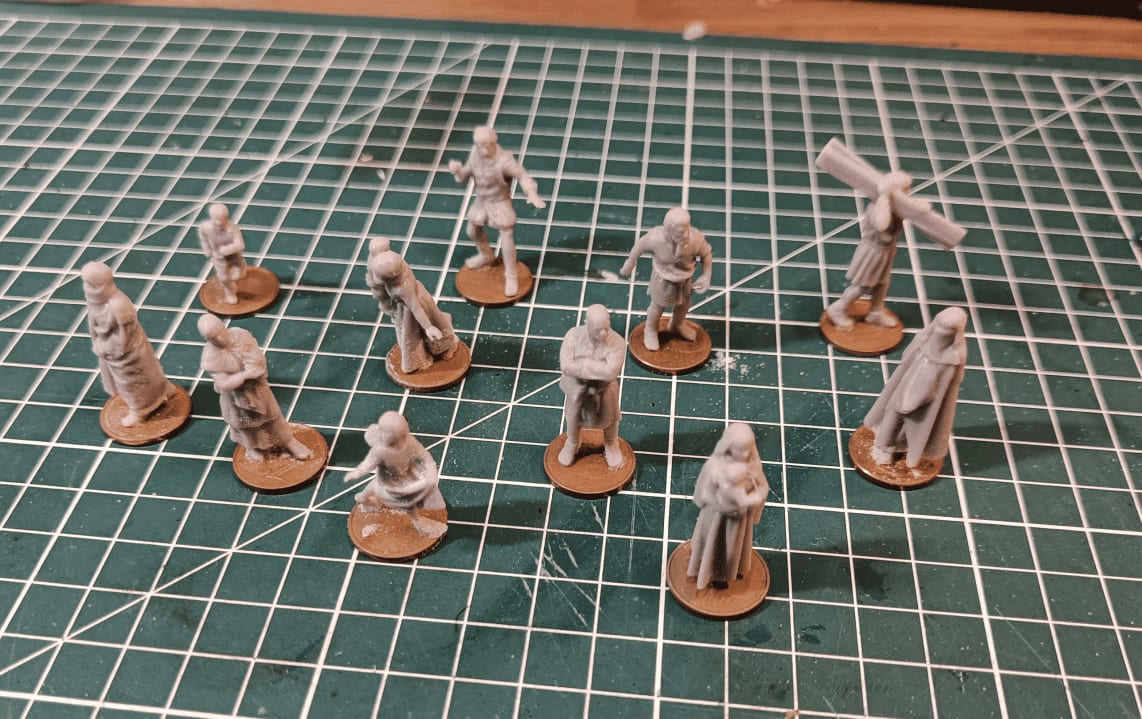
Most of the base miniatures, I bought them on Etsy. Someone 3D printed them and I got them. The printing is a bit smooth at times. I think some of the details were lost, but at least there are no molding marks from the 3D printing, so it does the job for what I wanted to do.
The other miniatures come from a bit of everywhere honestly. I think there are some Heroclix, and there's that little boy you can see at the bottom left. I don't know exactly where he comes from, I found him at a flea market. Not sure what he's supposed to represent, it's a small plastic figurine, maybe from plastic war soldiers or something.
For all my minis on round bases, I added some texture. It's a mix of filler, spackling paste, small stones, glue, and a bit of ink so I can identify it later. I glue it on, and if it spills over the edges, I just wipe it off with my finger.
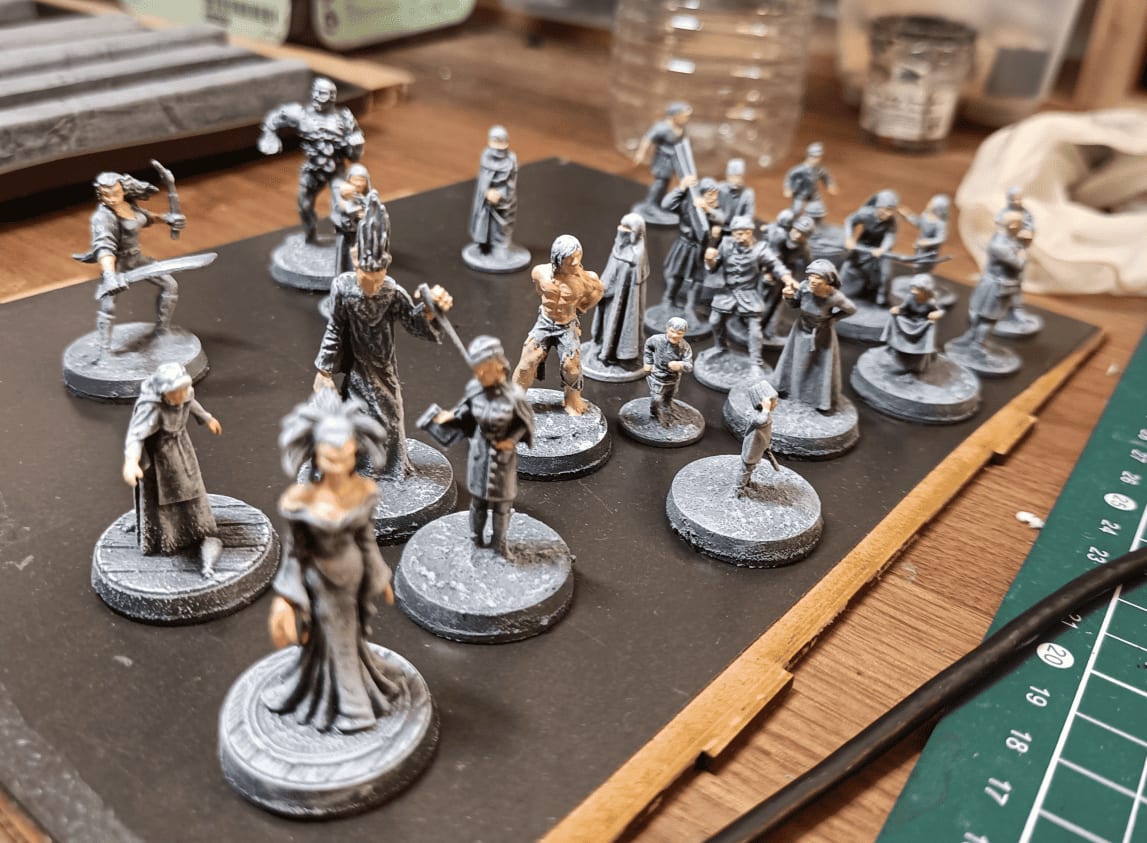
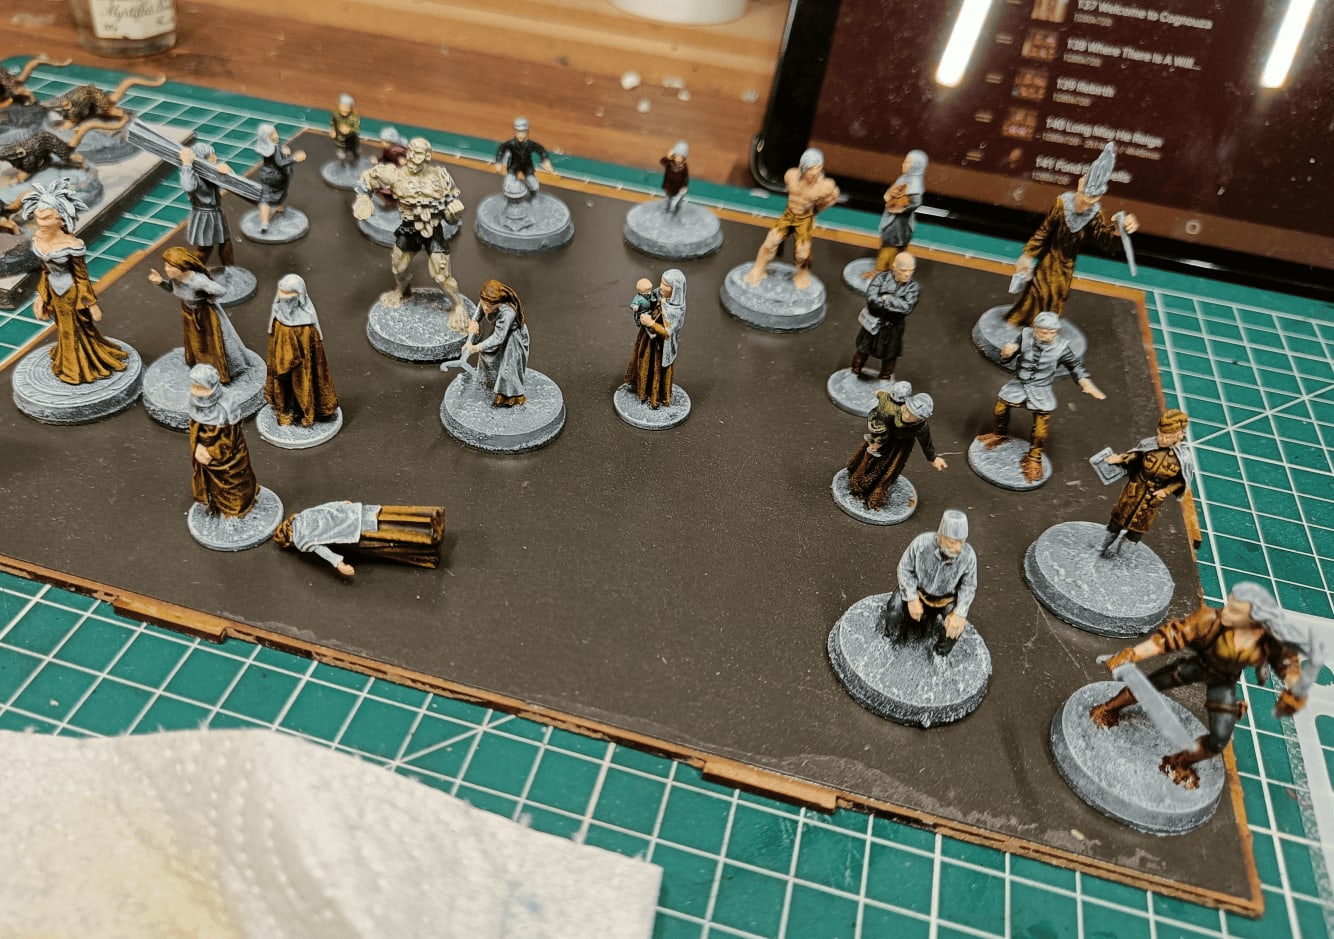
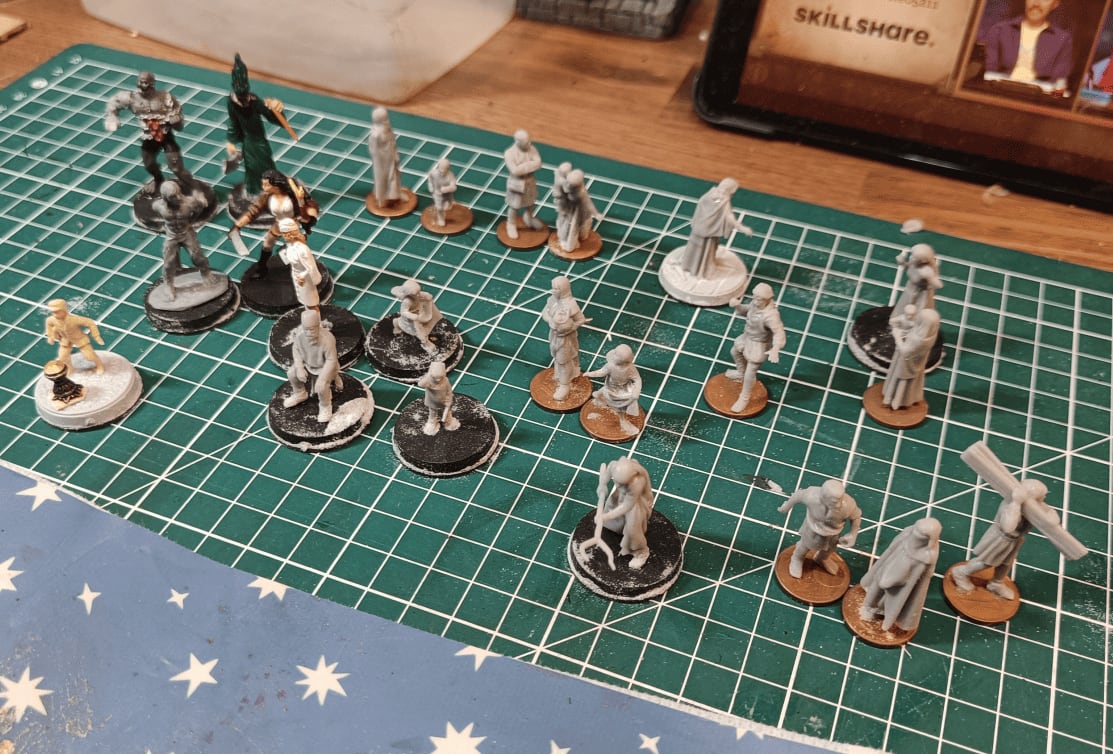
Now some photos of the different painting stages.
I started with an initial layer in black and white, which I find super practical because it lets me see all the details clearly. Then I moved on to doing the skin tones on all the models first.
After that, I grabbed some relatively neutral and dark Speed Paint colors to work on the different outfits. I gradually added touches of color to each mini to finish up all the elements.
The only slightly more involved work I did was on the metallic parts. For those, I laid down a base layer of black first, then added the metallic paint on top. I didn't do any highlighting or additional dry brushing at all, just the Speed Paint.
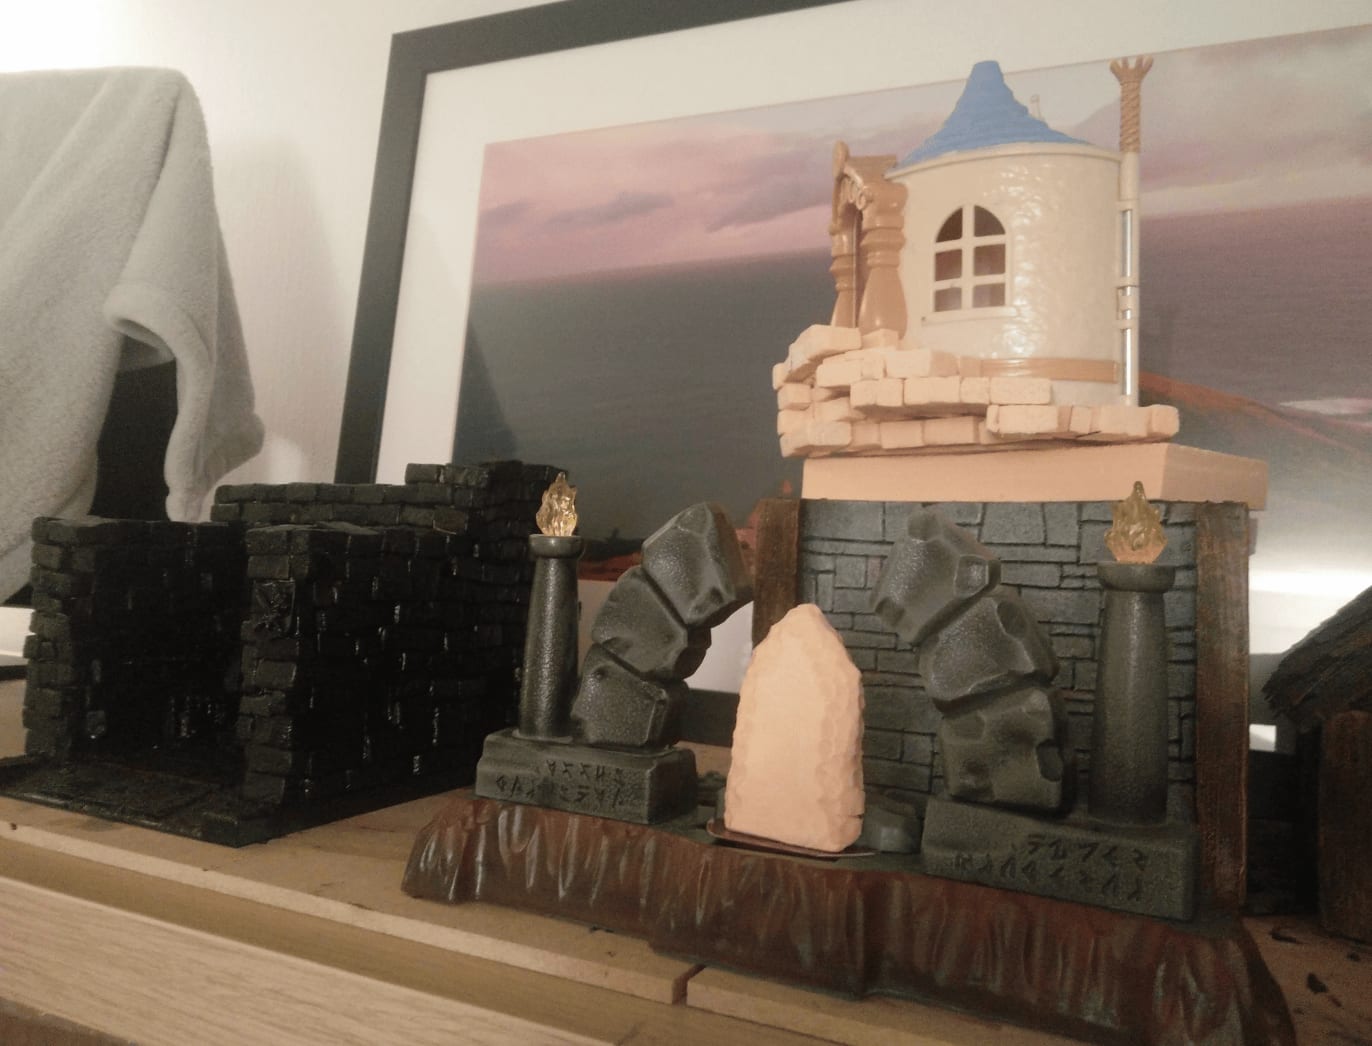
Tarnopol Belltower Beauty Shots

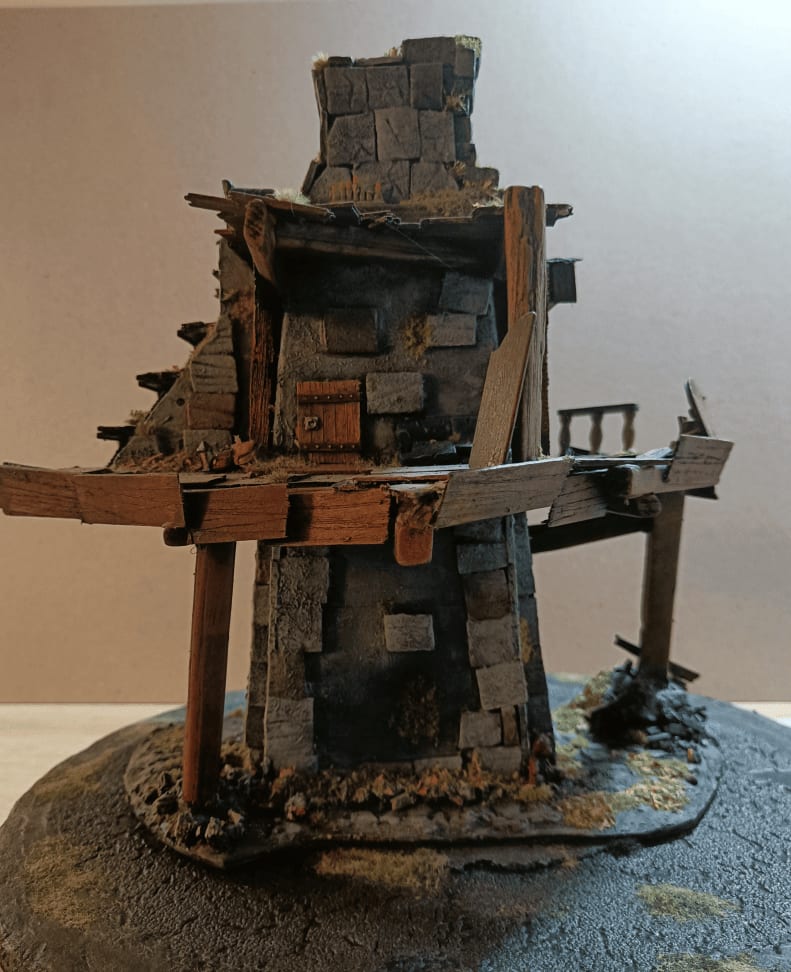
I already documented the entire build process for this bell tower a long time ago. This is really just a small post while I'm going through all the photos I took to make sure I'm properly sharing the beauty shots I made of this piece. It was one of the biggest builds I've done.
This one is quite interesting to me because it represents the bell tower of Tarnopol, a place described in "Mariemburg, Sold Down the River", a guide to Marienburg for Warhammer Fantasy Role Playing Game first edition that I loved. It's this bell tower where orphans live, and it left an impression on me, so I wanted to recreate it.
This build was nice because there were quite a few techniques I was discovering while doing it. Wood, foam bricks, very easy stone painting and very easy wood painting too, with flocking all around which holds really well. It's super solid.
It's a build I appreciate a lot, even though it's simple and I don't really know when I'll need it. I like it a lot because it evokes something for me.


Plastic Dragons

Quick documentation of a batch of dragons I once painted. I figured it would be good to have a dragon miniature of each color in case my players ever encounter one.
To be honest, in over 10 years as a game master, I've never actually had my players face off against a dragon. But I still think it's such an iconic and mythical creature, so I wanted to try painting them according to the different color schemes that exist, and tell myself I have a miniature for each of the dragon types.

Collecting dragon figurines can get pretty expensive. Most of mine are actually secondhand. I usually find broken ones, missing a leg or wing or something, but after buying enough of them over time, I've accumulated spare parts to frankenstein together my own creations. Kind of like Sid from Toy Story.

The red dragon is apparently a pretty common plastic figurine (I've found more than one), but the wings are always broken. So I grabbed wings from another toy I found cheap at a junk store. It was a Lego knockoff where all the pieces come apart, so I salvaged the wings and glued them onto the poor red dragon.

The blue dragon you see in the middle had a similar fate. It was a toy that was missing the legs and I think it was missing an arm, so there too I glued arms and legs from the same fake Lego figurine that I had already used on the red dragon. It gives it a somewhat hyper-muscular look as a dragon. It's not my most successful creation.

This one was originally a Skylander figurine, it was a Spyro the dragon figurine. I cut off Spyro's head because it was way too recognizable and way too cute and instead I glued on again the head of that dragon as a spare part.

Finally, the black dragon is a fairly cheap plastic dragon. It was complete but the wings looked really ugly so I think I cut them off. Instead, I glued on some shriveled wings that I had salvaged from another toy. I really like these because they have a look as if they were really old and damaged.

I also got this black dragon figurine from Monster Hunter in a really dynamic pose with excellent sculpt quality. I picked it up on AliExpress for pretty cheap, thinking I could easily mod it into something even better. Since the pose is so dynamic, I mounted it on a special plastic base I had that already has a mountain sculpted on it.

Here is a small family photo once the bases were made. There are a few others in the pile you can see in the background. There's a zombie dragon that comes from the Zombicide board game that I've had for a long time, and I thought it would be a good opportunity to paint it too.
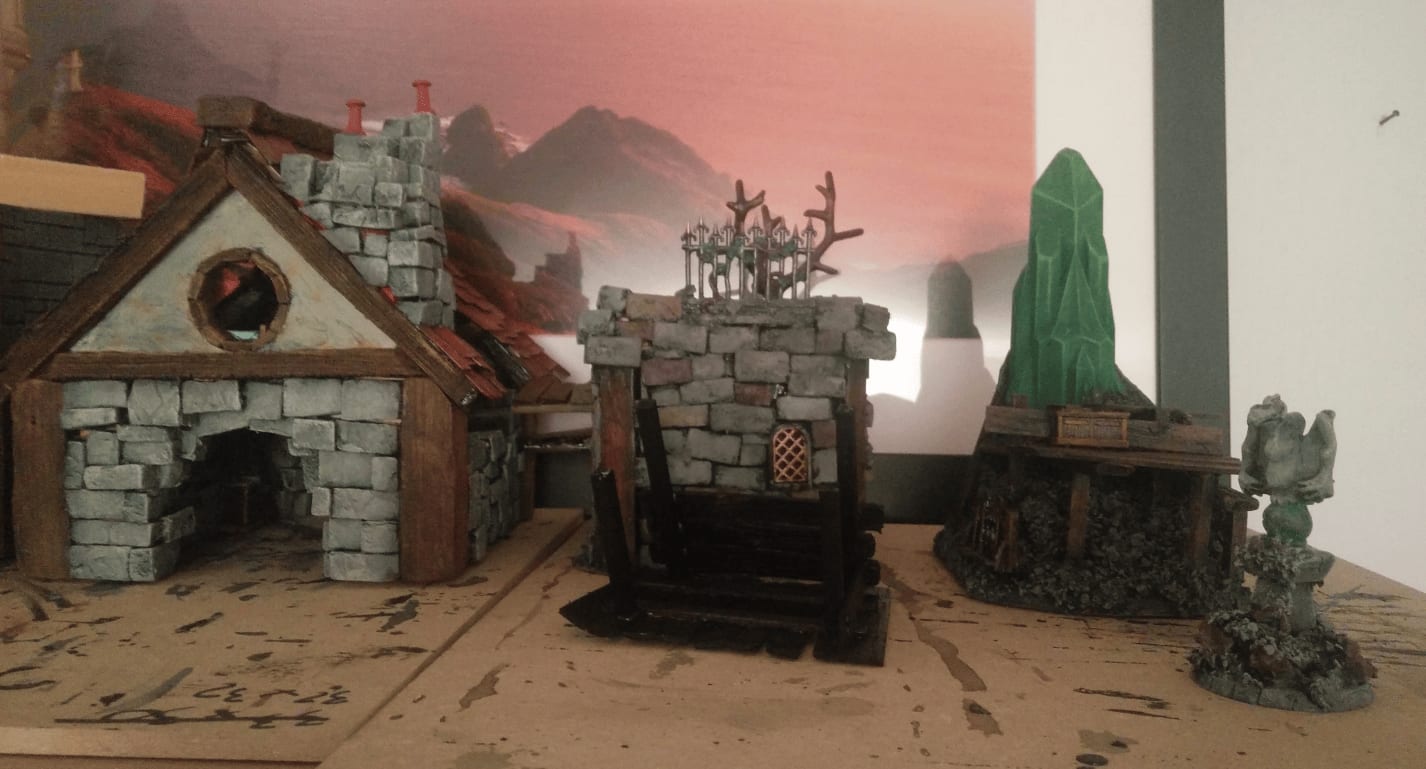
The green dragon on the side is actually an emerald dragon. The sculpture is really cool because there are actually pieces of emerald pretty much everywhere. I mounted it on a base where I wanted to make it look like it was walking on a partially destroyed city.

A few others. The Green Dragon is a recovered toy. I didn't make too many modifications on it. I just glued the arms in a fixed position because otherwise they could move.
The mini tarrasque in the back, I don't remember where it comes from, but same, it's a cheap little plastic toy. The red dragon in the back comes from the Dungeons and Dragons board game, and the one in front is a Monster Hunter figurine.

As you can see, I totally went off the original colors! The blue one was my black dragon from Monster Hunter, but I really love the blue and yellow contrast, it looks amazing.
The black dragon in the back was originally red. It's the one that was missing wings and where I glued new ones on. With the slightly greenish base, it looks like it comes from a swamp, which I really like. Very thematic for a Black Dragon.
The red dragon from the Dungeon & Dragons board game, I stuck with the traditional red color and it works really well.
And then there's the little plastic toy that I turned into a green dragon.
Everything was painted with speedpaints. They're incredible for transforming cheap plastic toys into something that looks impressive on the table or building a nice collection of dragon miniatures.