Speedpaint Test
I recently bought the new Army Painter Speed Paint small set, and it has been a revelation to me. Painting miniatures became fun again, I was having a lot of fun doing it. With barely some skills, I was able to quickly pull full groups of creatures with a painting level as good as what I wanted to achieve when I was young. It's really liquid talent, it's like a 3D child coloring book. One coat, and it's looking fine.
I started with some Zombicide heroes, testing the new colors and the results were fantastic.
One coat of brown and the whole dog was done.

The yellow bottle allowed me to finally paint yellow in one coat with it looking good enough!

Even the more green and purple colors looked great.

I continued with more miniatures I had, with no real goal, but just to test the paints. This kept getting better.
I continued with some Hell Dorado miniatures gifted by a former co-worker; the sculpts are incredible, full of details, and a joy to paint. I would gladly paint more of them, but they are quite expensive.
Painting large monsters was so easy. Especially the black part of the Cloaker that would have been a pain to do otherwise.

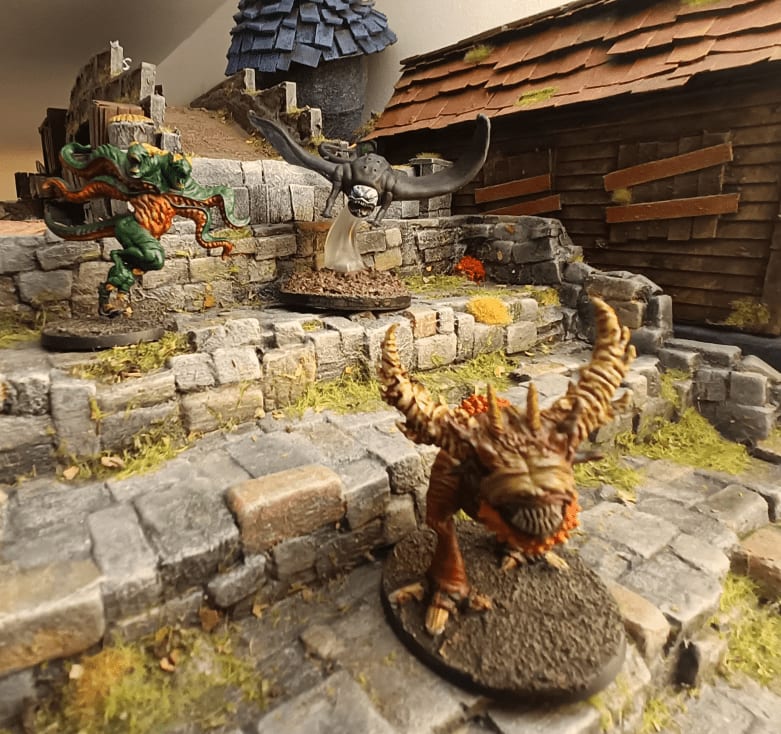
I went ahead and painted the giants of Zombicide as well.

I continued with the Abominations. Some colors were hit and miss, especially the green on the right (I think it's Orc Skin, but it's way too bright).
I had been basecoating them in full white initially, but then switch to black basecoat followed by a white drybrush to make the edges more visible.

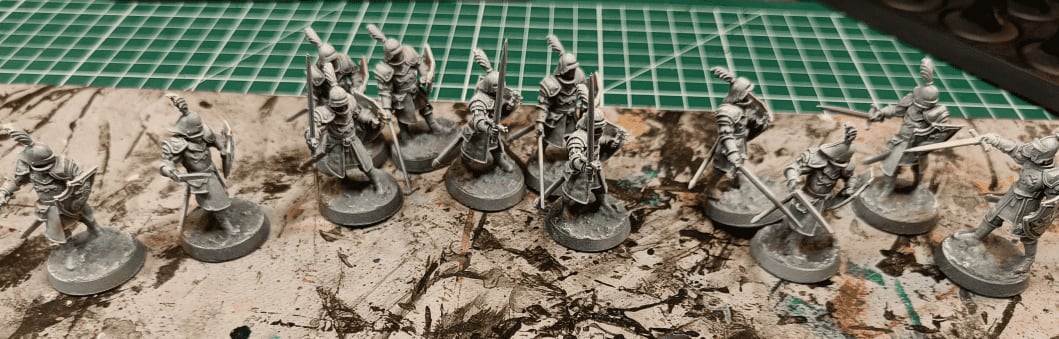
I started with the flesh and the main blue. I didn't bother avoiding the details (like the belt, etc) because I was planning to overwrite them in brown at a later stage.
And here they are, waiting for the final stages of basing. On the side also a troup of dwarven ranger.
I still have a lot more to paint in my drawer, but with this new paint it's going to go pretty quickly.

Oh, and this is what I use for basing. Sand, small rocks, glue and paint.
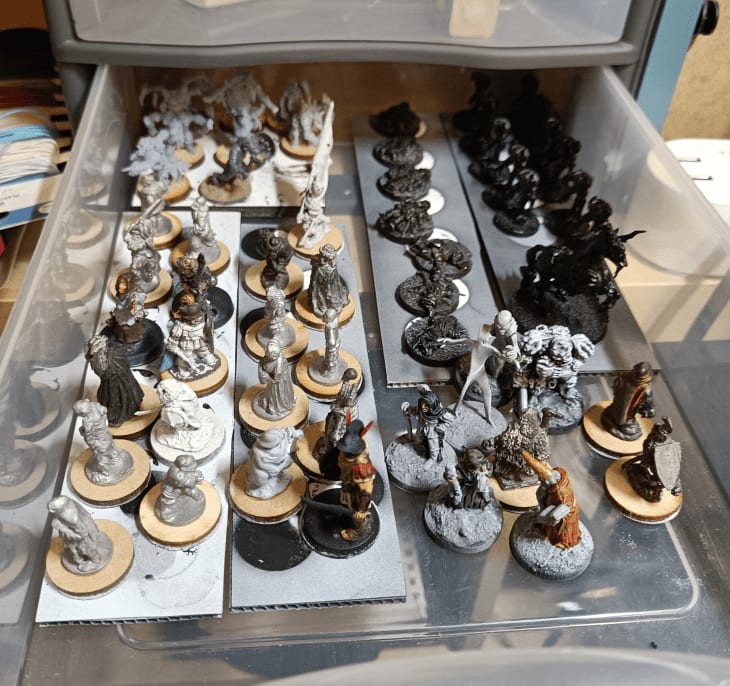
I used test miniatures to test the various paints and see what it would look like.
A few more tests. The more I see the results, the more I like it.

And I finally bought the Speed Paint Mega Set with the whole range of colors!

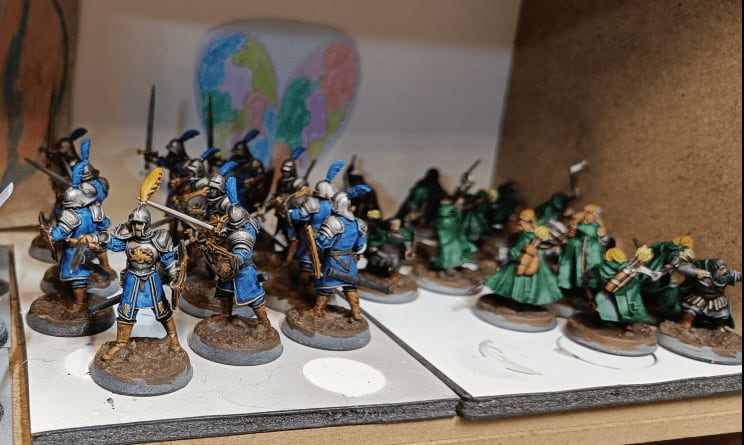
So I updated my army of little colored mens!

And what better than an undead unicorn to test those new colors?
Ramshackle hut

This might be a goblin hut, or the a forest gnome laboratory, or even the visible part of an underground complex.


But, more specifically, it's mostly old coloring pens, a coaster and a plastic glass glued together.

The glass is some kind of fancy plastic cup with a weird shape. I thought that glued upside down, it gave a nice slanted shape I could use.
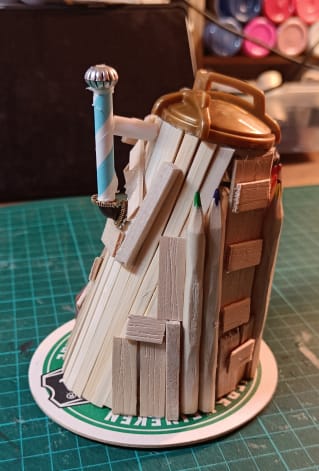

I went to town and glued bits and stuff I had lying around. Coffee stirrer, bits of plastic toys, coloring pens, straws and beads.

I added some sand on the base, and added the usually black modpodge mix.


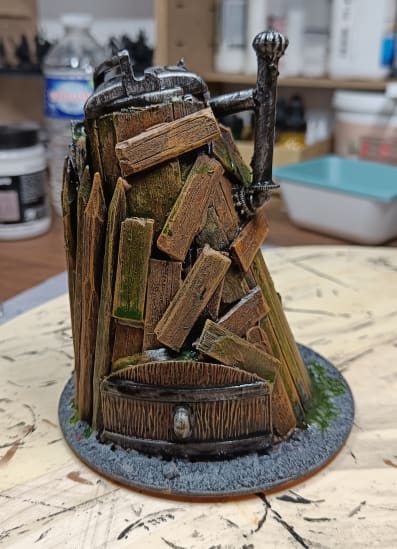

Dark brown overbrush, and light brown drybrush. Followed by some green ink, and black wash once dried.

It didn't look like much, so I added some heavy flocking and fake flowers to it, and now it kind look like something usable (even if I still don't really know what this is).
Dwarven Vault Door
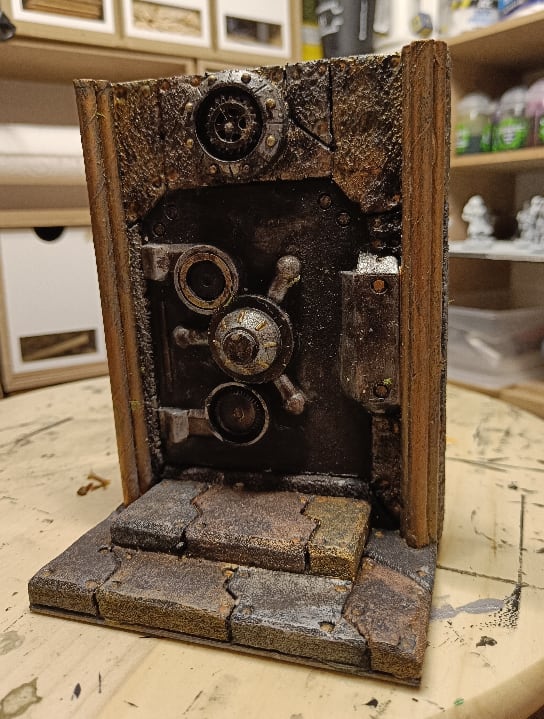
Deep under the city, there is the legendary Vault of the Strongfist, where this whole Dwarven family stored their riches. What traps are hidden on the way, and how is your rogue going to unlock this huge door?
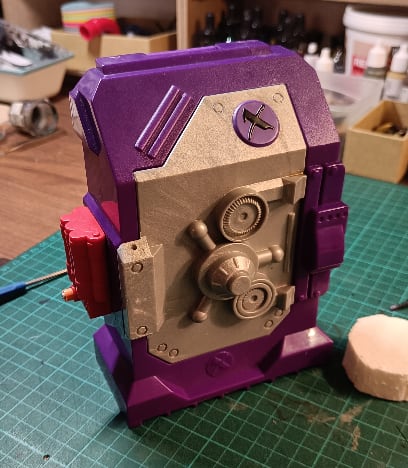
This whole crafted started from an Action Man toy accessory. I think this is supposed to be an explosive contraption.
I was only interested in the main door. I put it upside down so the cut corners would be up. I also cut some parts to keep it flat. I then carved its shape in a foam board and glued it inside. I added straw trios to simulate columns on each side, and carved some more steps in another type of foam. I carved irregular shapes on them, to attempt a dwarven look.
I had also added a lot of rounded shapes to simulate rivets, but it was a bad idea and I didn't like it, so I removed them.

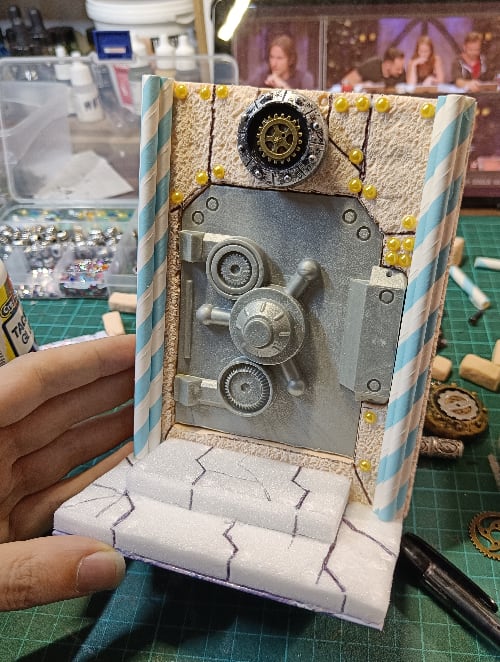
Covered in black for robustness, then a layer of silver.
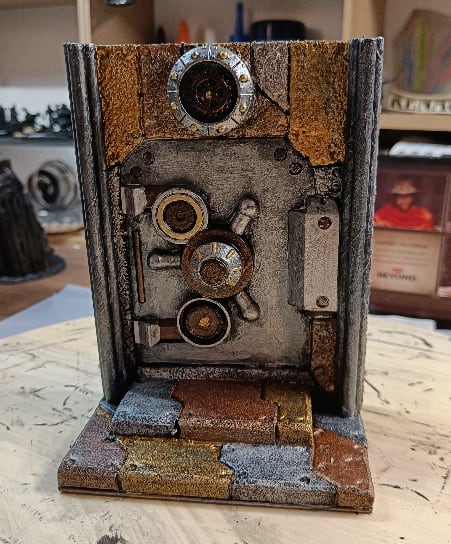
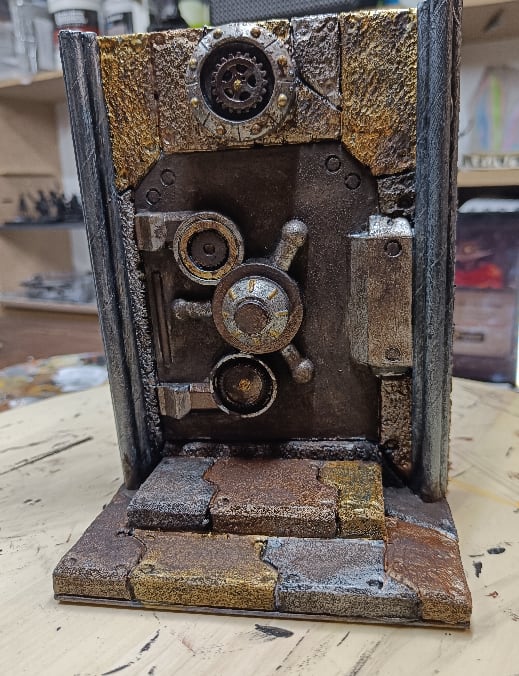
I added more colors to each individual stone, but stayed in the realm of metallic colors. I then added some grime using Typhus Corrosion.
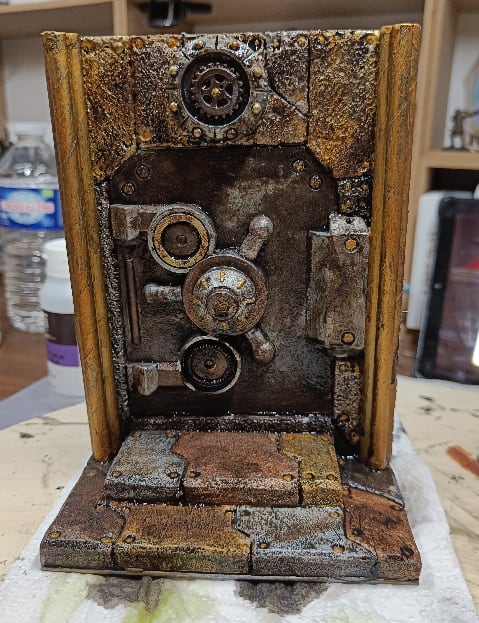
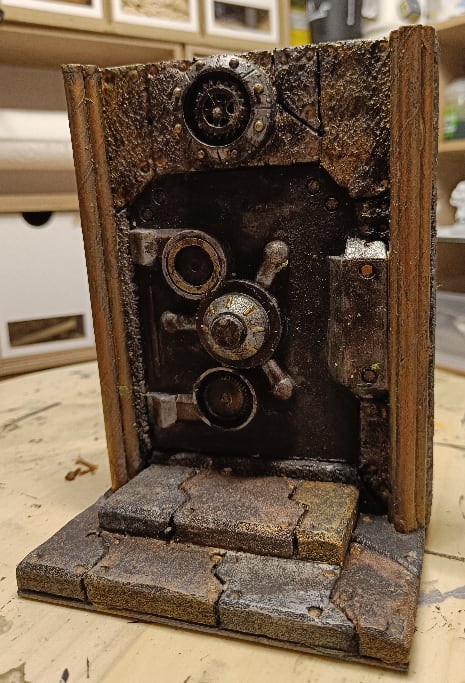
I then applied a dark wash on top, and was very careful not to brush too strongly against the stones. My cheap metallic paints have a tendency to reactivate when mixed with water. Once dry, the effect was... good enough I guess.
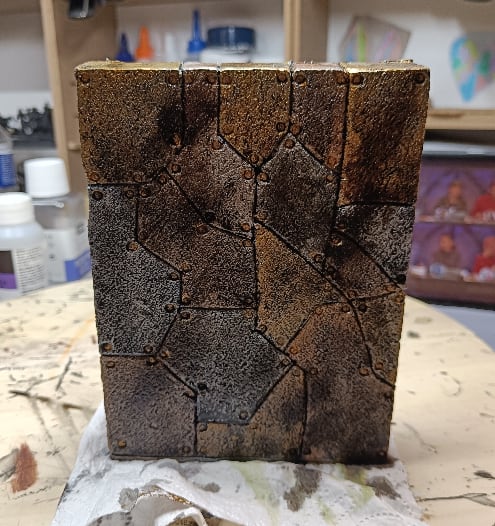
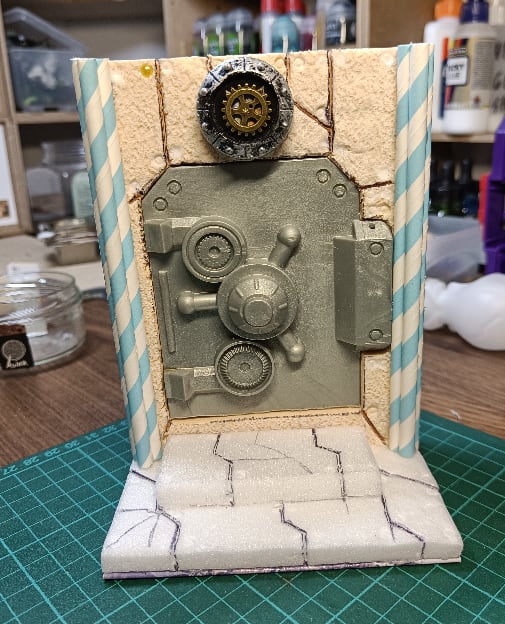
Oh, and let's not forget the backside.
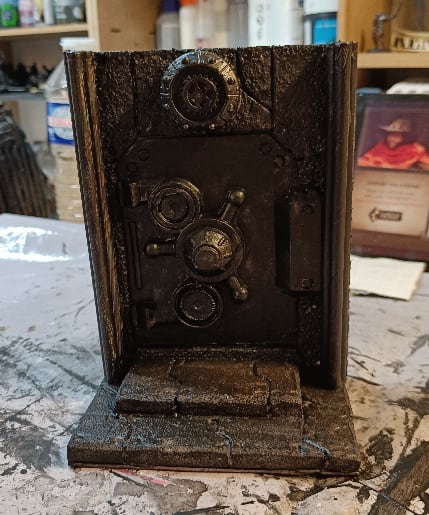
Overall, I'm not very satisfied with this build. It's too chunky and doesn't have much depth.
City Pictures
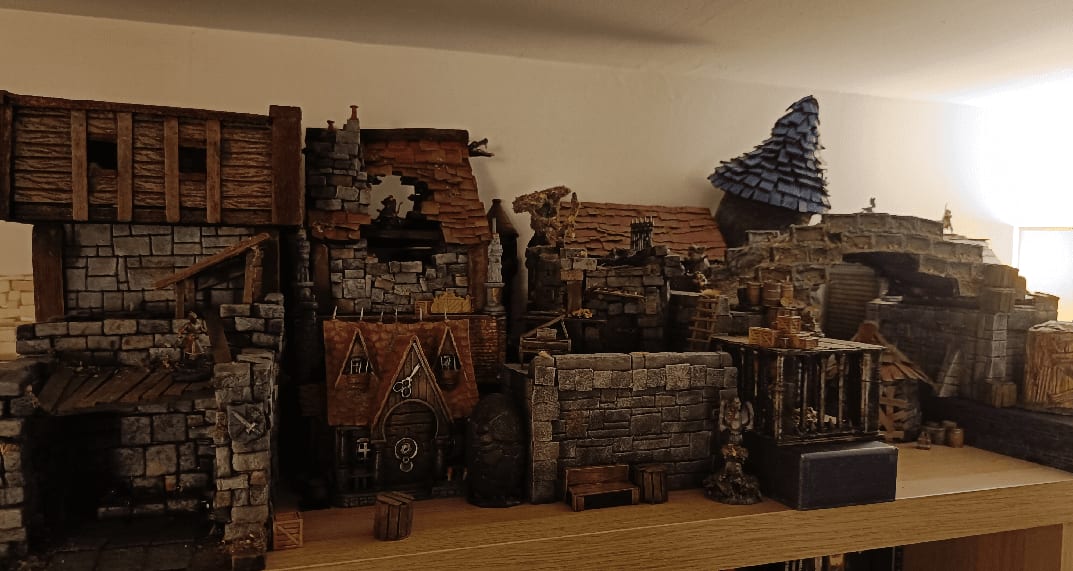
I put many of my terrain pieces on the shelves at the back of my crafting room/office. There will be no step-by-step pictures of me building anything in that post, just pictures of the pieces together, to feast your eyes.
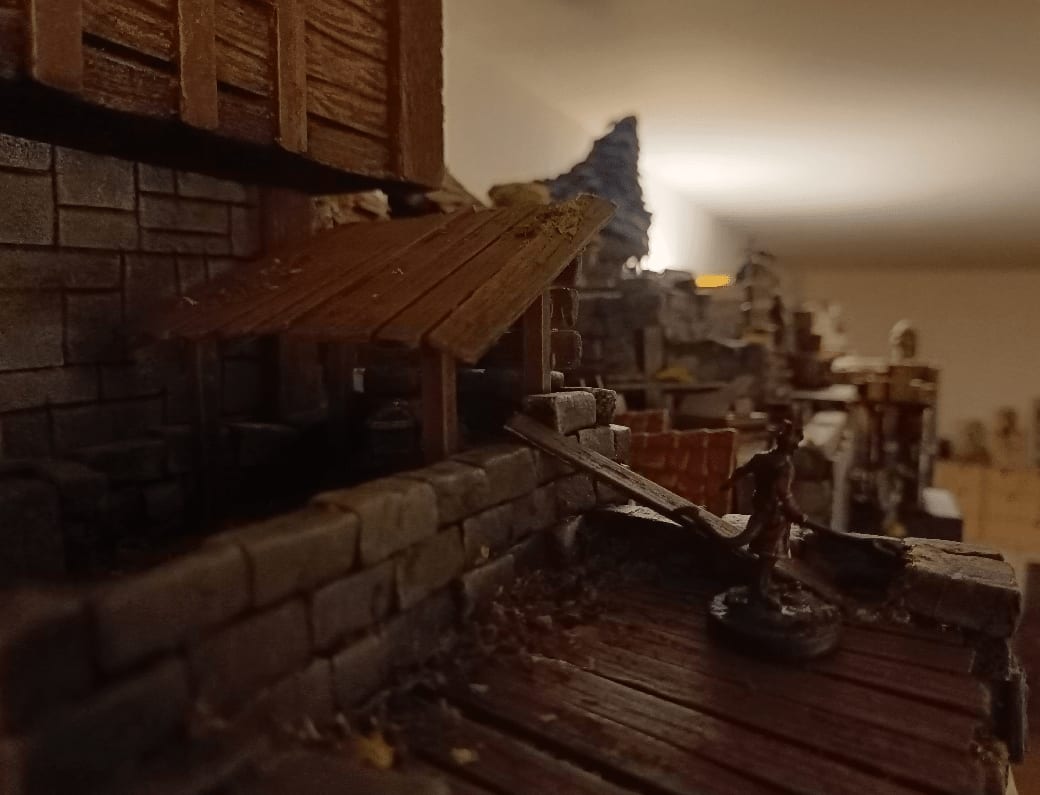
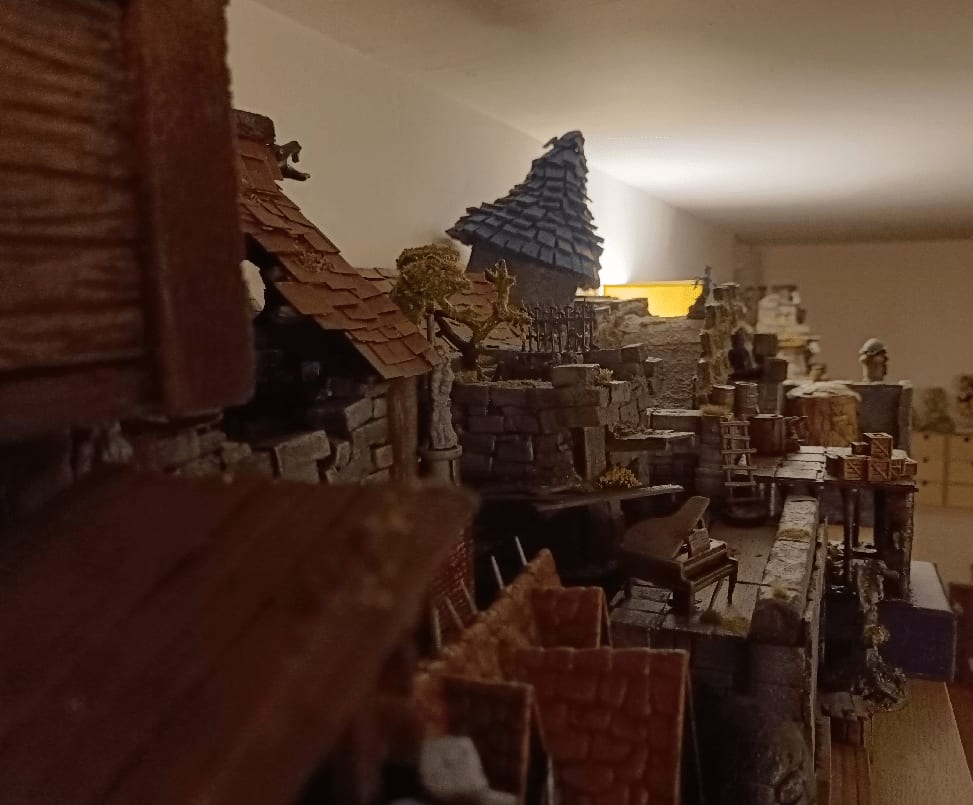
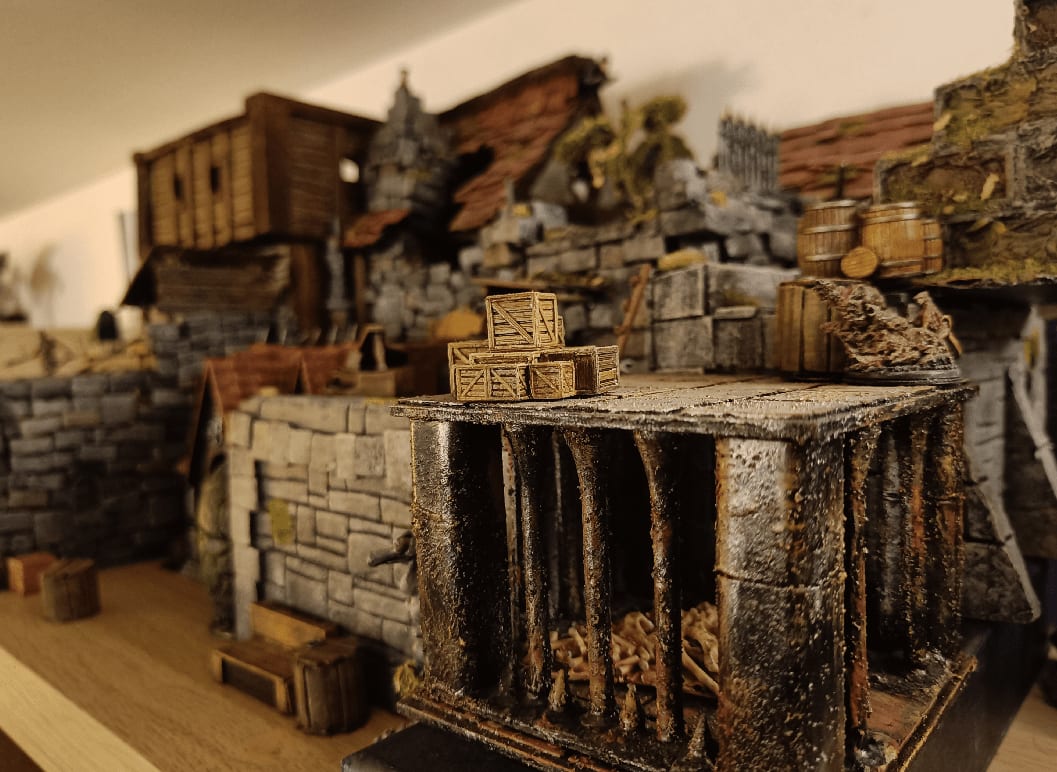
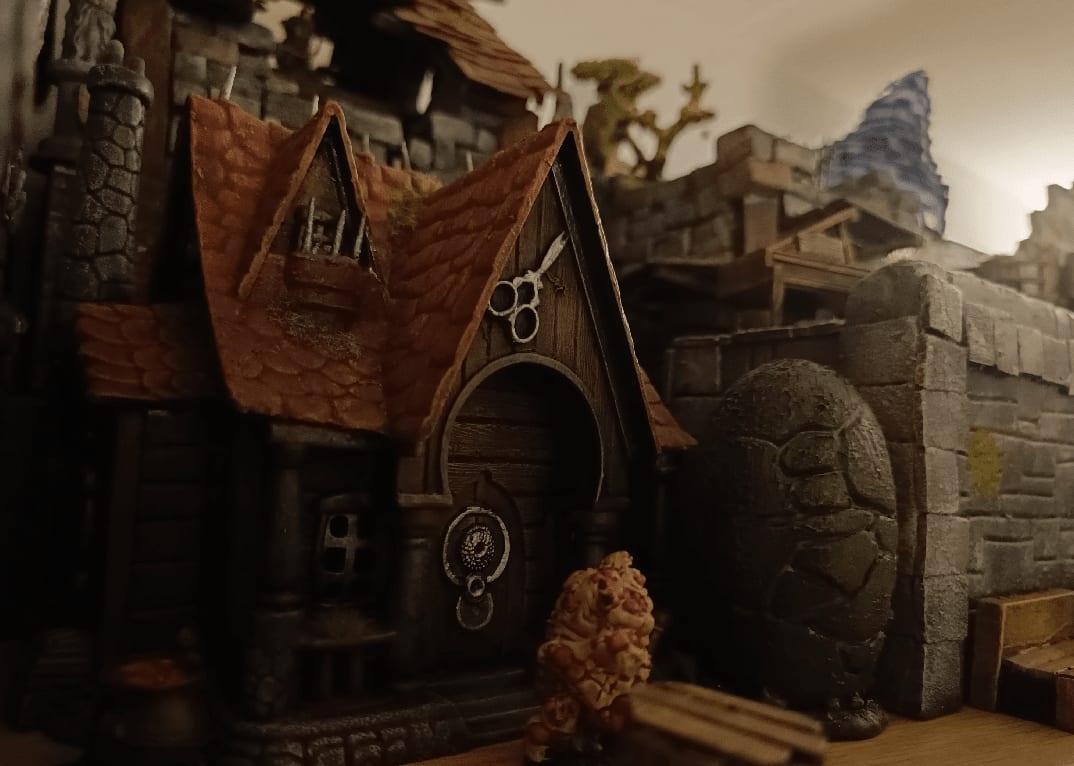
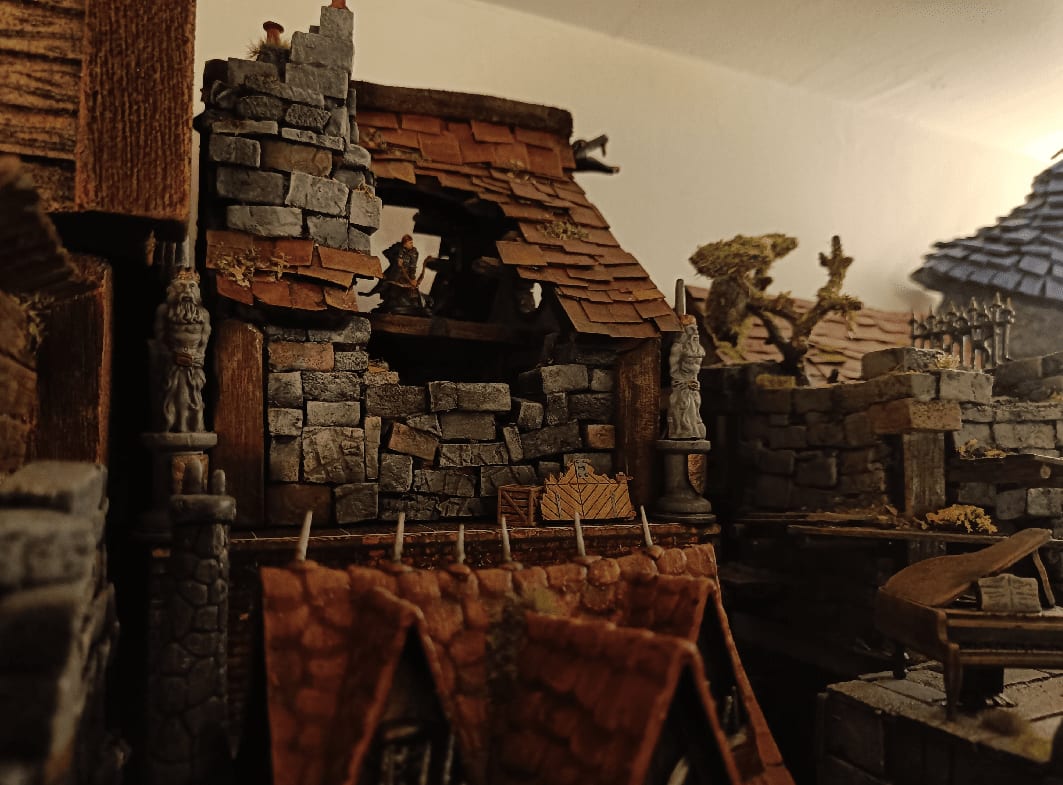
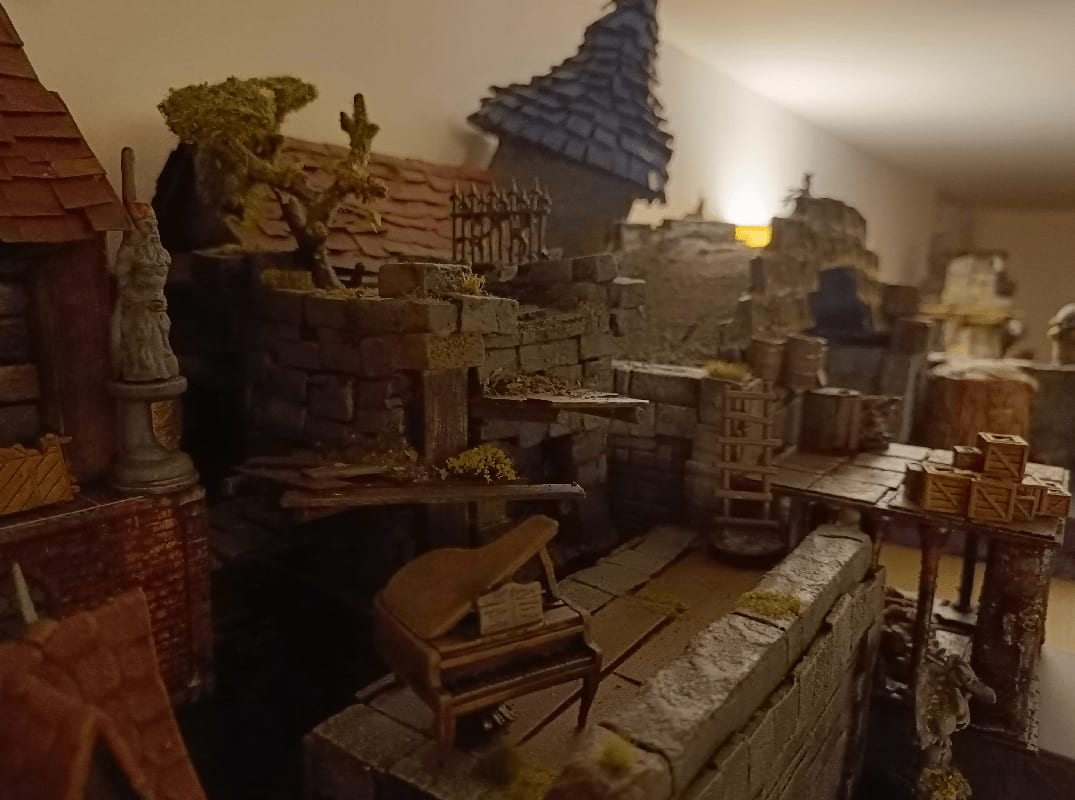
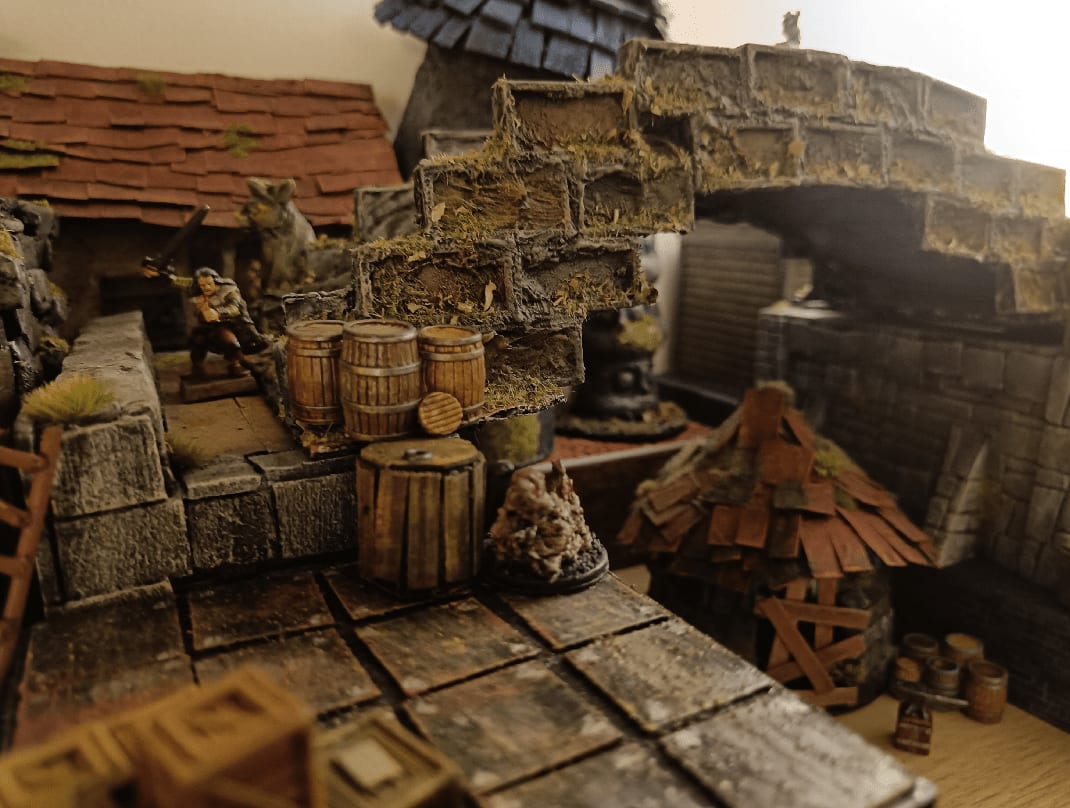
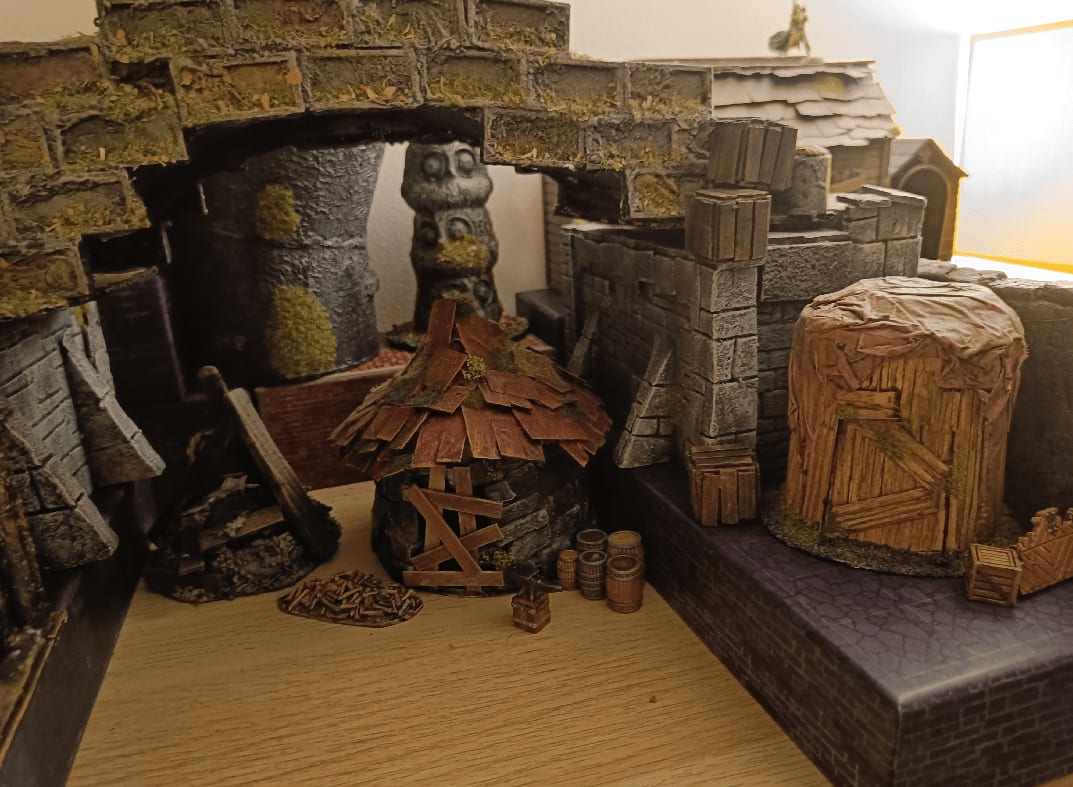

I built so much stuff, and never yet got the chance to play with it. So much terrain would be great for a Mordheim (or Mordheim-like) game.
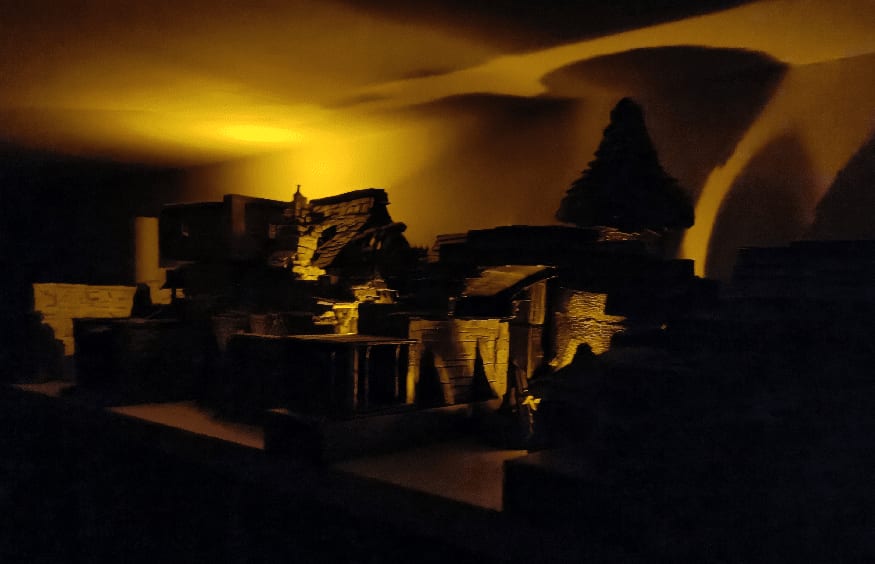
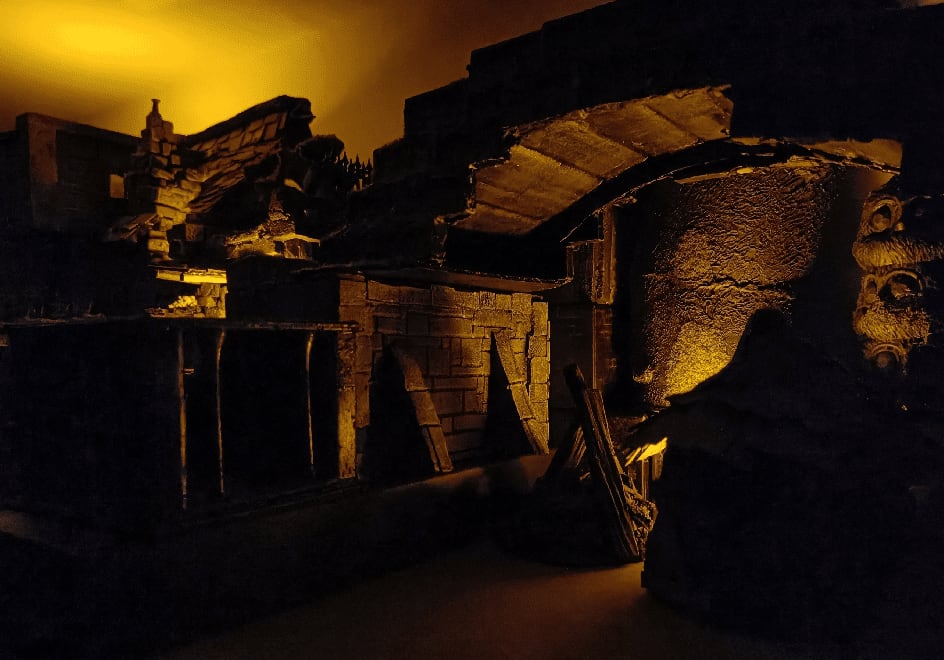
And some more during the night
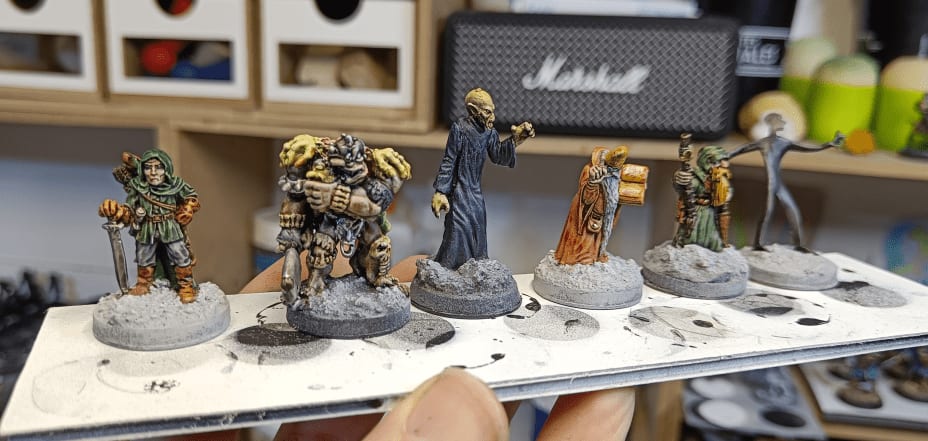
Thugs

There is one trope that is present in every of my D&D game: thugs attacking the PCs.
Inevitably, at some point, a bunch of never-do-well will attack them. Maybe as a warning to stay away from what they are investigating, maybe because they are infiltrating the Thieve's Guild, or simply as hired muscle from any BBEG in their way.
I already had miniature to represent some of them, but in every adventure my PCs where fighting the same 6 or so miniatures. I wanted to extend my collection of thugs, to represent more variation.
So I scouted the ASOIAF miniature line and bought a few boxes, to make me a group of ruffians with no two miniatures alike.
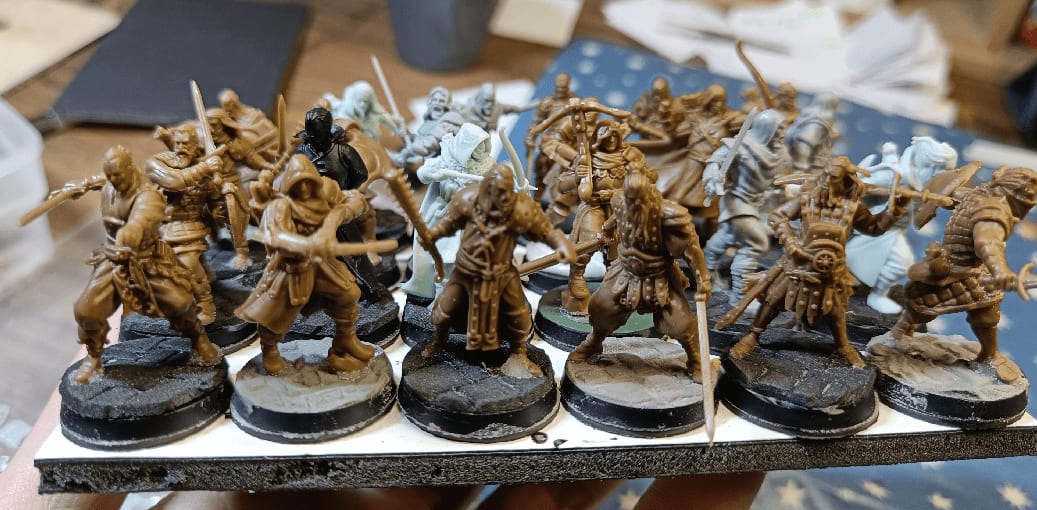
I went for all those that didn't wear any kind of recognizable iconography, nor very obvious military outfit. The various units of scouts and hirelings the best.

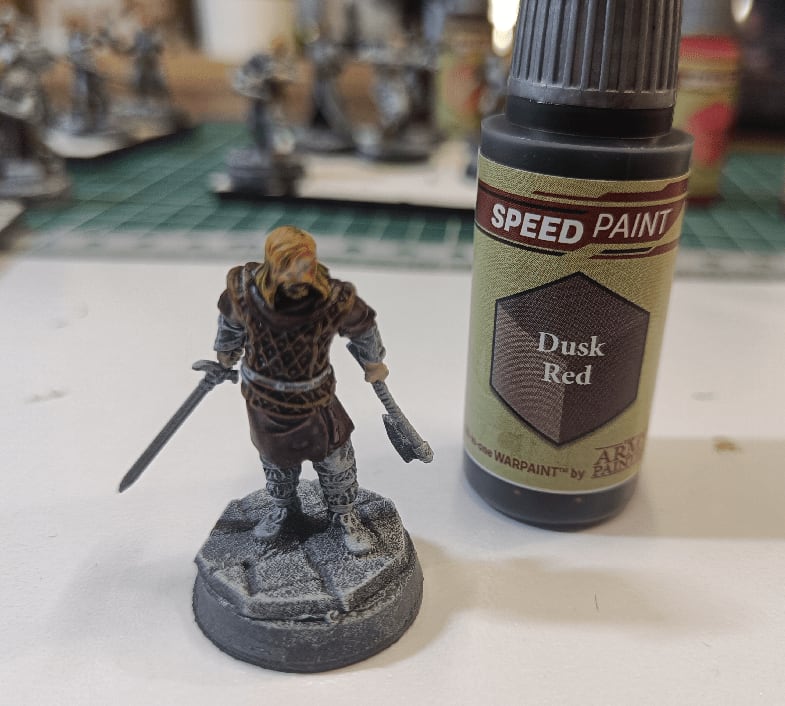
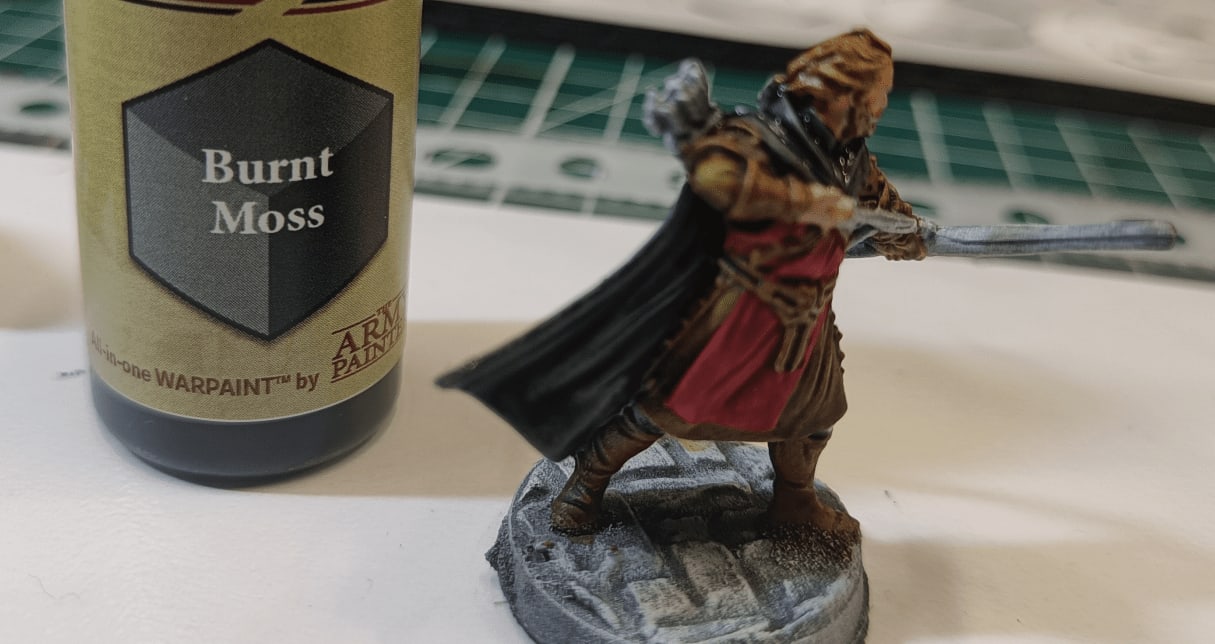
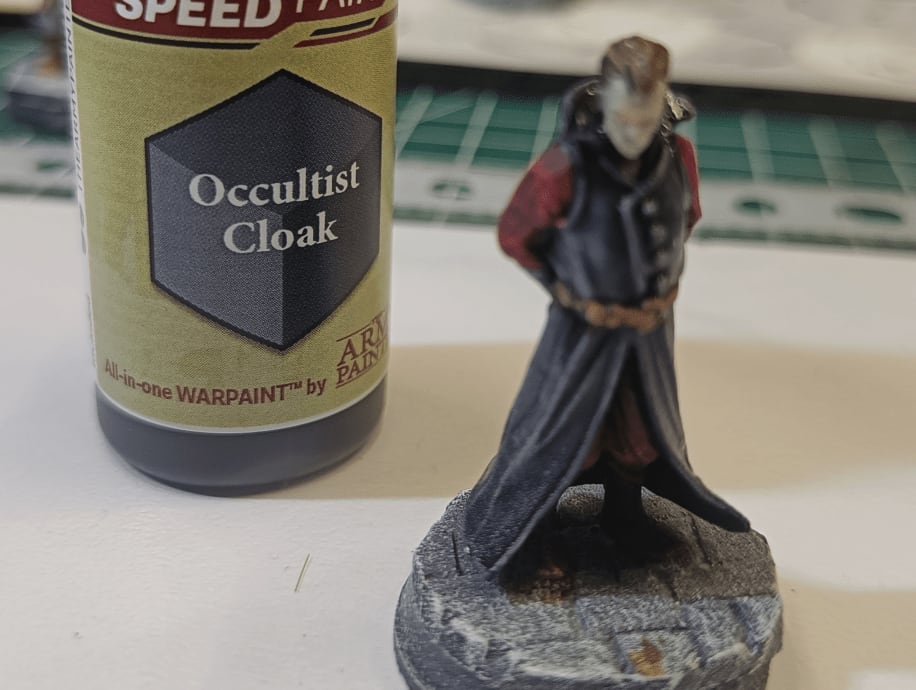
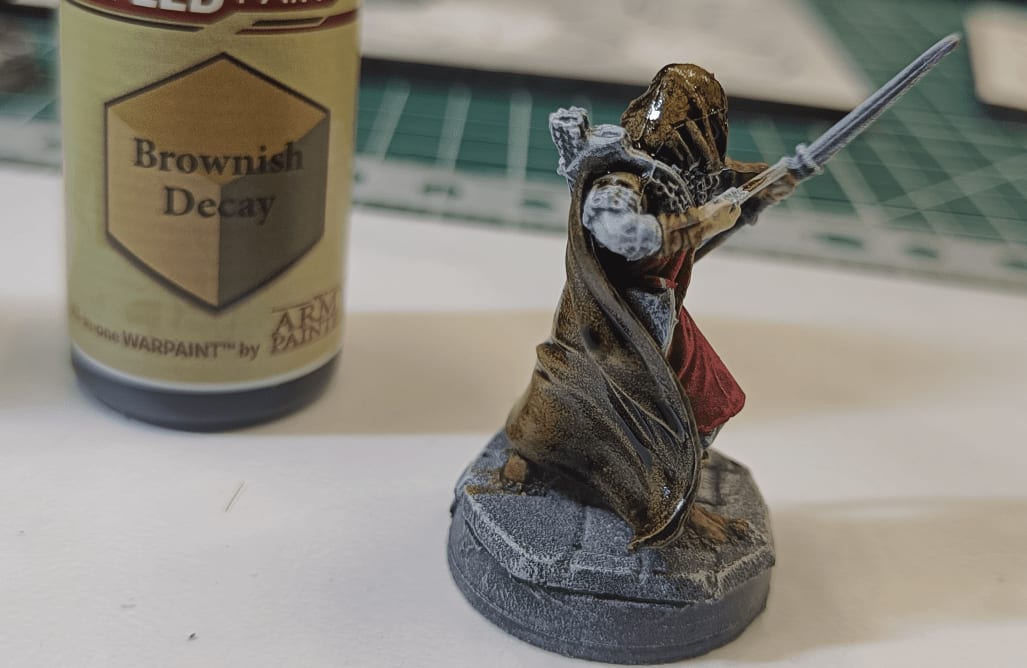
I primed them gray, with a light zenithal priming of white, and then drybrushed them white again. I then went on trying my Speed Paints on them, taking pictures next to the bottle I used, to better compare how each color actually look like once on a miniature.
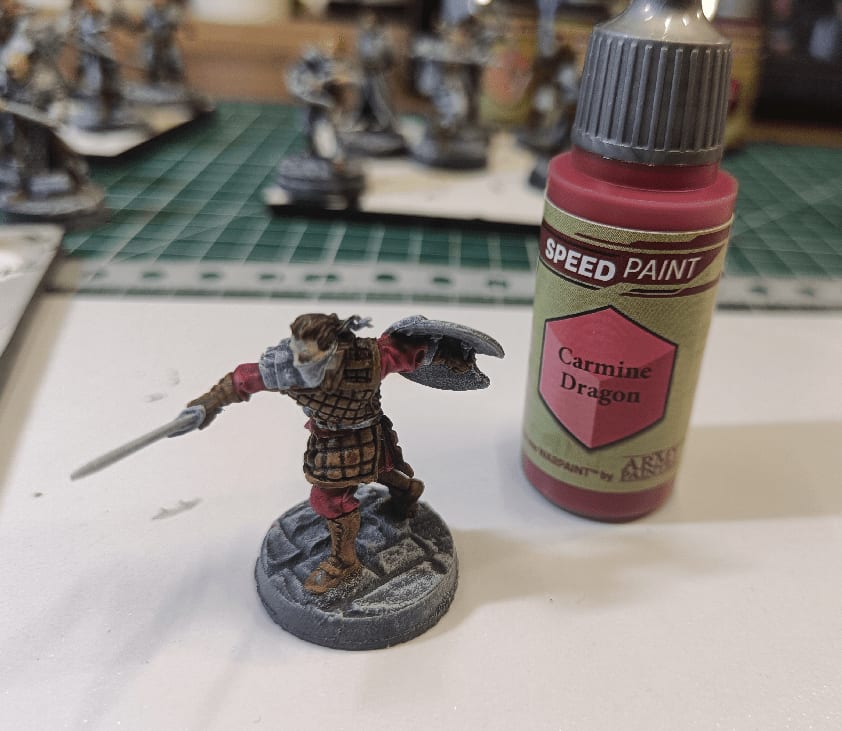

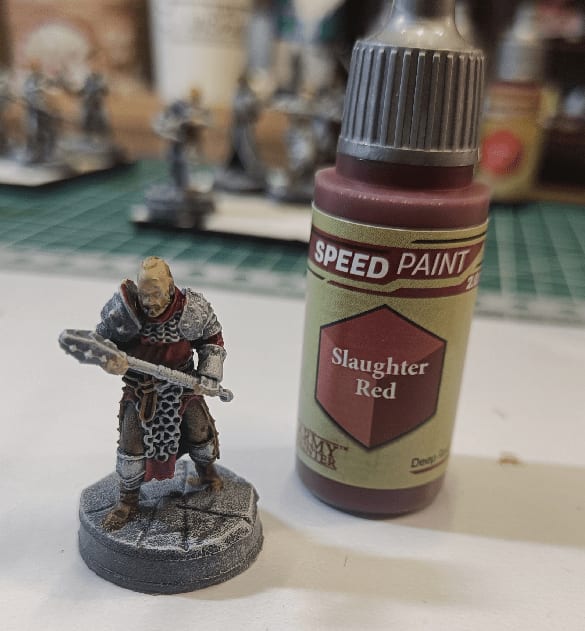
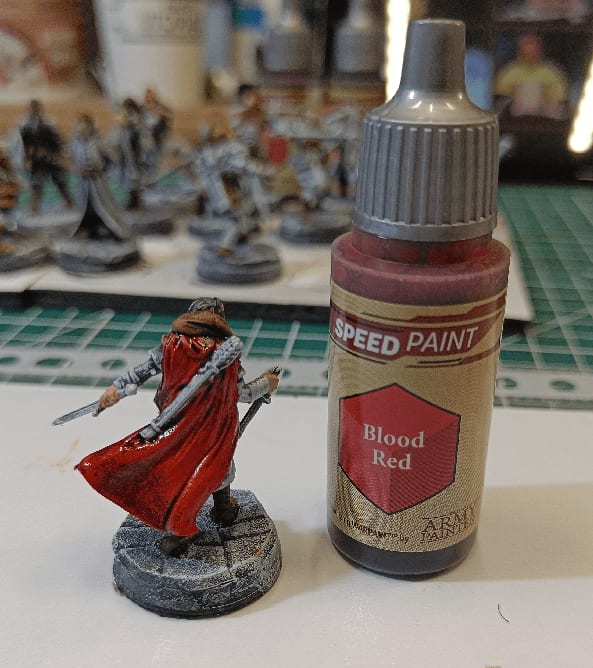


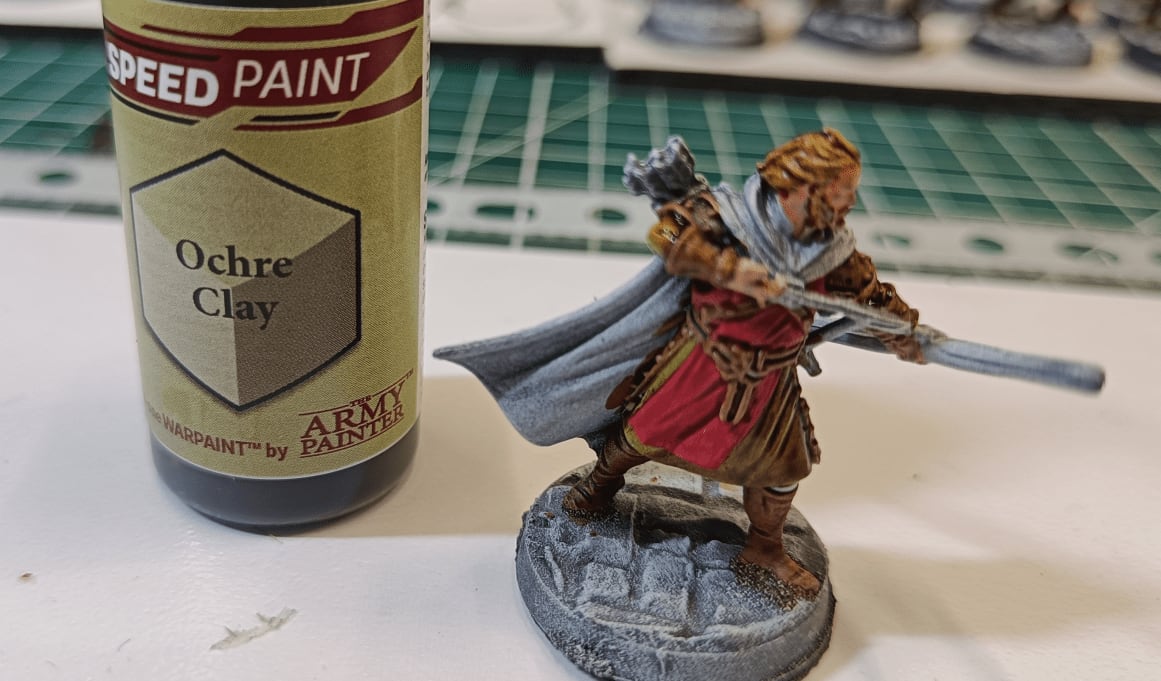
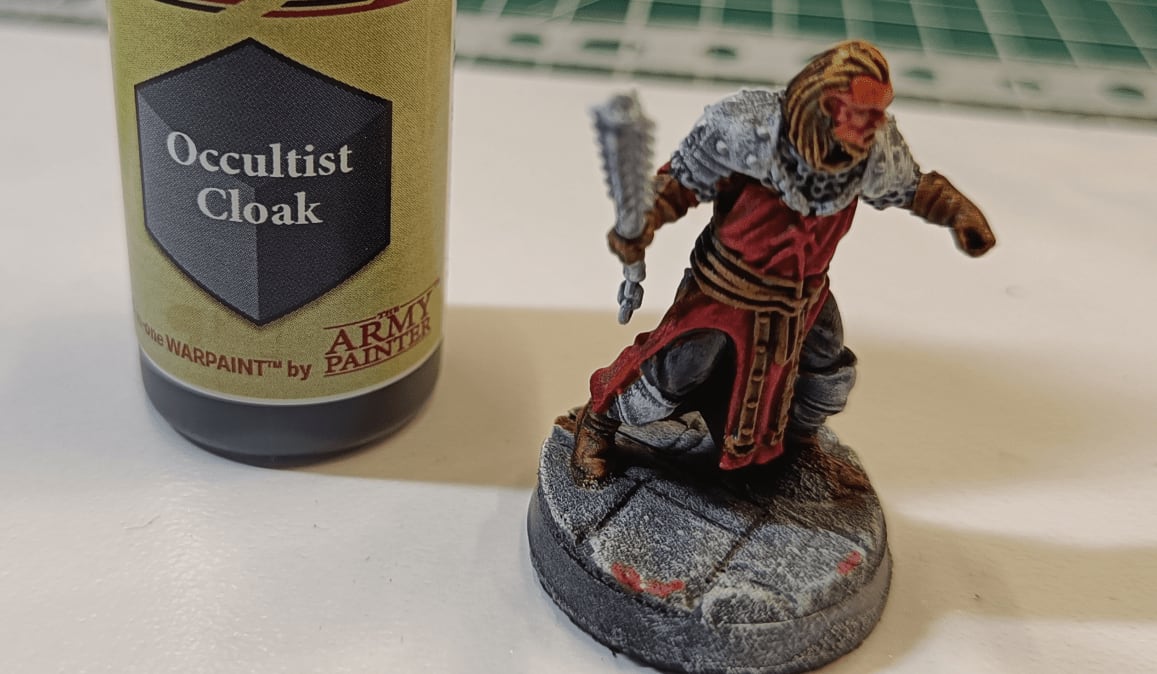
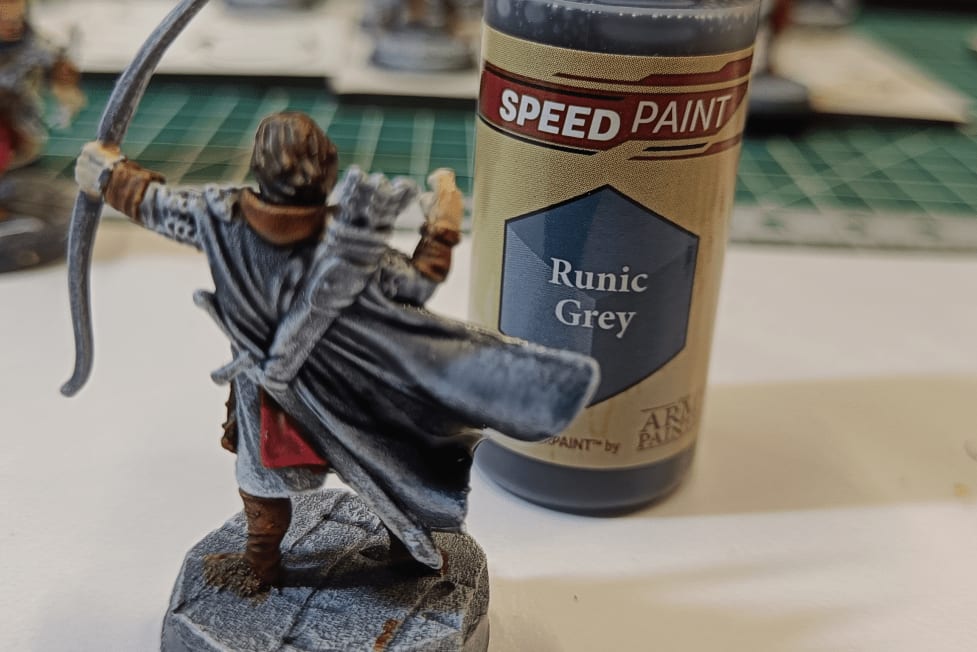

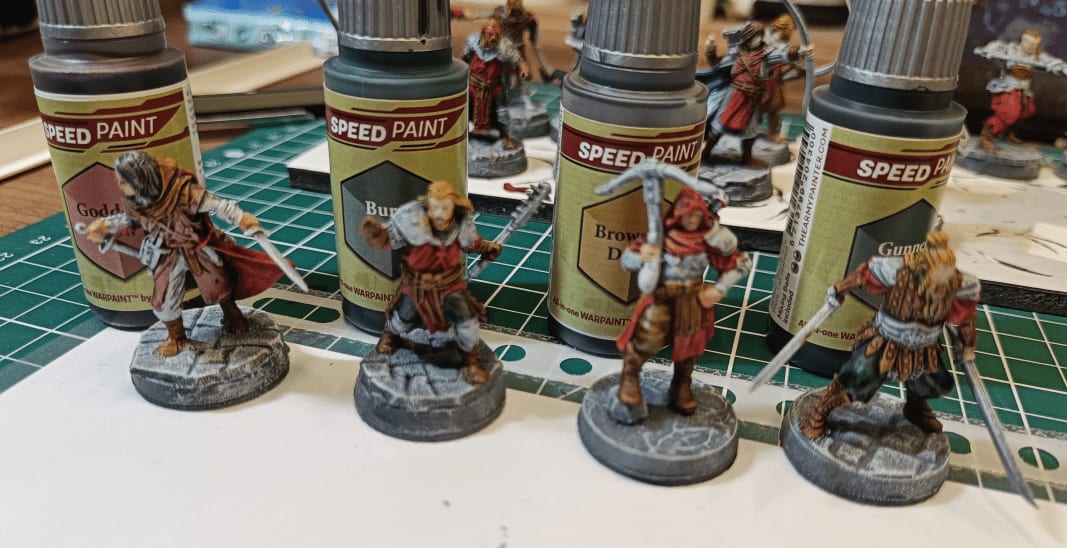


I went with Red as the main color for the thugs. I want my players to quickly identify that a bunch of red armed men means hired muscle thugs. I plan on painting various groups of miniatures following a similar paint scheme, with one main color.
Even if I used all available Red, and if close-up pictures show the difference between all Reds, the overall effect make it look like a cohesive group.

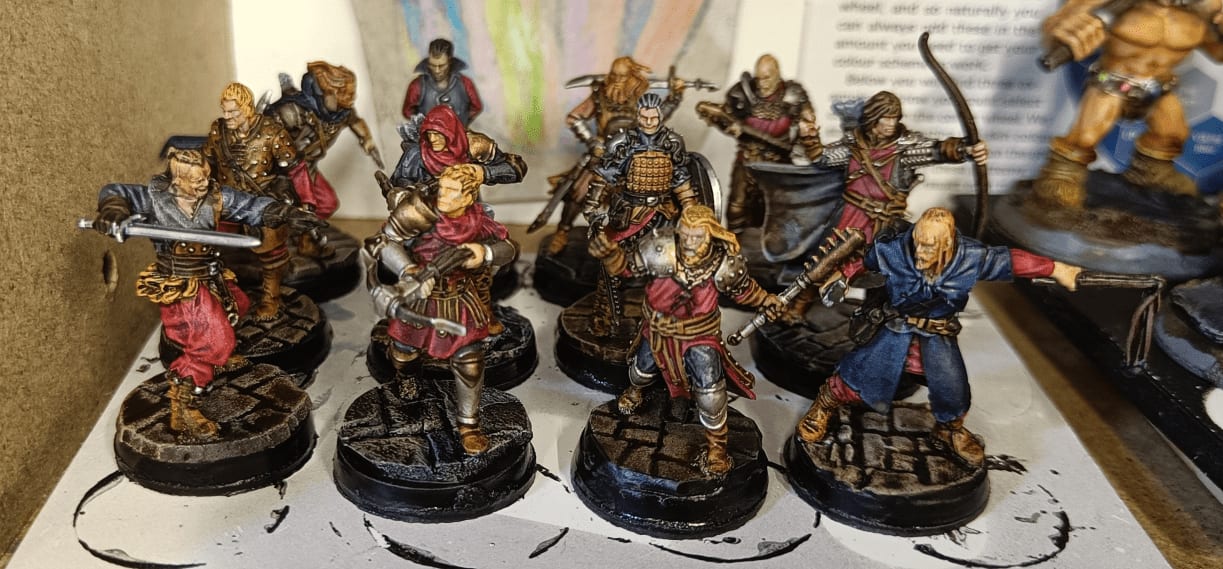


Those miniatures were a joy to paint, and a great way to test the various shades of Speed paints.
Metallic Speed Paint overlays

When I painted my Skaven group, I wanted to test the Speed Paint Metallic paints. I wasn't impressed (at all) by the official Metallic paints, but I found that adding regular Speed Paints over a layer of metallic Silver paint could generate interesting effects.

Here for example, I used the Smokey Ink from the Game Color range as an example. It was the first ink I ever used over metallic paint that gave an interesting effect of old rusted iron.
A layer of Noble Skin, work similarly to Nuln Oil. Sand Golem makes it an interesting shade of old gold, while the third one (Tyrian Navy) could make some very thematic cold blue iron weapons.

Bony Matter, Pallid Bone and Fire Drake are very subtle effects that can act as nice alternatives to Nuln Oil.

Dusk Red is very weird, I wouldn't use it. But Ruddy Fur gives a nice rusted effect.
14x14 Floor Board

Sometimes, for big battles, I find it easier to use a large board instead of placing the individual floor tiles, so I made large 14x14 board.

I wanted it to fit on my lazy Susan, so I used it to make sure it would not go over the edges too much. It's only foam after all, so too much weight it it will break.
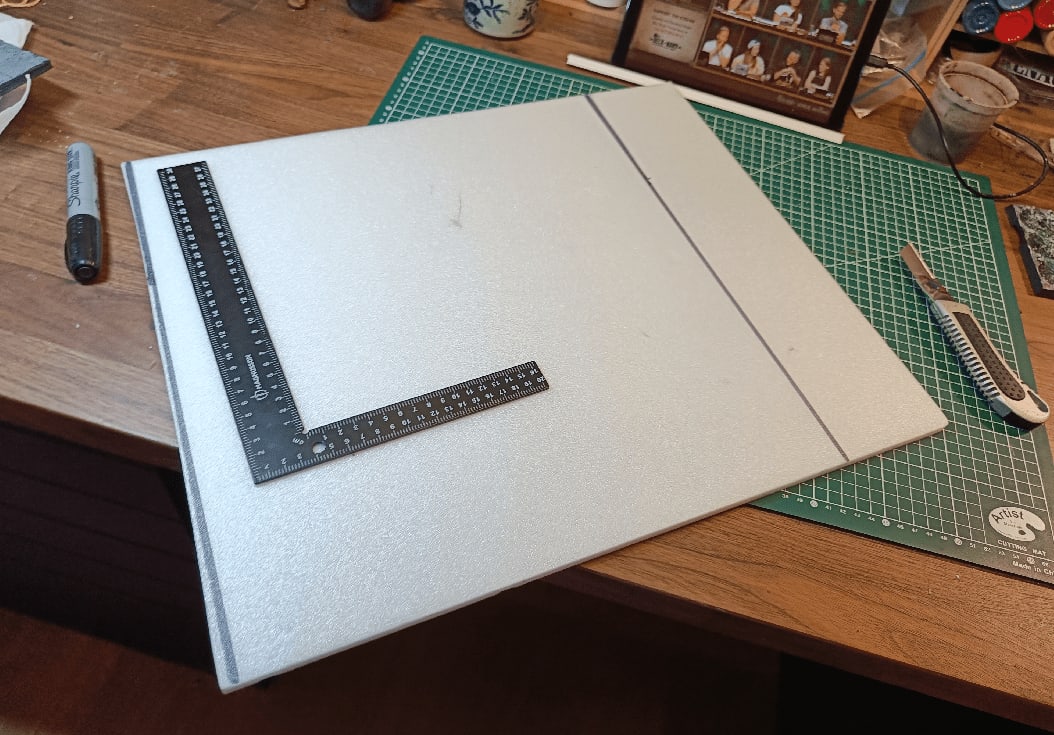
I used my new awesome metal ruler to cut straight lines.

And here we go for the usual carving process. Straight lines, shallow cut with hobby knife, then enlarged one with ball pen. Texture with a tinfoil ball, and some manual carving of broken stones to add some irregularities.

Nice uniform coat of black (it actually needed two coats)

I then did the usual gray overbrush, followed by various acrylic inks on the each square. The acrylics inks I use tend to remove the previous overbrush if I brush too much, so I needed to apply them with a very low brush pressure.

I let it dry, then added a black wash. Once again, very low brush pressure.
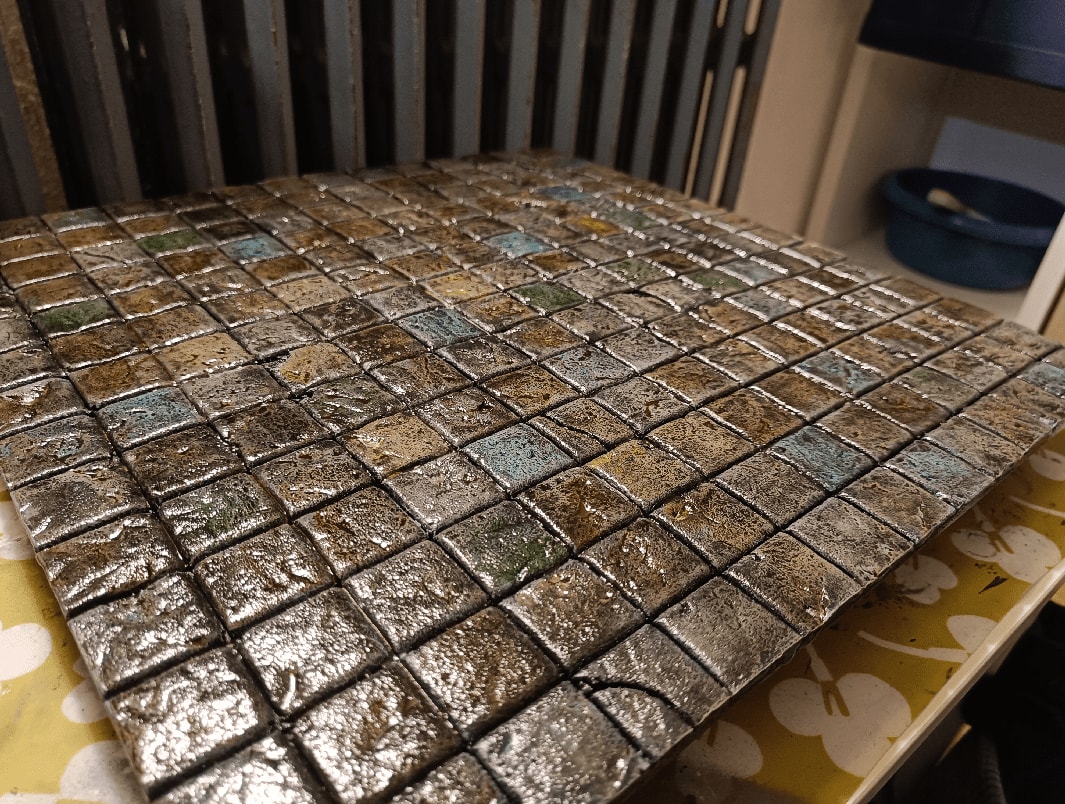
I like the final effect. Next time I might use less colors, or at least colors that are closer to each other, like various blues instead of blues and greens.
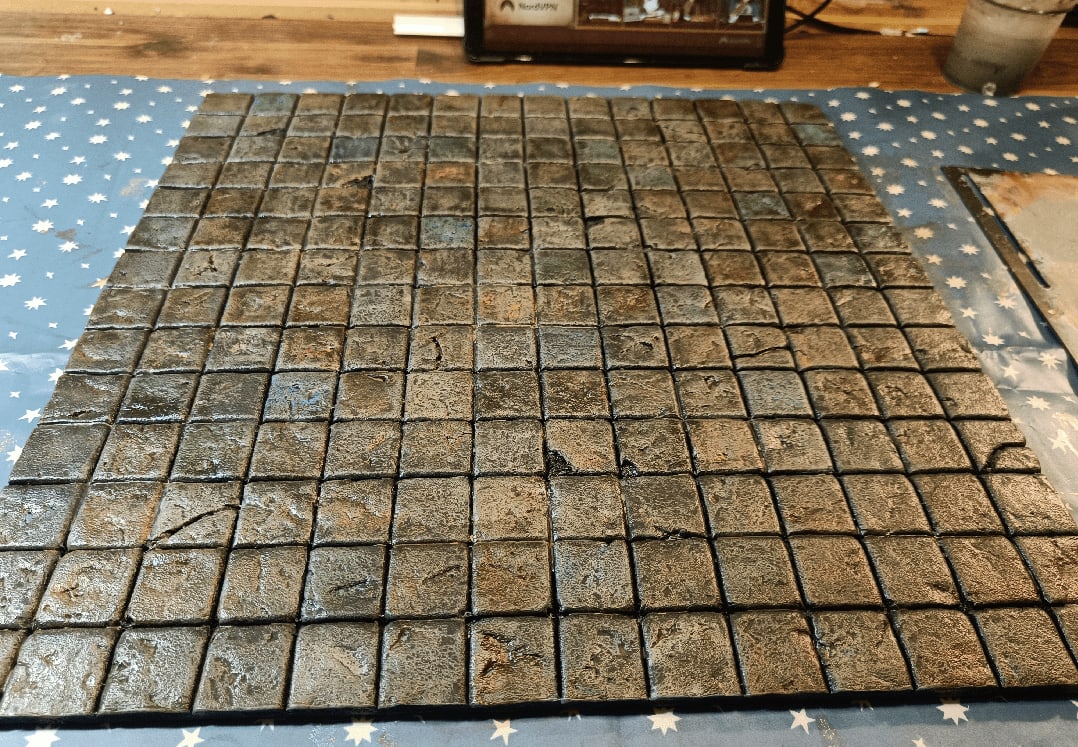
Once dry it looks much better again.

And a drybrush to bring it all together. Really, the wash and drybrush really mutes the colors, so I can go heavy on the blues.
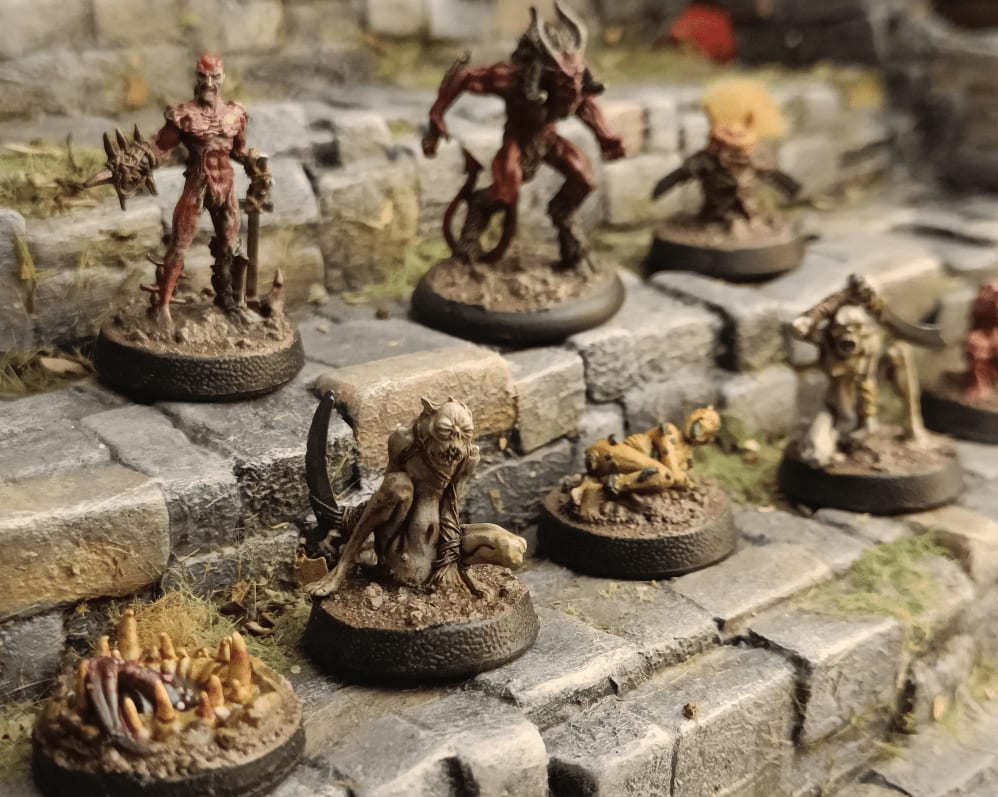
Rainbow Ghouls

I used a sprue of plastic ghouls as an excuse to test some of my new paints.

First, I was surprised by the Ghoul Green. It felt very vibrant to me (where I expect a Ghoul to be more in the faded, dying colors). I thought I should try the paint on the miniature of the same name, maybe it works well on it.
Well, it still seem very bright to me.
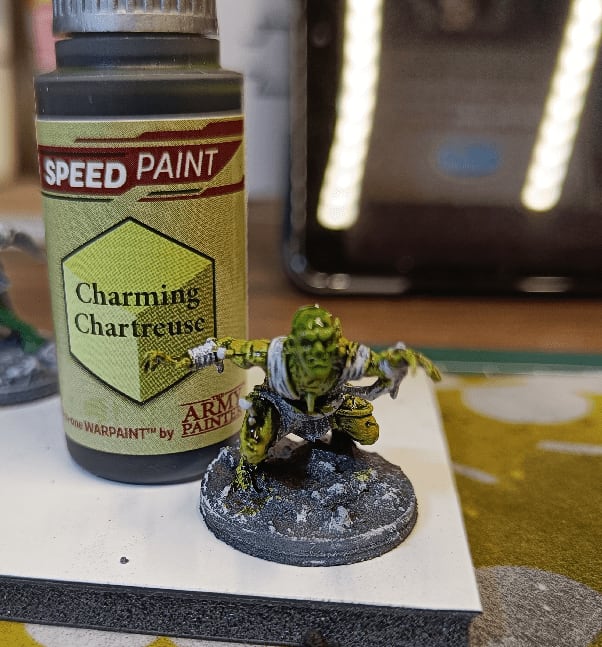
On the other hand, I also tried the vary Charming Chartreuse on a not-so-Charming ghoul, and the result is better.

I extended the test on more ghouls. My favorites are the various greens. I could see a whole group on various shades of green. That could look great.
The Blue, Pink and Green on the left are way too vibrant for me. The Gravelord Grey on the right could be another interesting color scheme.
Drowned Men

Those were a very quick paint job with my new Army Painter big box. I couldn't believe how quickly I could paint this whole group. One evening and it was done, and I was very happy with the result.
All skin and clothe, where the Speed Paints shine the most because of all the recesses and raised areas.

In my game, I made them followers of Krakoa. Krakoa is a Kraken God that lives at the bottom of the oceans. He catches all the people that drown in the high seas, offering them a bargain: they can either drown and fall to the end of the bottomless seas, or be saved and raised to the surface, but become spawns of Krakoa.
I wanted him to represent the dual aspects of the Second Chance. When you're supposed to be dead, but are miraculously saved, and what you do with your new found life, and if you actually have any impact on it, or if it's all part of a deal with a devil-like entity.
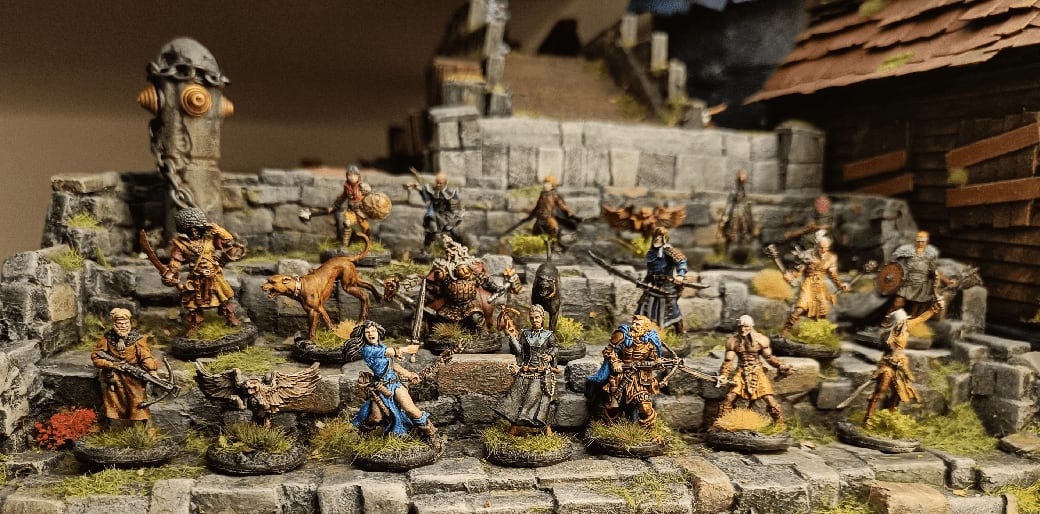
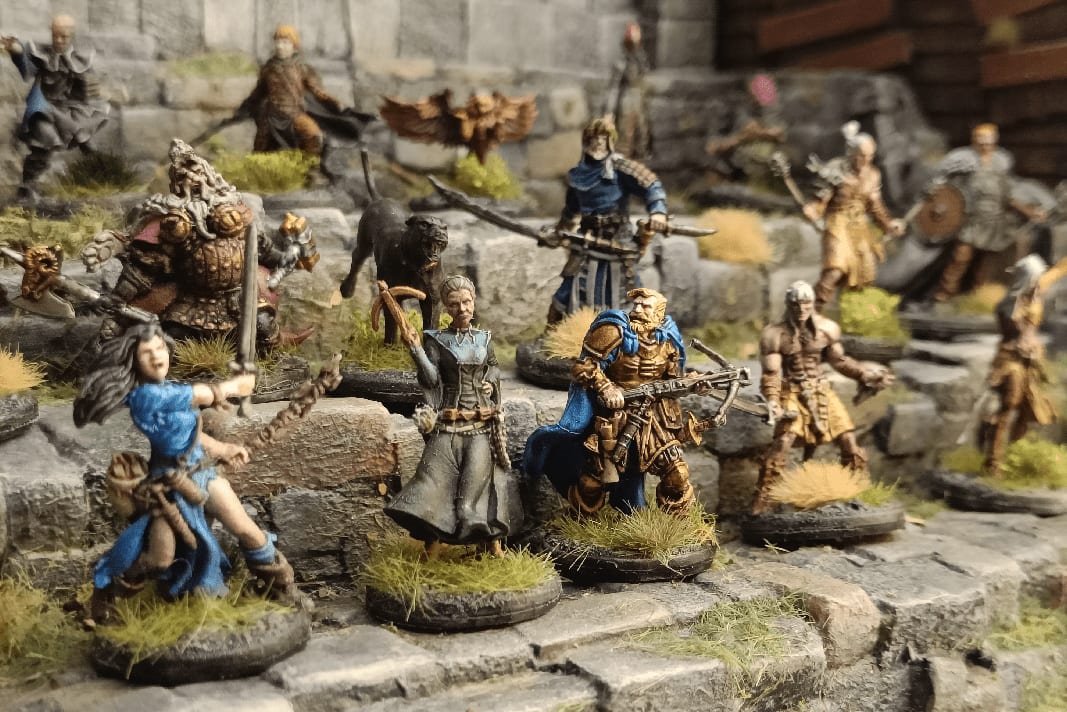
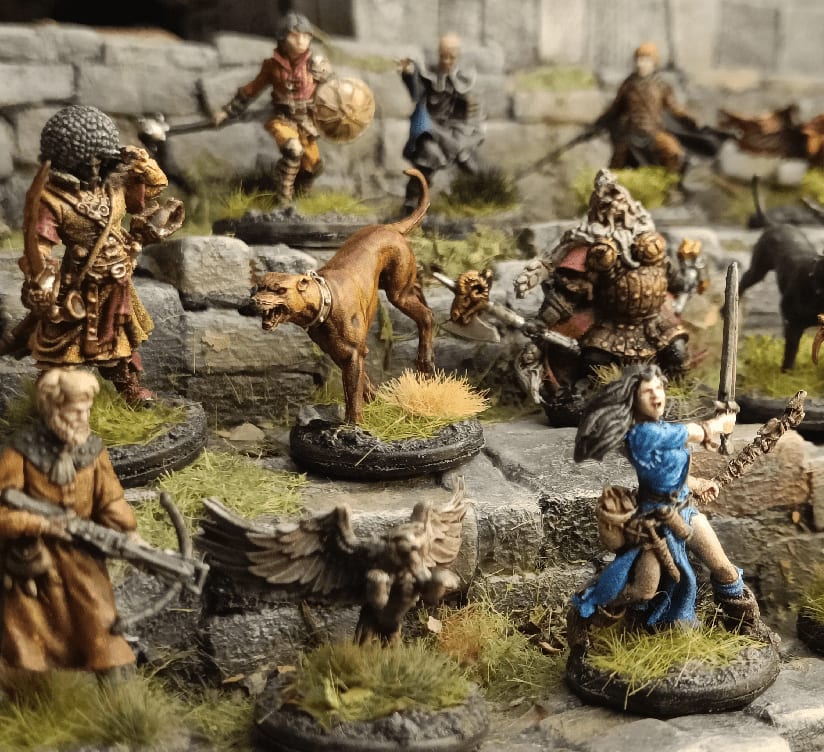
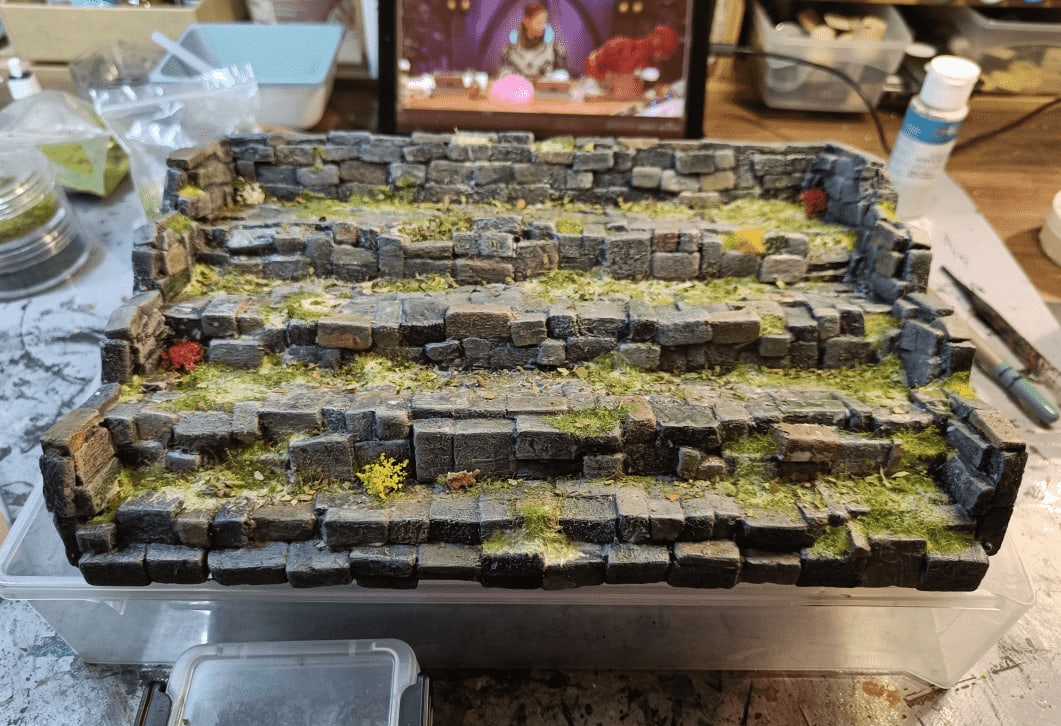
Paint Rack Stone Stairs

I made more stairs; this time to thinking as a terrain piece for a game, but rather as a display element for putting my painted minis.
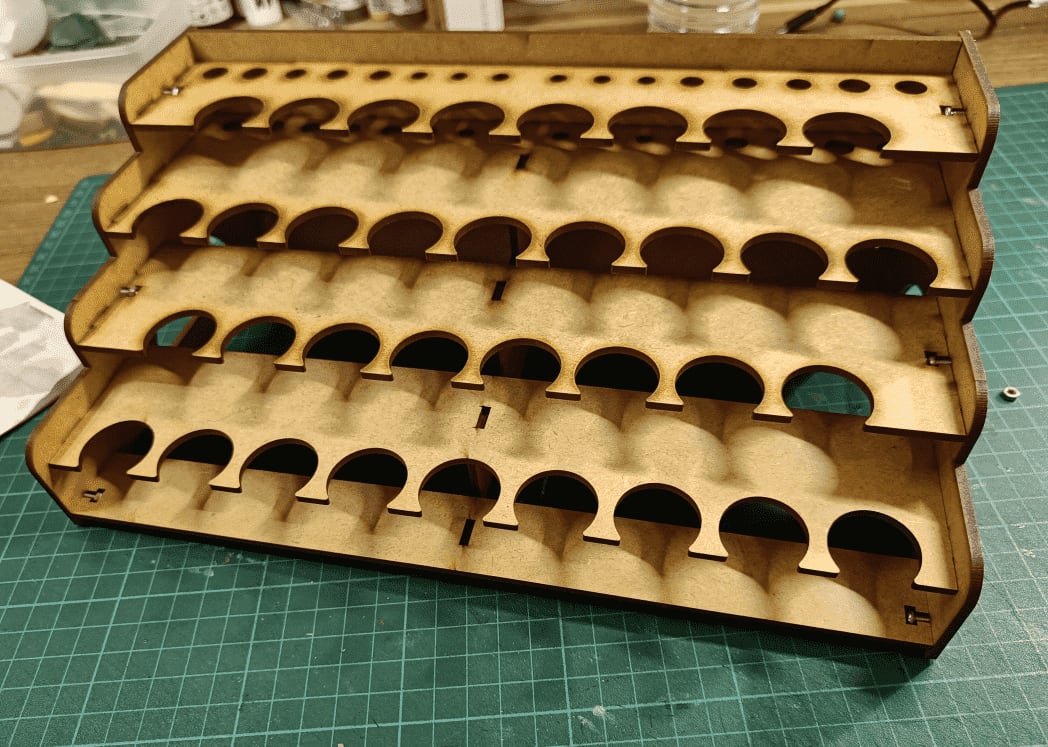
It all started with this paint rack I wasn't using anymore. I used it in the past, when I was painting mostly miniatures (and not terrain), but I've now moved to larger paint pots that don't fit in those holes anymore (my miniature paints are now in a drawer).
So, instead of throwing it away, I recycled it into terrain.
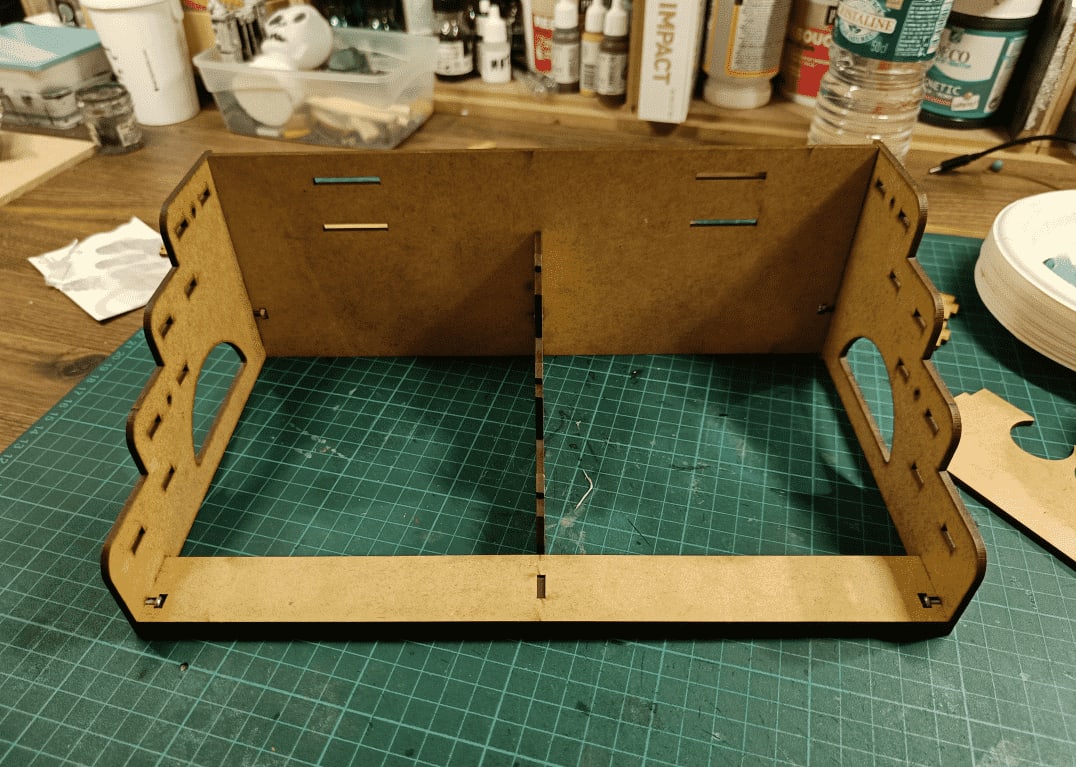
I started by removing the various ledges, to keep the overall structure.
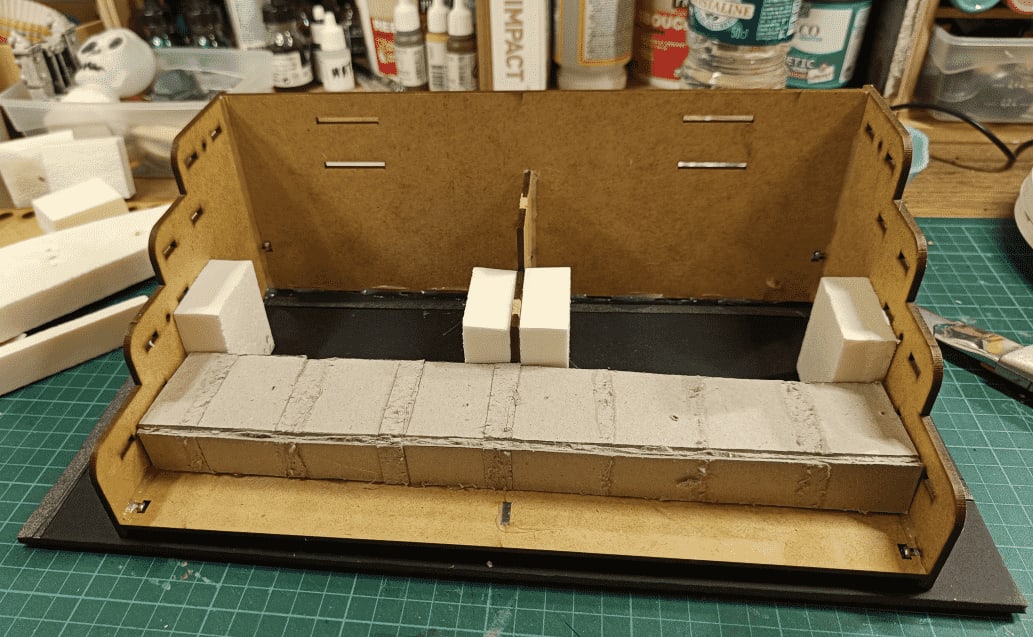
I glued it all on some foamcare, and added more glue at the joints to reinforce it. I then added styrofoam blocks to act as pillars to put cardboard on, to simulate the steps shape.
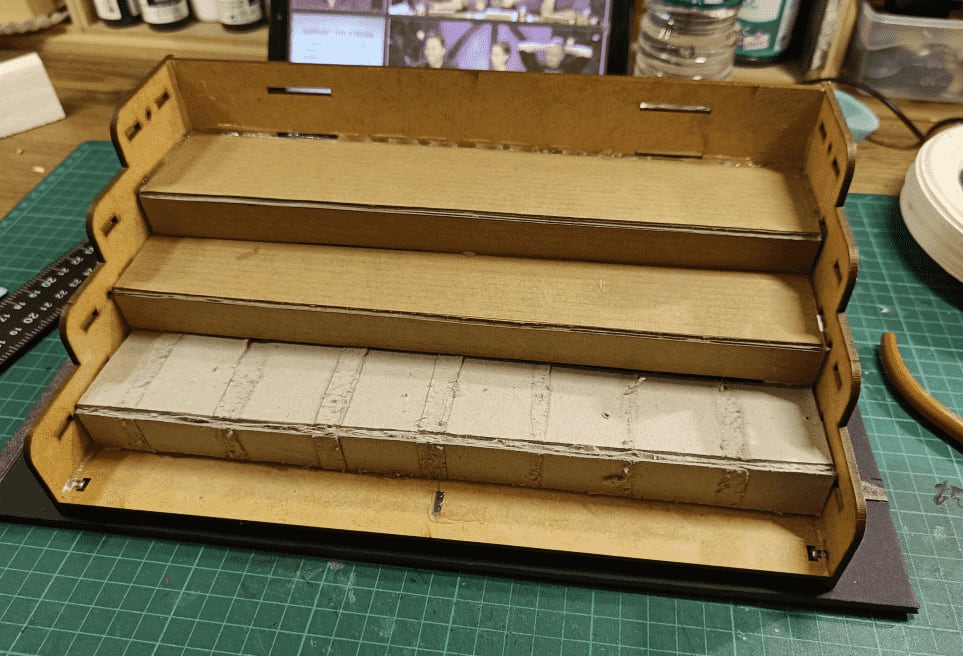
I did that shape for all steps, using whatever cardboard I had around.
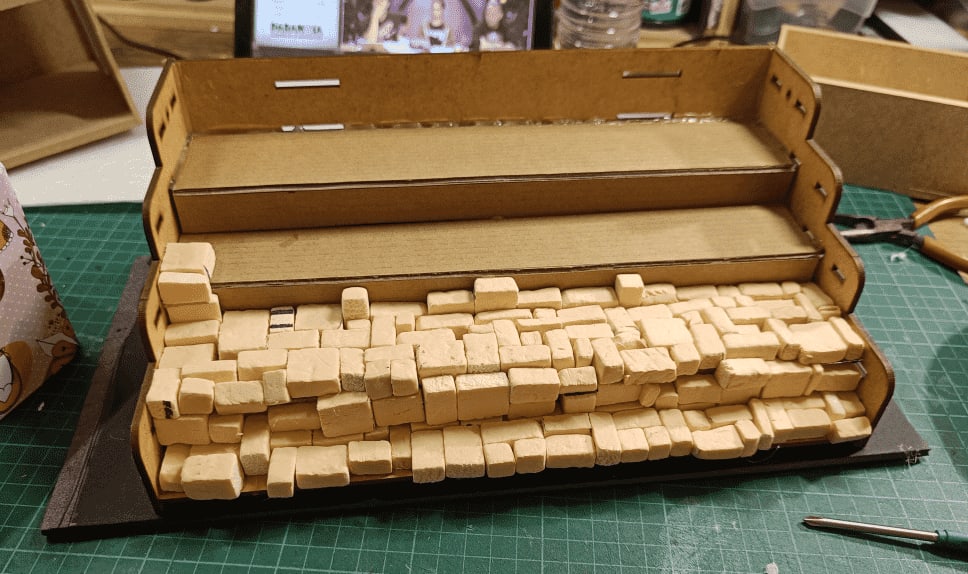
I then glued bricks one by one, starting from the bottom.
And with everything covered.
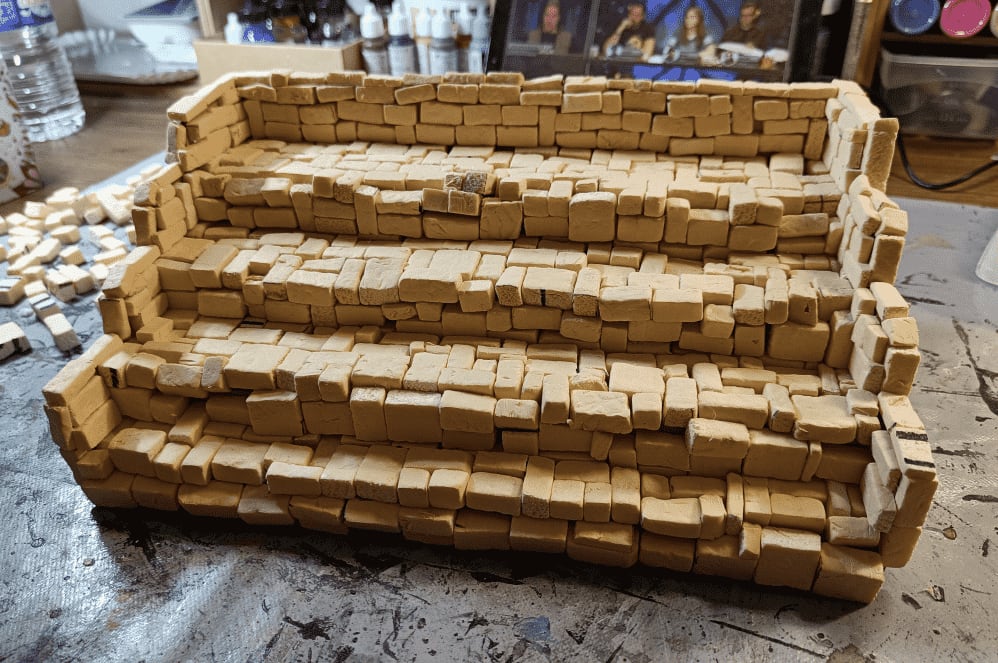
I covered it all with spackle. The way I do it is as follow:
- Add a blob of spackle somewhere
- Spread it with a flat object. Here, I was able to cover about 1/3 of a step with one blob
- Use a wet brush to spread it further and really go into the holes
- Use a paper towel to wipe the excess, removing what's on the top of the stones, but keeping what's in the crevices between them.
It's the messier part of the project.
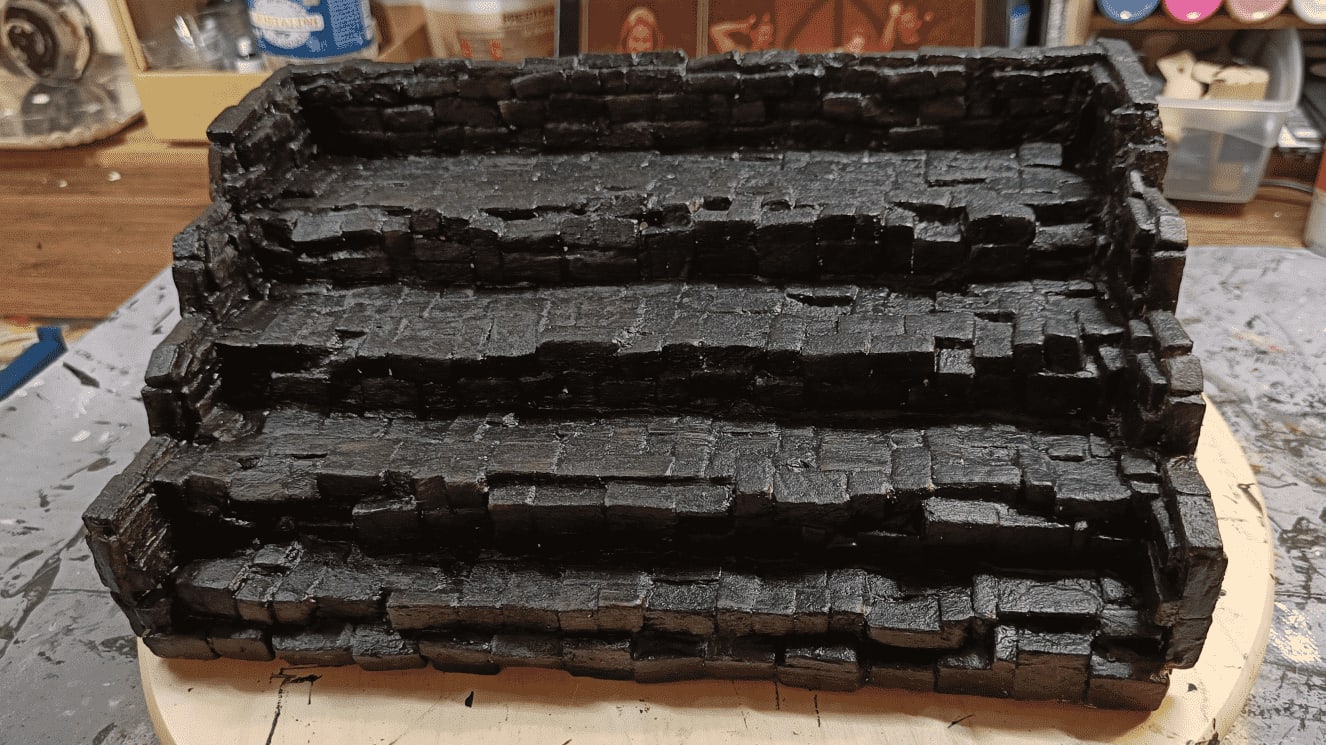
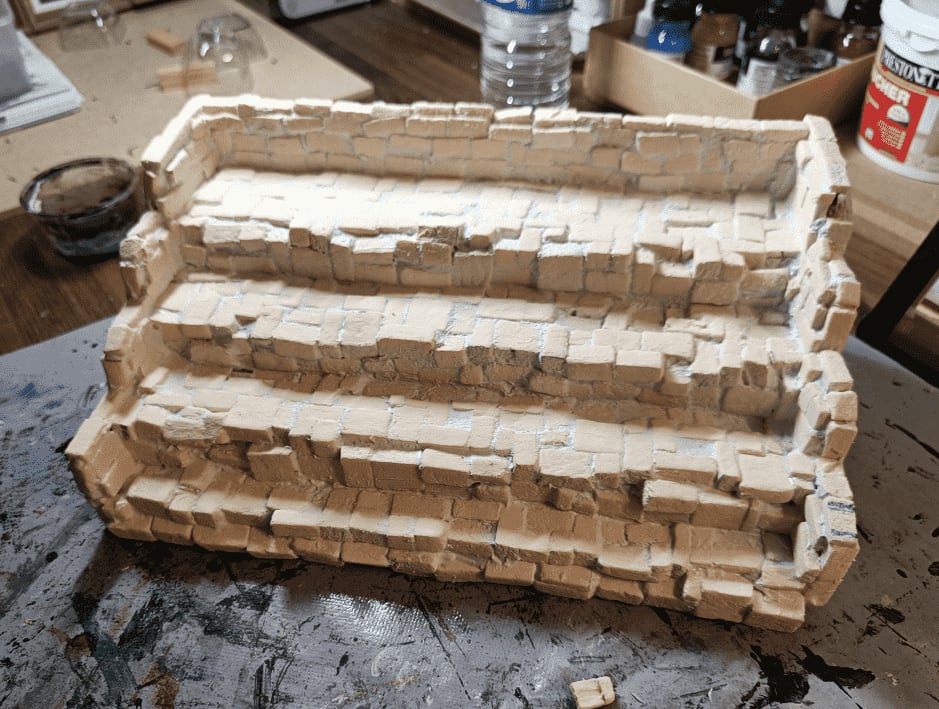
Then, covered with black glue, to act as a basecoat and protective layer.
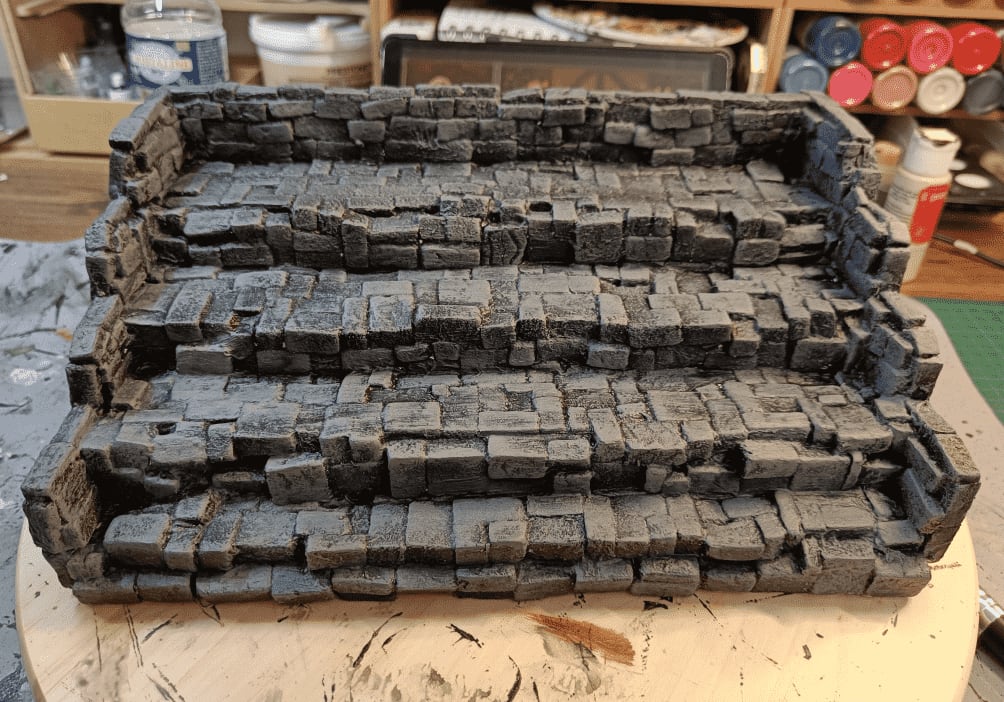
Messy overbrush of grey. The difference in shape of the stones already gives a nice look. But because it's a large piece, it's also pretty boring.
Adding a second drybrush, of a lighter gray to add more nuances.

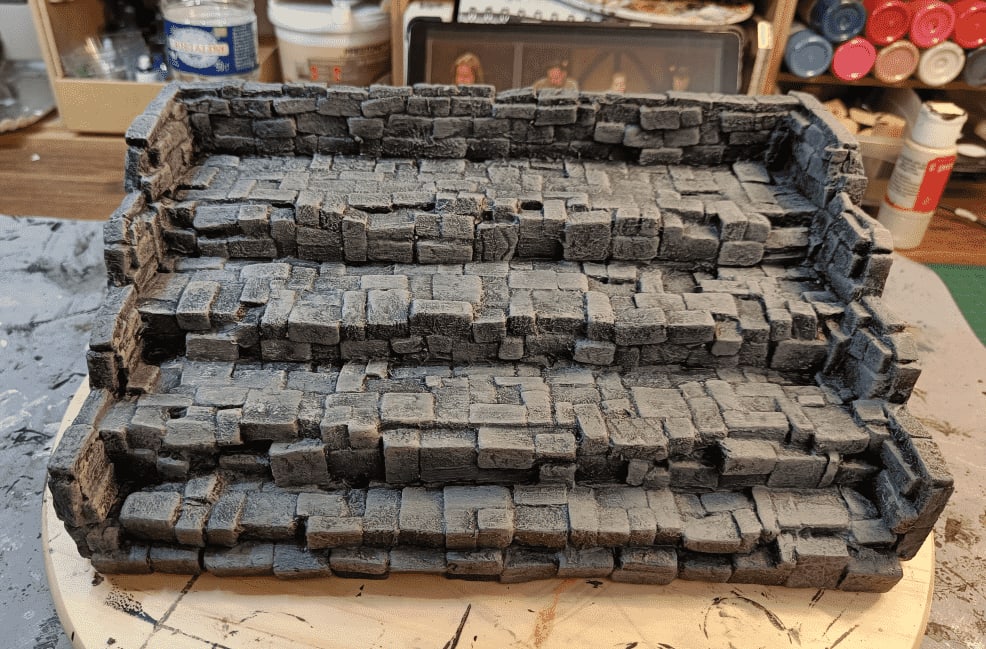
Still boring, so I'm now painting individual stones in various colors. I'm using diluted paint so the underlying gray shows through.
I added green, which in retrospect didn't fit so well with the overall scheme.
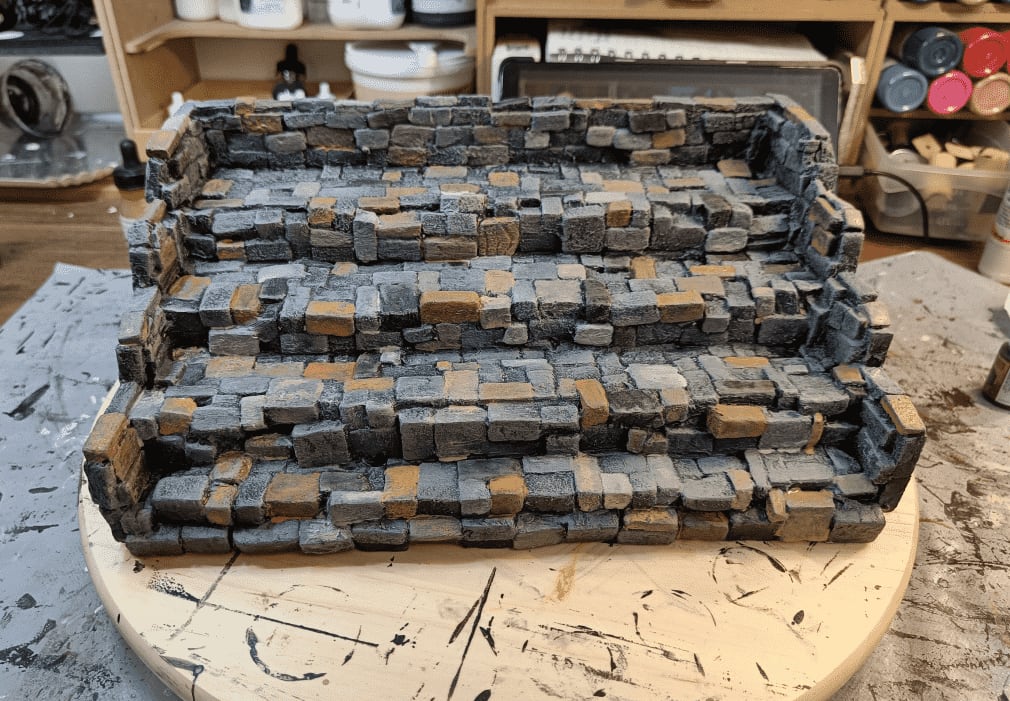
So I added more beiges and browns.

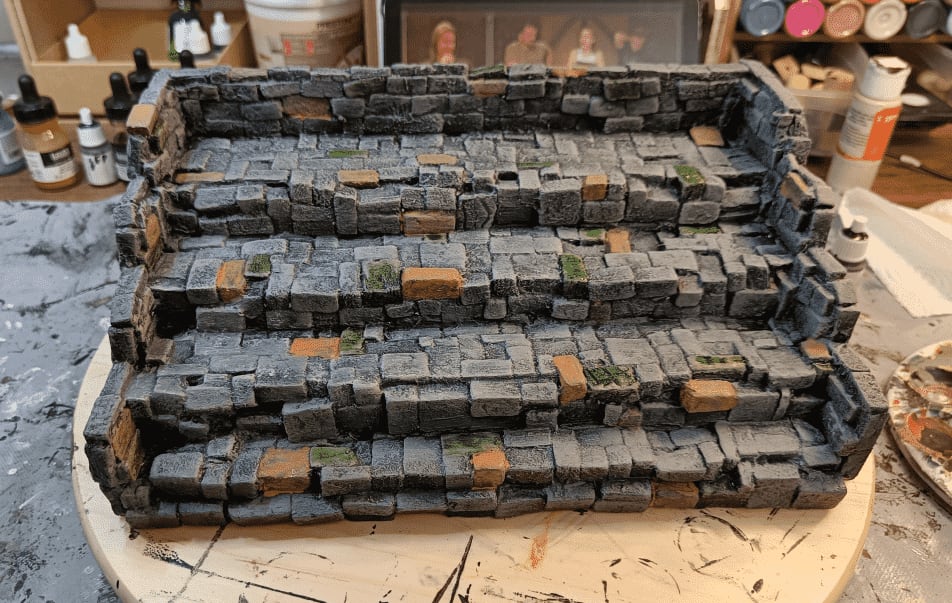
Finally I added one last drybrush of a pale beige, followed by a dark wash to make the whole tone more uniform.
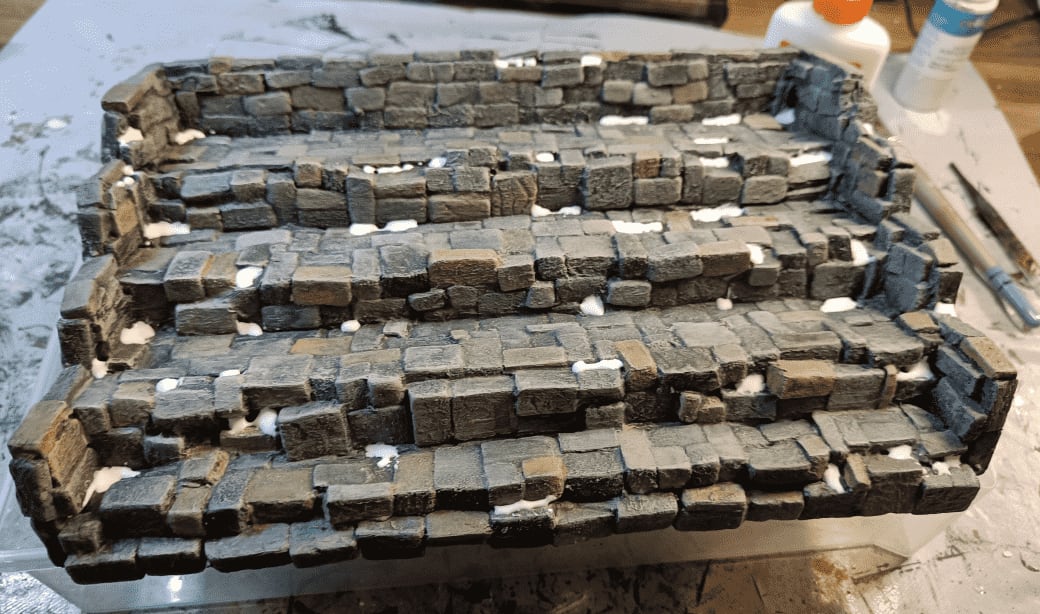
As it was still too uniform, I used the secret technique that makes every terrain piece better: flocking.
I started by adding blobs of glue wherever my paint job was shitty. For example in the corners, where the drybrush didn't get, or when I accidentally splashed some unrelated color.
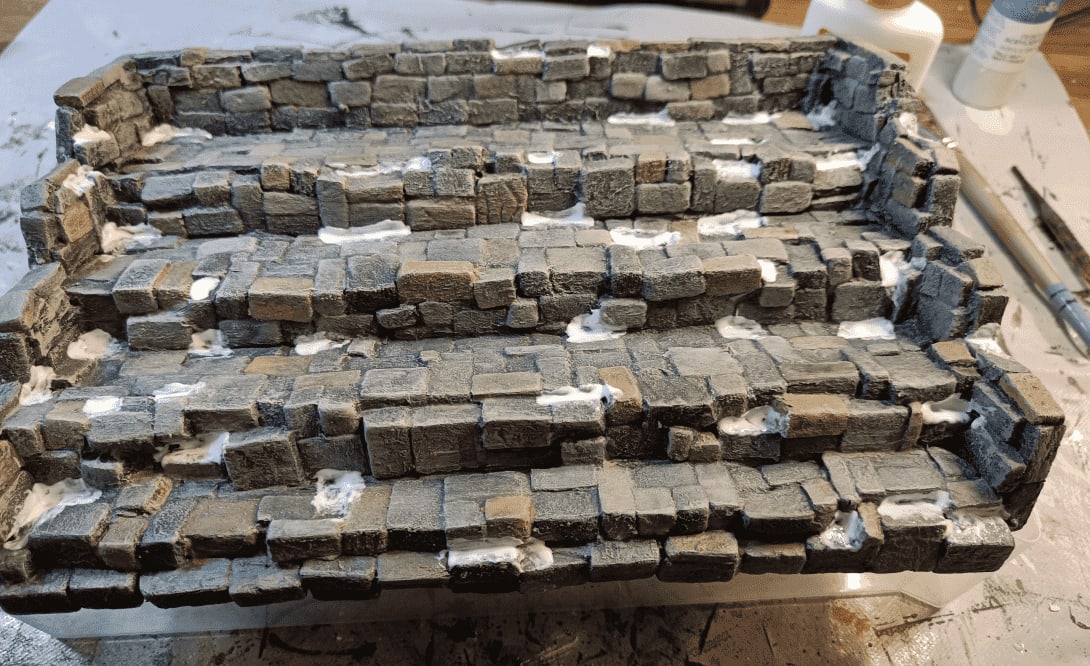
Using again a wet brush, I spread each glue blob a bit.
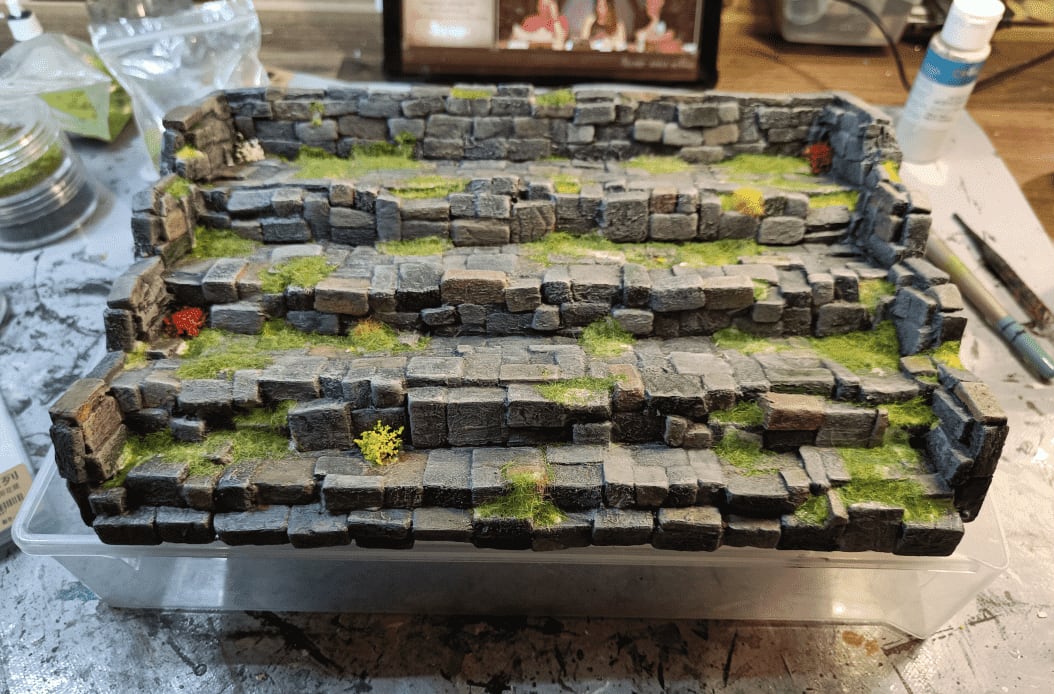
I started by adding a few fake plants here and there. And then randomly sprinkled different flock colors here and there in no specific pattern.
I then add a mix of cooking herbs I have, to simulate leaves. And splashed it with a mix of water and PVA glue.
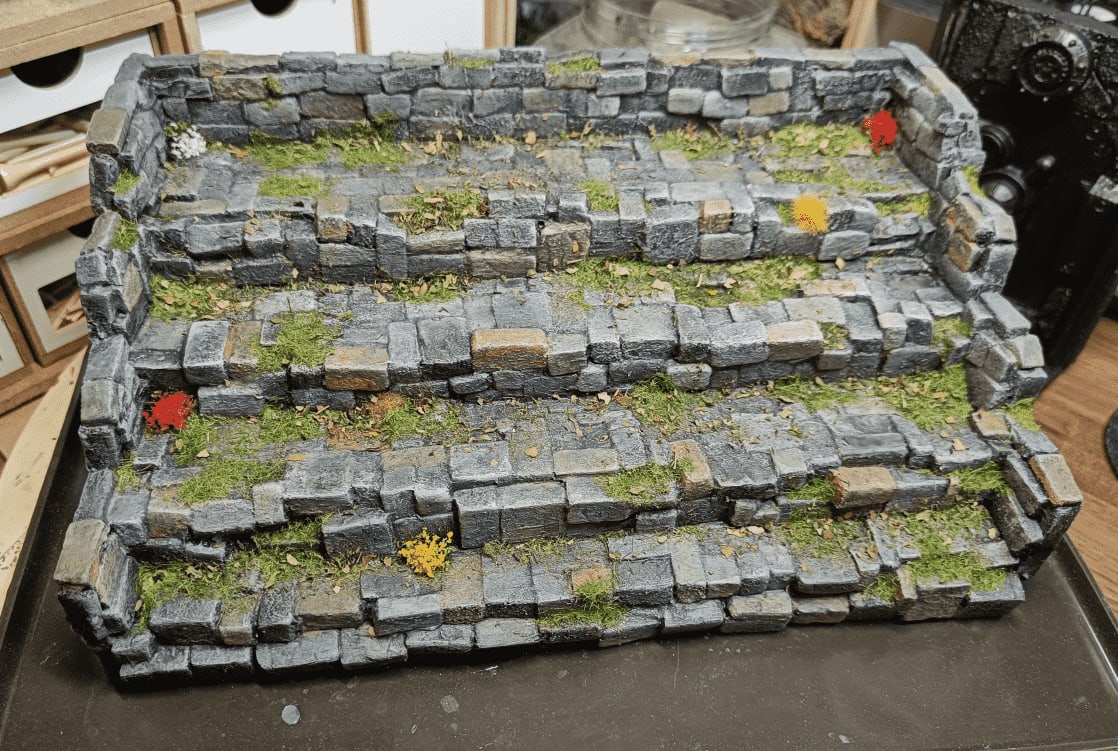
Let it dry overnight, and here is the final result.
If I were to do it again, I would try an oil wash instead of my water based one. I tends to soak the underlying material and such a simple texture would be a great way to test oil washes (I'm afraid to mess up my build though, but hey this is how you learn new things).
I would add more details, like discarded tools, forgotten camp fires and such, to give more character to the build.