Runic Floor

The rune on the floor is a variation on the Alaznist rune from Pathfinder, and has been the rune of Ezren, the Warlock of the group, whose evil twin has perverted all timelines. The various dungeons they encounter have variations of this rune, and in this room specifically it was part of a puzzle, of the rune turning red and green.
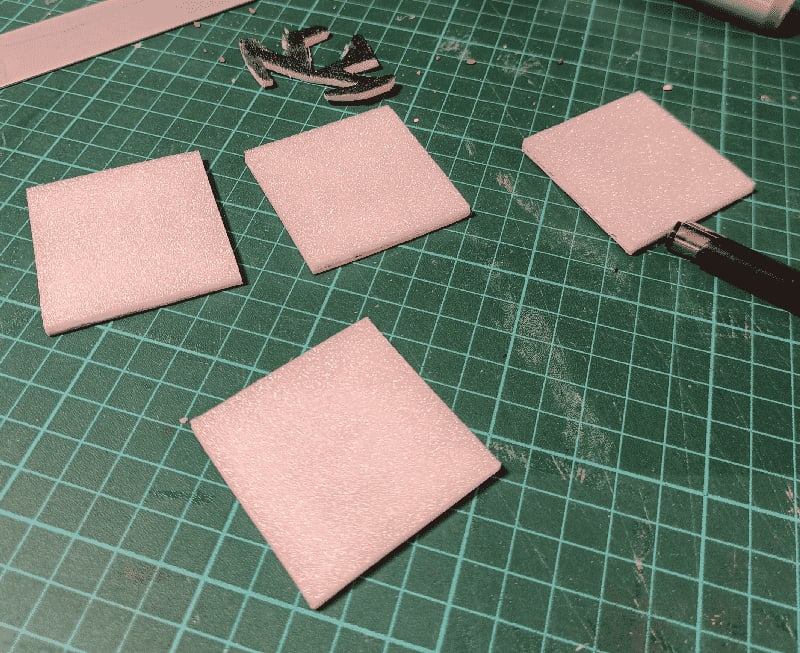
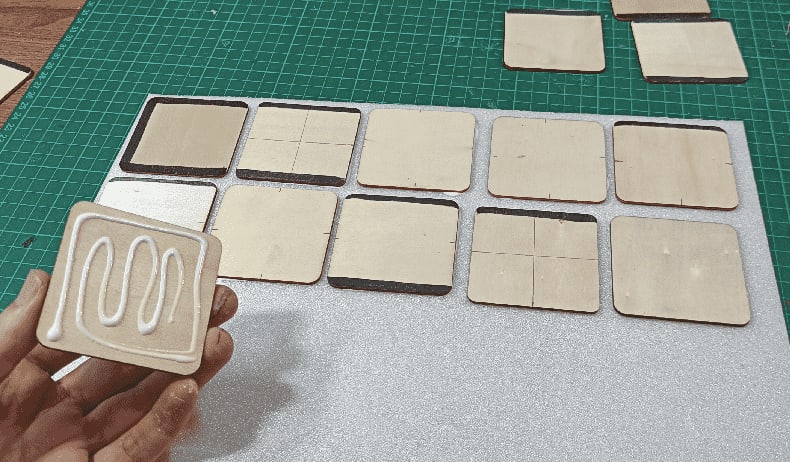
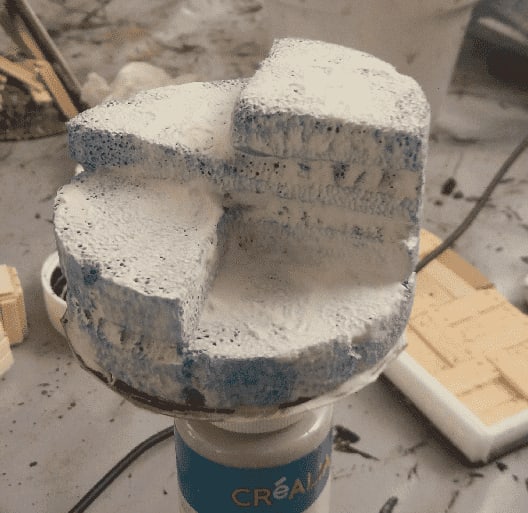
To build the runes, I carved a template out of foam (top of the picture), and used it to trace the right shape on four foam + cardboard tiles. I made the tiles smaller than my usual dungeon floor tiles, so they could sit in between walls.
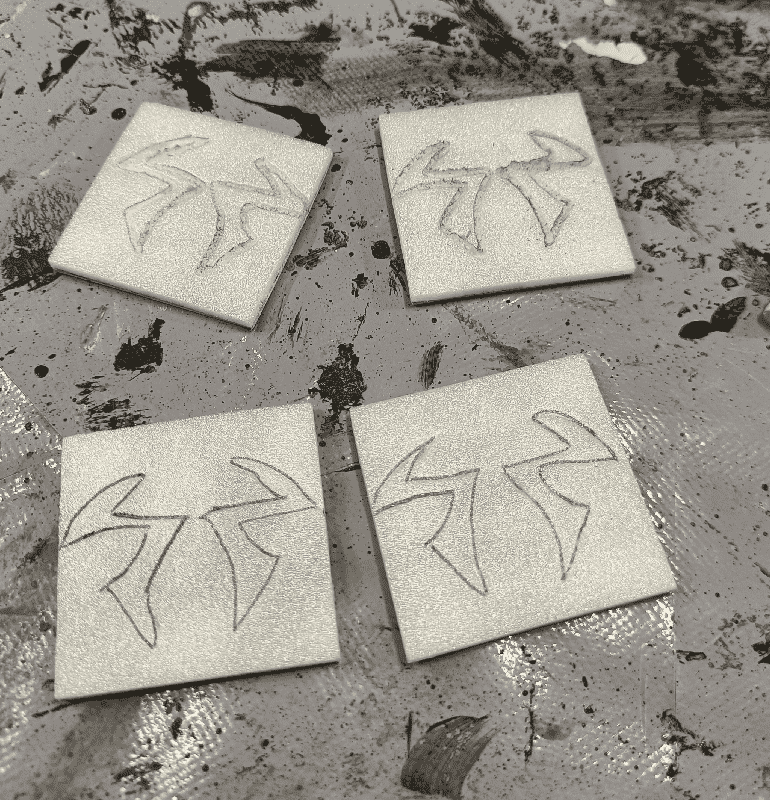
Using the template I draw the run on the tiles. For the first ones I tried to melt the foam using the tip of my hot glue gun but it turned out to be too rough. For the last one, I didn't even used the template and free-hand draw them.
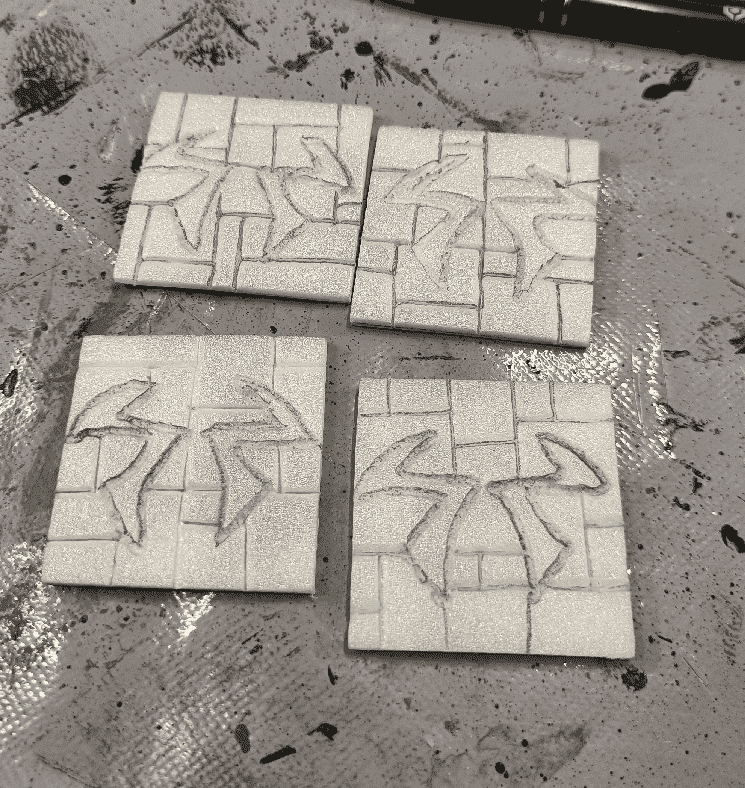
I carved the rune, and added a classic stone pattern in the background, to better blend them with the rest of the terrain.
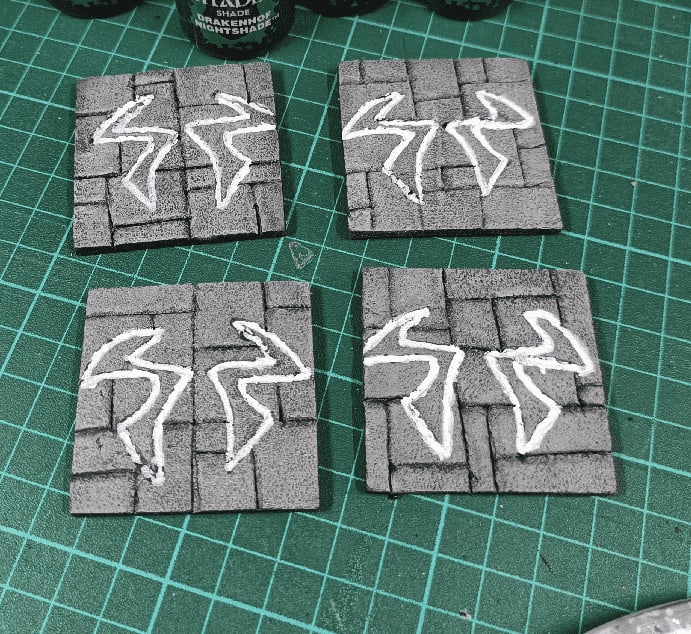
I painted the stone, and traced the rune white.
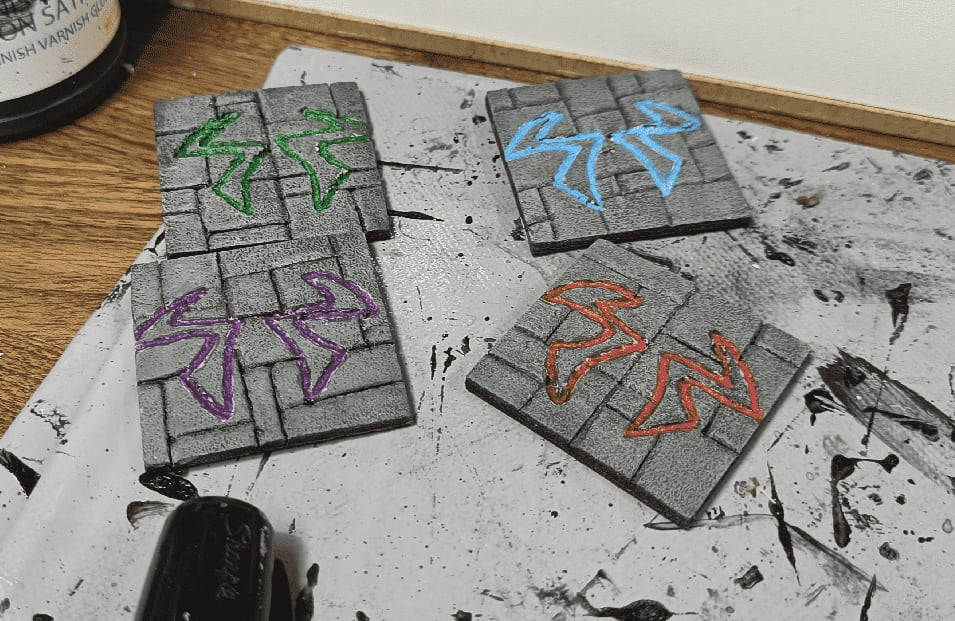
I then painted each rune in a different color. The white priming helped in making the colors more vibrant.
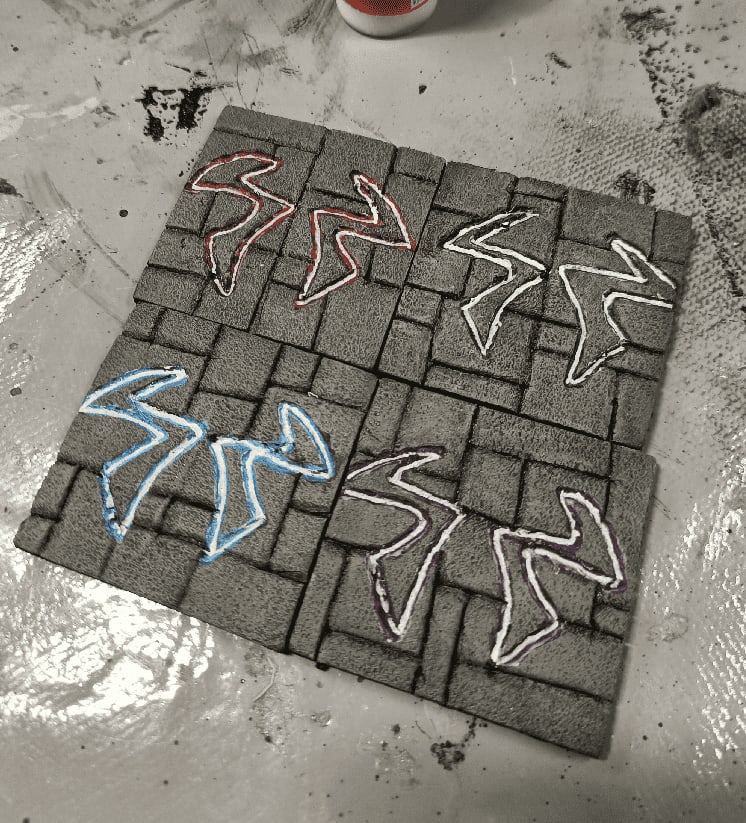
Then I added a second layer of white, this time focusing on the central line.
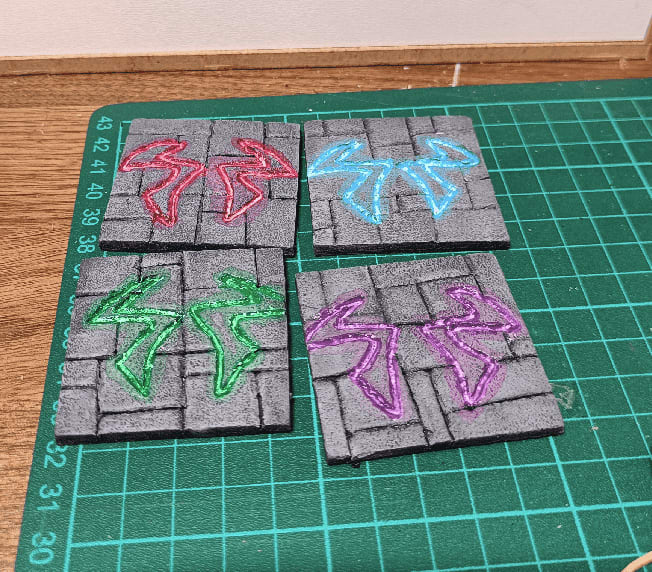
And I finally added a last layer of highly diluted paint, making it bleed on the side. It gave kind of a glowing / neon effect to the runes.
Mantic Crate Furnitures
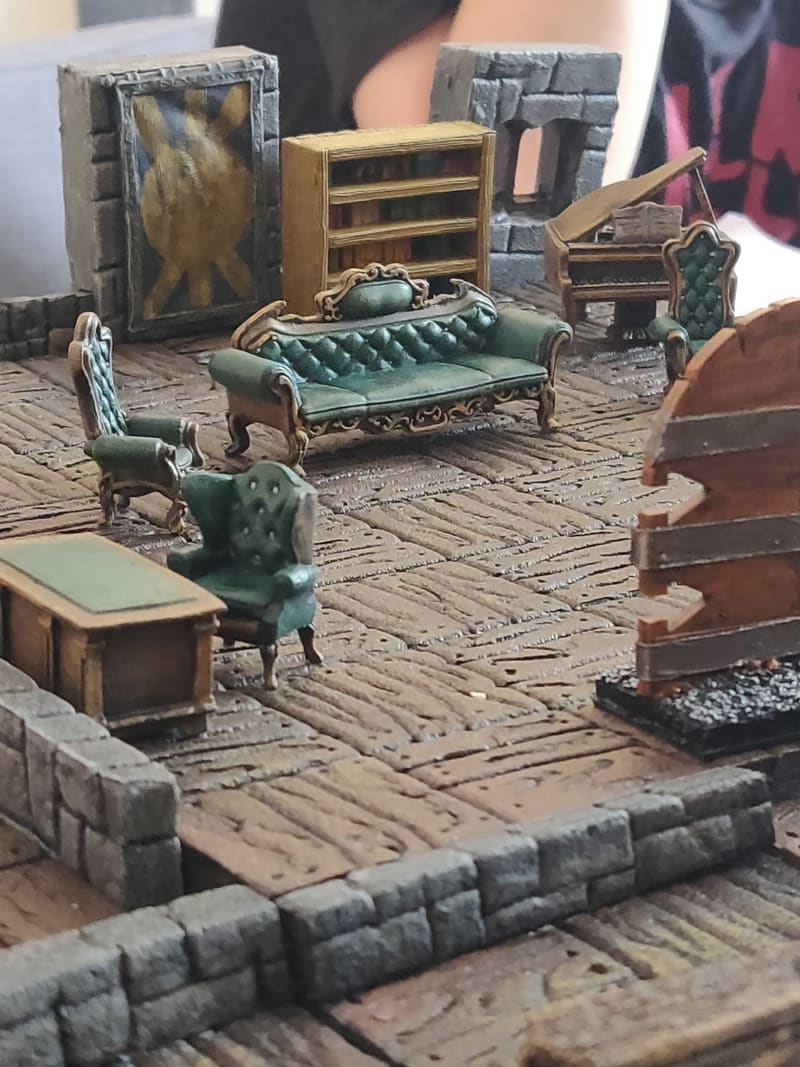
The mansion needed some furniture, to make it look like all posh and classy. Thankfully, I had a few already in stock, from a previous Mantic Crate Kickstarter. I did back their first project, which got me a lot of dark, grimmy and broken dungeon furniture; but their second project was more on the "haunted mansion" side, with much more high classy stuff.
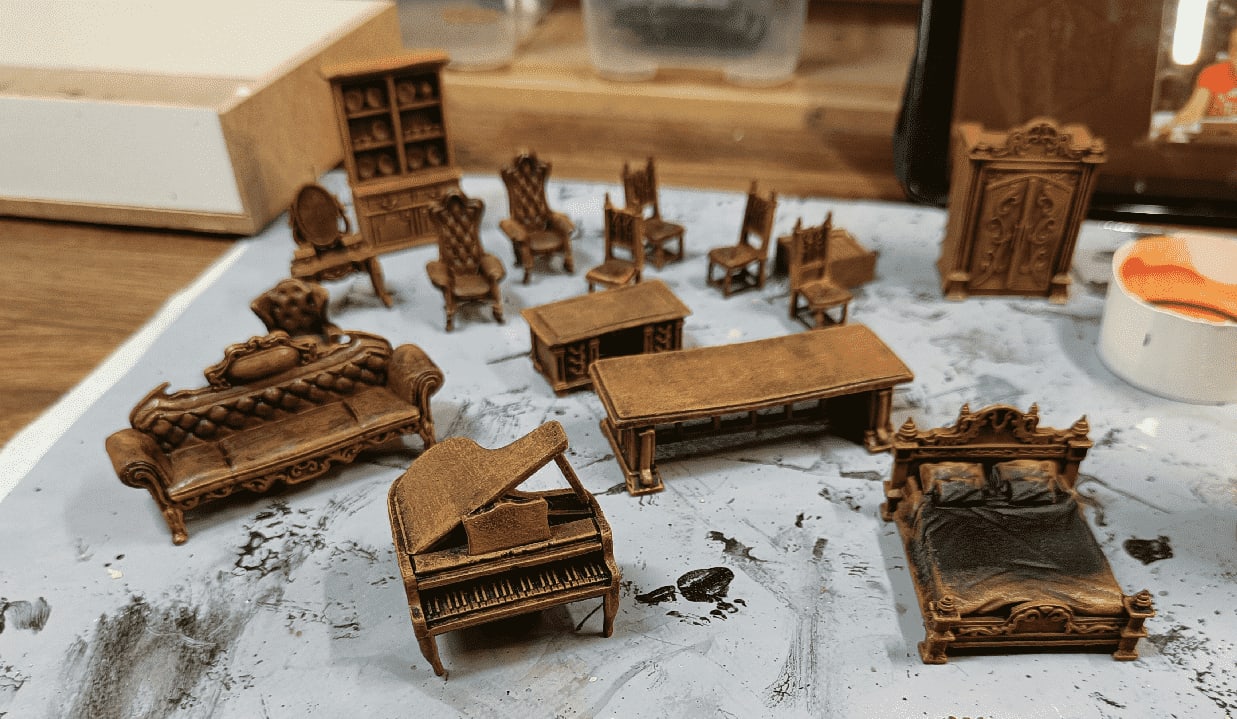
I started with a black priming. I almost always start with black priming now; I find that it makes the job easier in creating shadows with a quick dry brush. It sure works well for terrain and furniture, and I always often do it with miniatures as well now.
Well, after the initial priming, I did a first dry brush of dark brown. I keep always the exact same pattern for anything wooden; it makes my final set looks more homogeneous.
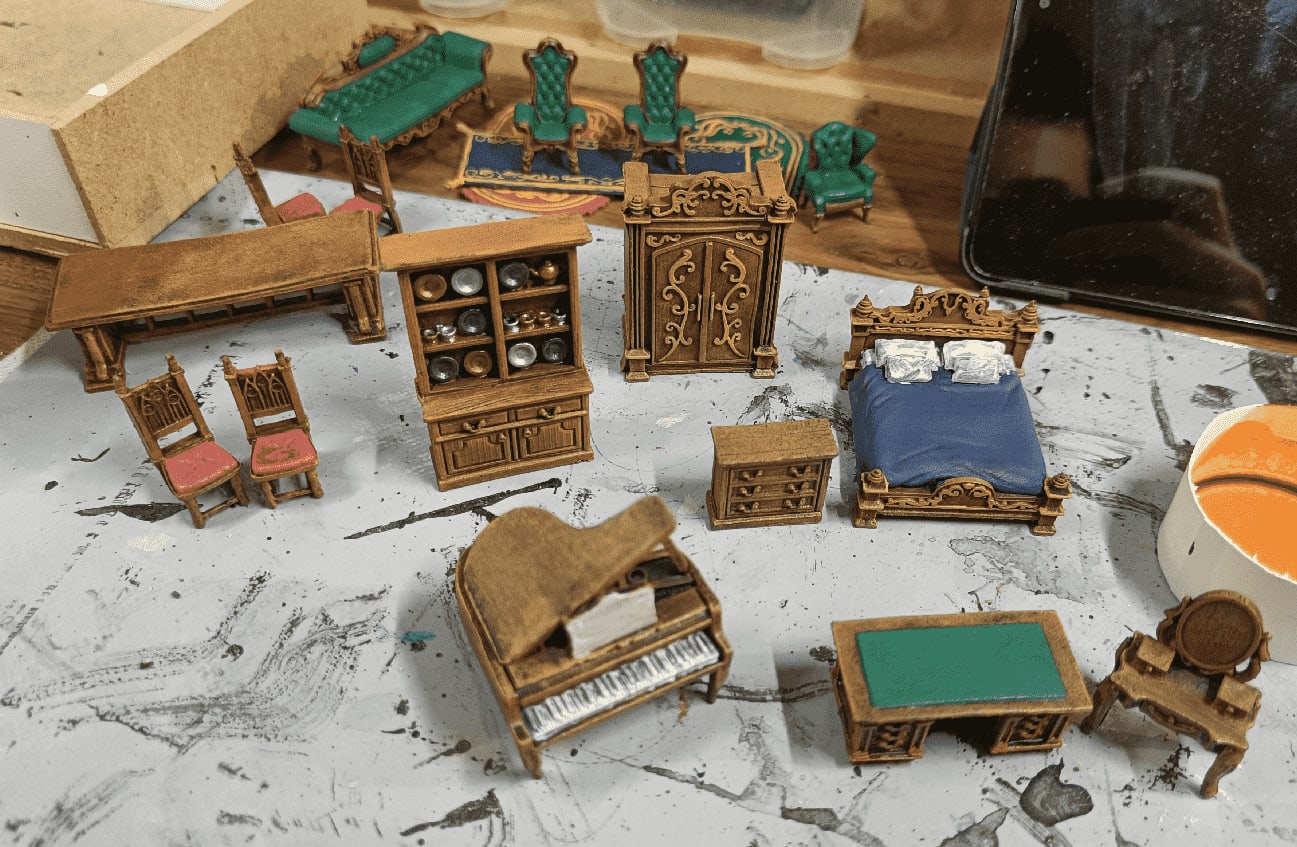
I the picked individual colors. I tried to keep it simple and easy. They are furnitures, and should be used mostly as room dressing, so I need something simple. For example I only painted the chair cushions, or the bed sheets. For the cupboard and wardrobes, I painted the ornaments and that's it.
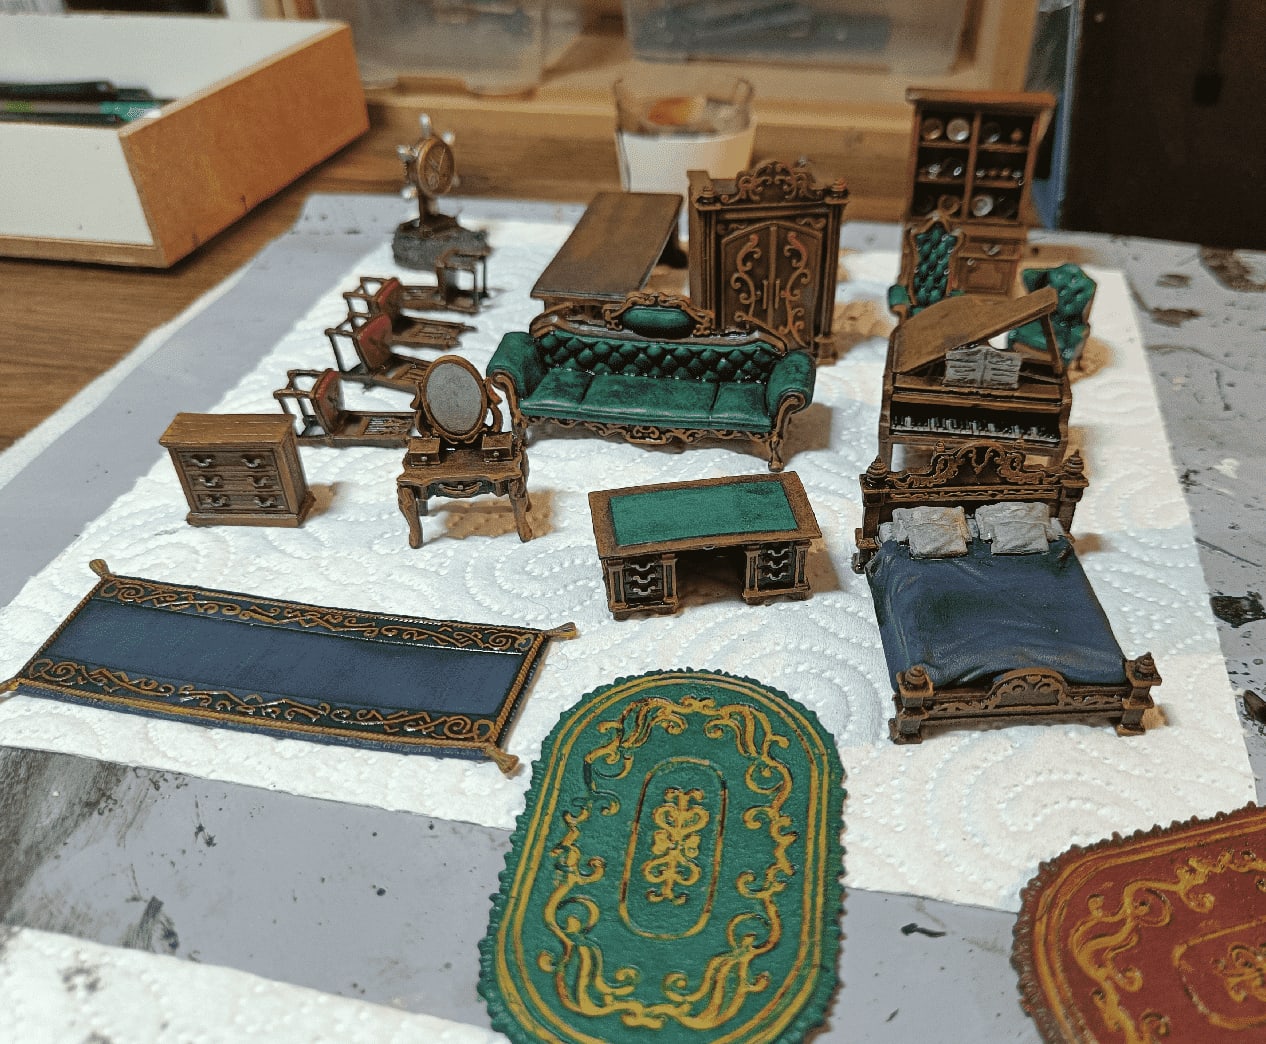
I the applied a wash on it, which gave them a darker look.
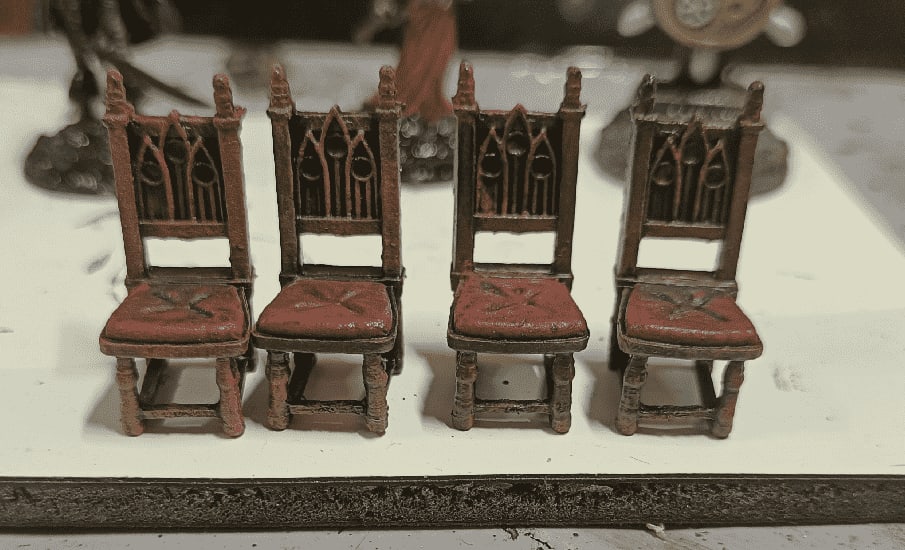
I think I added a last drybrush on the back of the chairs after the wash, but I'm not even sure.
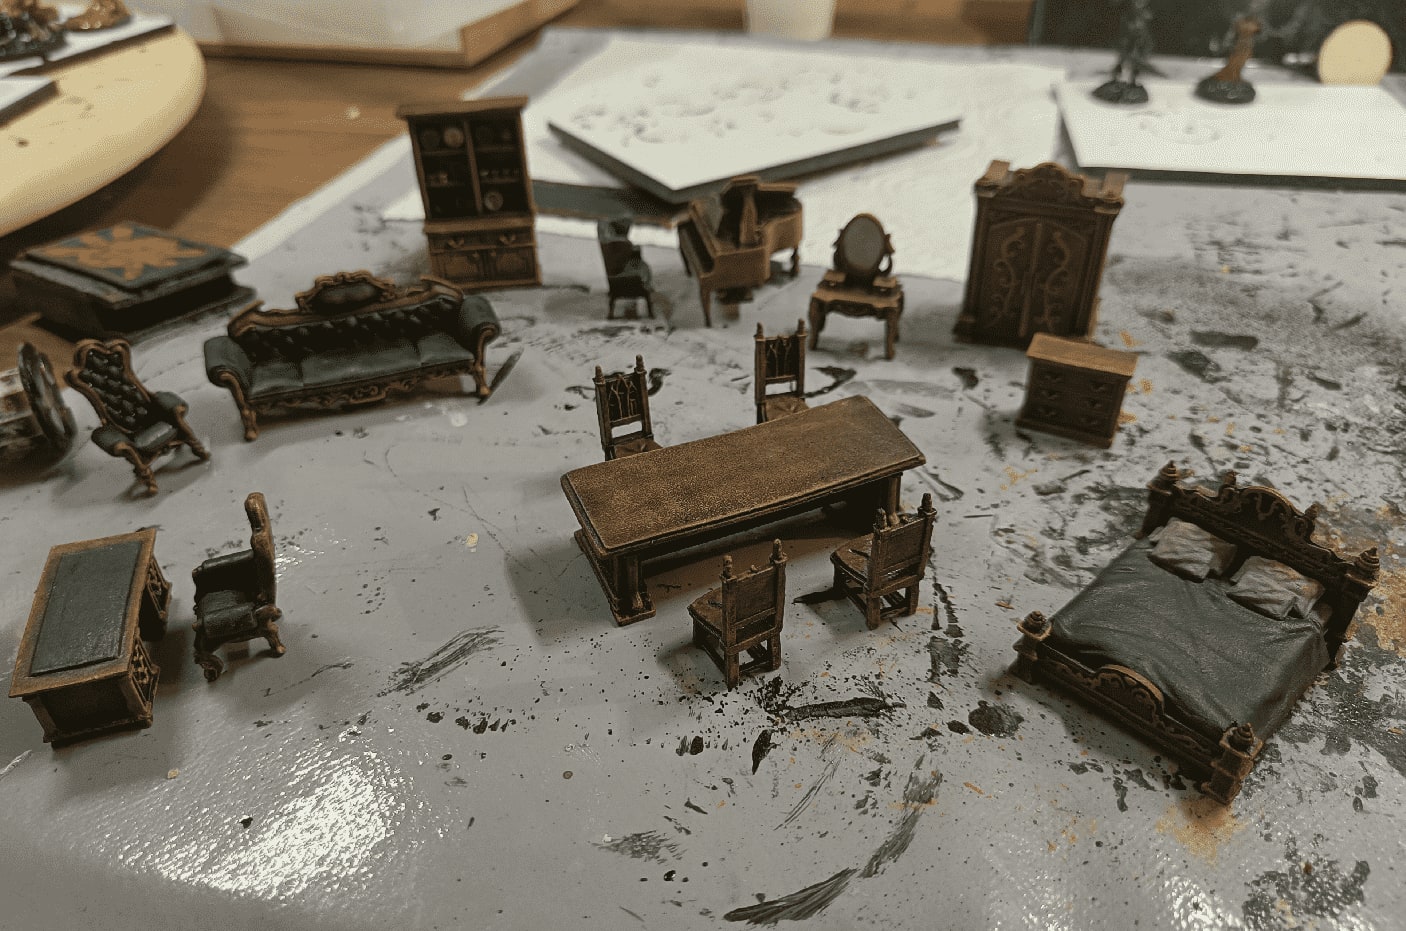
And the final set, ready to be used in play.
Wooden Railings

The fight in the Kaijitsu Mansion took place on the first floor, and there was a balcony allowing for some vertical combat with people on the ground floor (actually, only a flying mage). I wanted a way to represent the ledge, so I built some wooden railings.
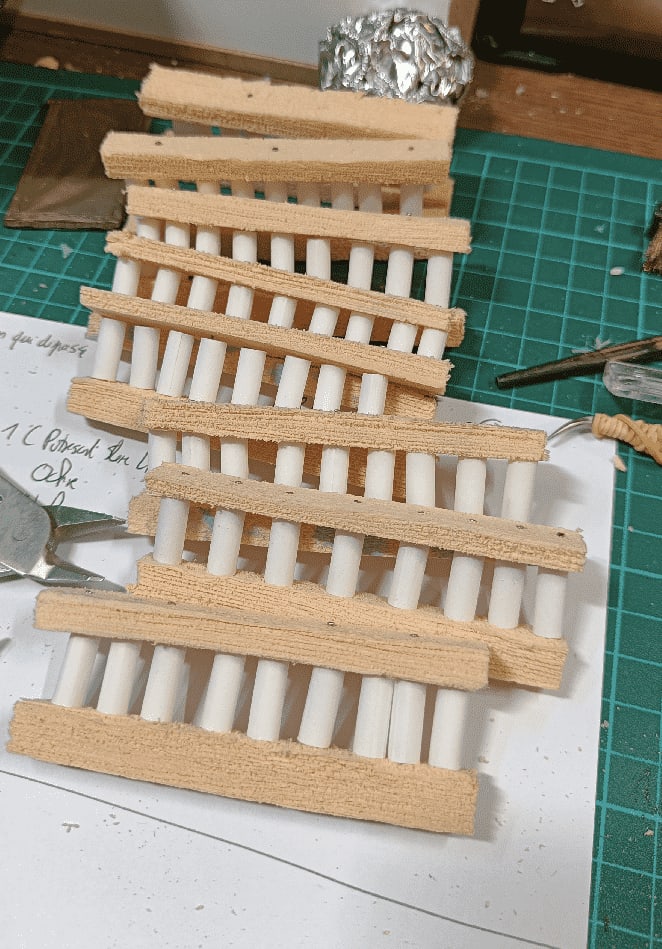
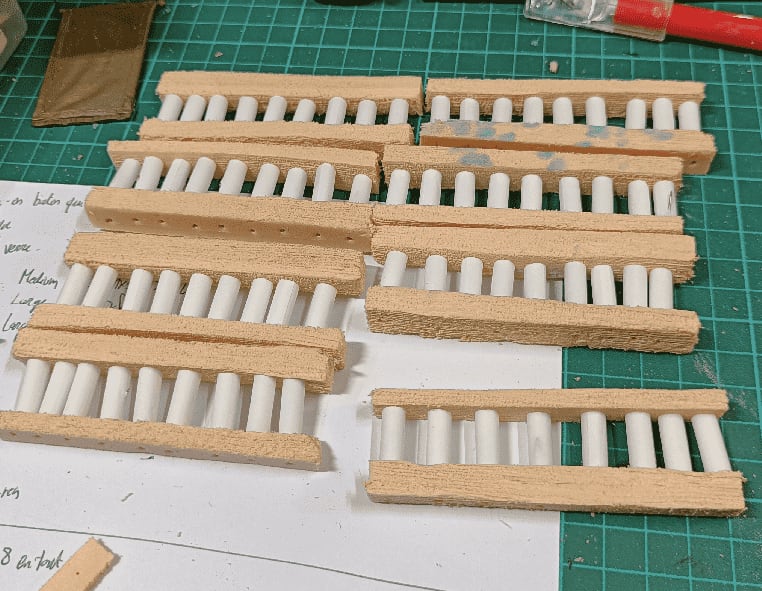
The crux of it are two foam beams (textured to look like wood) and some cigarette filters for the vertical parts. The filters are put in place with small pins on the top and bottom.
I tried gluing the things in place, but it was too instable. In the end, using the pins was the most sturdy solution I could find.
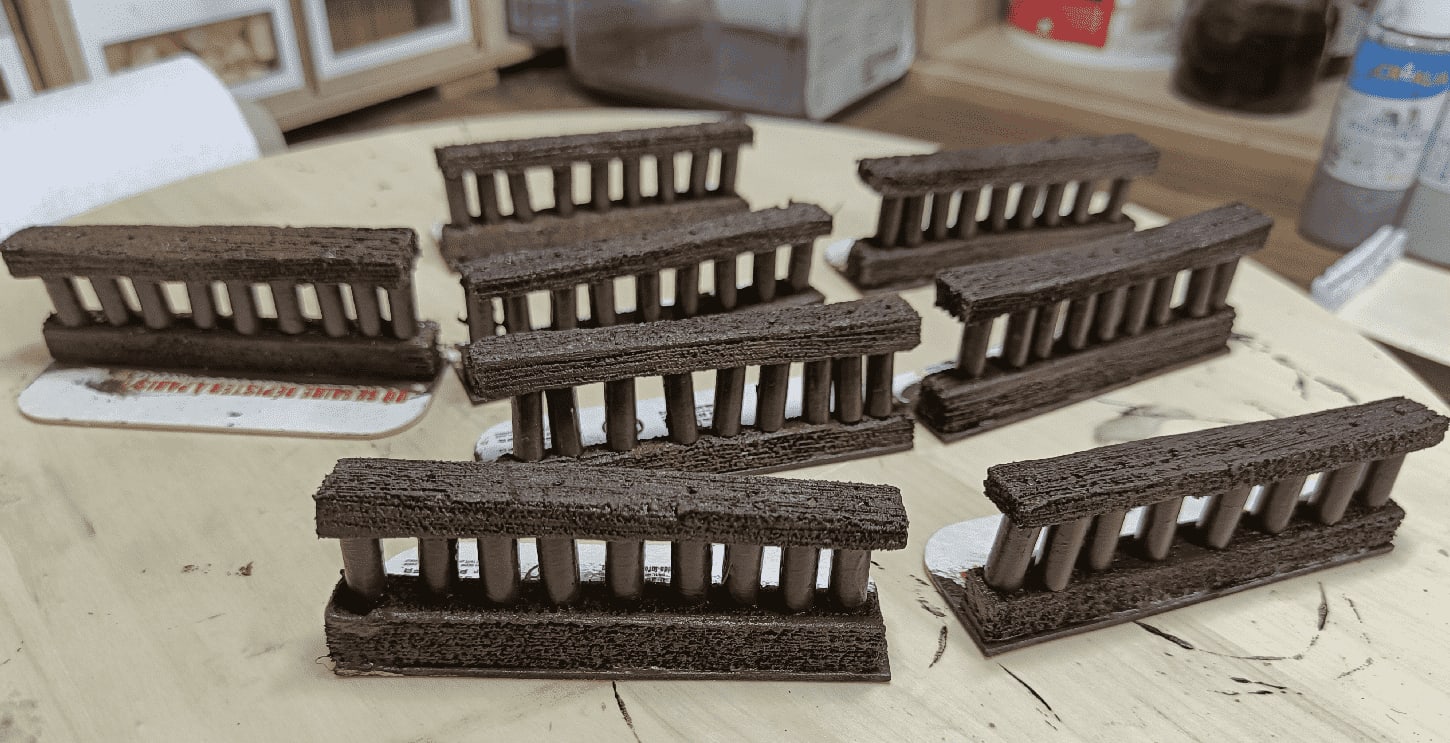
I glued them on some cardstock. I kept a large part on the side, both to ensure they would stay flat on the table, and also to be able to tuck them under existing boards.
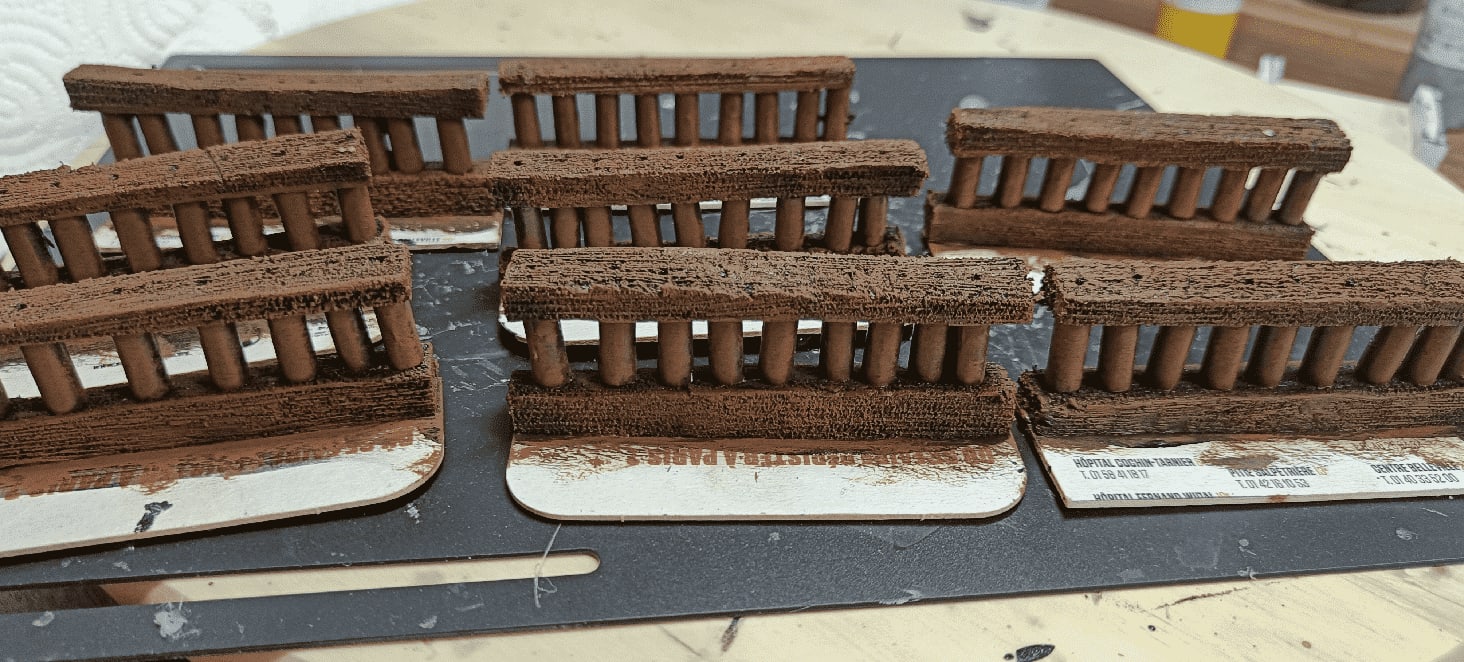
The mandatory second brown drybrush.

The result before the final painting of the bases black.
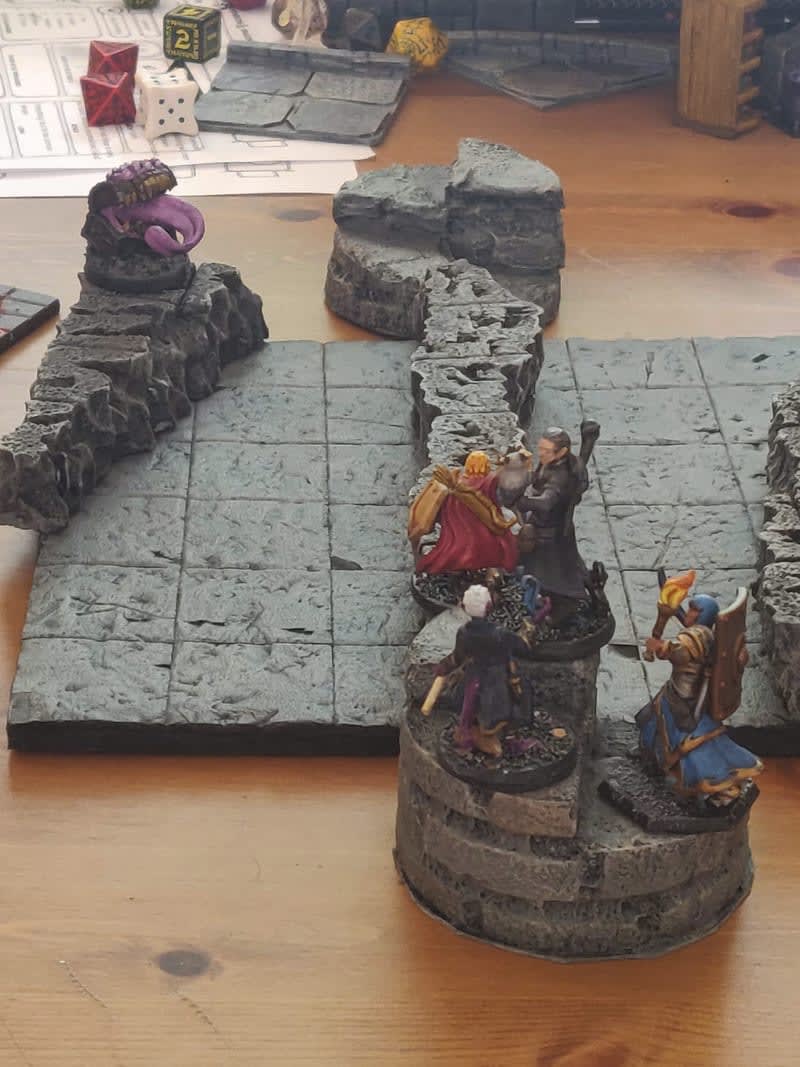
Stone Stairs
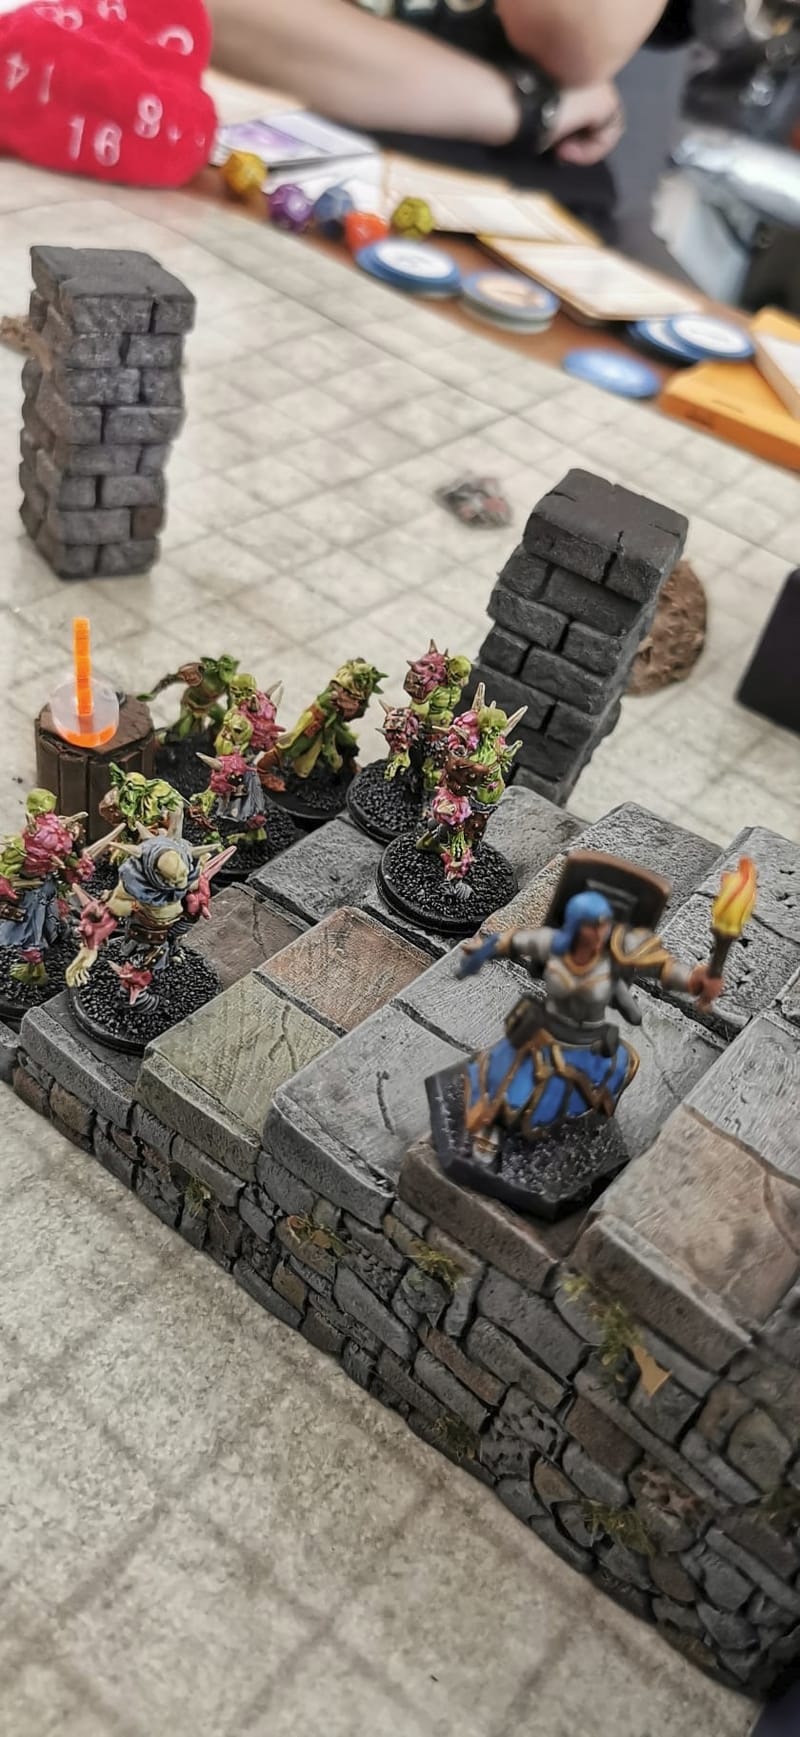
During the final fight, Kyra had to run on a set of stairs to avoid a horde of reanimated zombies. Those stairs turned out to be a great crafting investment, as I have been reusing them in various contexts already.
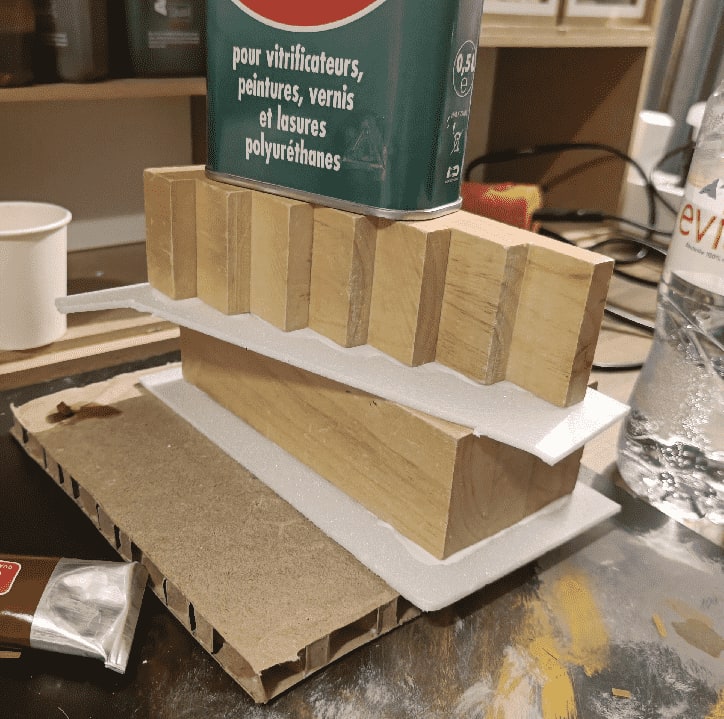
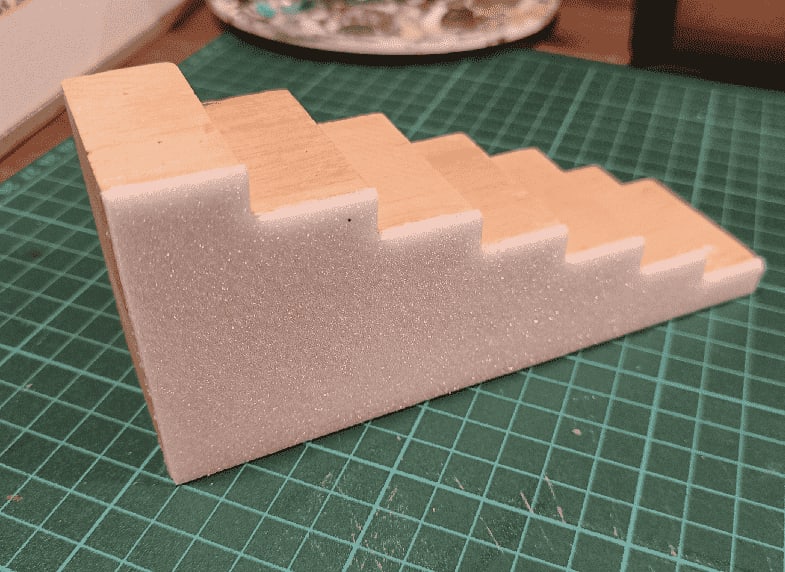
The stairs themselves are coming from a doll house toy I found in a second hand shop, and are made of wood. They are sturdy, well made and I knew they would make a great basis for crafting something more. But the wood itself was too smooth, so I needed a way to make them look more like stone.
I glued on some thin foam layers on the sides. I left it to dry for one night on each side, with something heavy on top.
I followed the wood shape to cut the excess foam.
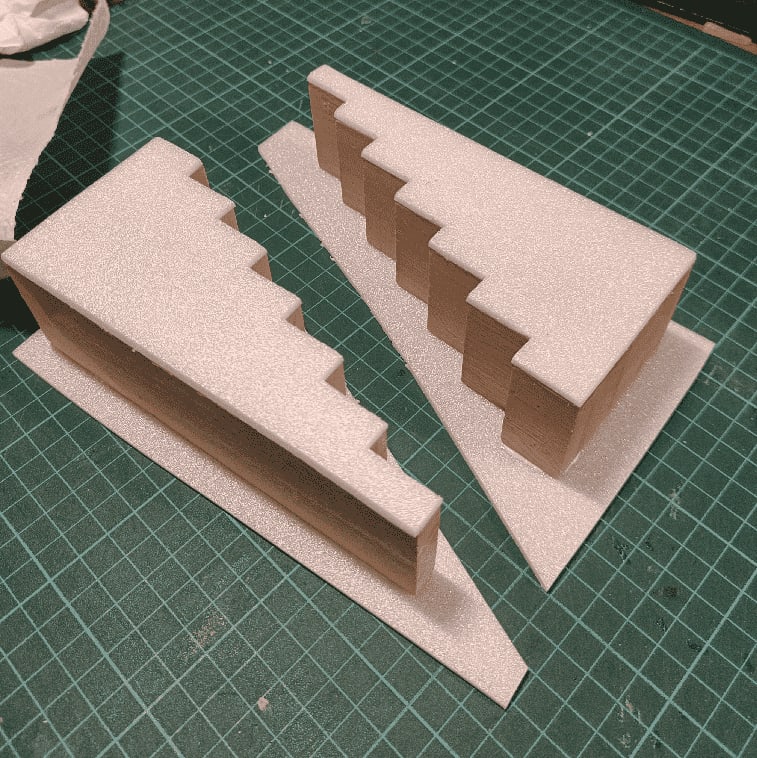
Did the same treatment on the other side.

I then used a dremmel tool to split each step in two. I also tried to add some random cracks.

I wasn't very happy with the result of the dremmel on the first stairs, so for the second, I glued some more foam on the steps.

Once cut to shape, I drew on some stone patterns on the side with a pen and a knife.
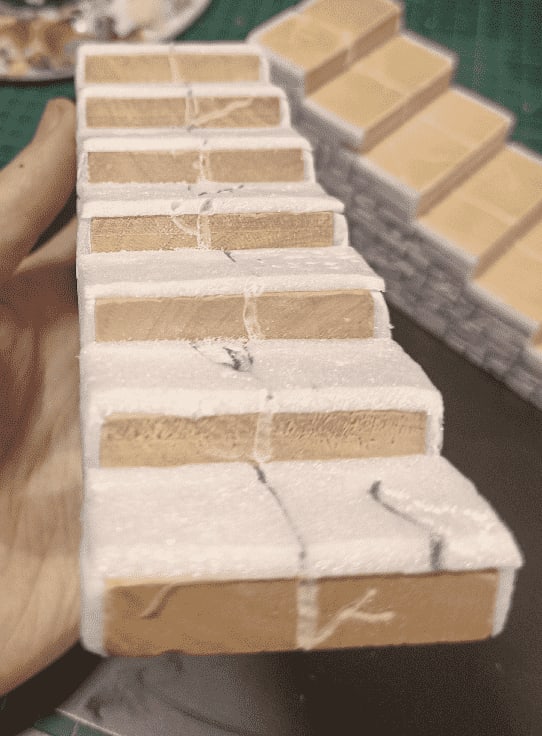
I still used the dremmel to carve a separation in the middle of each vertical step; otherwise it broke the illusion.
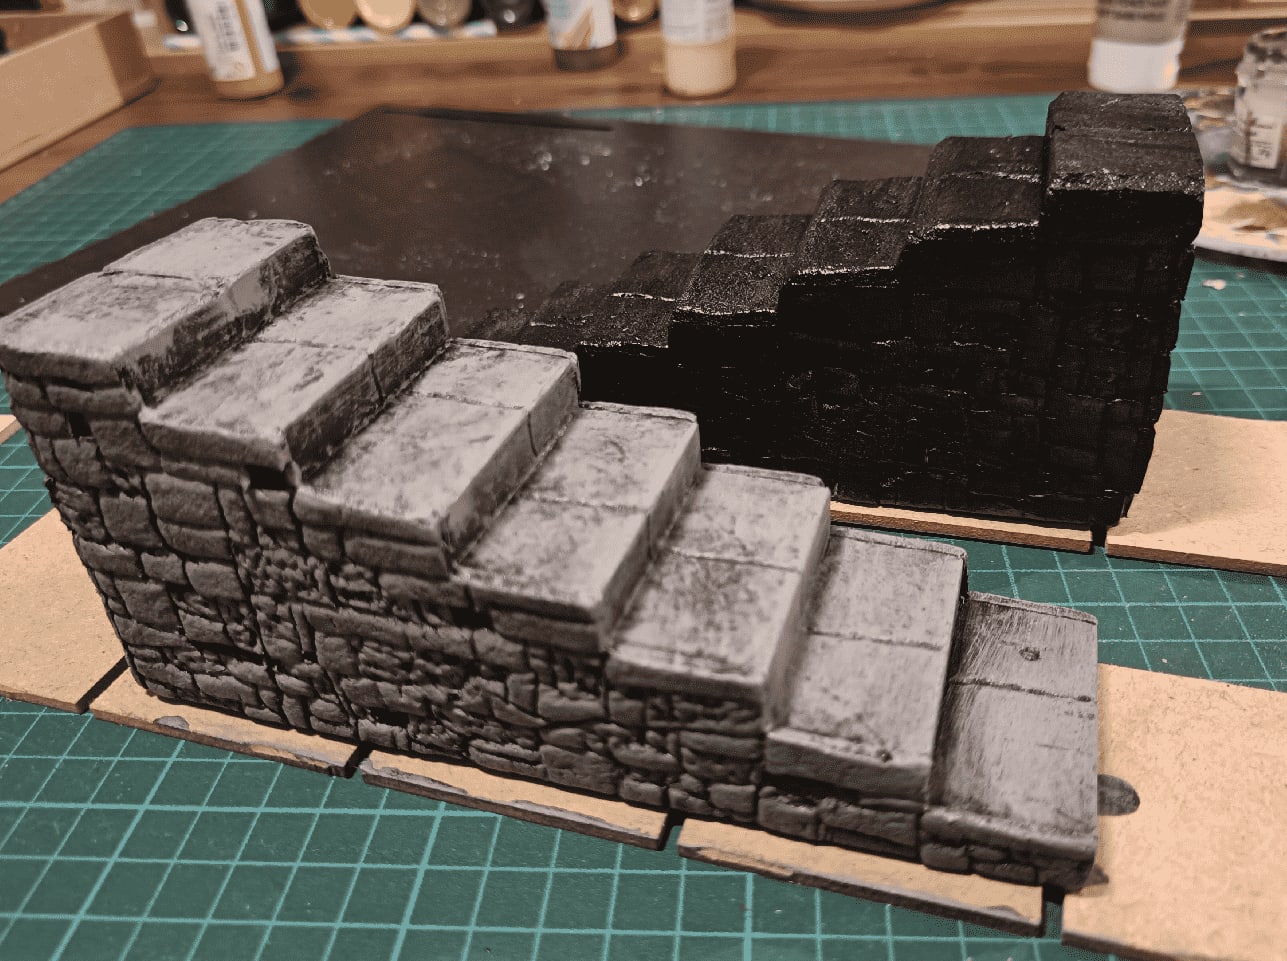
Once painted black, and one with the first drybrush.

Only one drybrush on the back, and a second lighter on the front. The back one really looks rough, the second drybrush brings it to life.
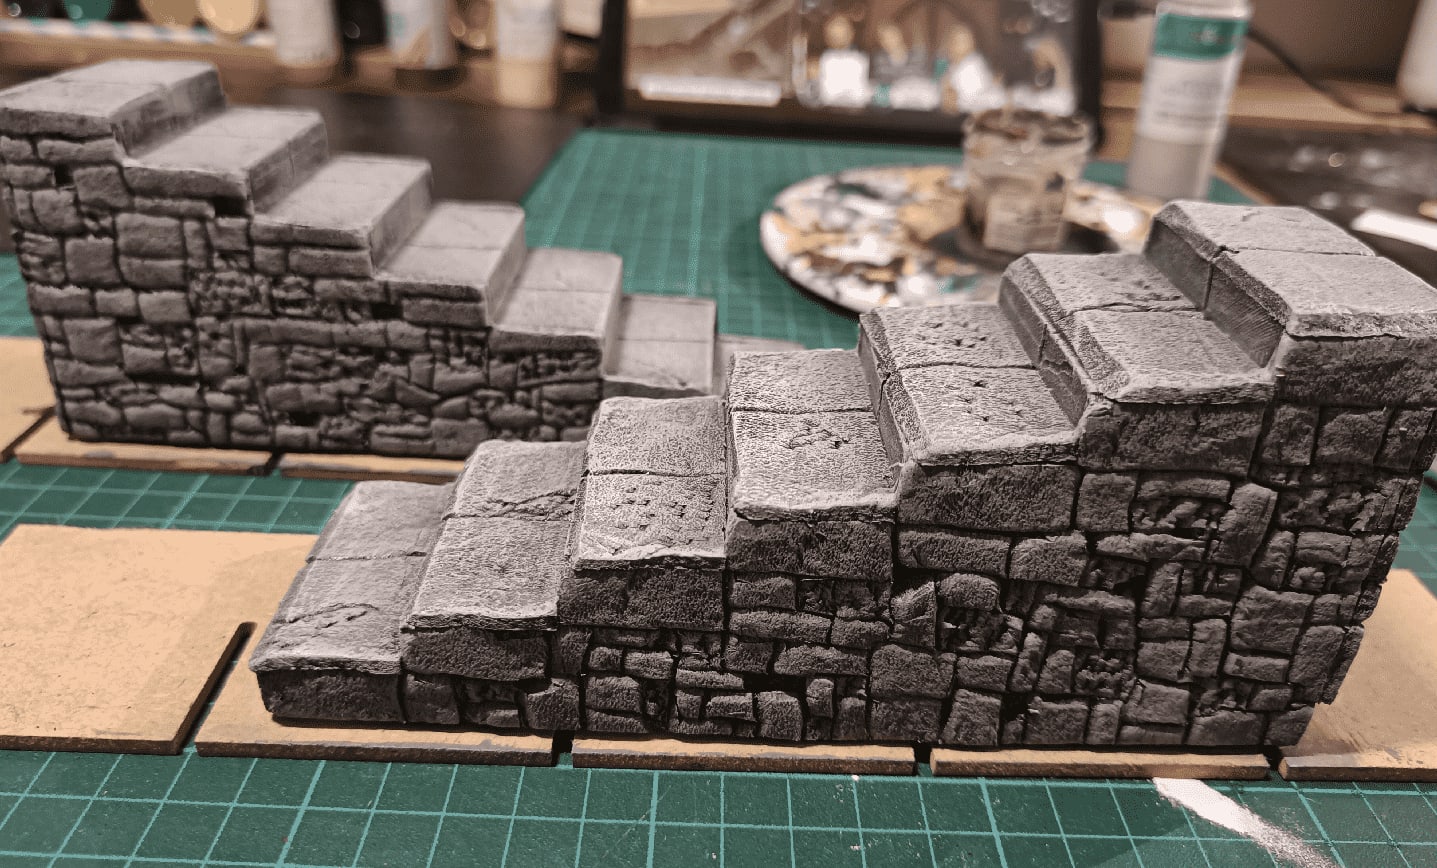
I even did an even lighter drybrush, on the edges here. It makes it pop even more.
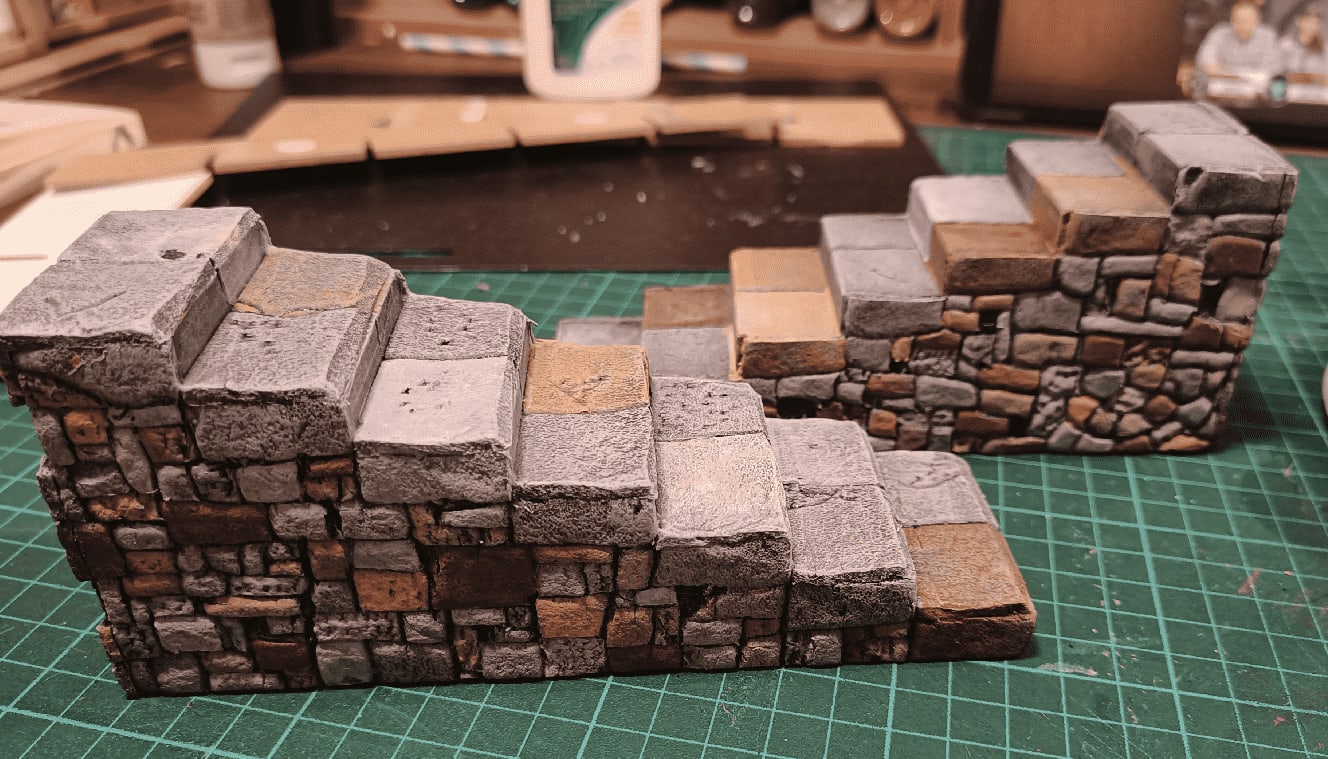
But it was a bit too gray, so I painted individual stones in various earthy colors, using highly diluted paint.
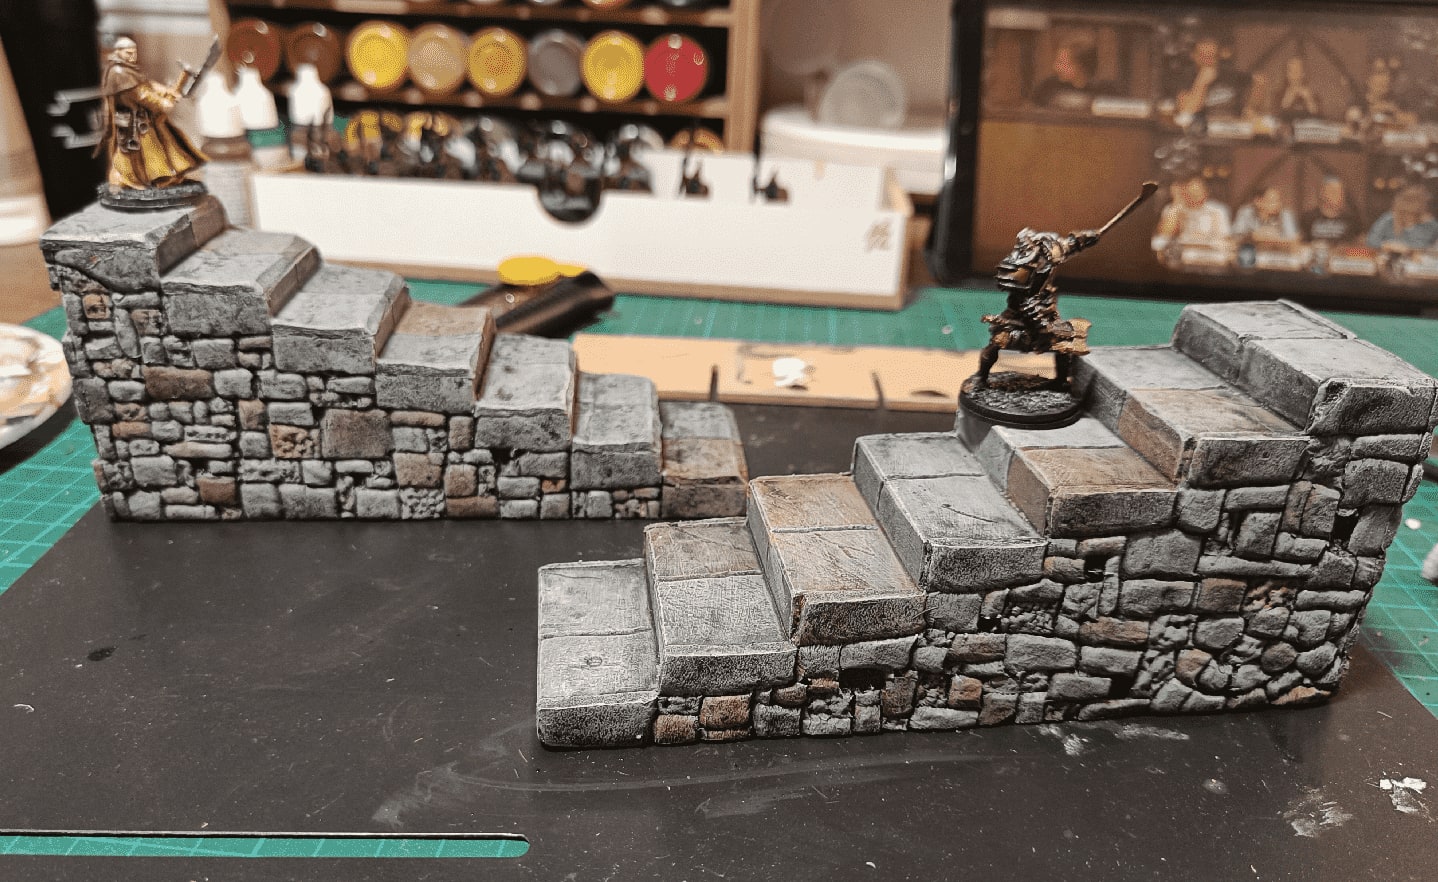
I then added a black wash on top to blend it all together. Last step was to add some flocking on the sides.
Stalagmites
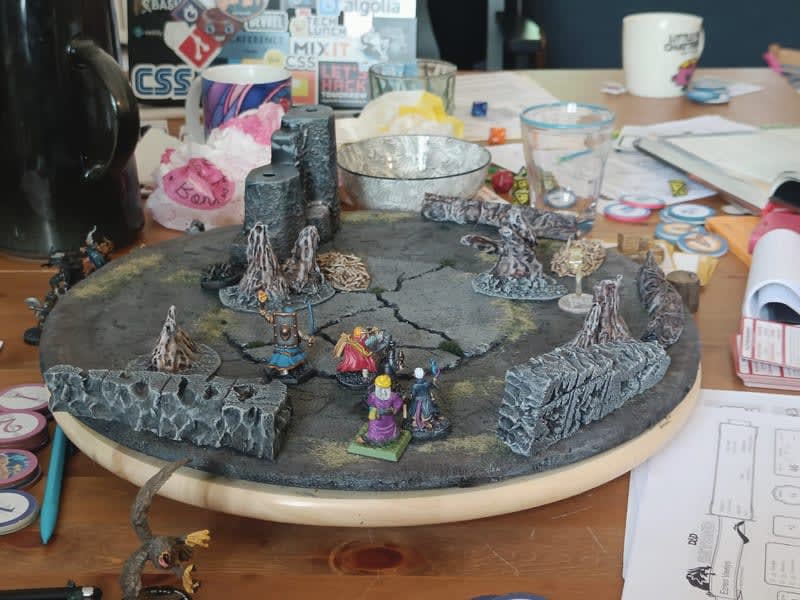
When they took a rest in the underground caverns and got attacked by a Roper, I used some Stalagmites to add some interesting dressing to the scene.
This was my first attempt at crafting them. I think they are a first good attempt (I didn't throw them away), but they can definitely be improved.
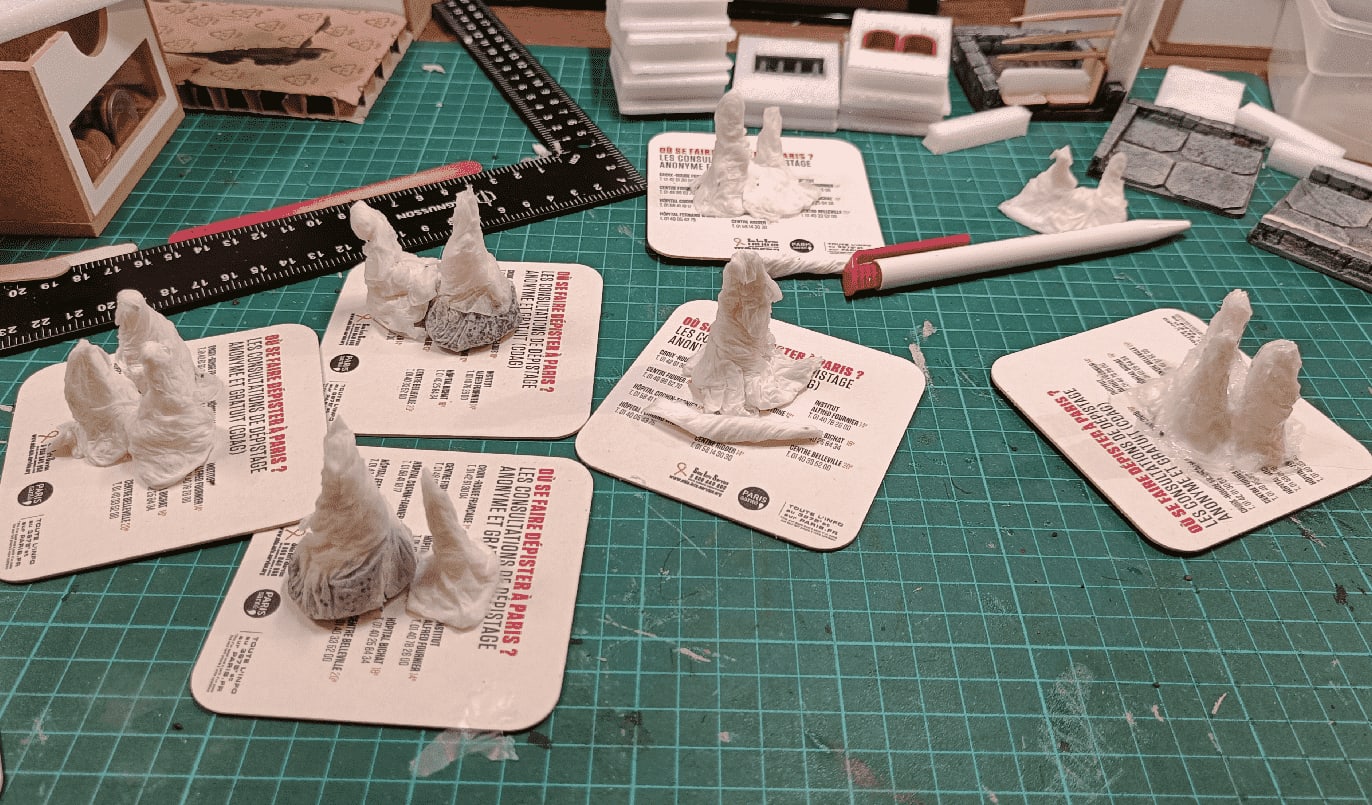
The core of it is made of paper towels that I dipped into a mix of water and wood glue, then tried to sculpt into shape. For some of them I even added gravel at the bottom, to give them some weight, but it turned out to be a mistake as the gravel was leaking while I was handling them.
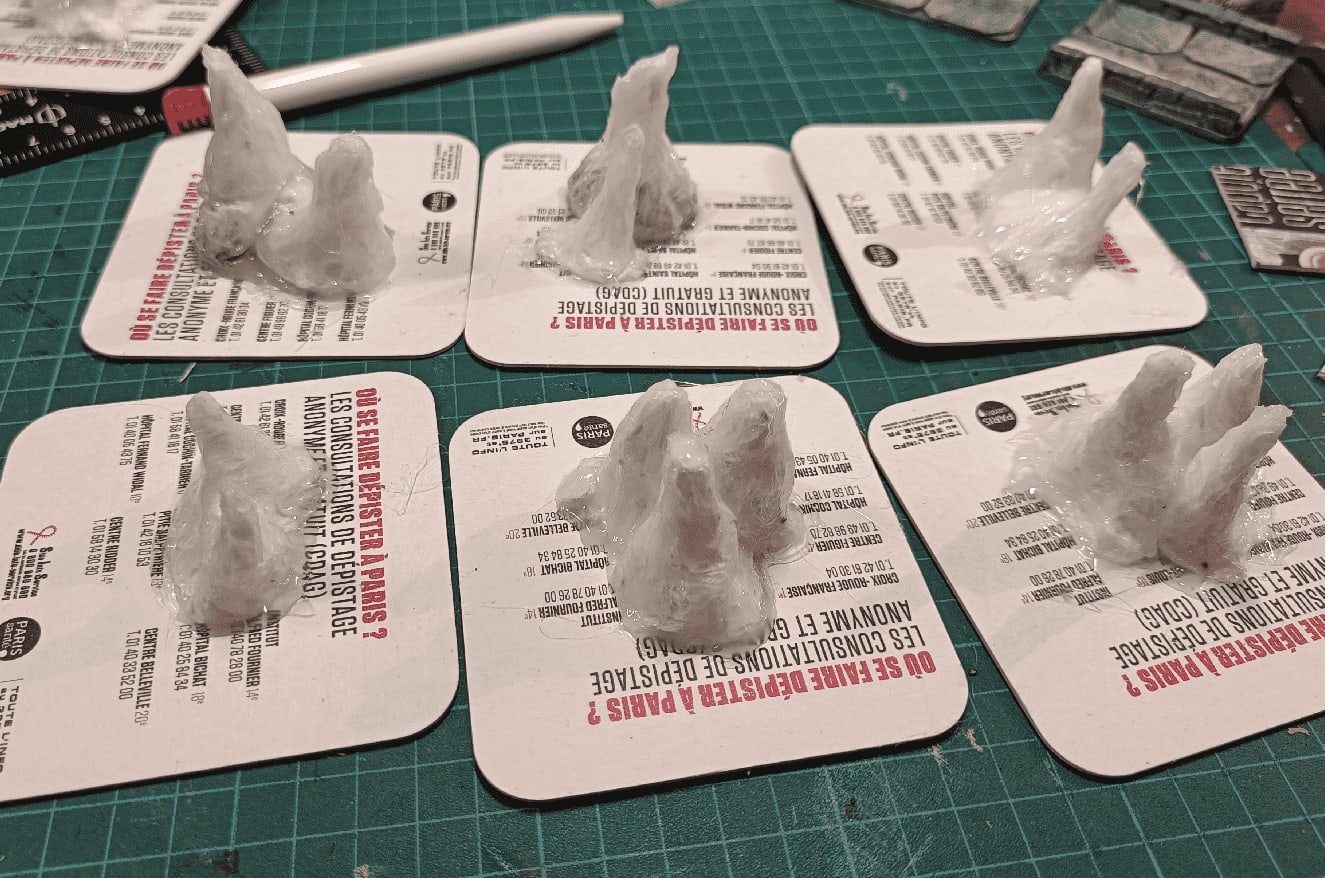
My crafting bench is in my basement, which is slightly damp and so it took forever for them to dry. Honestly, they stayed wet for more than 48h, until I decided to move them outside for faster drying. And they dried in about 4h there.
Finally, I covered them all with a fine layer of glue (from the glue gun), to protect them and give them some texture.
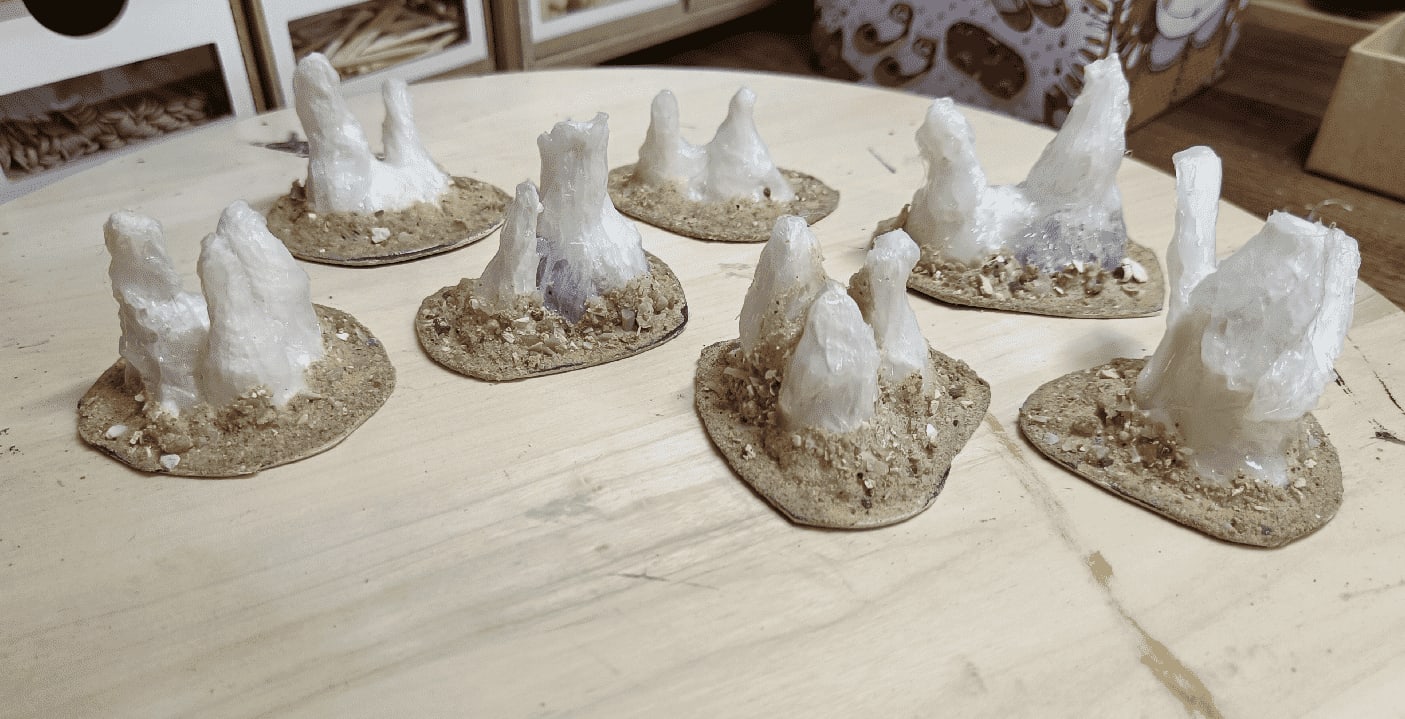
I did the base, with sand and small rocks.
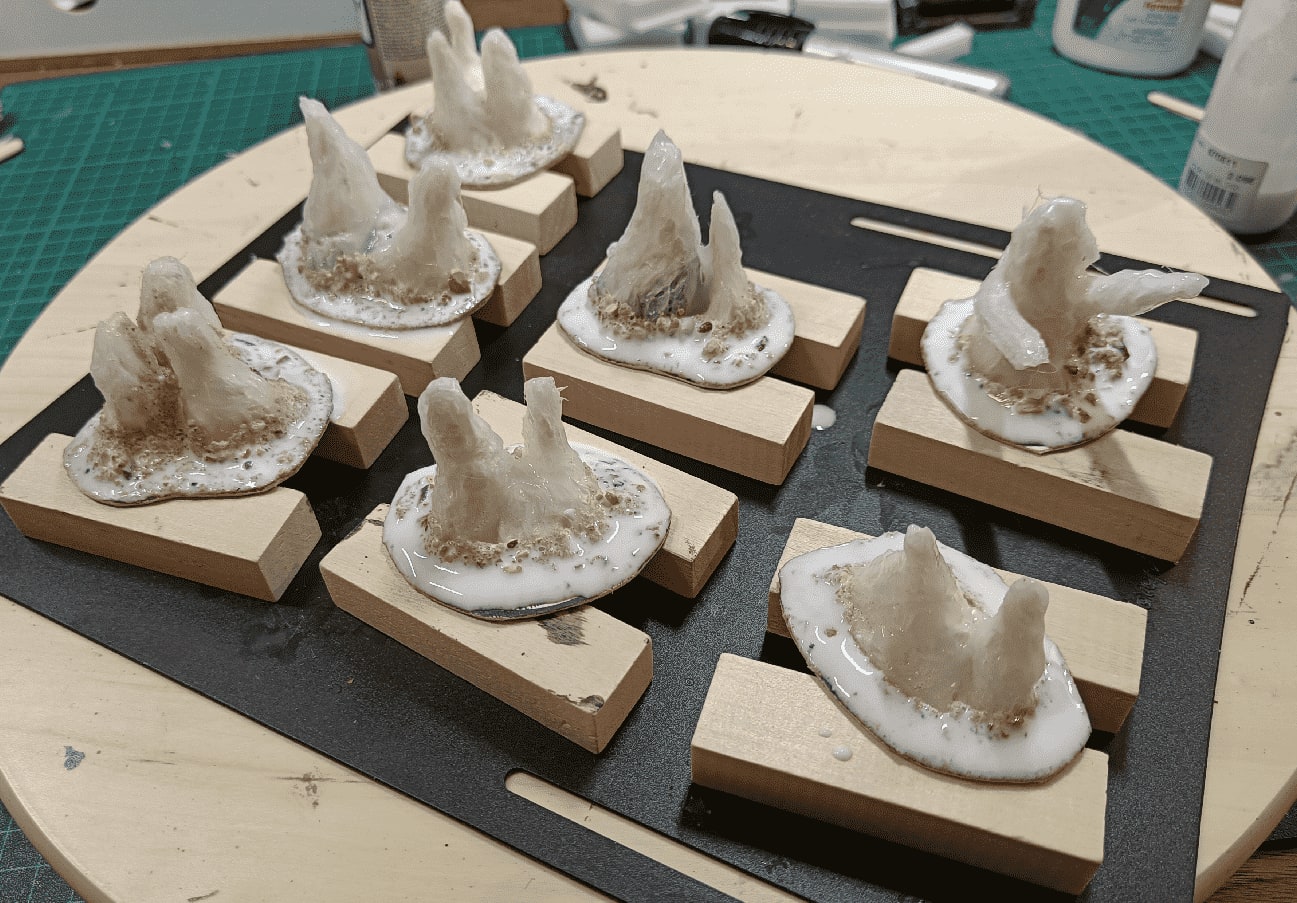
Sealed the bases, with more glue and water.
And started painting.
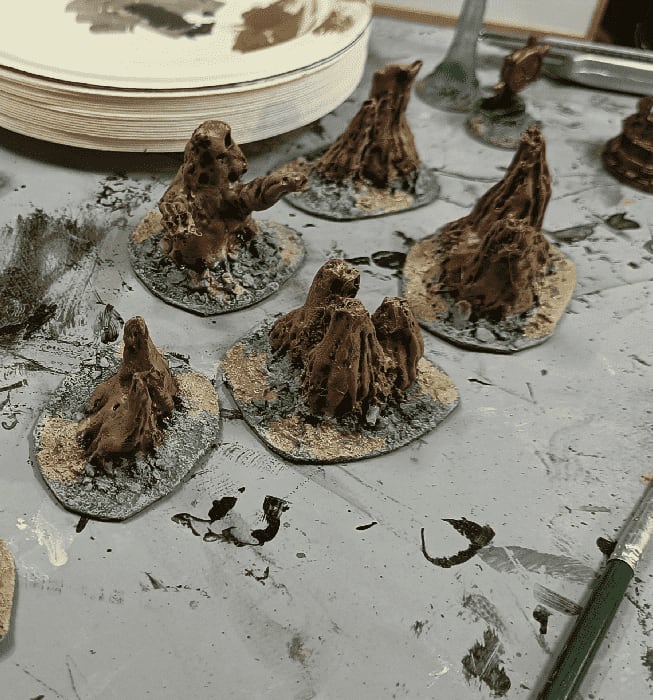
I wasn't exactly sure what to do with the paint scheme. I didn't want them to be full gray, as it would be to monotonous with all the other gray-only pieces I have. So I went with some kind of brownish red. Still not sure what I should have used.
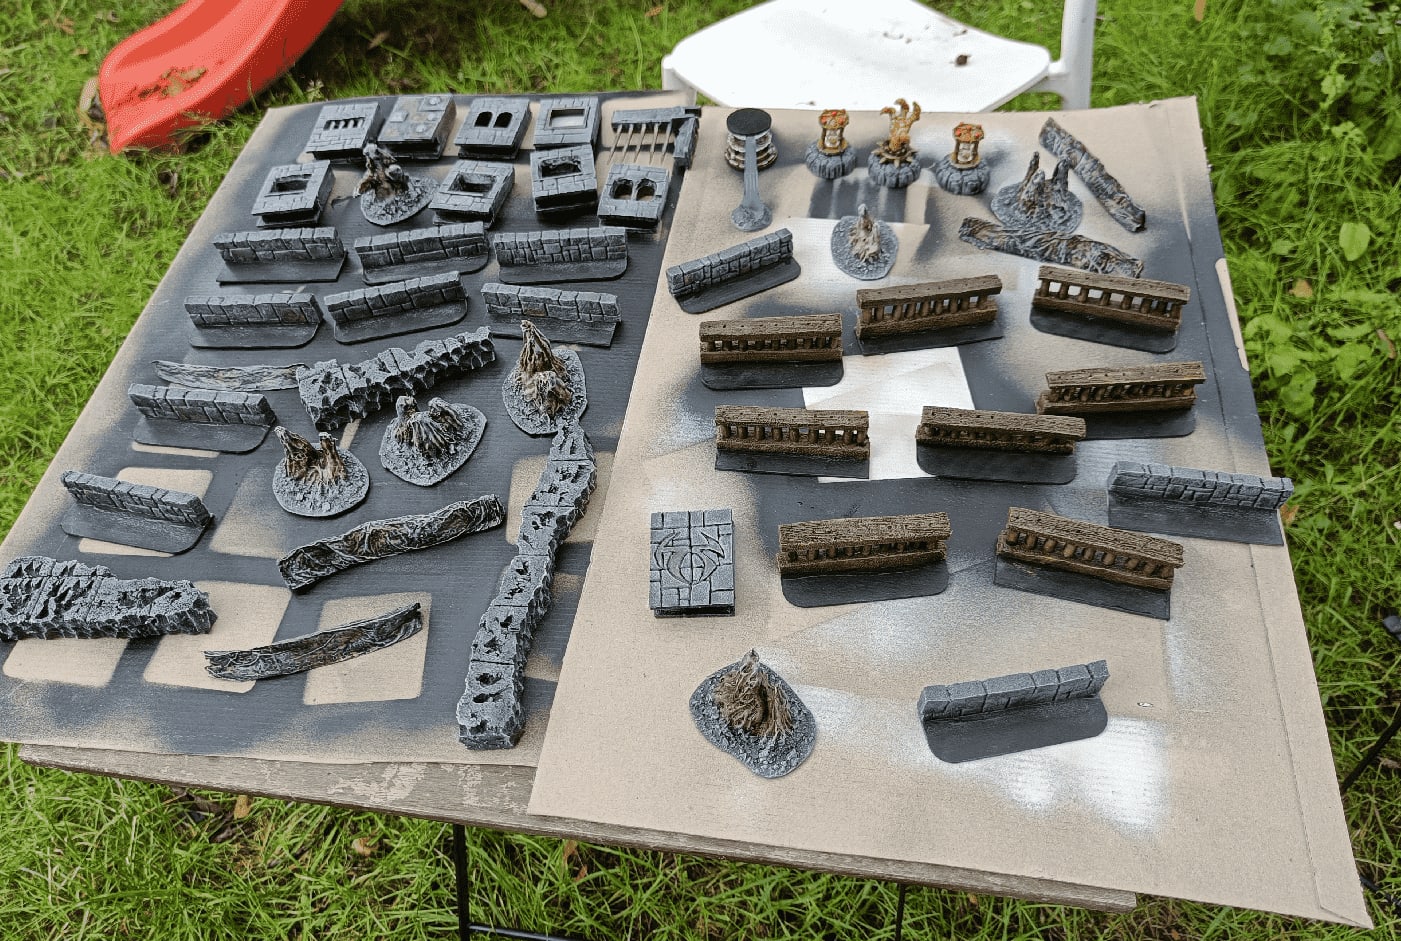
Just for fun, here is a picture of what my crafting looked like at that time. There was a lot going on, from walls to windows to railings to stalagmites to rocks to props.
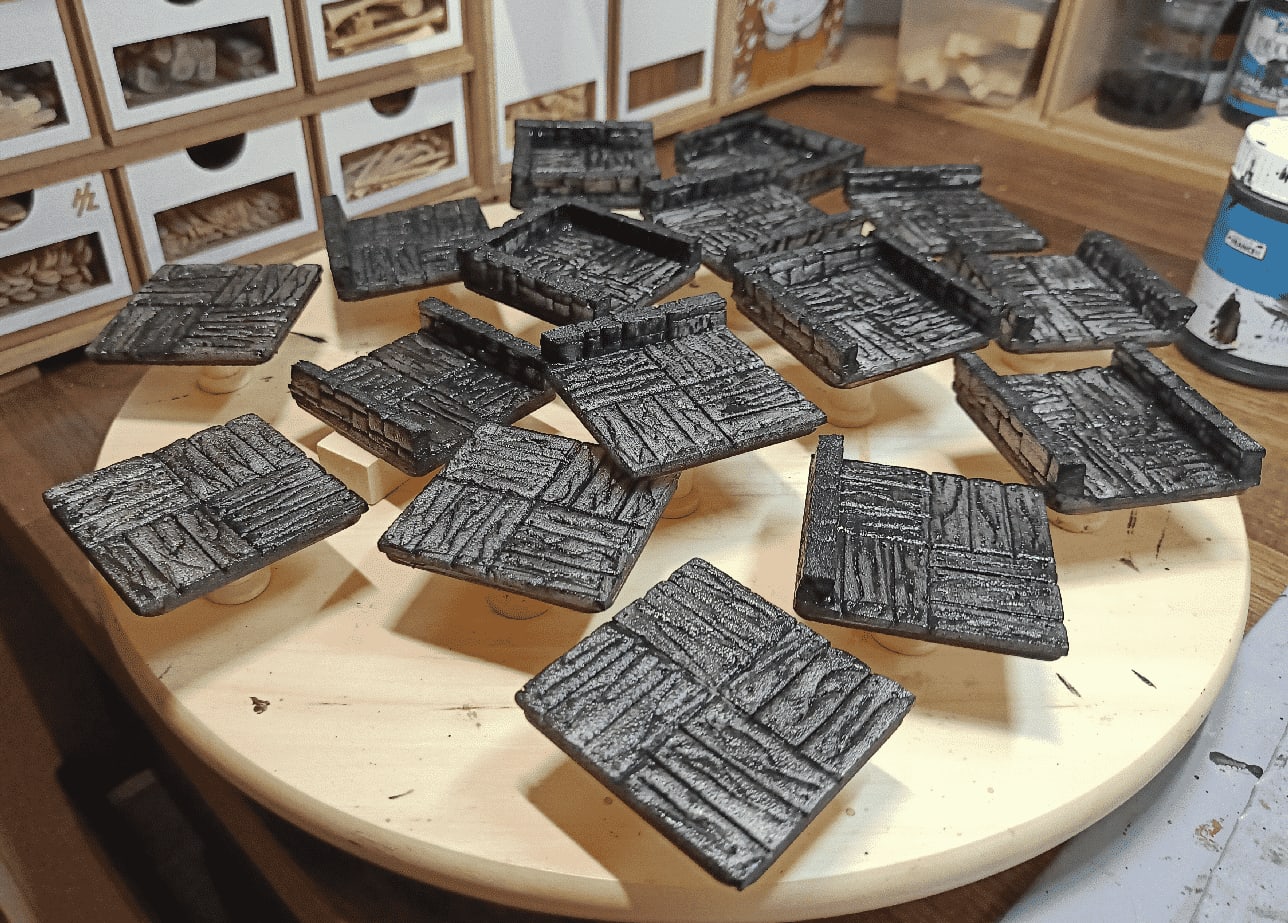
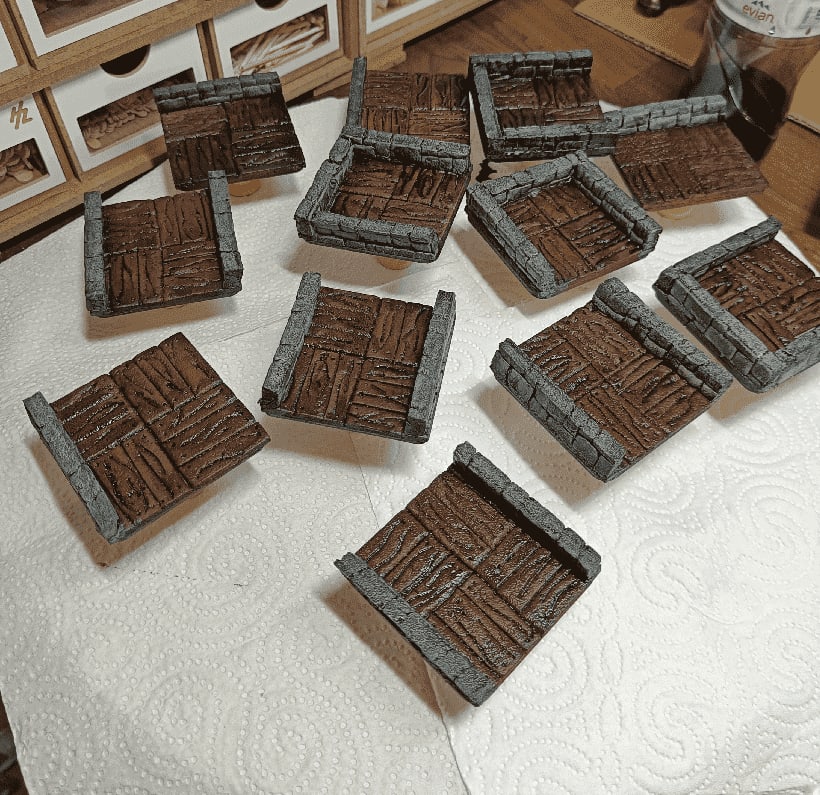
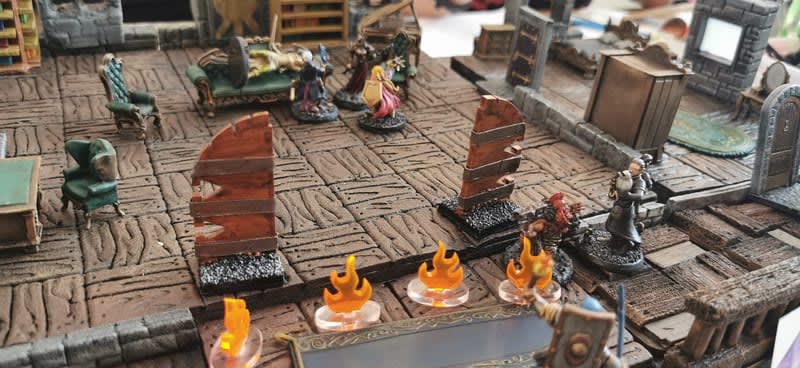
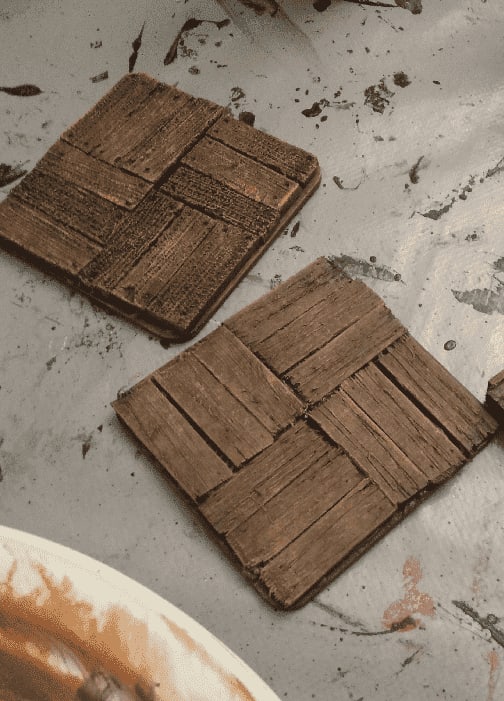
Dungeon Wood Tiles
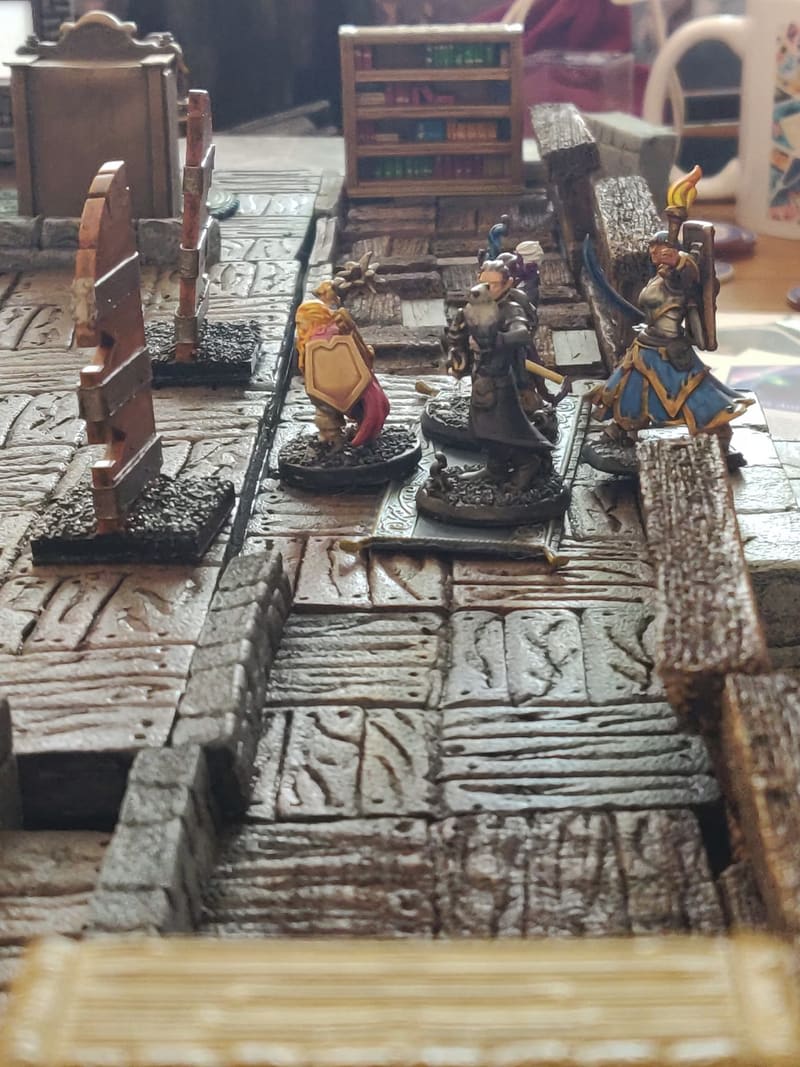
Large wood floor boards are great, but sometimes I need something more modular, a bit like Dungeon Stone Tiles. Like here, I needed a way to represent a balcony, so I set up to work on wooden tiles.
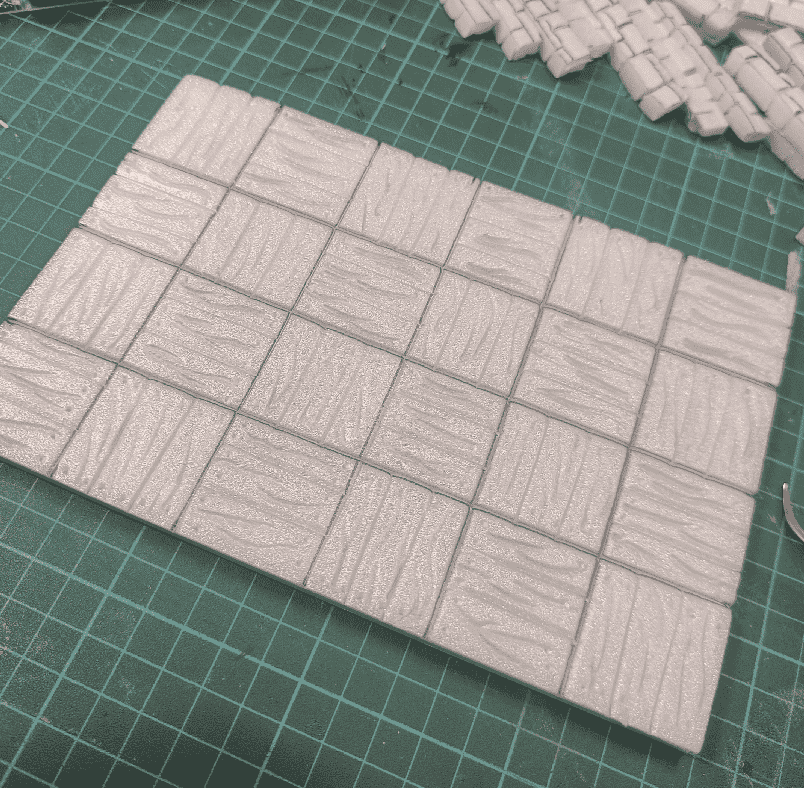
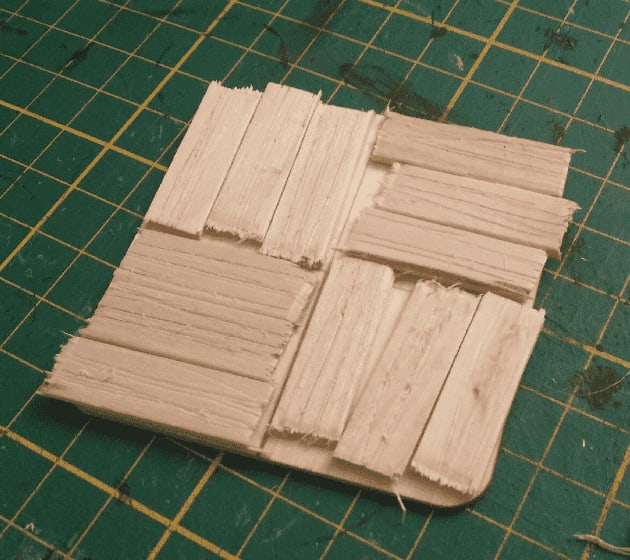
I started by gluing my wood squares to a sheet of foam. I had traced with a sharpie where the wall should go. Gluing the squares to the foam allowed me to perfectly trim them, so they were perfectly squared.
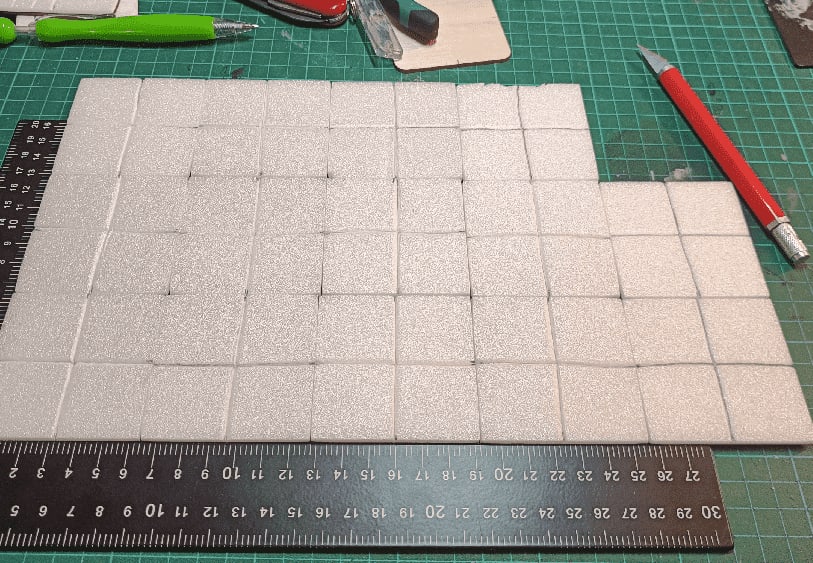
I then carved a cross in it, to separate each movement square.
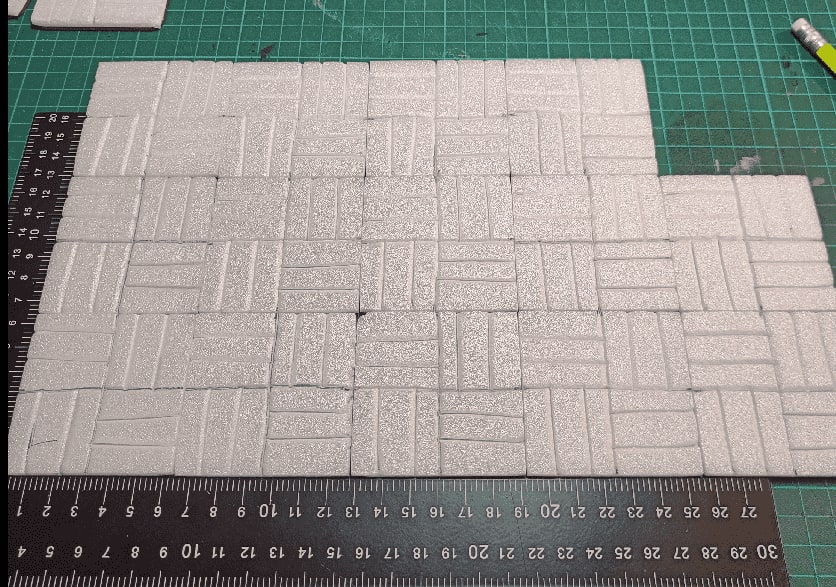
And carved them with planks, alternating the side. I picked that the lower left corner was always vertical, and stick to it for the whole craft, allowing me to arrange them in any shape and always have alternating directions.
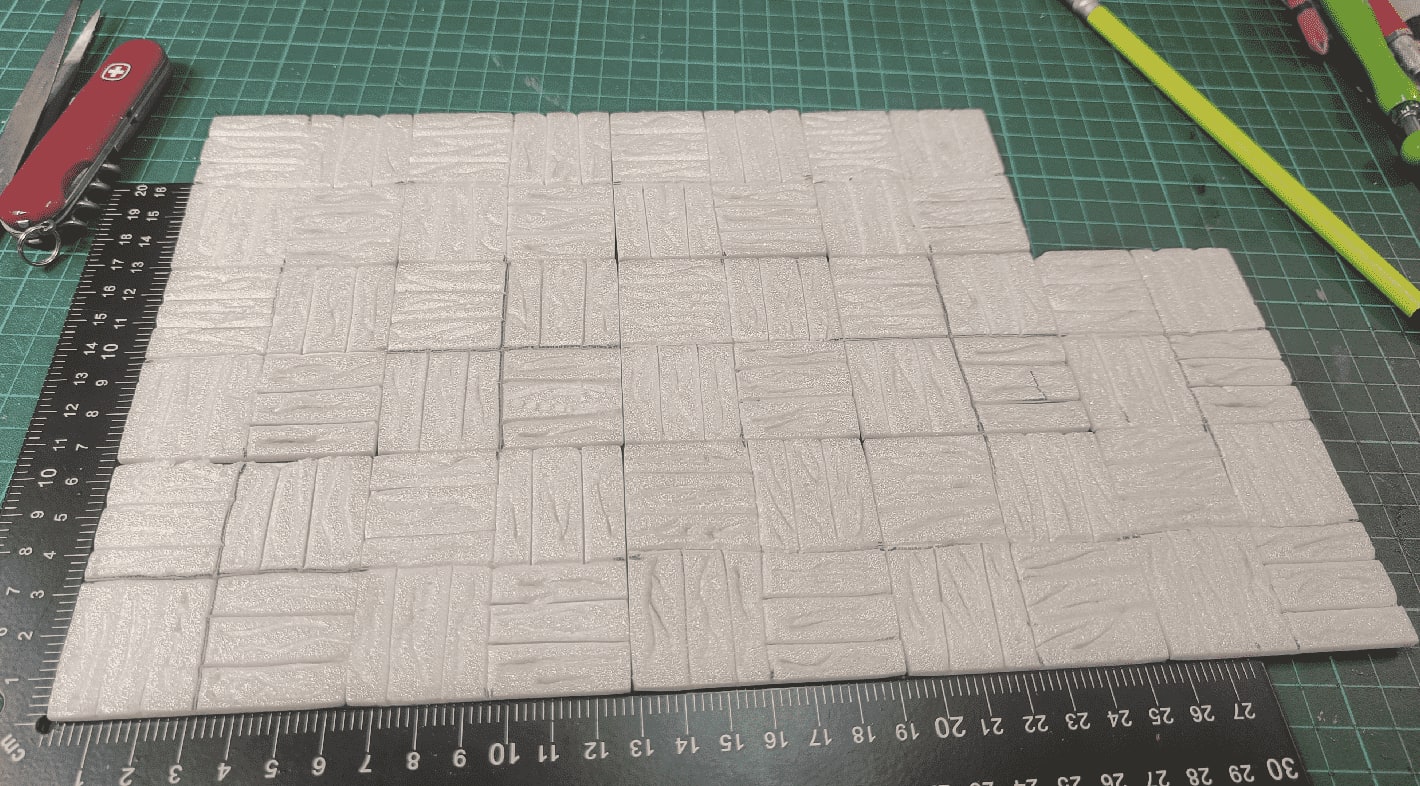
I then manually carved squiggly lines on each plank, to symbolize the wood grain.
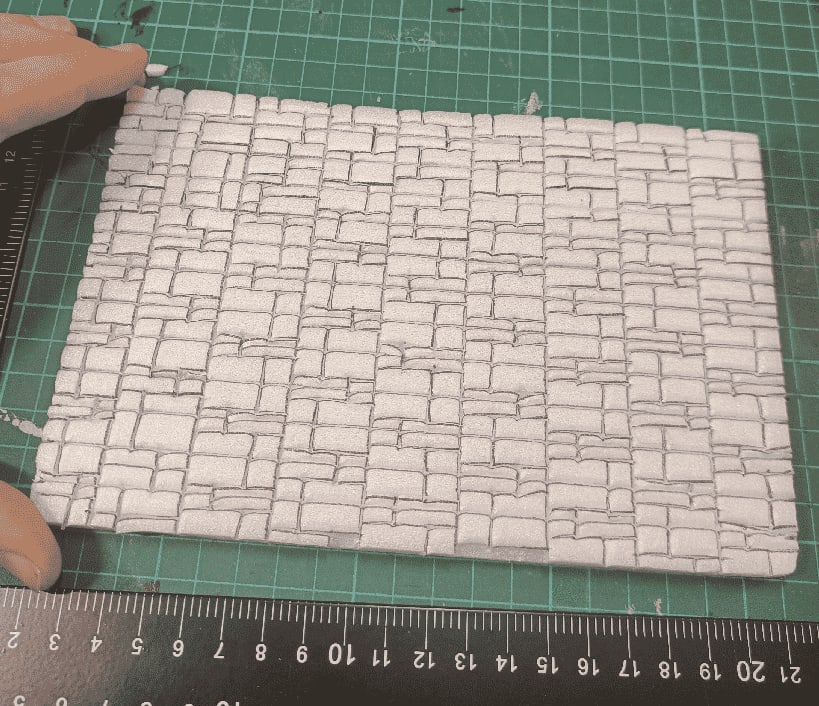
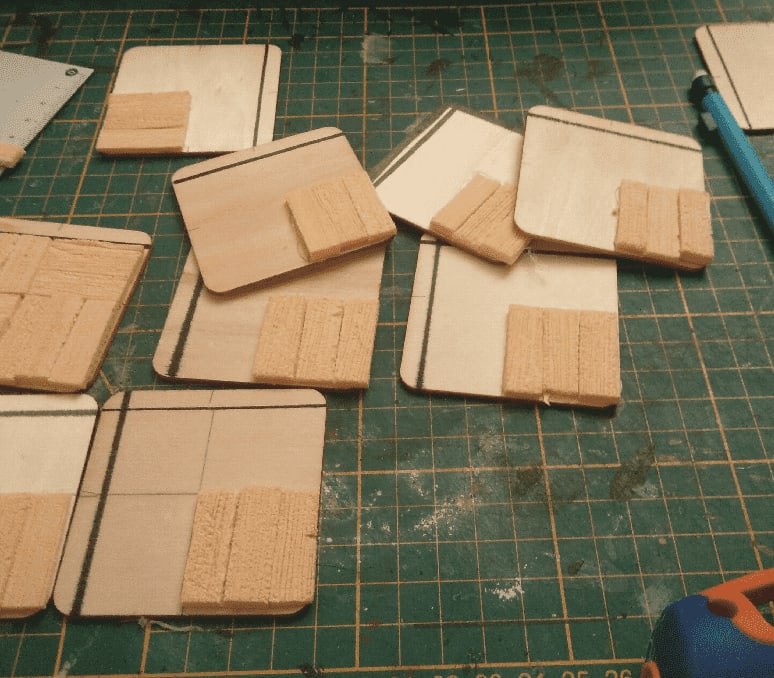
For the walls, this time I was more clever than last time and I carved the brick pattern on the foam sheet before cutting it to strips, which makes it way faster.
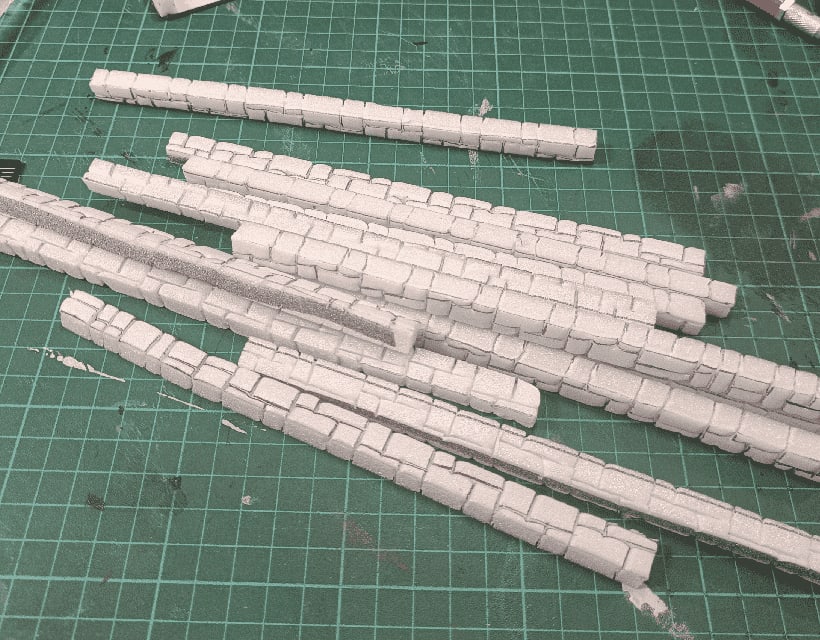
Only then did I cut them into long strips, continuing the brick pattern on the top face.

I then cut them into smaller strips, and continued the brick pattern on the sides.
I used a pin to create holes at the top of each plank, to simulate nails.
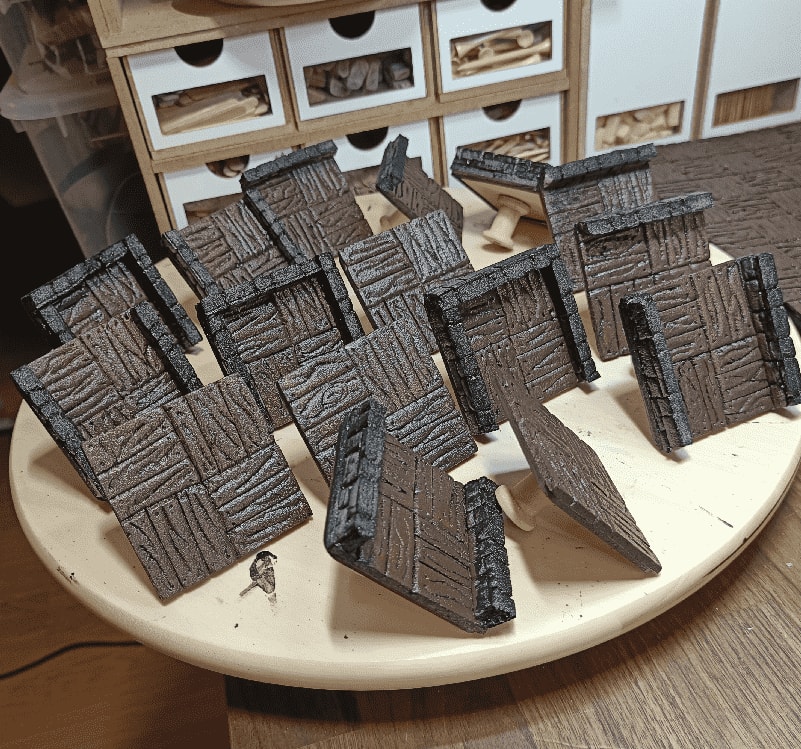
And I started gluing it all together. The walls overflowed on some sides, but I just then had to trim the excess. It's much cleaner than way than trying to cut the wall to size before gluing.
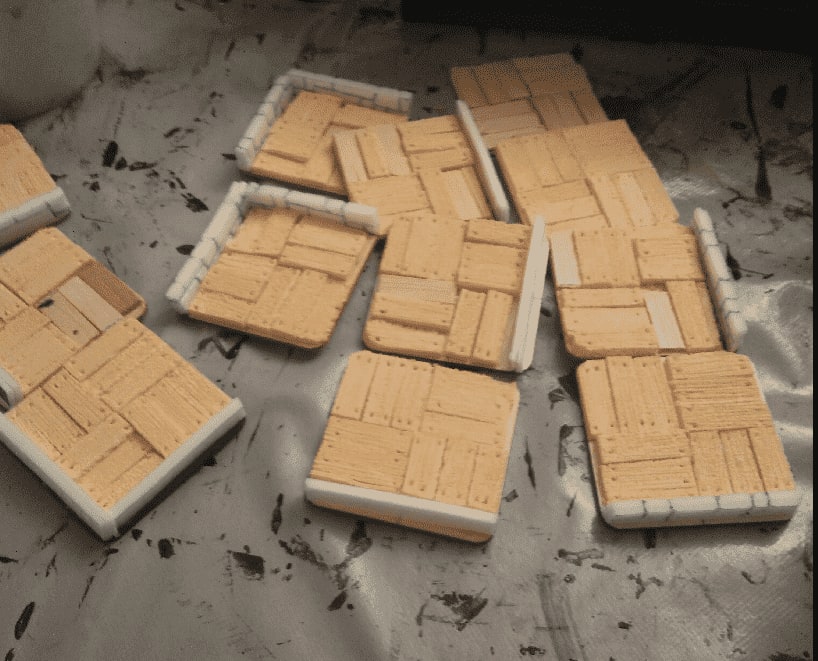
First layer of black modpodge.
Painting the wood in a dark chocolate brown.
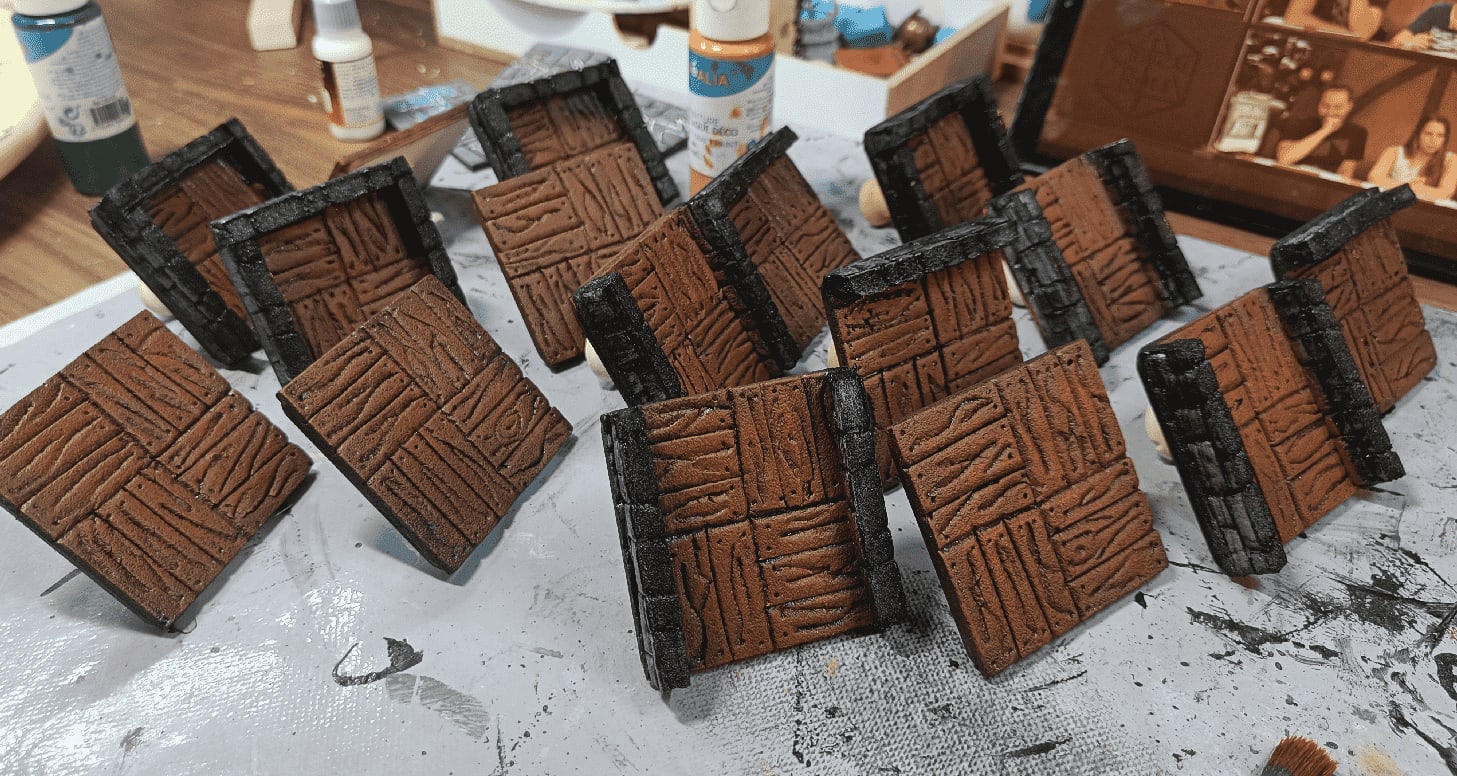
Then a lighter brown drybrush, mostly in the middle. I tried to avoid touching the walls.
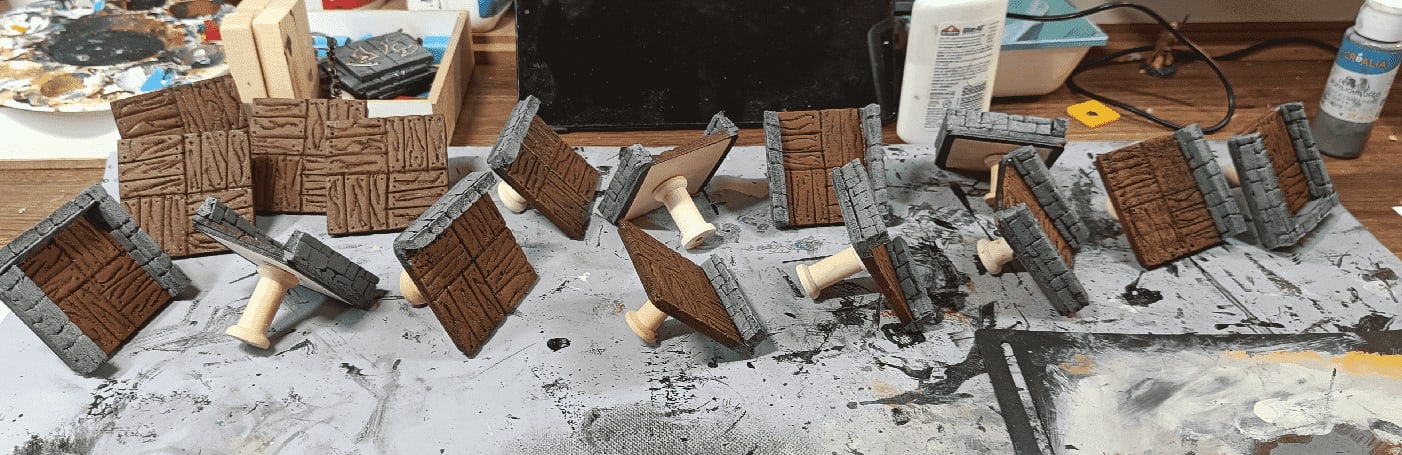
I then painted the walls.
And applied a liberal amount of wash on the pieces.
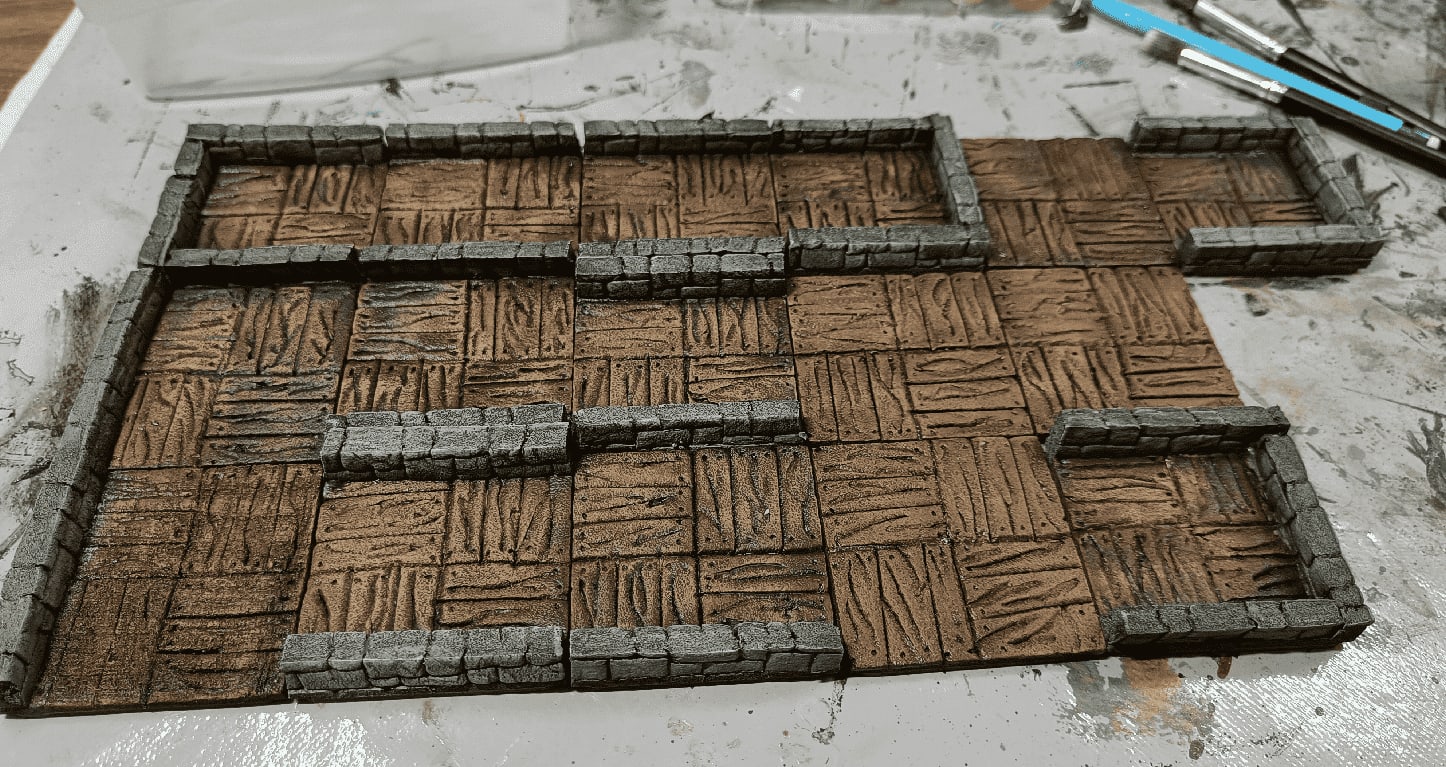
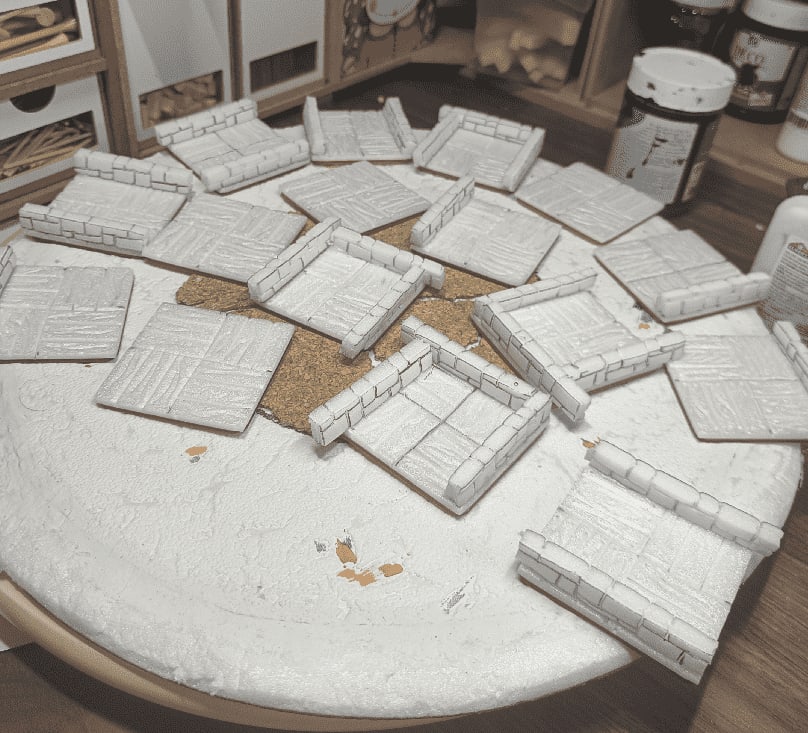
Test fit to see if it works. Looks good enough for me.
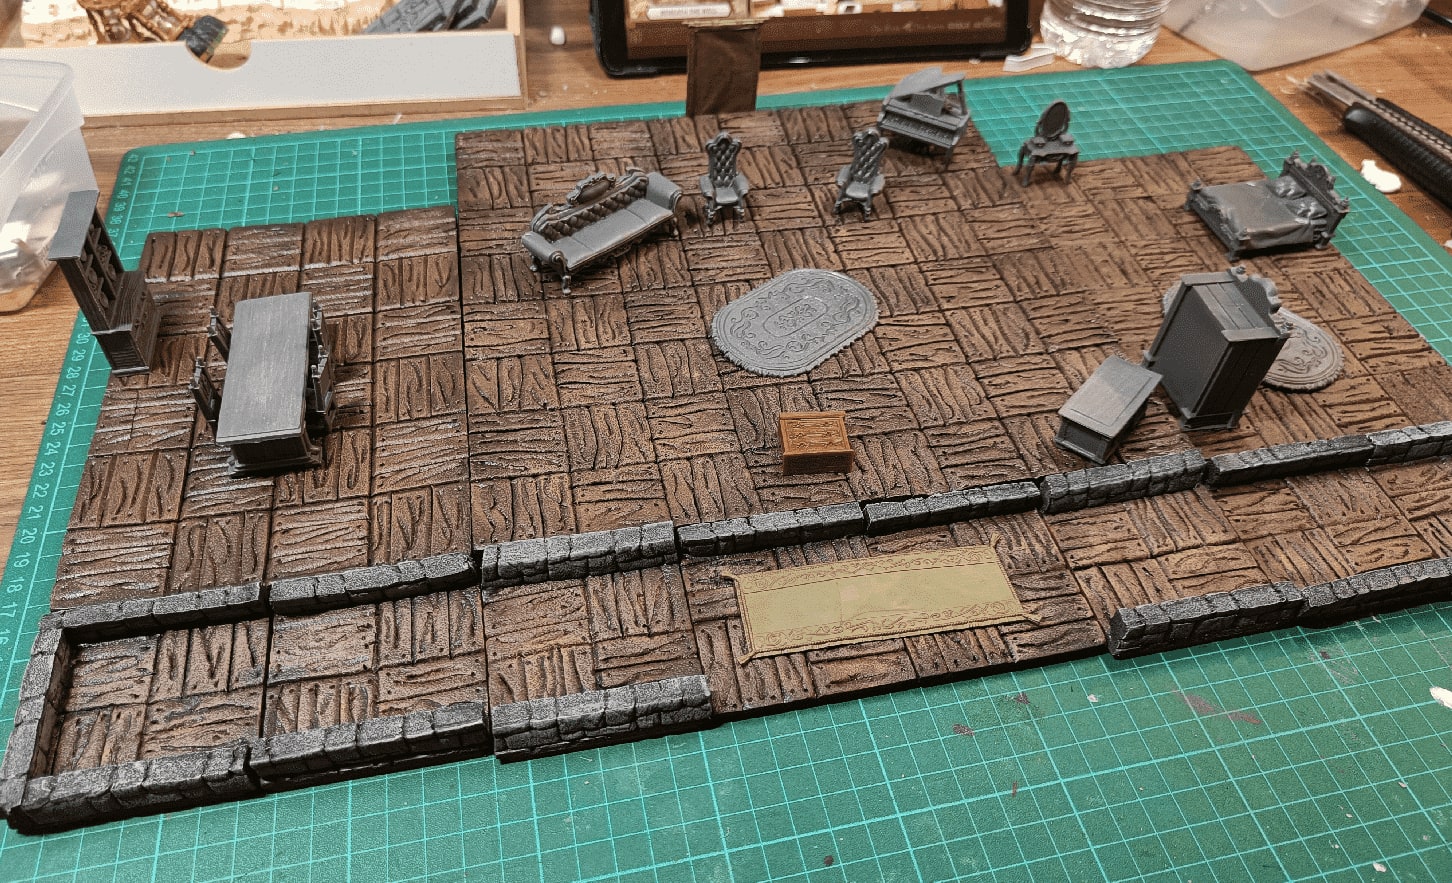
And checking with my larger floor boards. The paint scheme is similar and they blend well together.
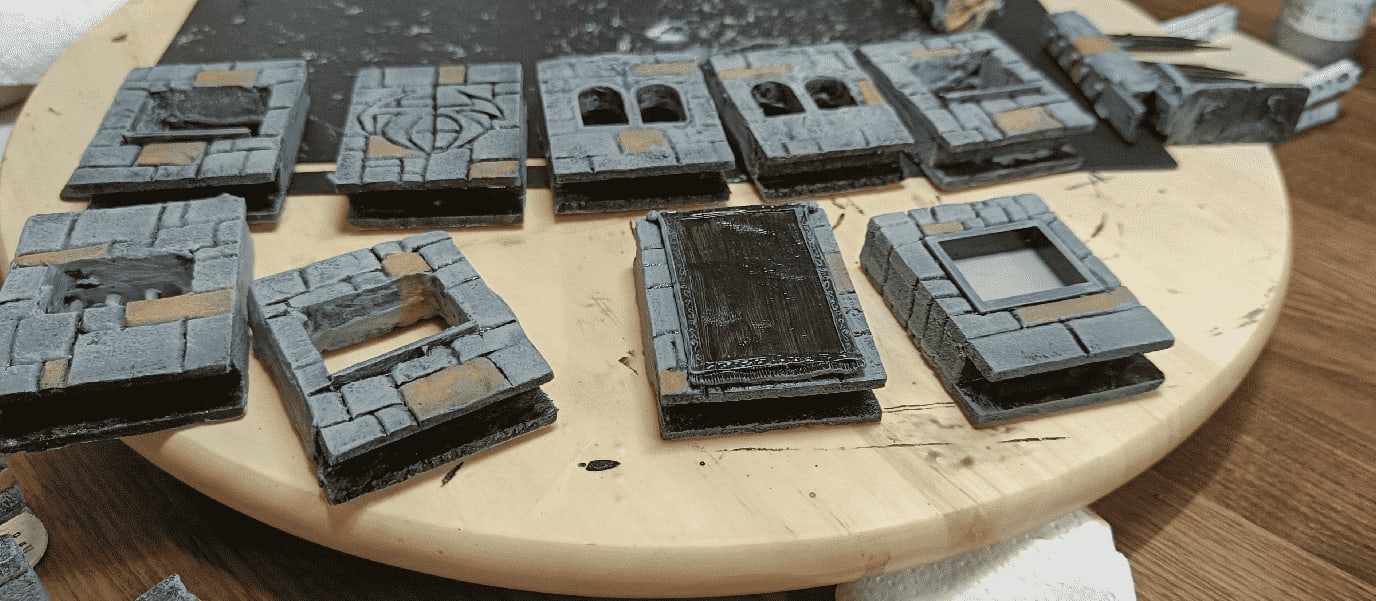
Clip-On Windows
The fight against their evil twin took place in a Mansion, and I wanted a way to visually symbolize the walls. I wanted a way to differentiate between the inner walls (separating two rooms), and the external walls (separating the mansion from the outside).
For the inner walls I made small half-height foam walls, and for the external walls I crafted some higher walls that I could clip on top of the small ones (original idea credit goes to Wyloch, even if I used different materials and dimensions).
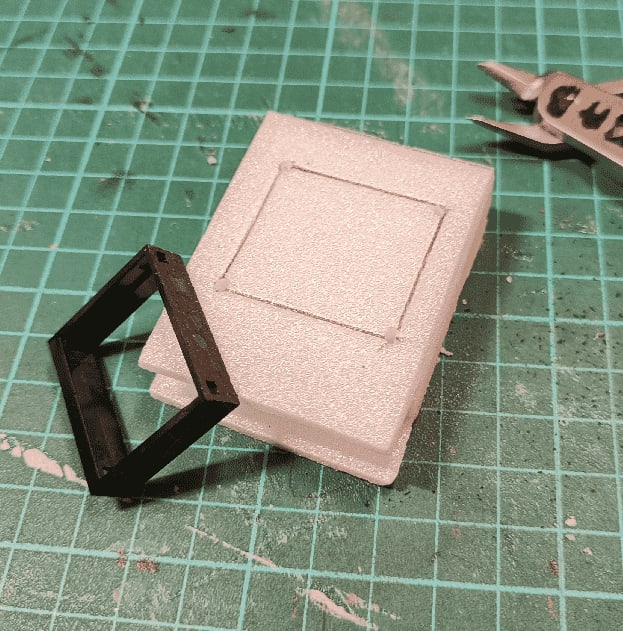
I started with a foam frame cut into the same foam sheet that the one I used for the half-height walls. Then I glued on some thinner foam on each side, and let it extend at the bottom. That way I was 100% sure that the spacing between the "legs" was exactly the width of the walls, as they were coming from the same original foam sheet.
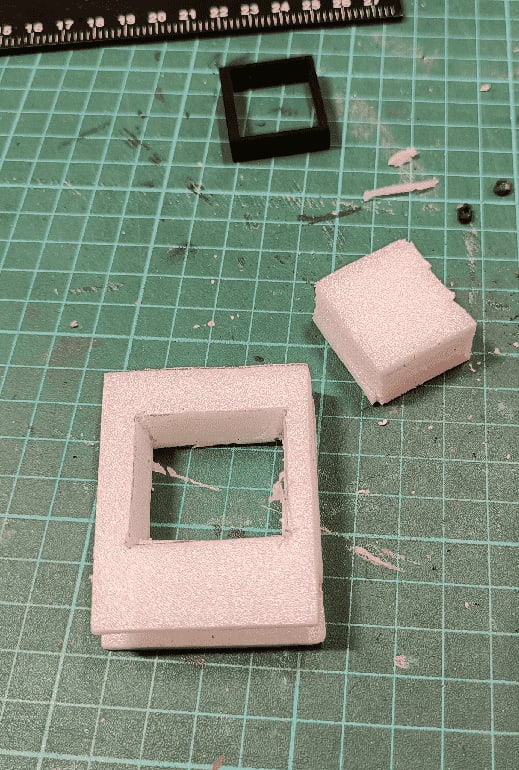
To do windows, I then cut out the desired frame. I used a Lego windows as a template, to have consistent dimensions across all my crafts.
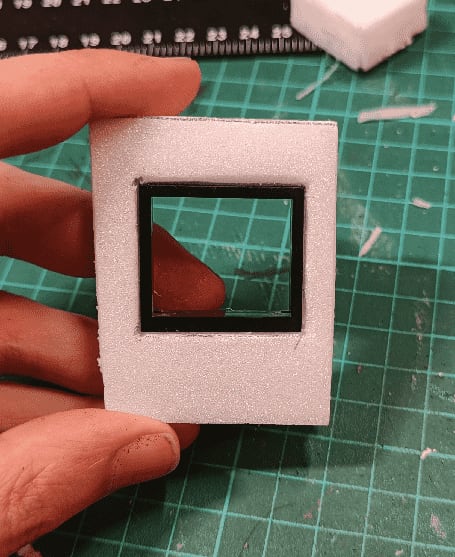
I even added the frame inside the hole.
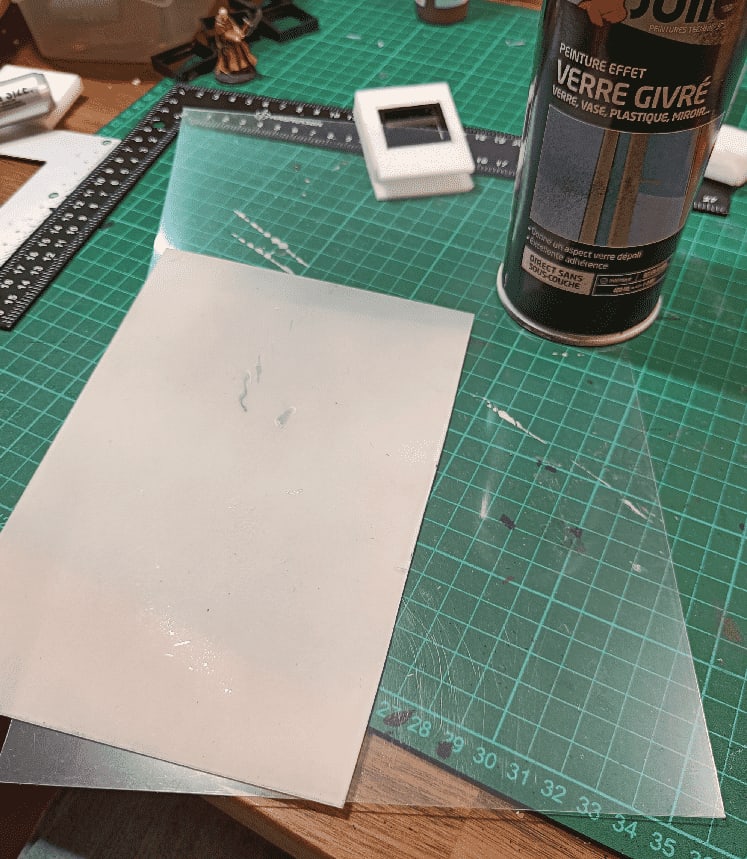
For the glass, I went with a frosty glass. I took a sheet of transparent plastic and applied a spray of frosty glass, and it turned it into a translucent sheet of paper, as you can see on the picture.
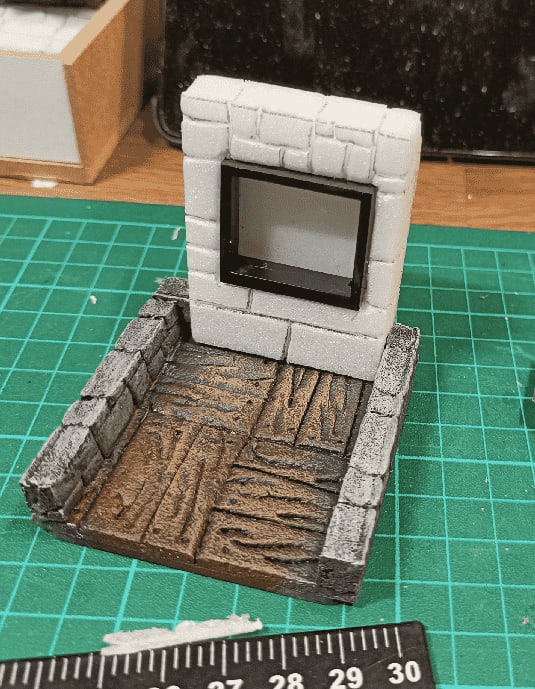
Test fit. It works well. The trick is to make it wide enough so you can fit a window in it, but short enough that you can clip it at the end of a corridor.
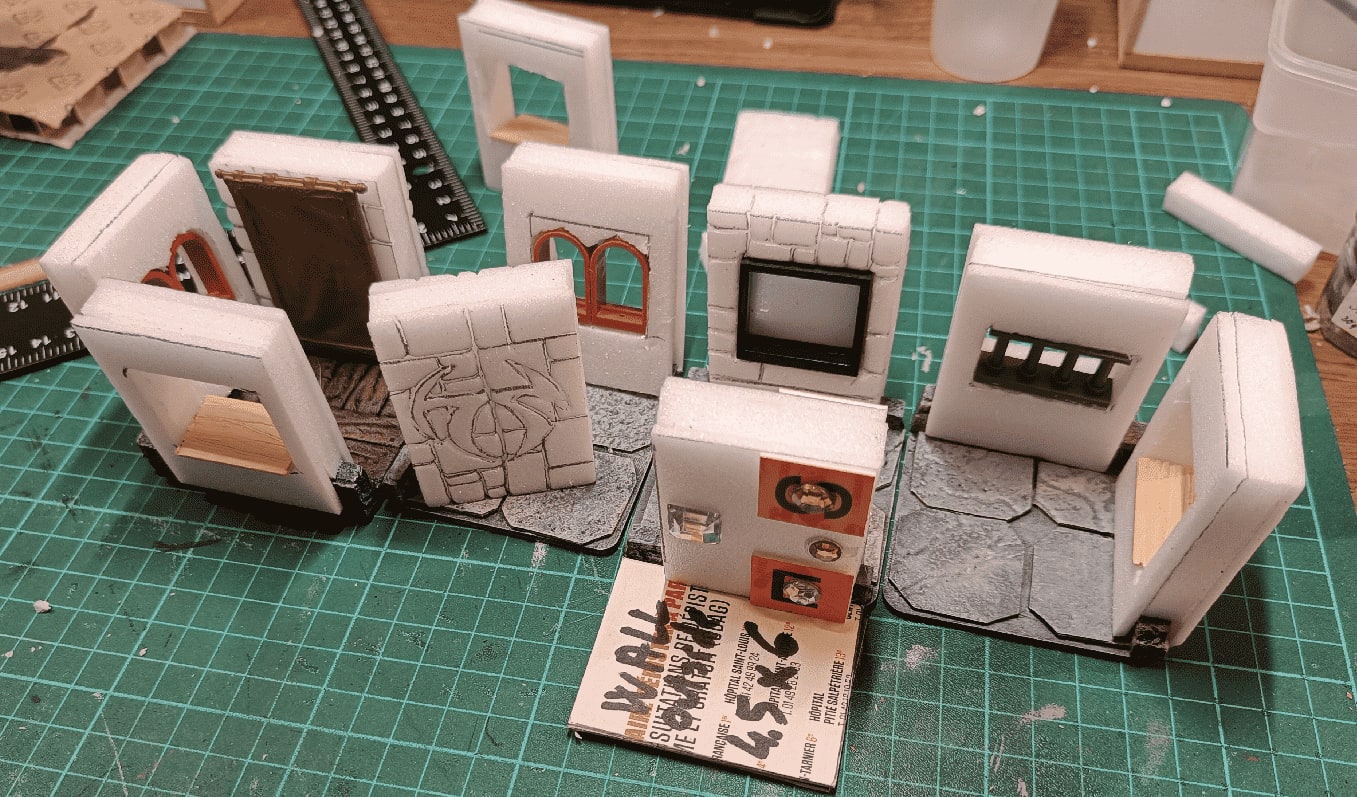
I then went on making more of them, using various Lego pieces for the windows (the two arched ones work really well). I also made simpler ones with only an ice cream stick. I also made a door (I needed a metallic door for the dungeon), and a piece of wall with a Rune inscribed on it.
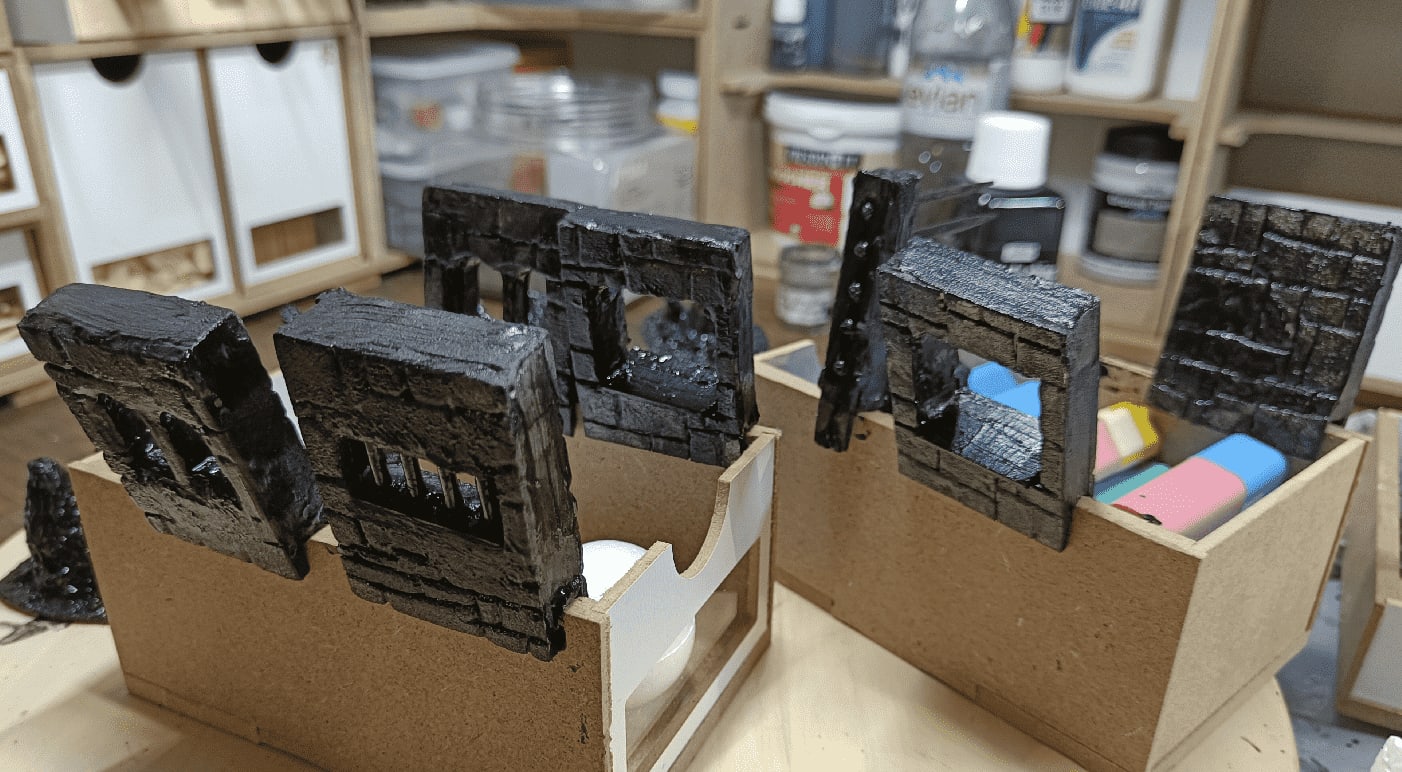
Before applying the black modpodge, I also covered the edges with spackle. It allows hiding the foam and would also make it easier to pain (foam absorb paint like crazy). I also had the nice side effect of adding some weight to the build, with is always a plus in my opinion.
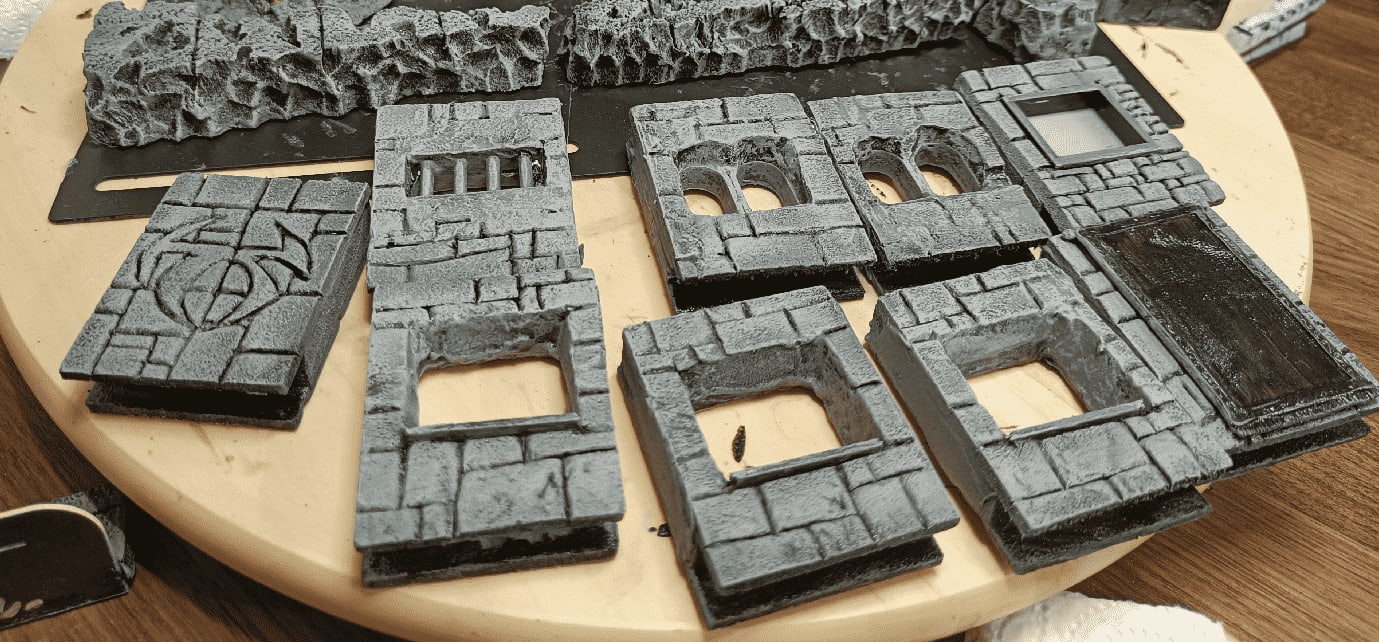
Classical gray paint scheme.
Picking a few bricks for variety before the last wash.
Alternate Wooden Tiles
On some pics you can see alternate wooden tiles (on the right here), that were an earlier attempt. They have a very rugged aspect, because not all plank has the same height, and also took much longer to craft.
For the sake of documenting my successful crafts and my less successful ones, here is how they were made.
For some, I glued ice cream sticks together, and used a screwdriver to carve the wood to make it look more like wood.
For others, I cut smaller foam planks that I textured, and individually glued.
This resulted in a weird mix of planks and also took forever to put in place.
The final look of the one made with ice cream sticks is actually pretty interesting, visually.

But adding walls to them means I needed to cut the ice cream sticks shorter to accomodate for the wall. And cutting those damn strips and texturing them is such a messy job that I abandoned this way of crafting after a few tiles.

The final result looks a bit like an abandoned house. This is an interesting look to go after, but I'm happy with my other wooden floors so far.
Spiral Stairs
In dungeons, players often have to use spiral staircases to go up one level. Thankfully, this is a simple build.
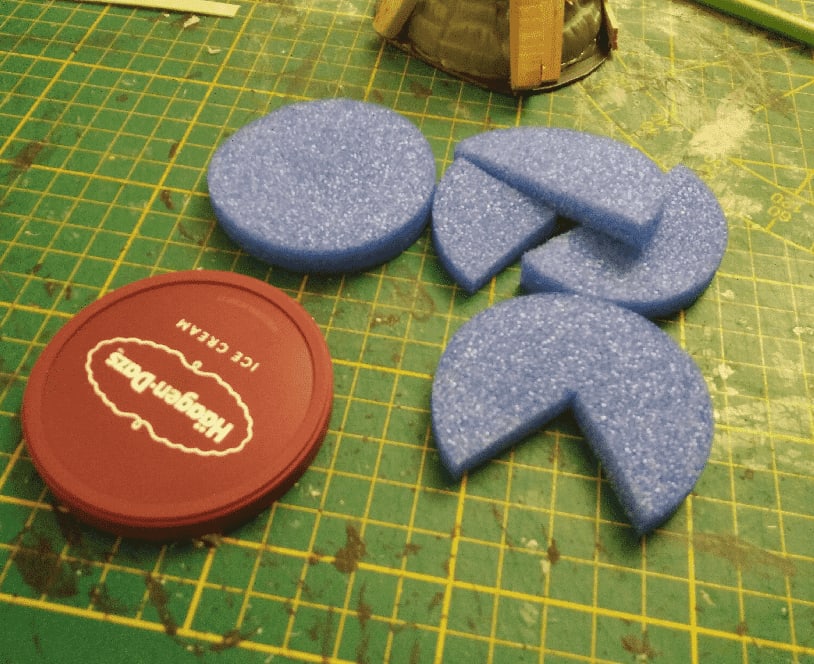
The base is an ice cream lid, and the stair itself is made out of foam from a swim noodle, cut in slices.
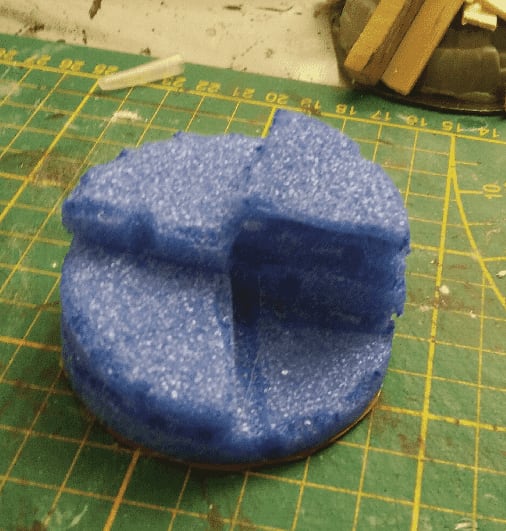
Stacking the slices on top of each other, and adding grooves by melting the foam with the tip of a glue gun.
I added some spackle / wall filler on it, to give it some texture. Without it, the foam would absorb all the paint, and it would also be too soft.

And another coat of black modpodge to further strengthen it.

A simple drybrush, and ready for the table.
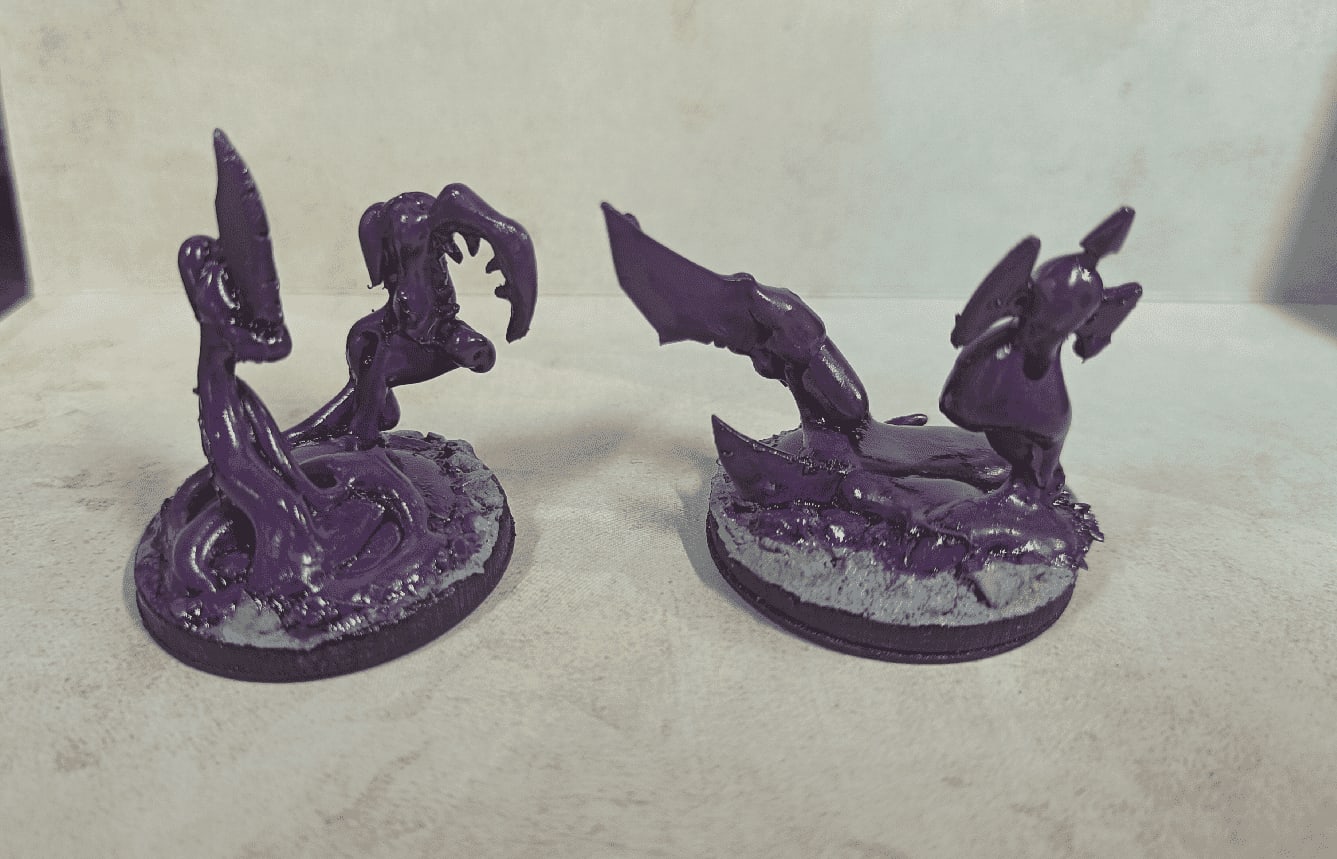
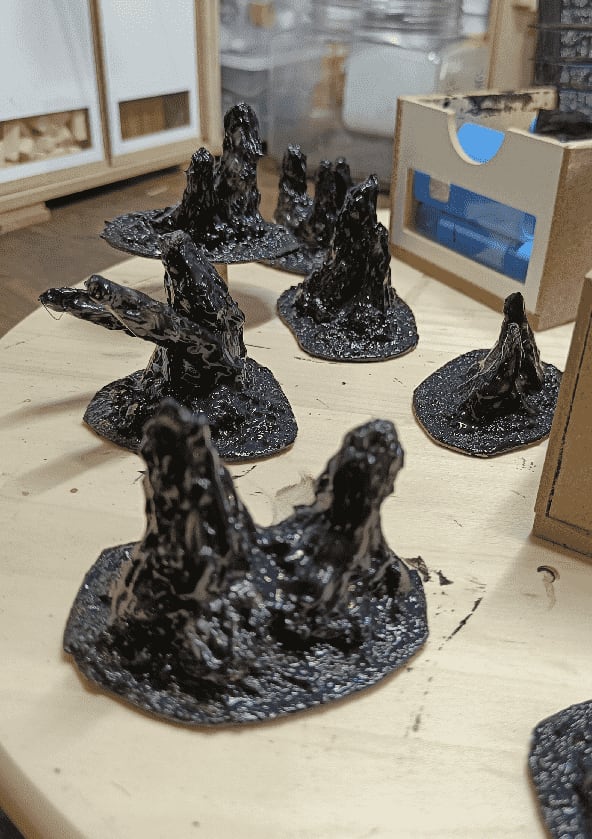
Oozes

When the glass tubes broke, my players were confronted against a bunch of colored oozes. I found it pretty hard to find good looking ooze miniatures, so I decided to craft my own.

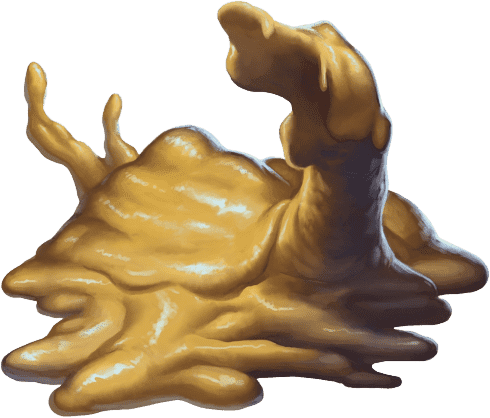
The bulk of it is made with a glue gun. My glue gun only has one setting: very hot, so the glue is pretty liquid and does not set quickly; instead it forms a puddle. To aid me in building shapes, I used rigid frames.
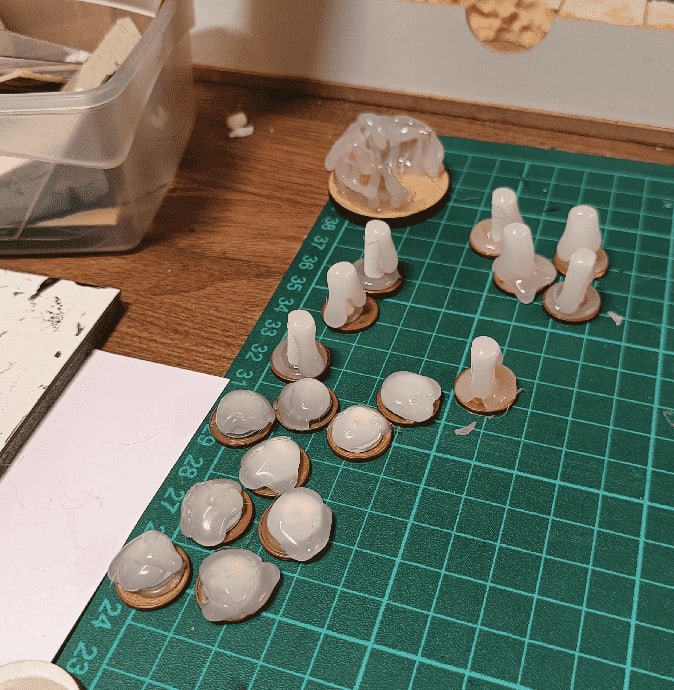
Some oozes split into smaller parts when hit with lightning or slashing, so I also needed smaller versions. They are mostly just a drop of glue on cent coins.
Having a bunch of shapeless blobs on my table, it can be hard to remember which is which. This is why I tried to gave them each their own shape, using various bits underneath to shape the final form.
Some were more elaborate, with bits of bones or even faces inside. Other even had sharp weapon edges.
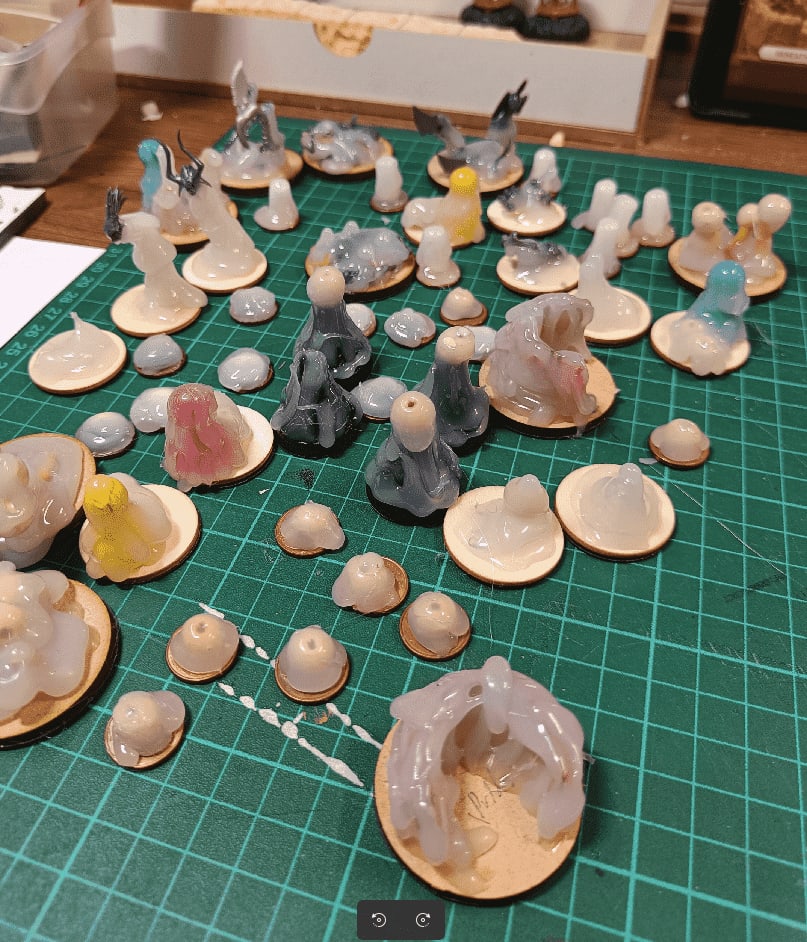
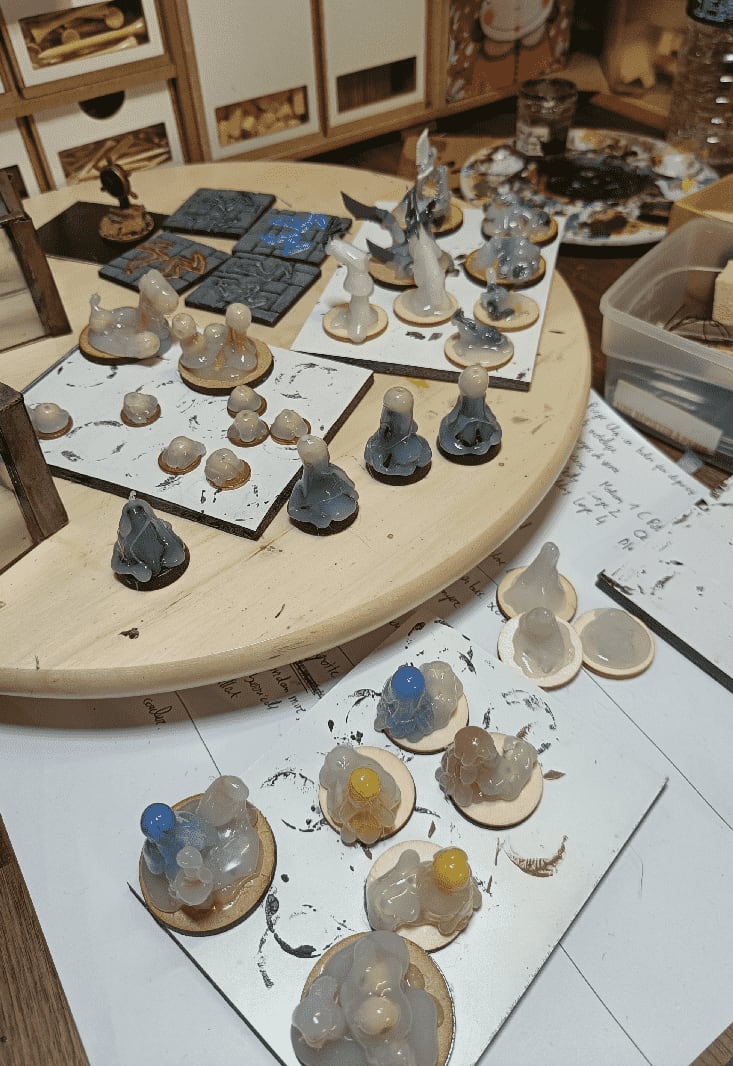
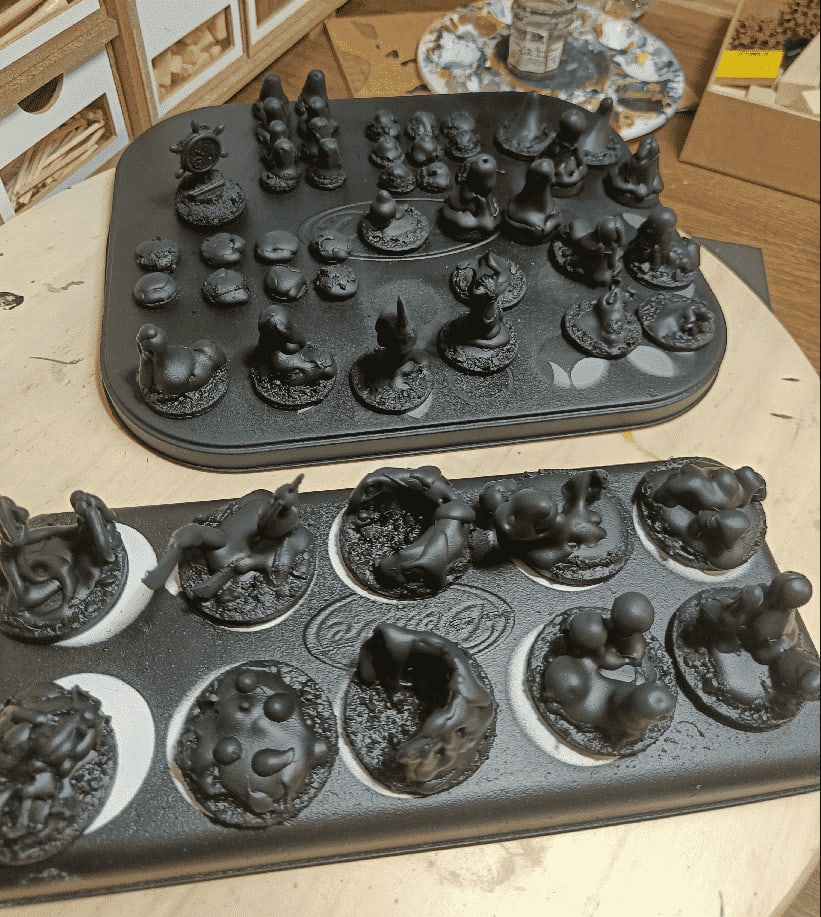
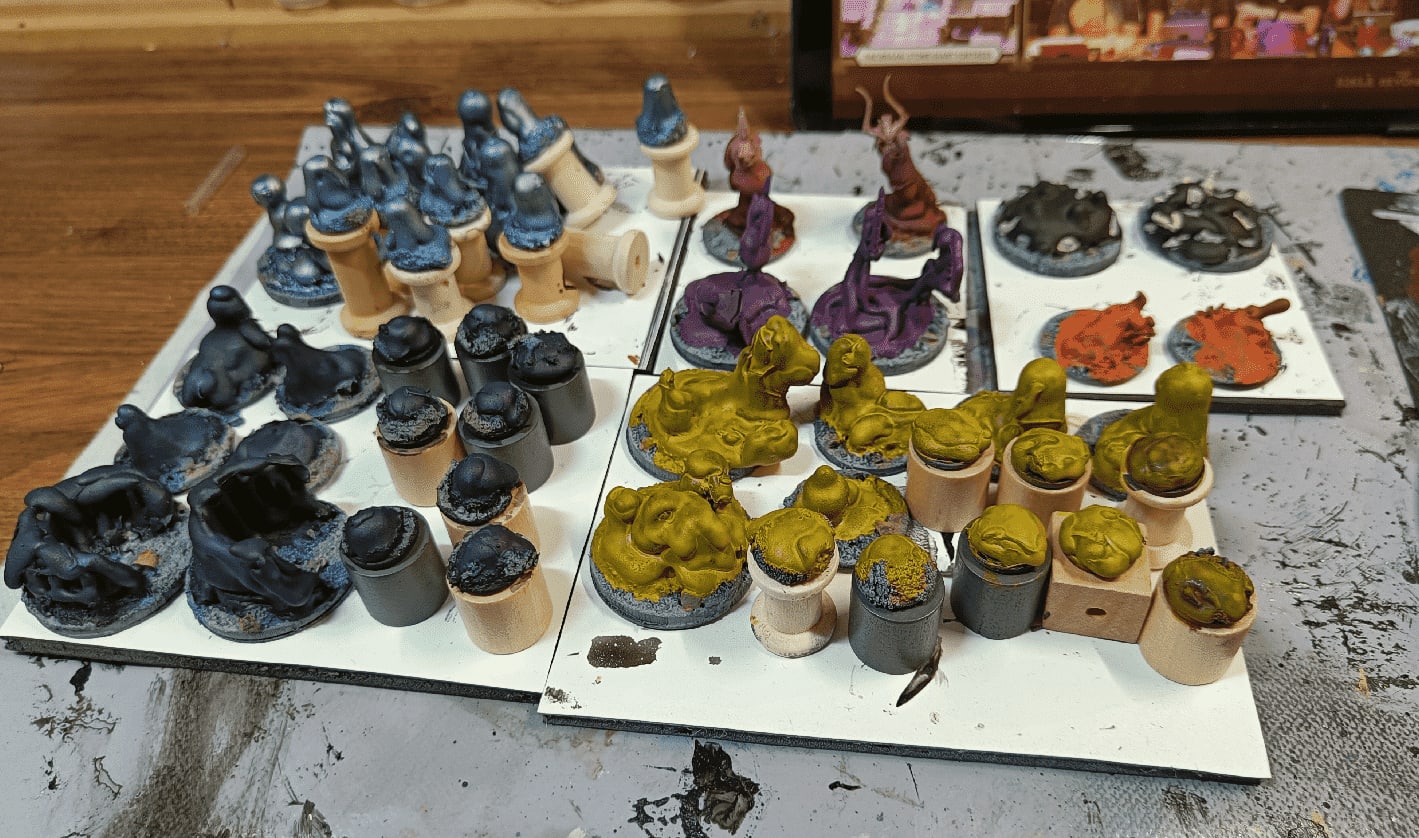
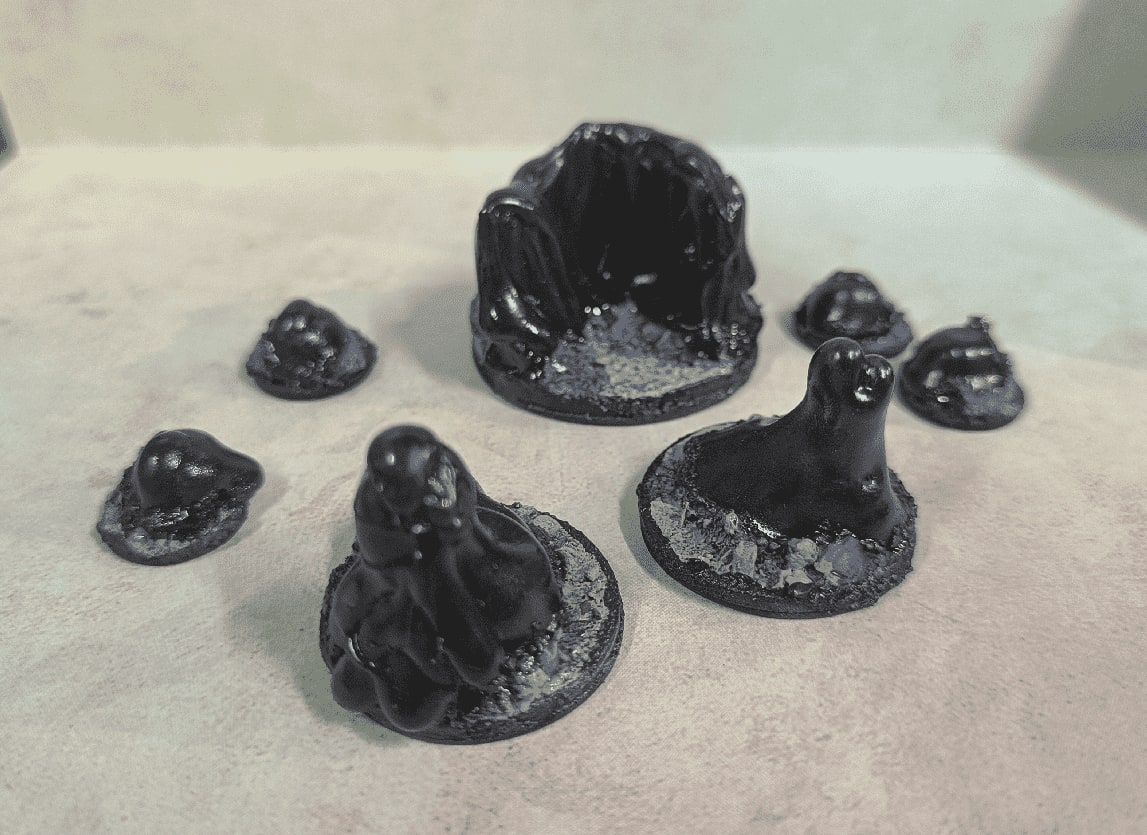
The whole set before painting.
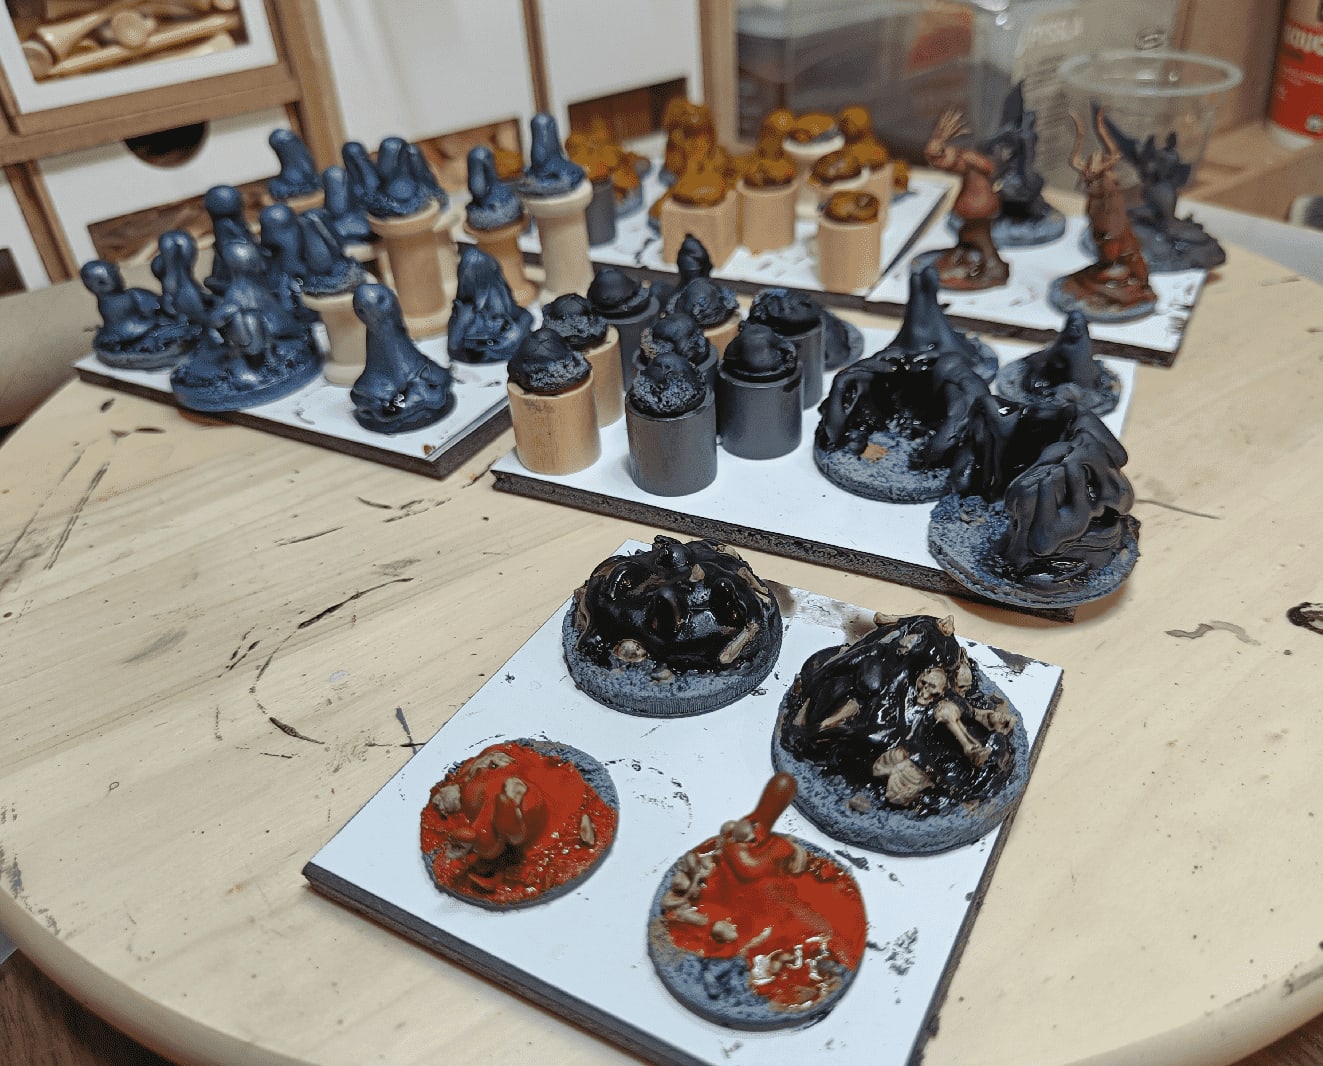
I did the base before painting the blobs, but in retrospects I should have made the bases even before creating the blobs, so they would have looked like they were oozing on top of the rocks.
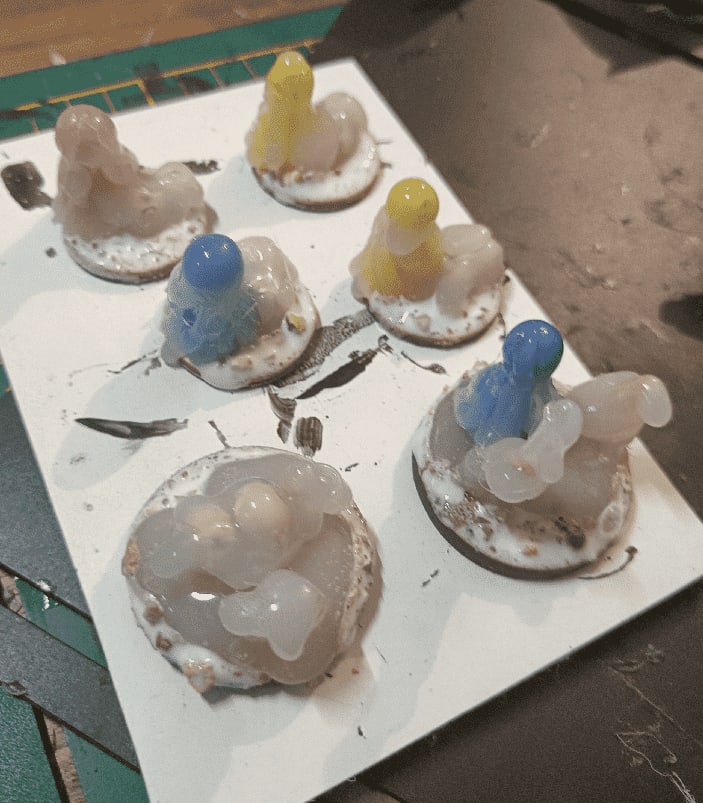
Consolidating the bases with a second layer of highly diluted glue.
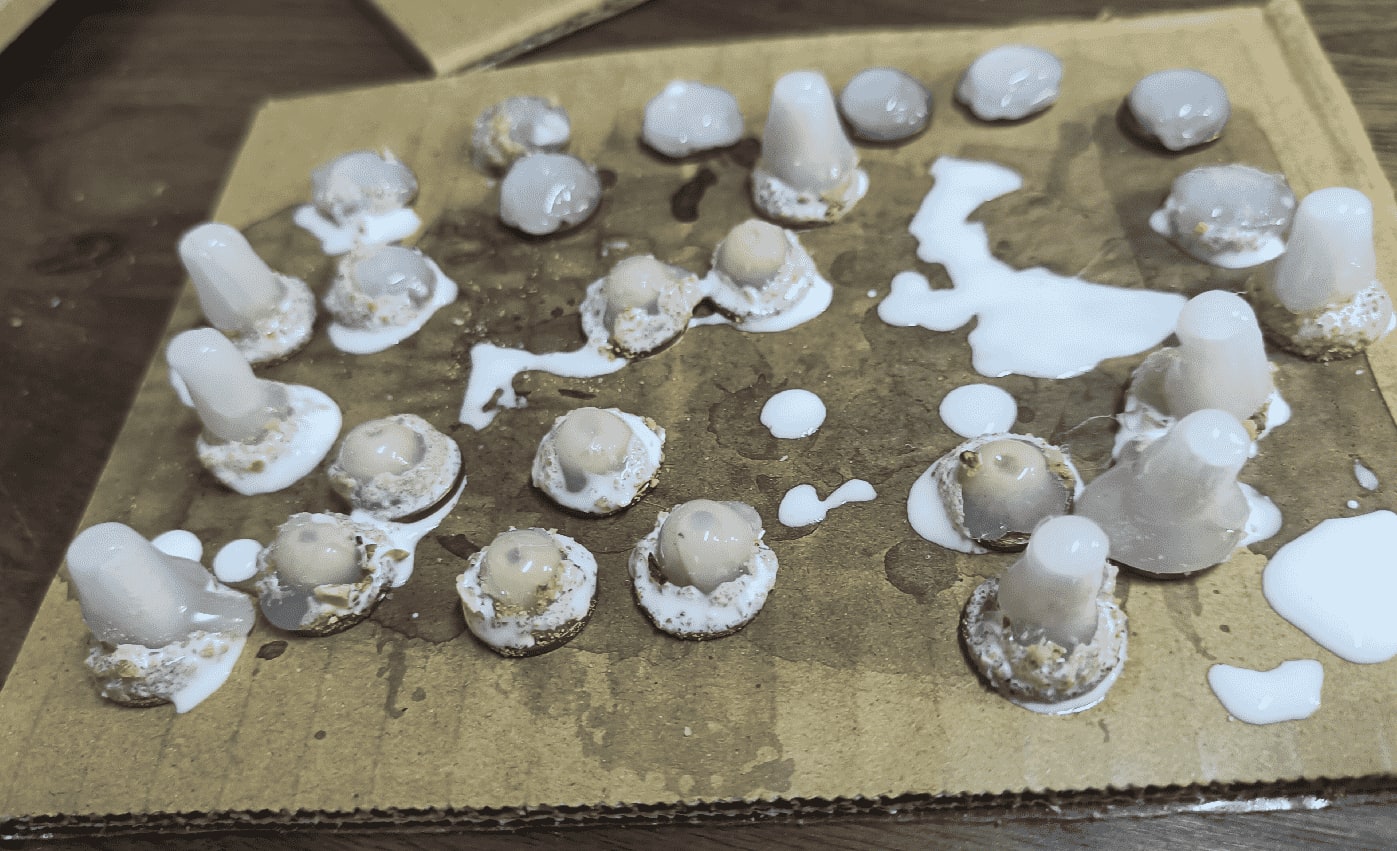
Same with the small versions, which is a very messy process.
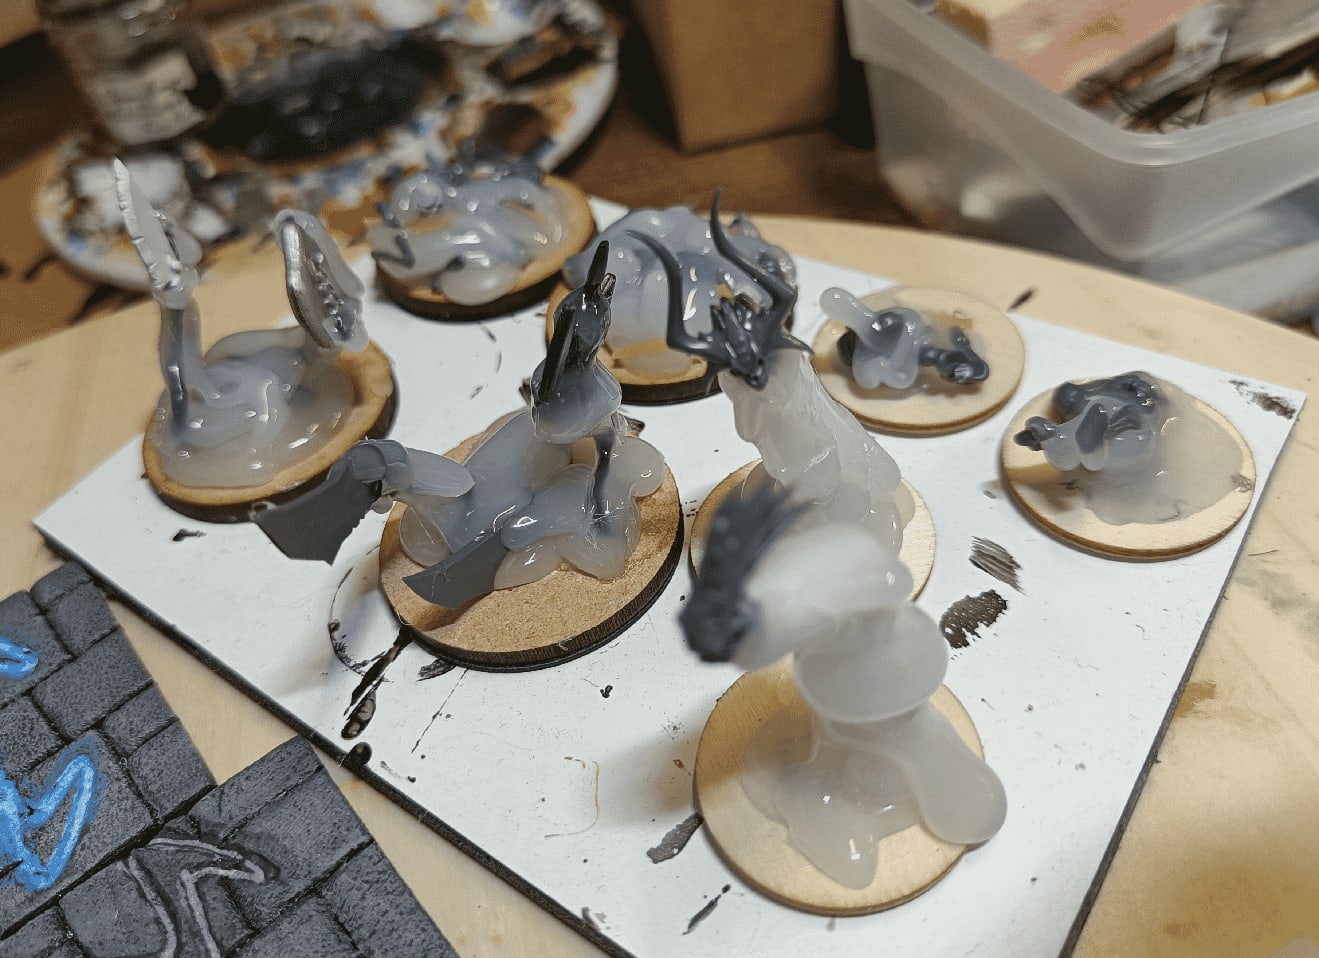
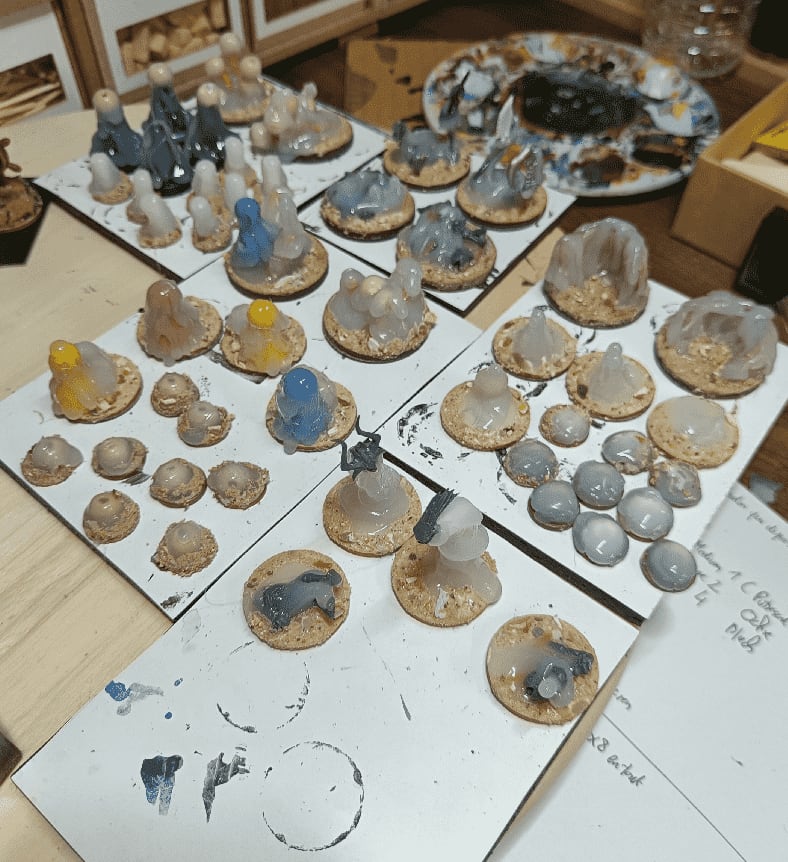
And here we go for painting.
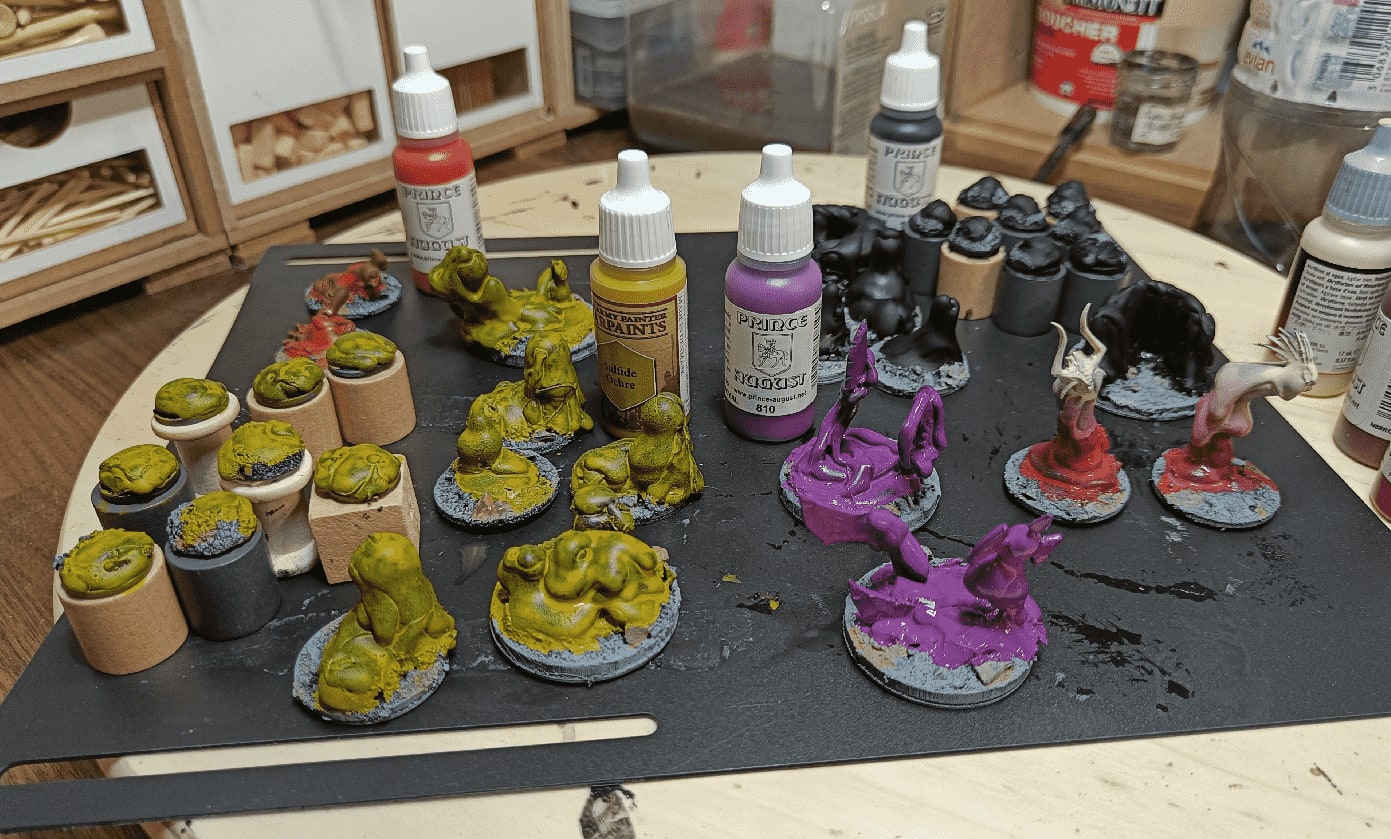
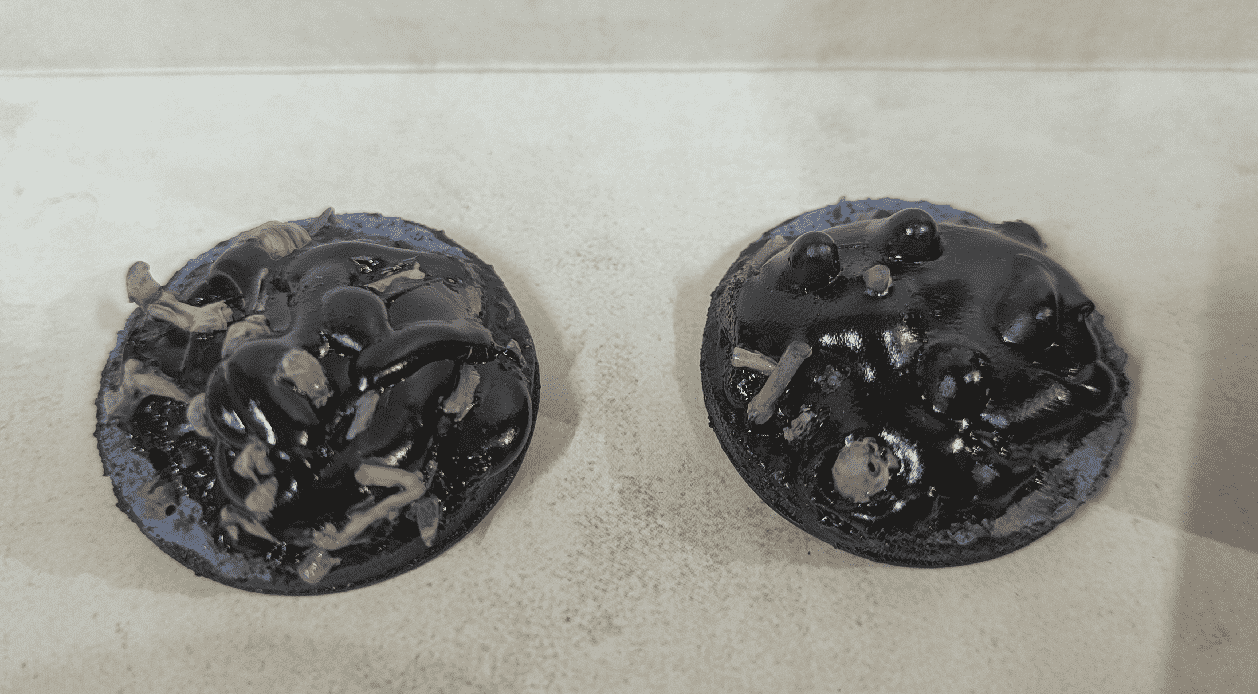
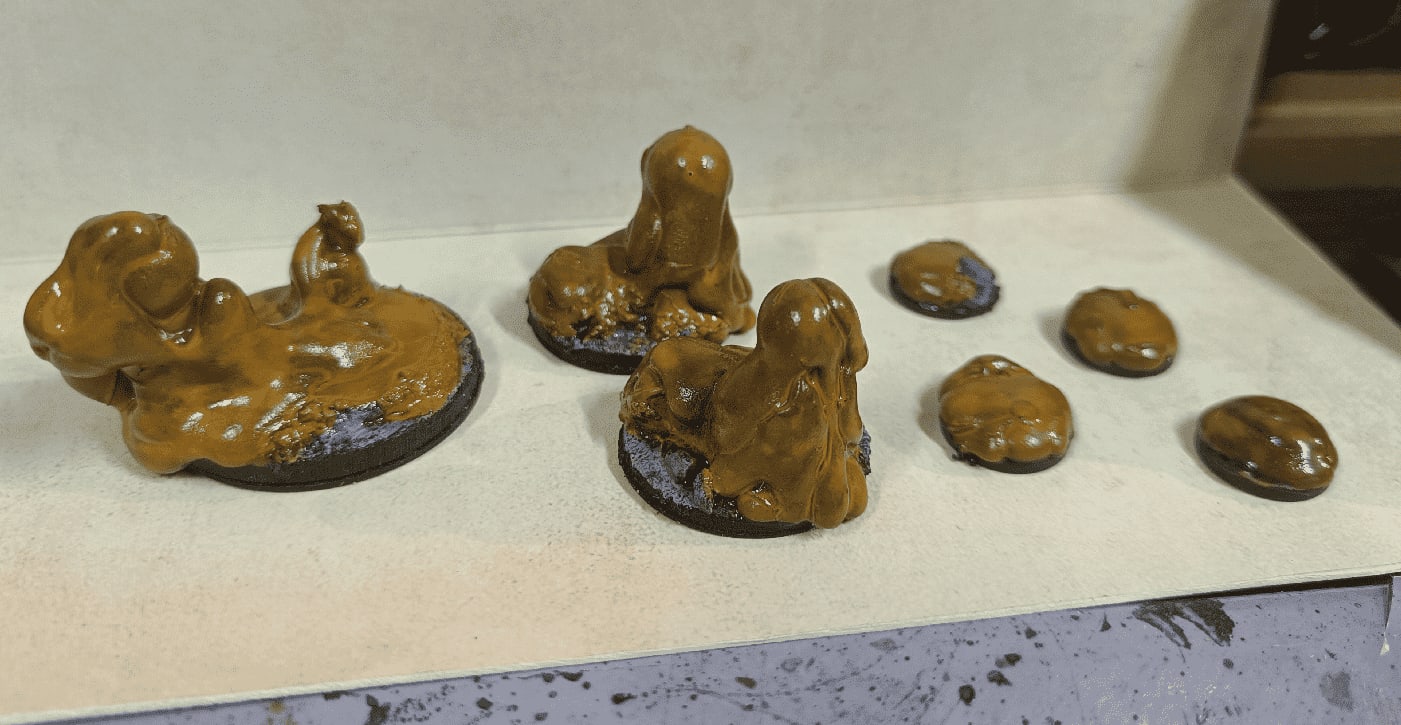
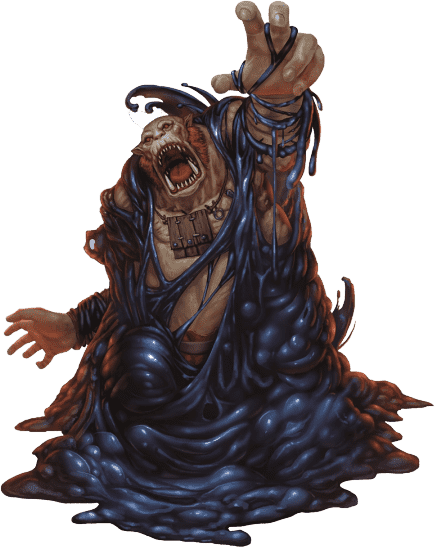
Ochre Jellies, Purple Ooze (from the Creature Codex) and Slithering Trackers (which aren't really ooze per se, but more of an undead kind of thing) on the front. Suppurating Ooze (again, from the Creature Codex) and Black Pudding in the back.
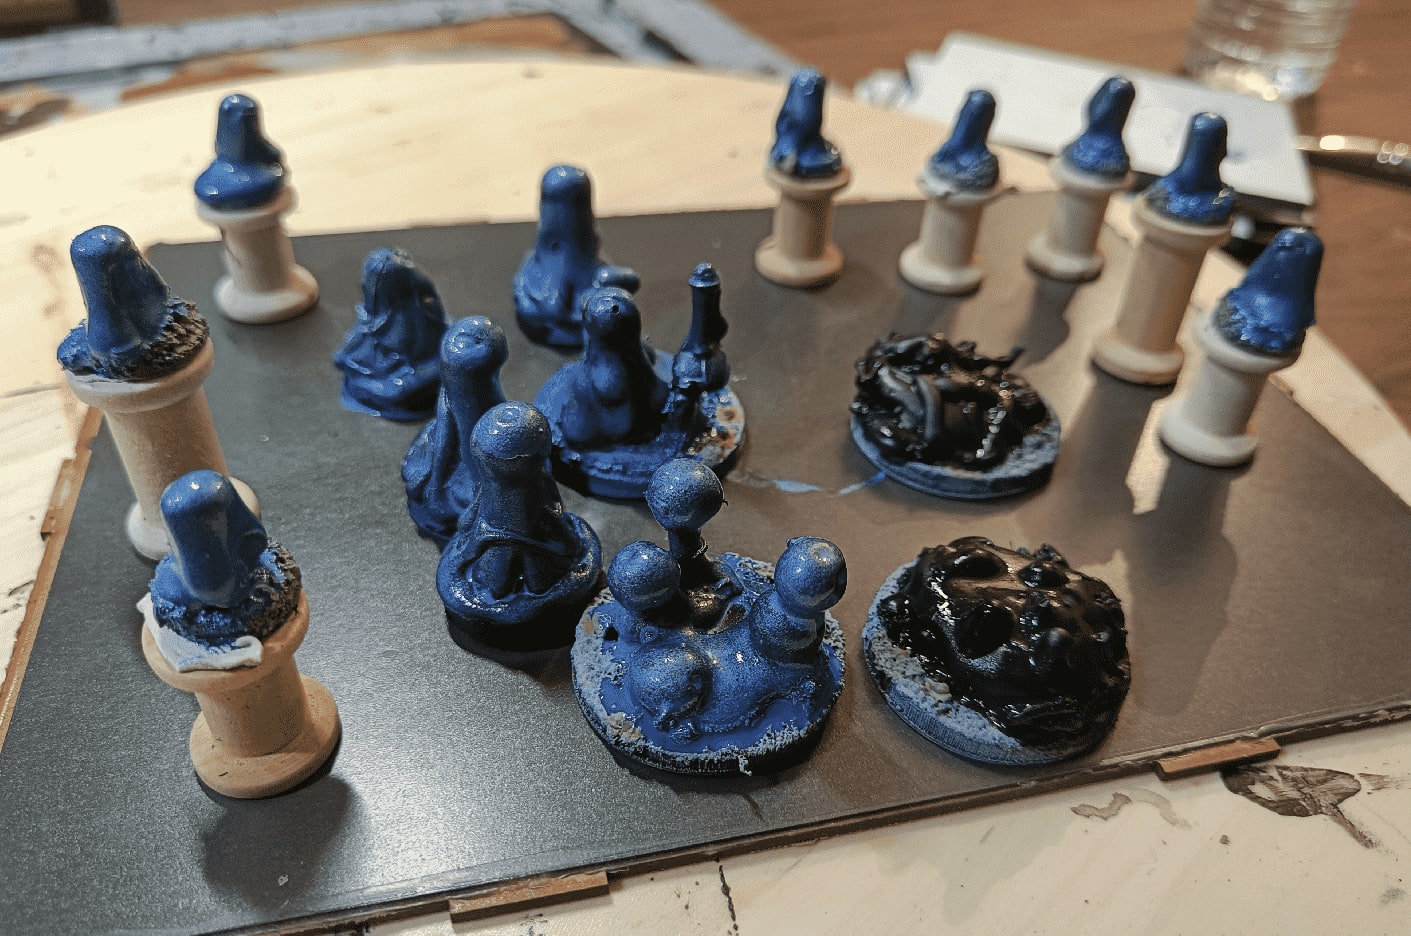
Eldritch Ooze and Tar Ooze from the Tome of Beasts II. The blue of the Eldritch Ooze is a silver paint mixed with blue.
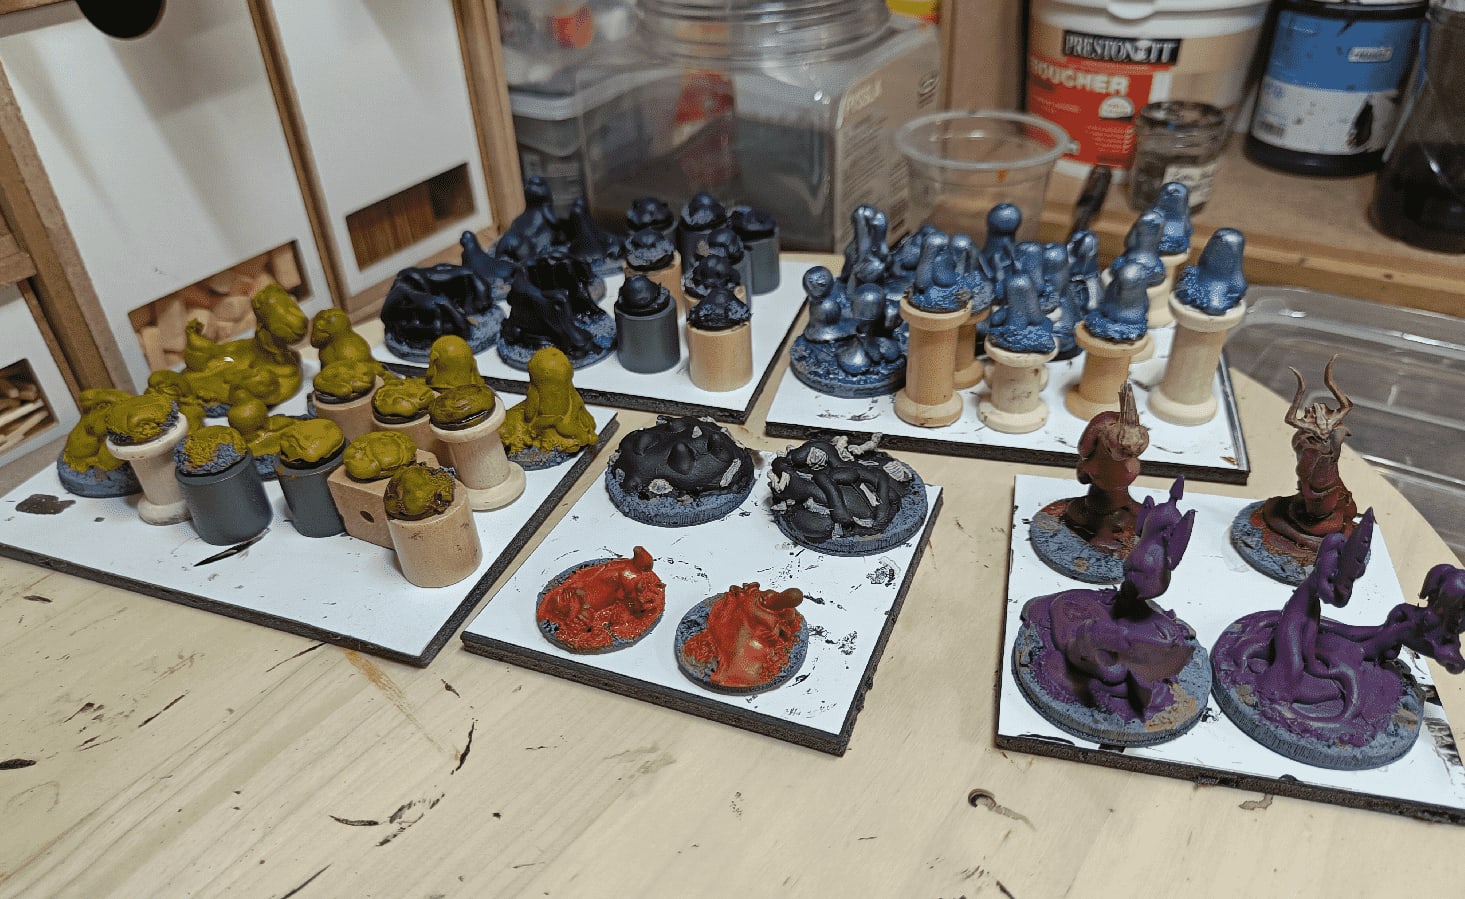
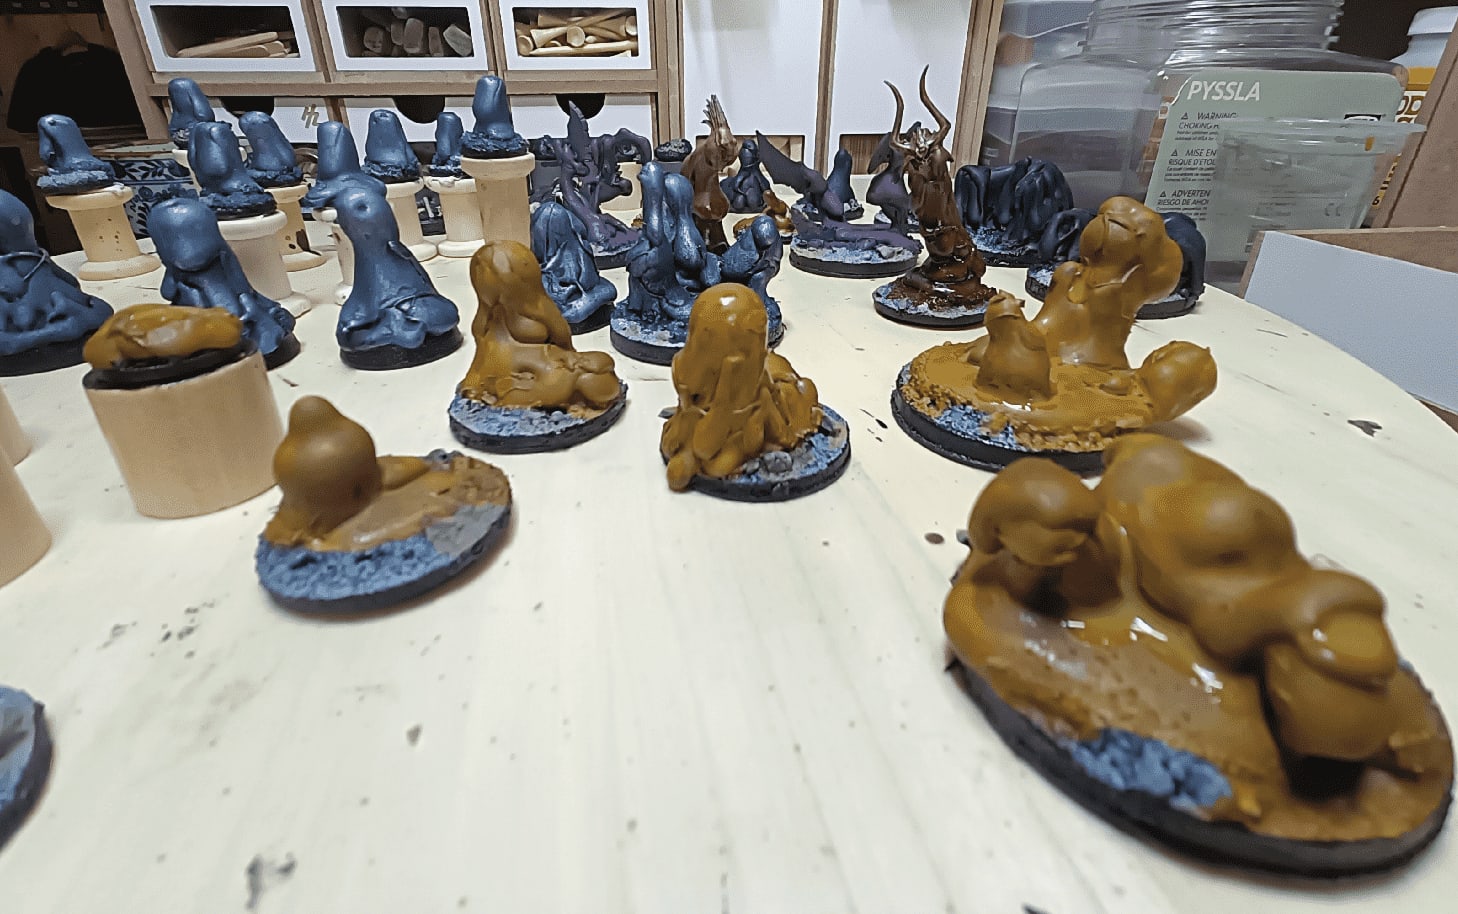
Family photo, with a few layers in.
This was a very long painting process. I can't say it required any skill, but it still took time. Some of the colors didn't cover the black well, so I needed several layers.
I carefully added washes on the ooze part, excluding the bones, to keep the shiny effect. But this was all wasted when in a later phase I used a matt varnish spray.
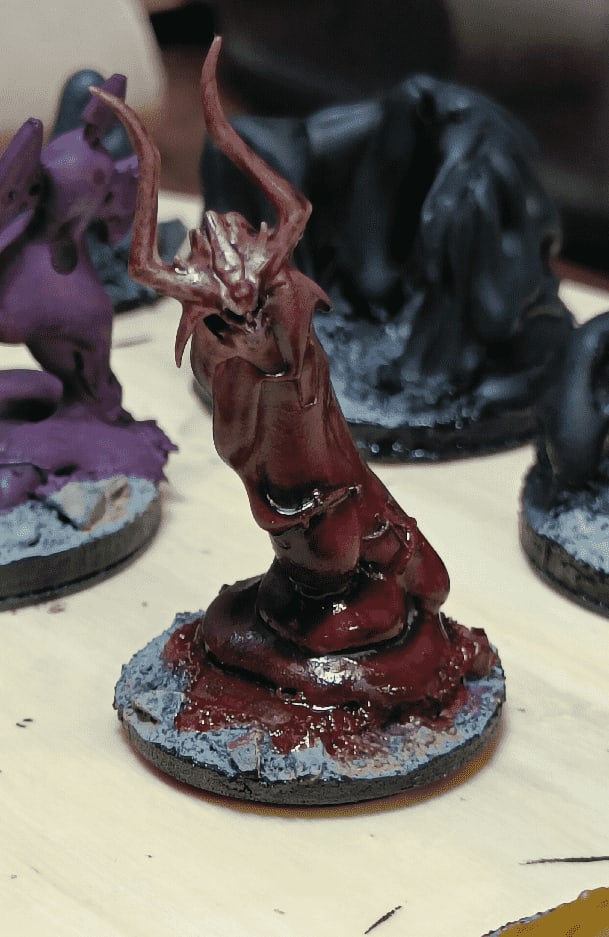
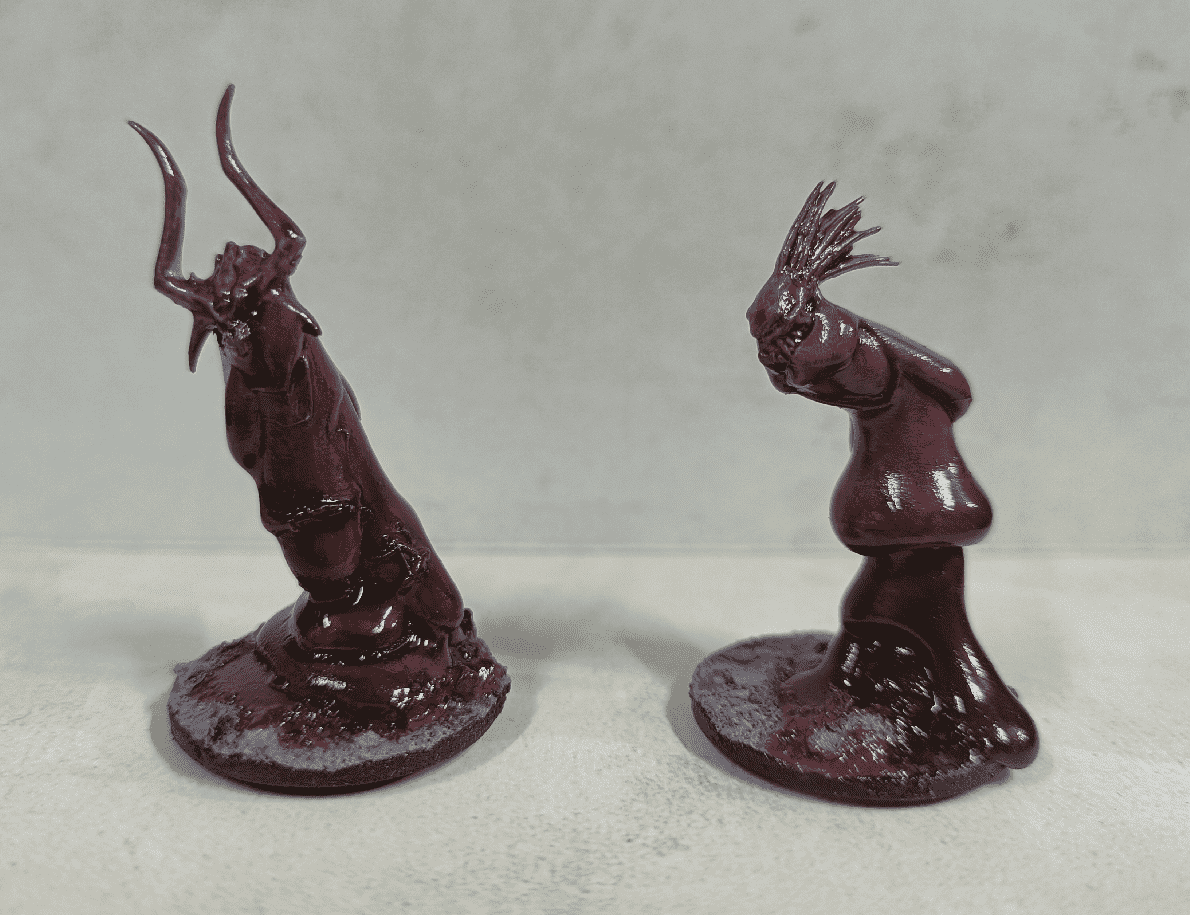
I'm happy with the gradient on this one. The head is lighter than the bottom which looks like coagulated blood.
Ooze invasion!
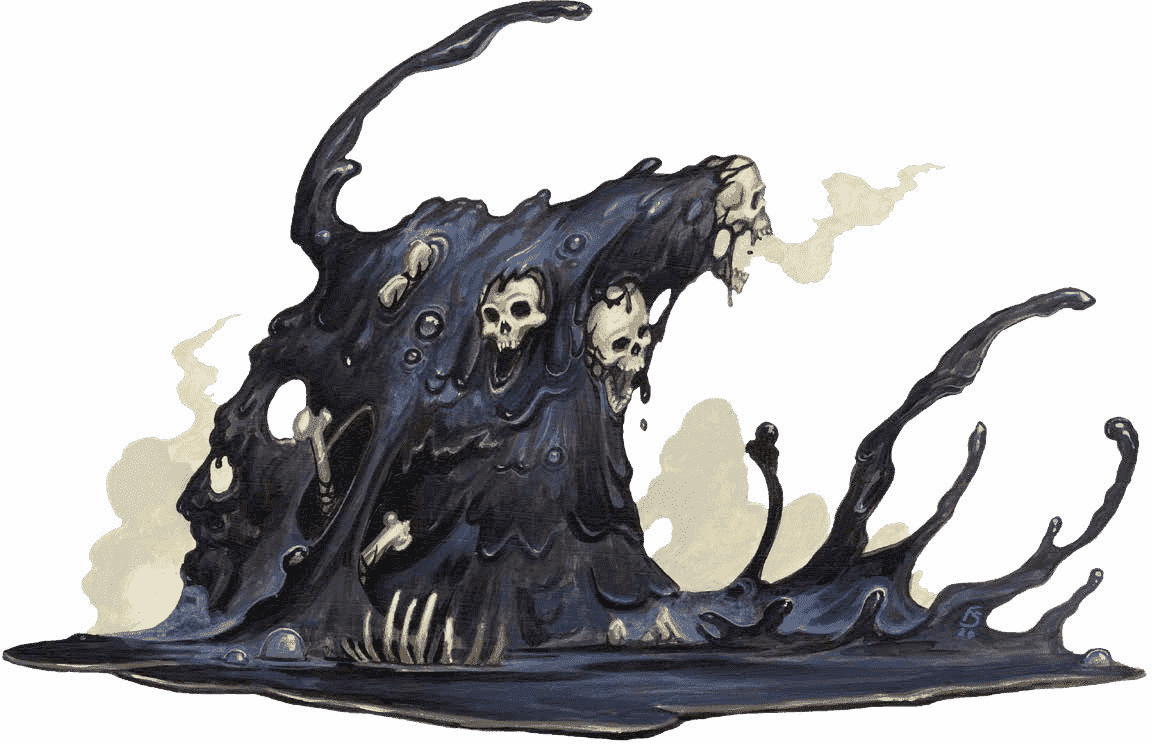
Final pictures and original illustrations
Slithering Tracker
![]()
Tar Ooze
Suppurating Ooze


Ochre Jelly
Black Pudding
Purple Slime