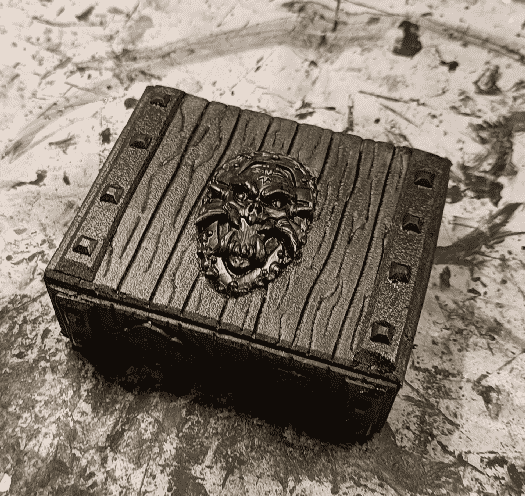
Pirate Chest Prop
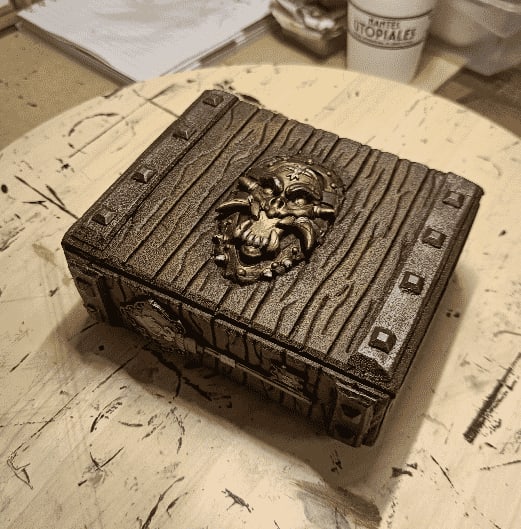
This is the first real-size prop I ever made (as opposed to my usual 28mm miniature sized terrain). It's a pirate chest, made out of a some earbuds packaging I bought. I made it for my 4 years old daughter, as she is in her Pirate phase.

It all started with this box.
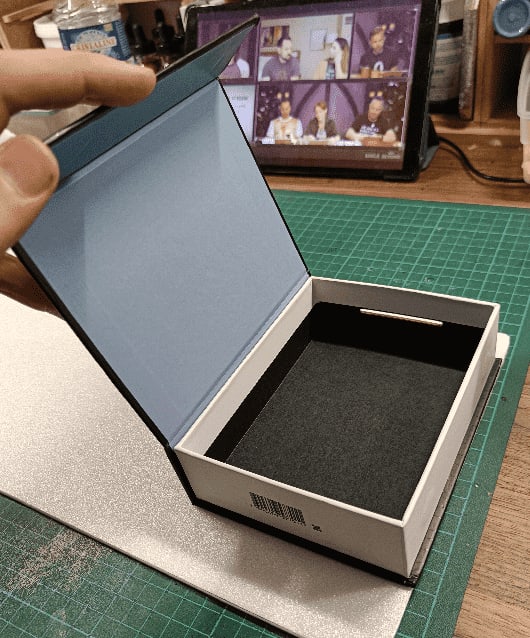
It is made of sturdy cardboard, and has a magnetized face, with the lid clipping into place with a satisfying thud.
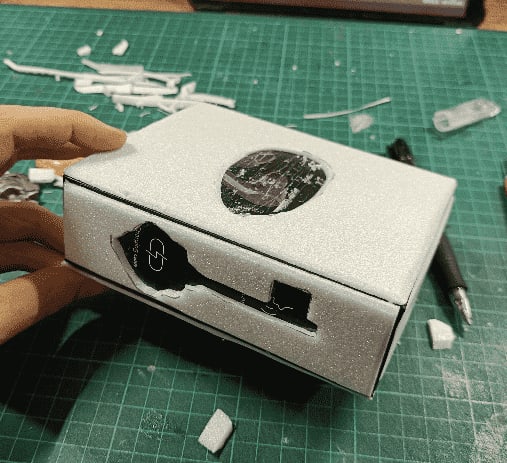
I covered it with thin foam, and carved out space for two plastic bits I had laying around.
I don't exactly remember where I got there, but most probably bought them in a second-hand shop or at a garage sale, knowing that I would be able to use them in a future project.

This is the one I'll put on the top lid.
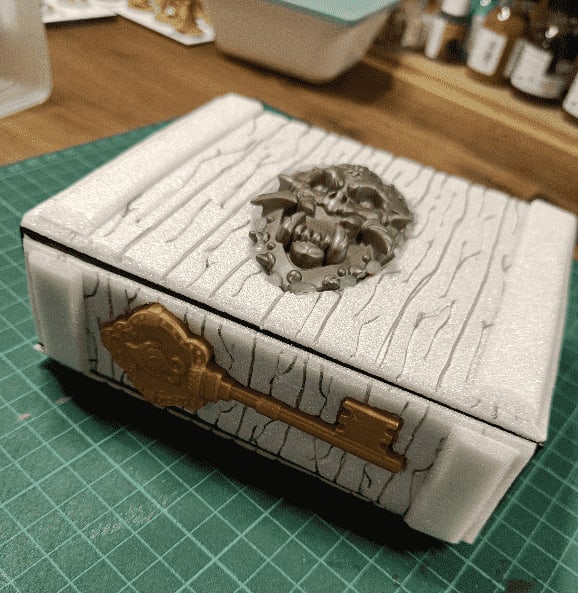
And with the plastic key in the front. I carved with a hobby knife the various planks, and used a ballpen to create the wood grain. 3 or 4 rough squiggles on each plank is enough.
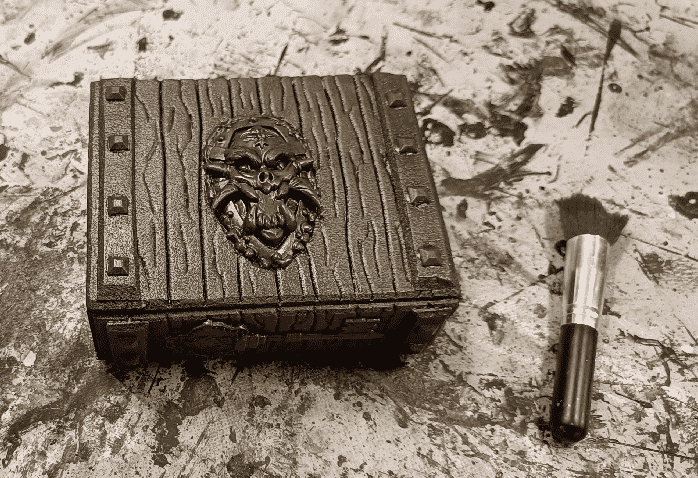
I glued my two plastic pieces in the holes I carved previously, and also added more foam bars, to simulate reinforced metal bars.

Covered everything with a mix of black paint and wood glue, to act both as a primer and to make the foam stronger.
I realized I forgot to add rivets on the metal bar, so I glued some decorative plastic square jewels and painted them black. I should have done that before the previous step, but I got carried away.
Did a first layer of dark brown with a large make up brush, to simulate the wood. I didn't care if some went on the metal parts, they will get covered later on.
Used a smaller makeup brush for a lighter brown, to apply on top of the first layer.

I don't have much pictures of the intermediate steps, but I basically added a third layer of an even lighter brown on the wood. I did the same three-step process with a dark, medium and light silver for the metal bars.
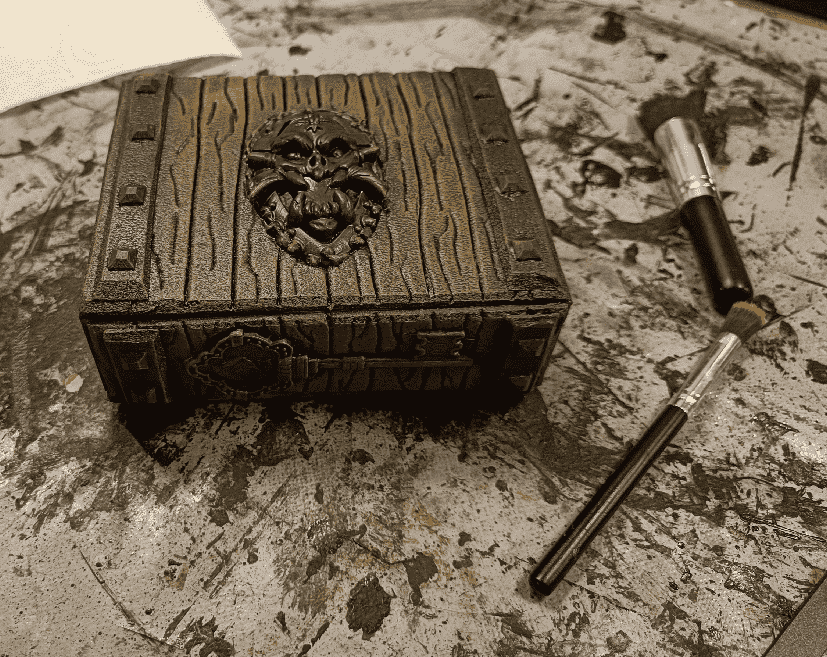
I applied gold with a makeup brush on the head and key, then painted with various metallic colors all the details.

I added a special Tiphus Corrosion paint (made by Citadel) around the head to simulate an effect of the wood being burned.

I then applied a dark wash (highly diluted black paint) so it would get into all the deep crevasses and let it dry.
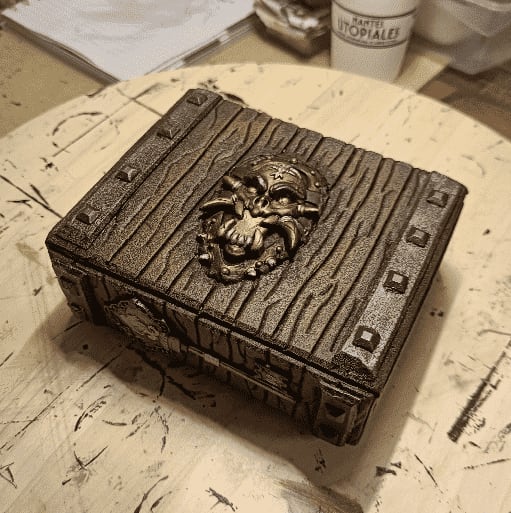
The result on the next day.
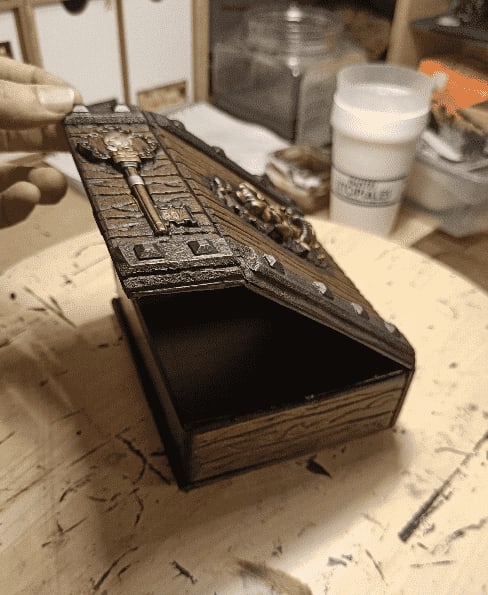
And it still opens!
If I were to do it again, I think I would add a handle on the front side. Currently, one need to put a nail on each side of the top flap to open it. Not so easy for a 4 year old.
Angry Bird Tiny Wooden House
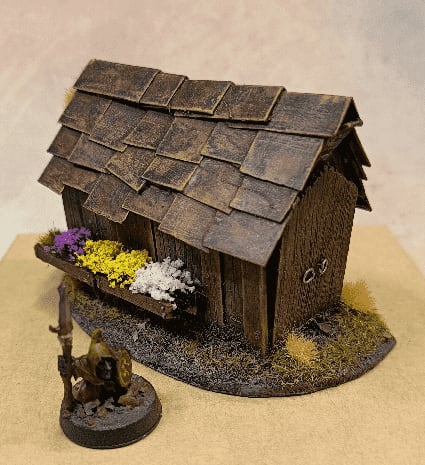
I made this small scatter terrain wooden house out of, what I think is, a MacDonalds Toy.
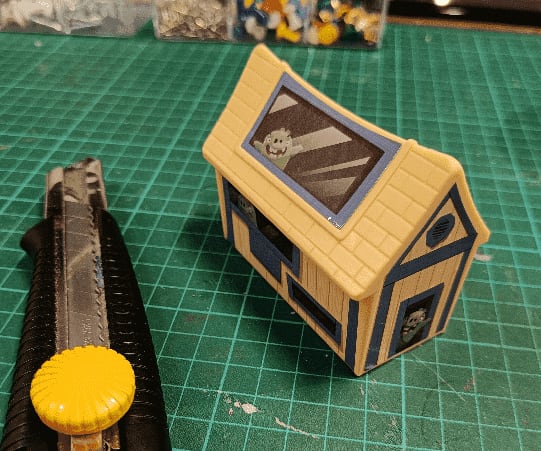
I liked the shape of the toy, so I thought I could cover it with some wood and cardboard and it would make a nice terrain piece.
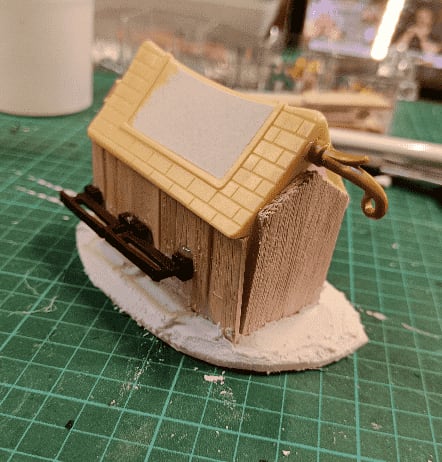
I started by gluing it on a base, and added bits from my bits box here and there. The doors is balsa cut to size, the walls are ice cream sticks, and the light and dark brown stuff are plastic thingies I had scavenged from toys at some point.
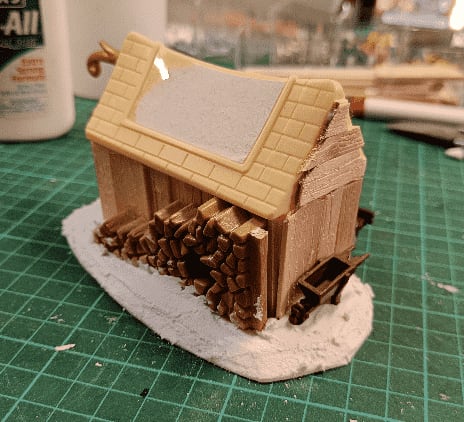
I decorated the backside with a Playmobil wood pile, and a Mantic Crate wheelbarrow.
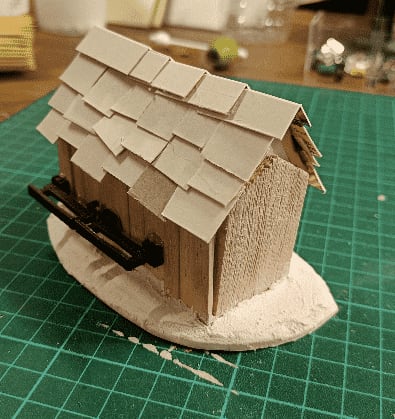
Glued on cardboard shingles.
Usual black modpodge basecoat, and also added some jewellry rings for the door handles.
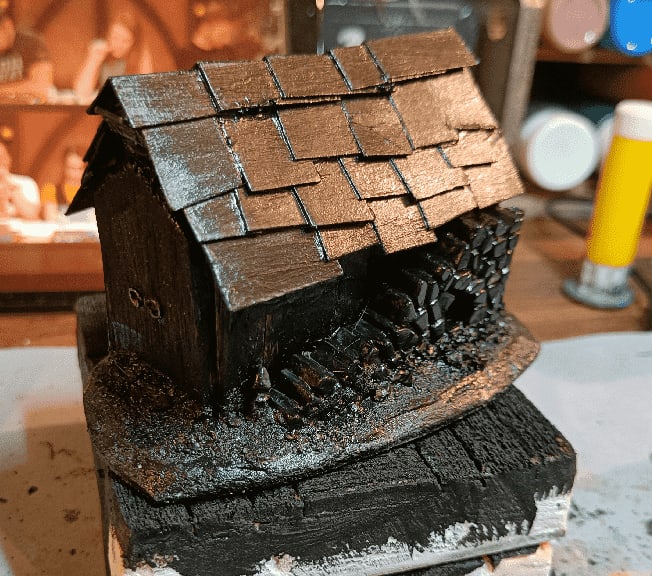
I then didn't take much pictures of the painting phase, just slapped on some colors with drybrushes. Added flower for the nice touch.

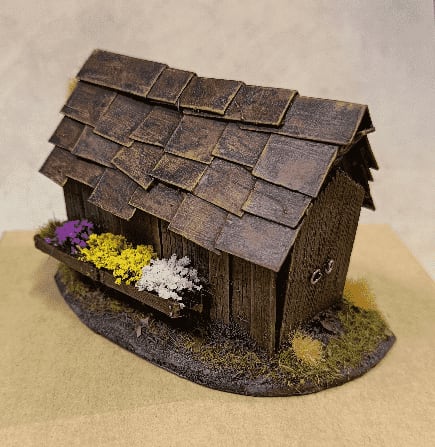
Put some flowers in the wheelbarrow as well, and mushrooms here and there to add more life to it.
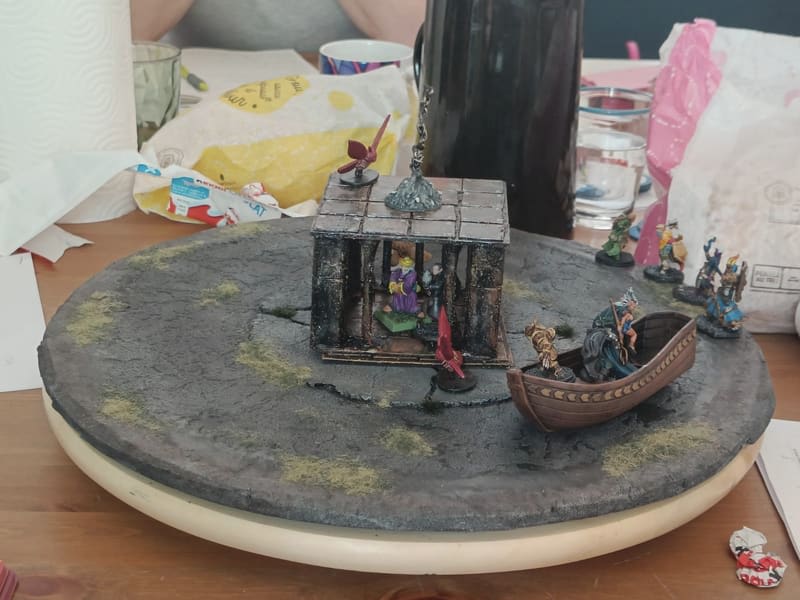
UDT (Ultimate Dungeon Terrain): Swamp/Sewer
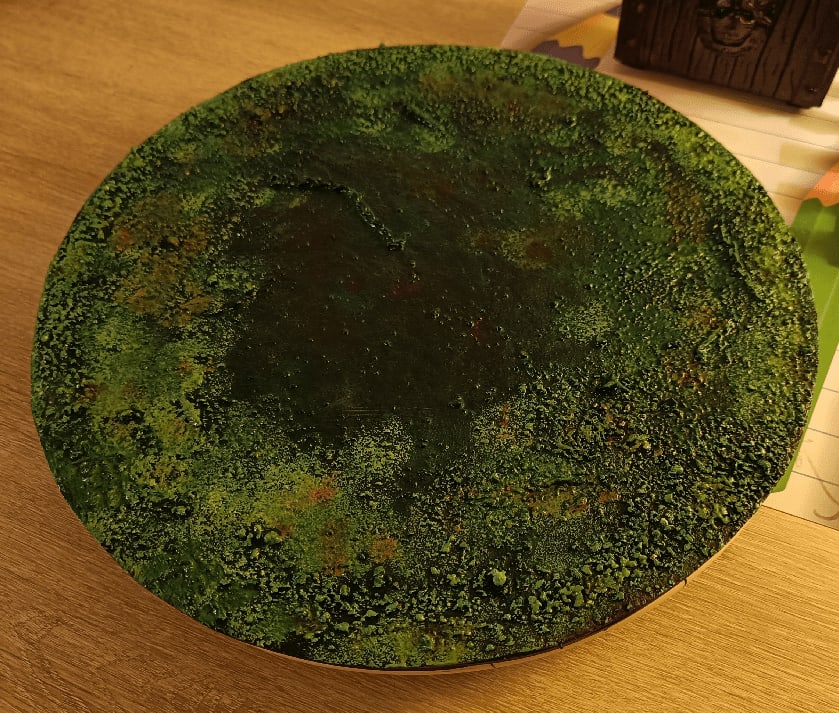
I built a Swamp/Sewer UDT tile.
UDT stands for Ultimate Dungeon Terrain and has been popularized by this Dungeon Craft YouTube video. The goal is to abstract combat and exploration by getting rid of the grid and focusing on a circle area that represents the current scene. The area can be further split into three concentric rings representing melee, range and "too far".
I like using this in games, mostly for the ease of focus on the current scene. You set your UDT at the center of the table and it does represent the scene. You add some scenery and it makes it easier for people to know where they are, and remember the place.
Add a few walls and doors and you can simulate a dungeon room. Players open one of those doors? You change the wall arrangement and now they are in this new room.
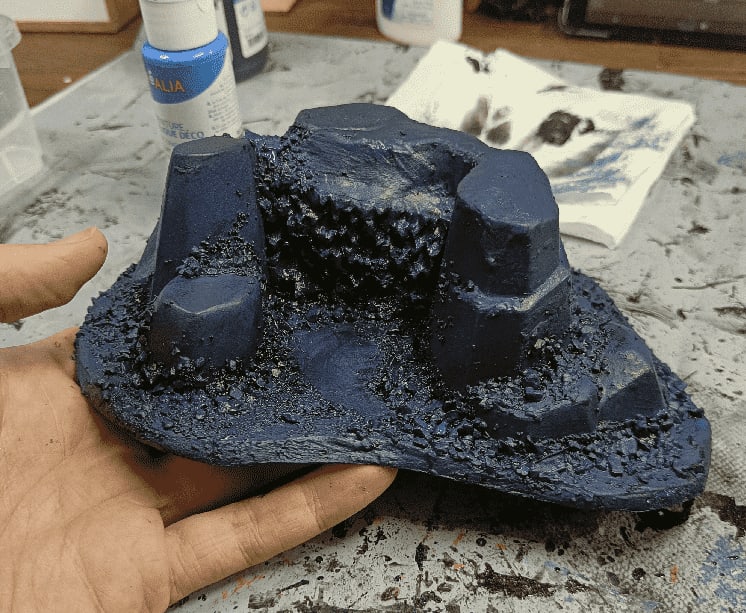
I loved the idea so much I wanted to craft a few different UDT to represent various common areas characters might encounter. I already had a basic "cavern" one, so this time I went with a more murky one that could represent either a swamp or some sewers.
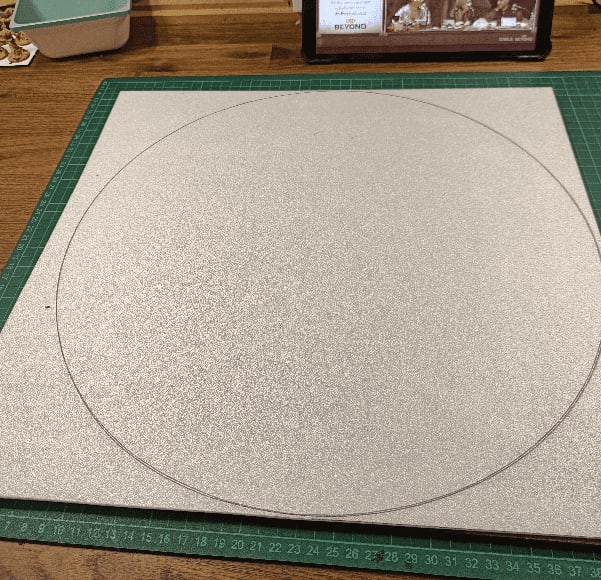
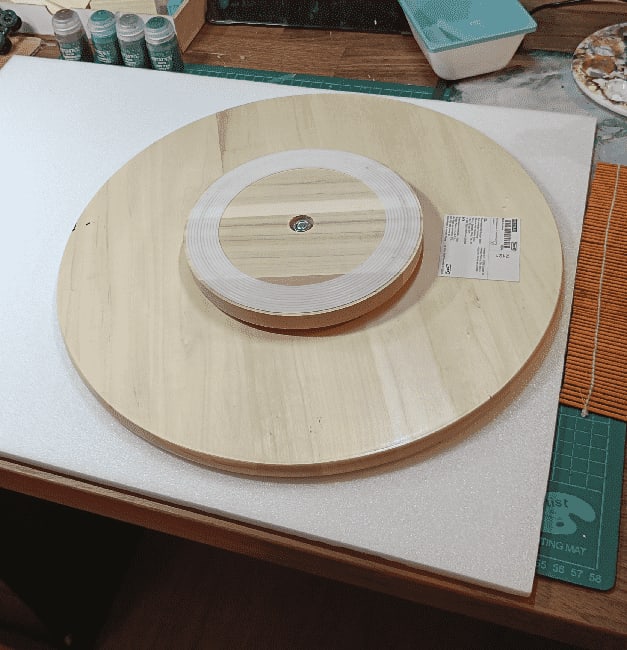
It all started with a circle of fine foam. I used my Ikea Lazy Susan as a guide for this. As the UDT will sit on it, I wanted it to have the exact same size.
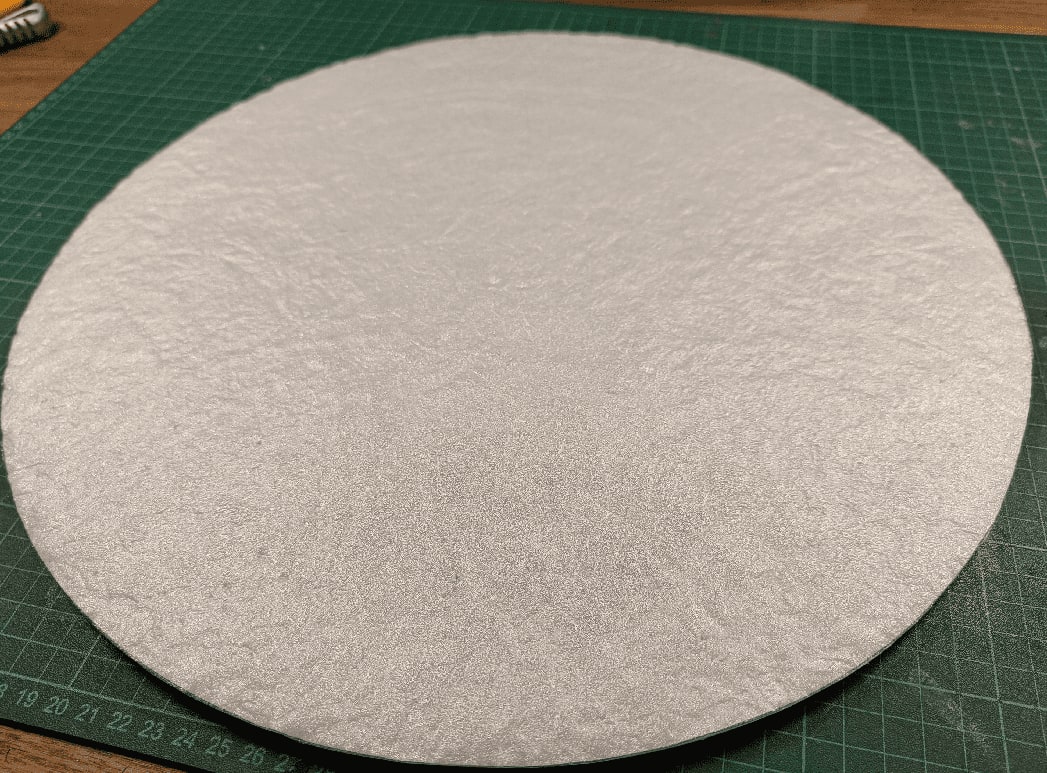
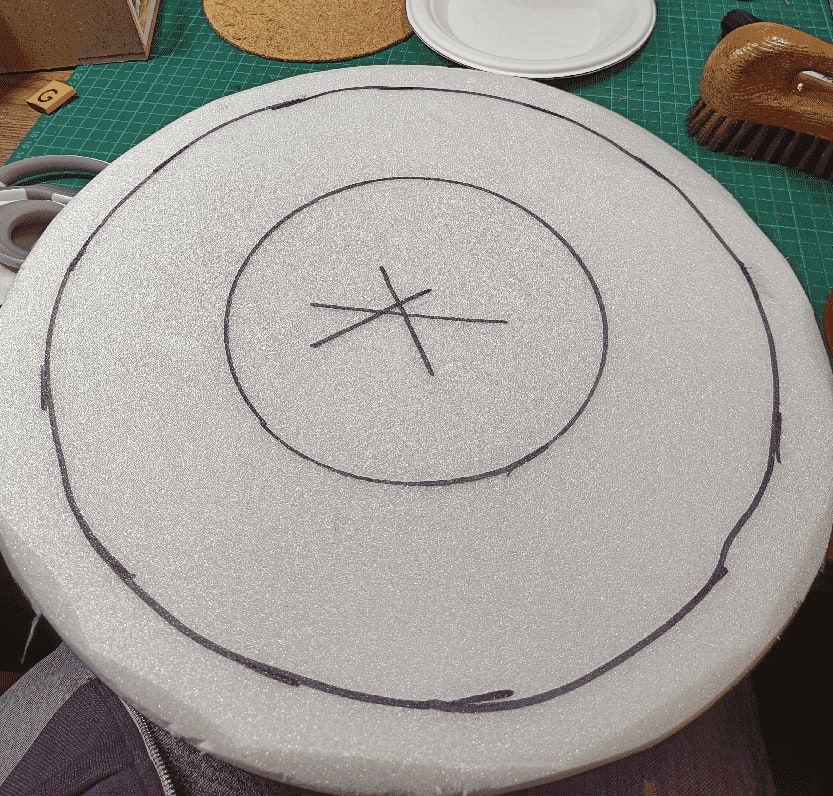
I then textured it with the usual rocks/aluminium foil. In hindsight, I'm not even sure that step is requires as I'll be adding a lot of dirt and rocks later on.
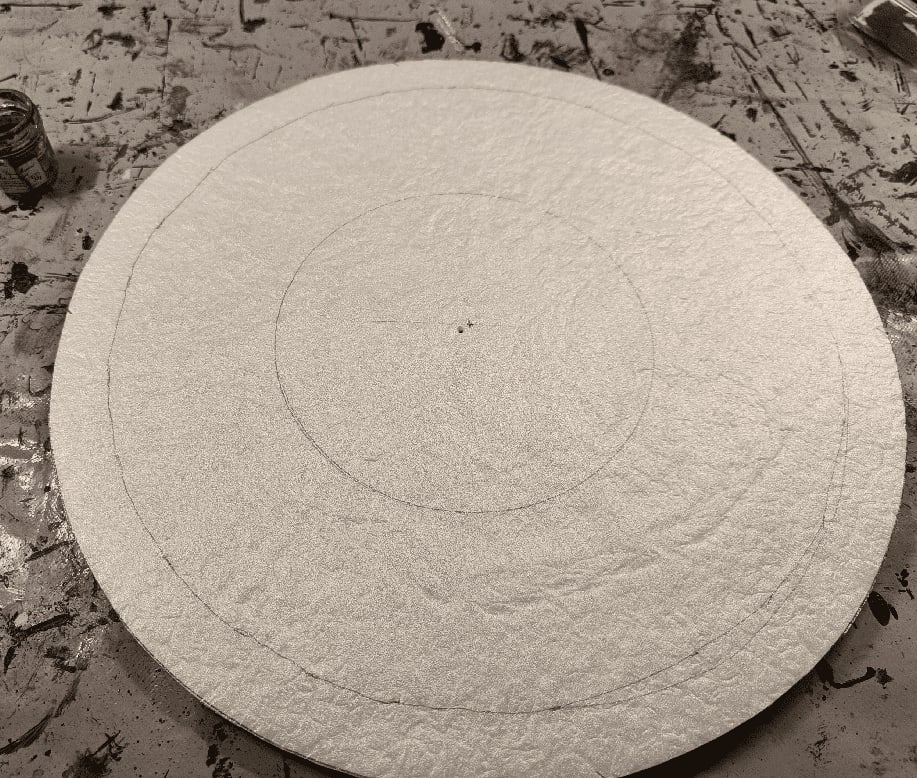
I roughly traced the three concentric circles. My initial idea was to have a way (either through texture or paint) to see the three zones, but still make it look like a swamp, without artificial lines drawn on it.
In the end, I didn't managed that effect really well. The final result only has two zones: the deep center, and the shallow outline.
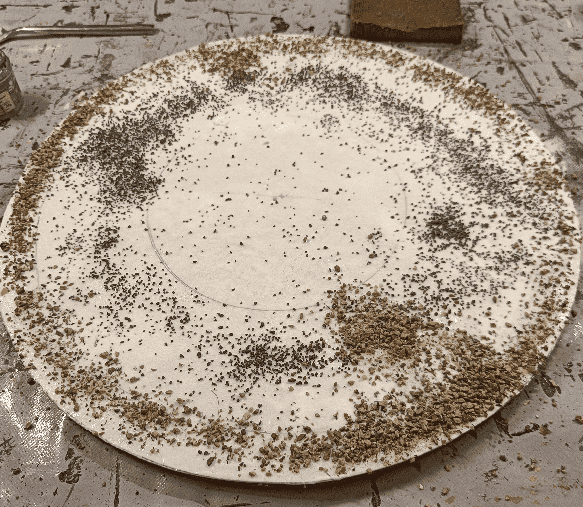
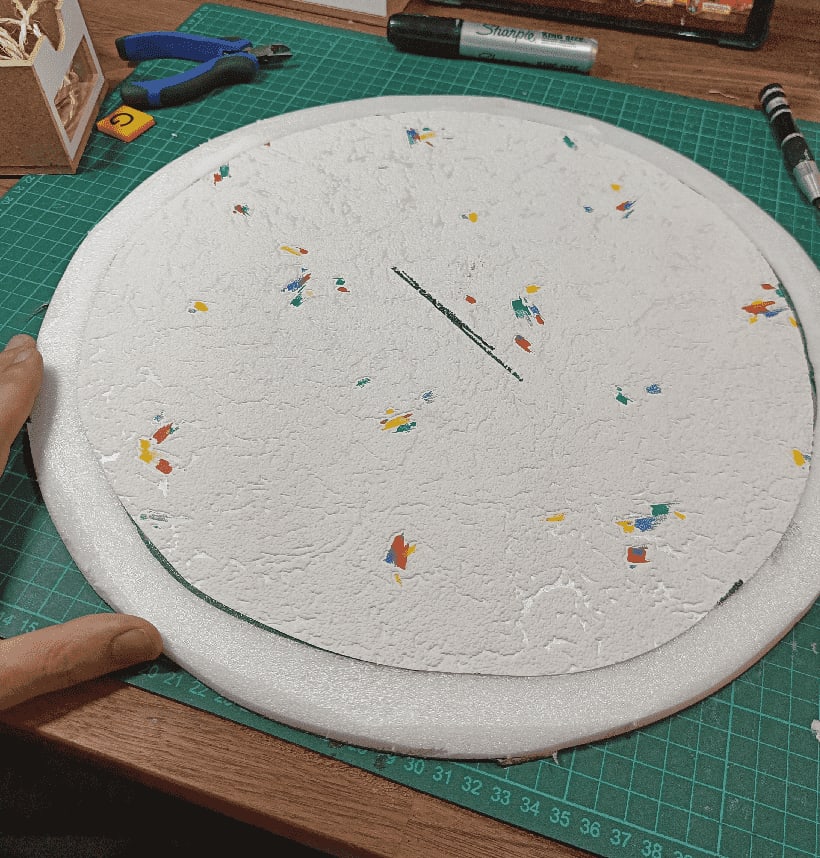
I covered everything with glue, and sprinkled various rocks and dirt on it. I tried to put the larger rocks on the outside, and almost no stones on the inside. Once again, I don't think this shows much in the final result.

I added some bits (chains, skeleton parts, weapons) here and there to give it some depth (both literally and figuratively). I find that those little touches (forgotten bottles, lit candles, footsteps, etc) makes our brain develop stories around them and make the terrain piece more real.
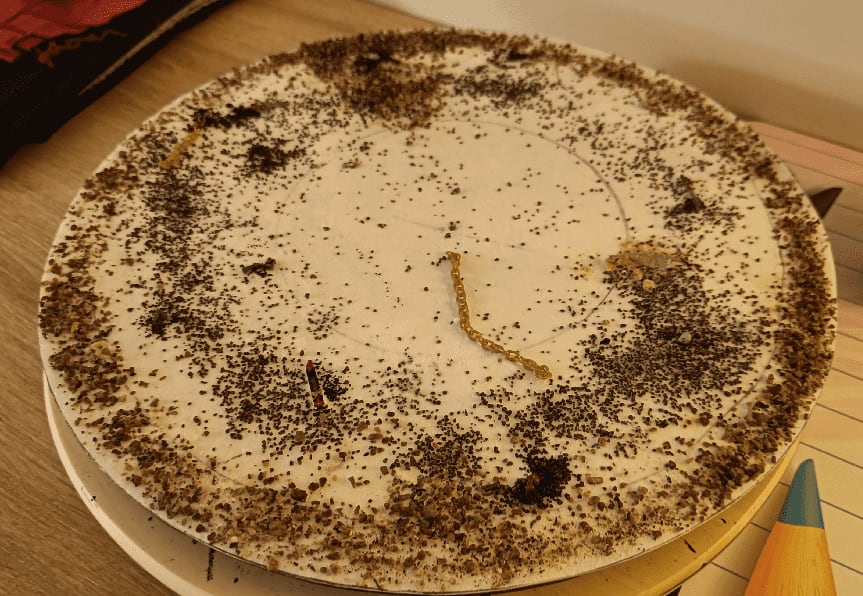
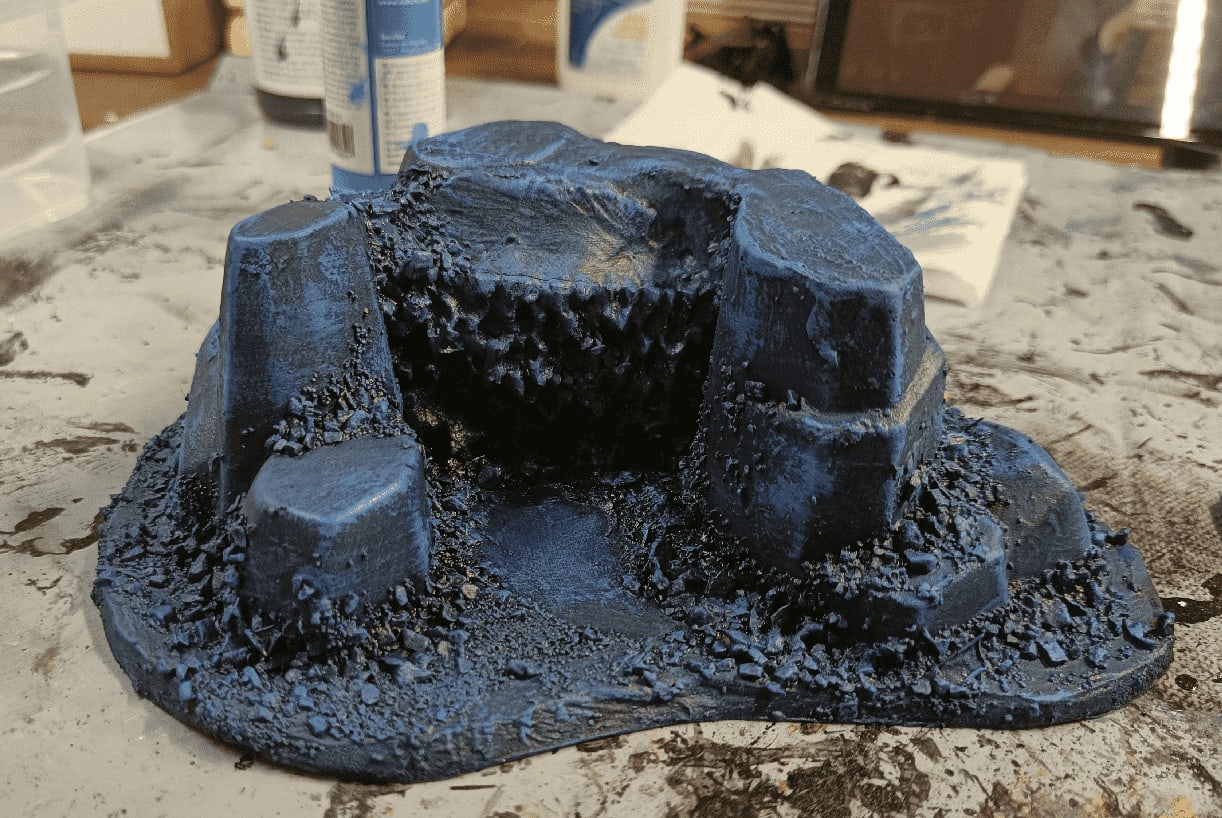
I let the glue to dry for one night, then I added a second layer of highly diluted glue all over it to really seal in all the rocks.
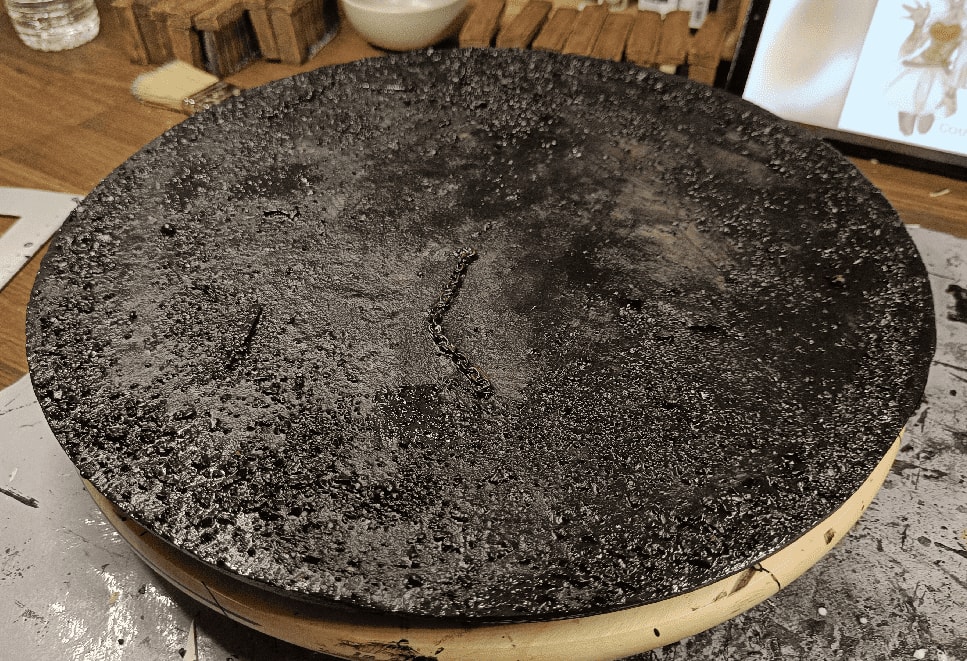
Once dry, after one more night, I basecoated it with the traditional black and modpodge mix. Those three layers of glue should put all the rocks well in place for the next steps.
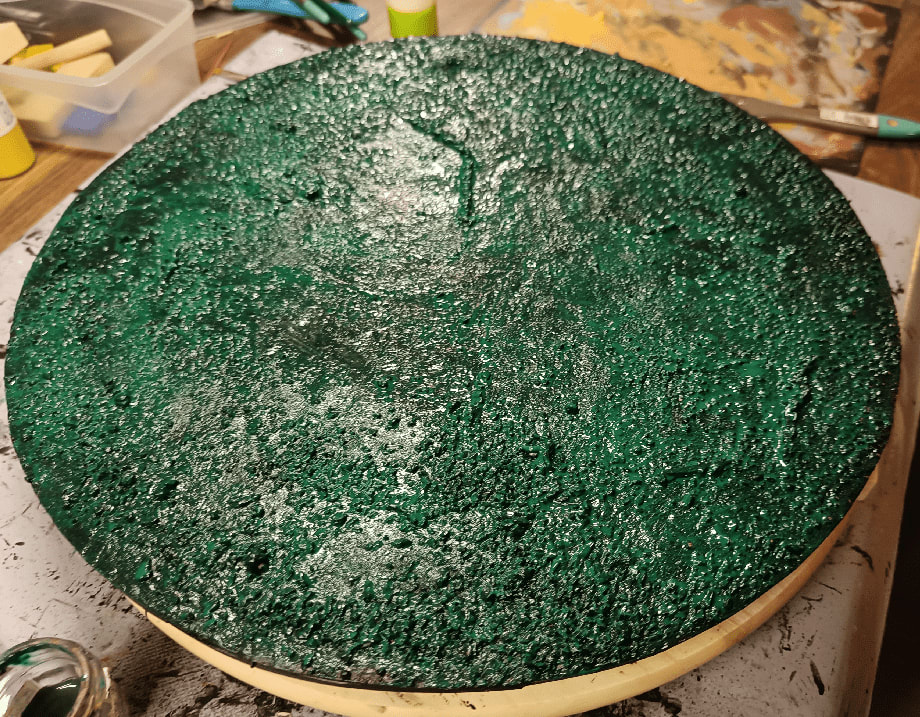
I did a first coat of green paint.
Then, once dry, I dappled a sponge into various browns and greens and dabbed it on the surface, avoiding the central pit. The goal was to make it look like the center is deeper than the rest, and also muddle the colors so it doesn't seem like one uniform flat surface.)
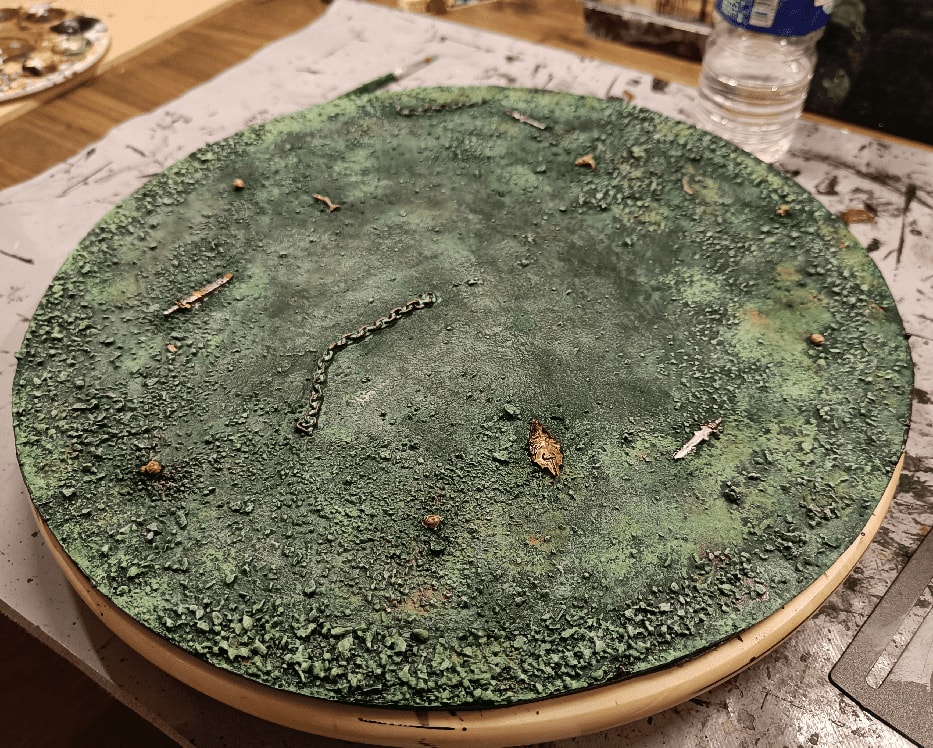
I then painted the individual bits (bone, chains, weapons) and drybrushed with a tan color all around it.

I then applied a serie of brown and green washes on it. I actually prepared something like 6 different shades, dabbed a big brush in the first shade, applied it on the piece in a rough circle, then dabbed in the next shade, made another circle next to the first, and continued, cycling through all shades. I tried to blend the circle together when they met, and it helped accentuate the weird coloring (not to mention that it's a very soothing thing to do).
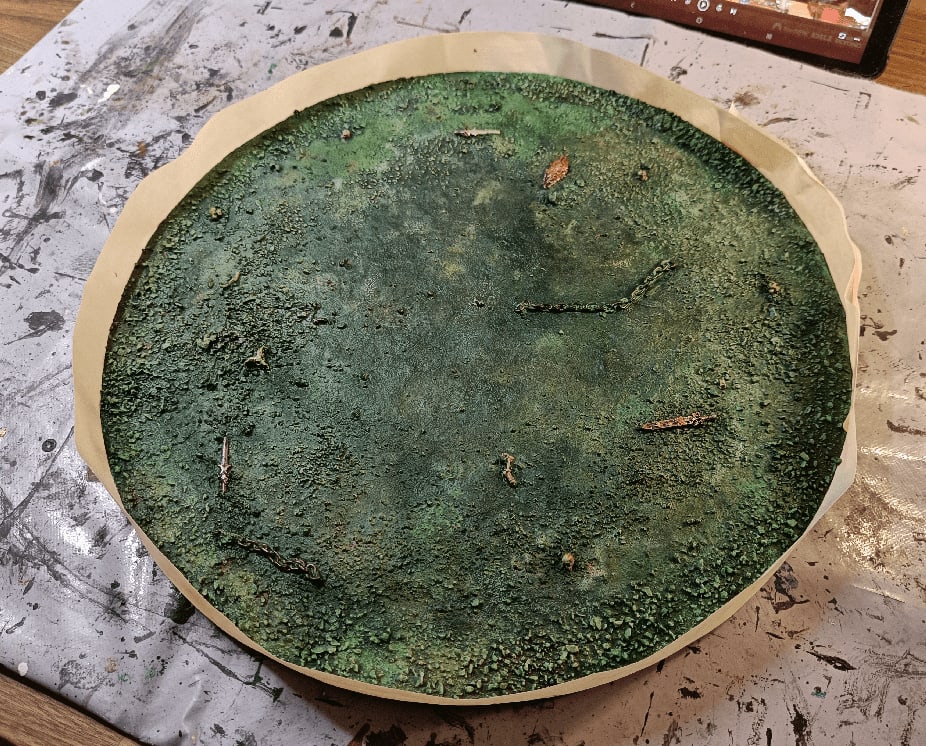
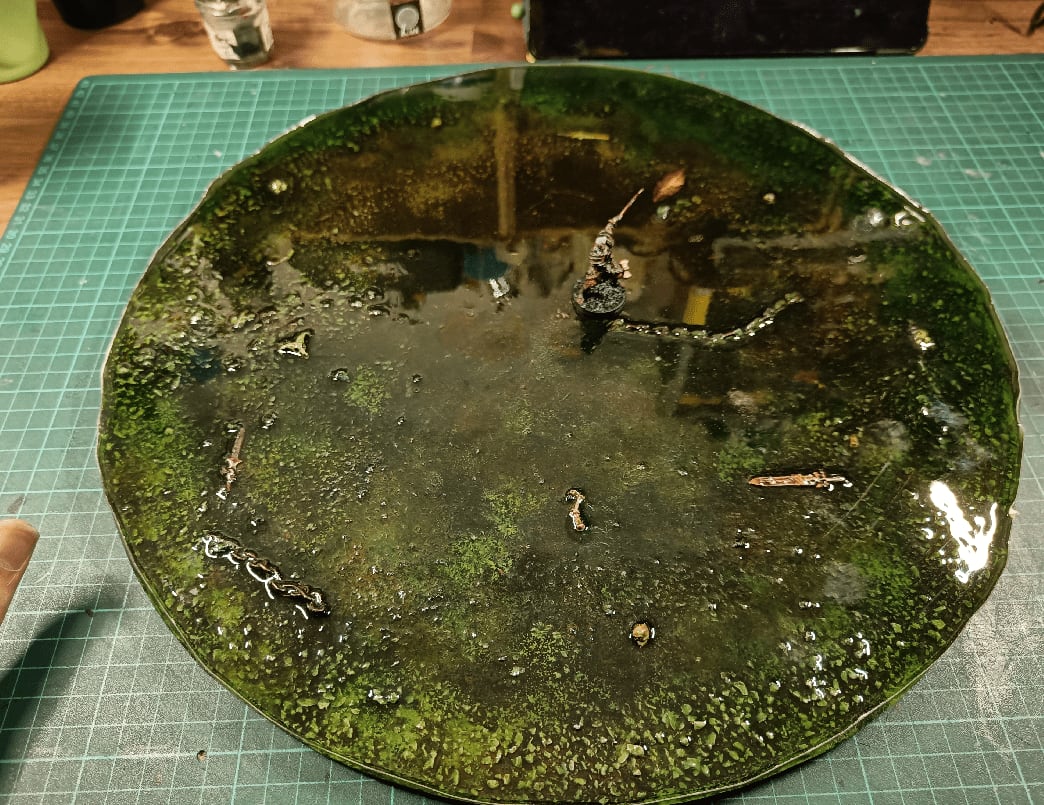
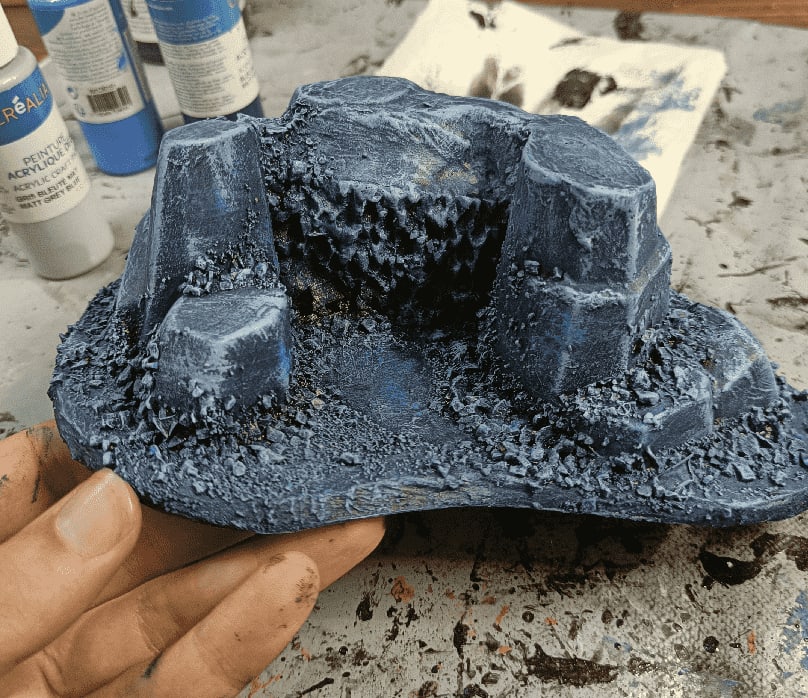
Once dried I added some masking tape all around it, in preparation of the resin pour. I pressed the tape real hard, to make sure no resin would leak.
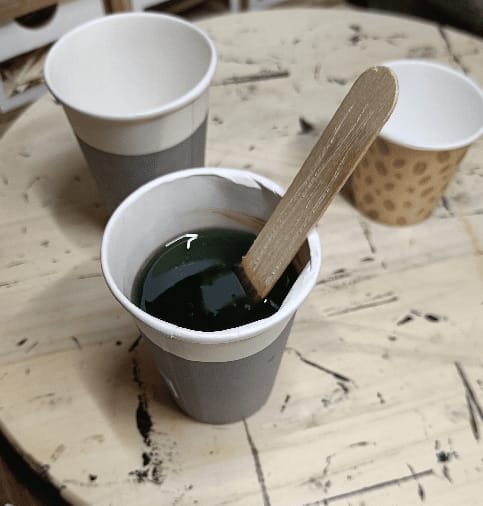
This is the first cup of resin I made. I added a few drops of green ink into it. I had no idea if the quantity was right.
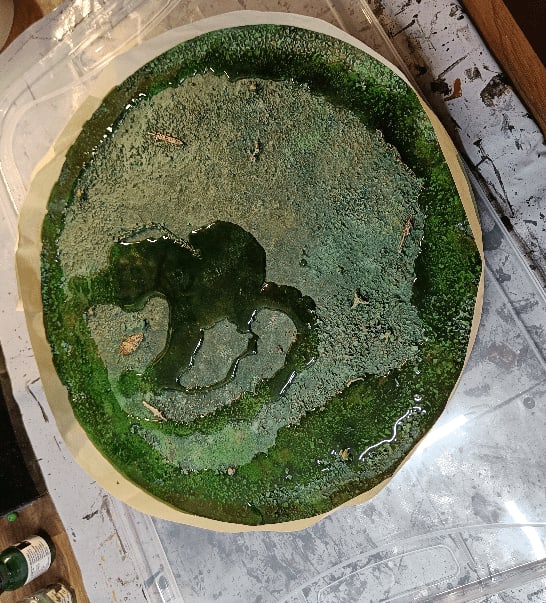
This was clearly not enough resin, it covered only about half. So I quickly made another batch before the first one could cure too much.

I managed to mix the second one before the first one could start to cure, and by leaning the UDT in all directions, I finally managed to cover 100% of it.
I finally made a last third pour, this time with brown ink mixed into and only poured it in the center and let it slide wherever it wanted. Because the first pours didn't cure yet, it blended a bit with them, but as most of the ink was concentrated in the center, it accentuated the depth effect a little bit more.
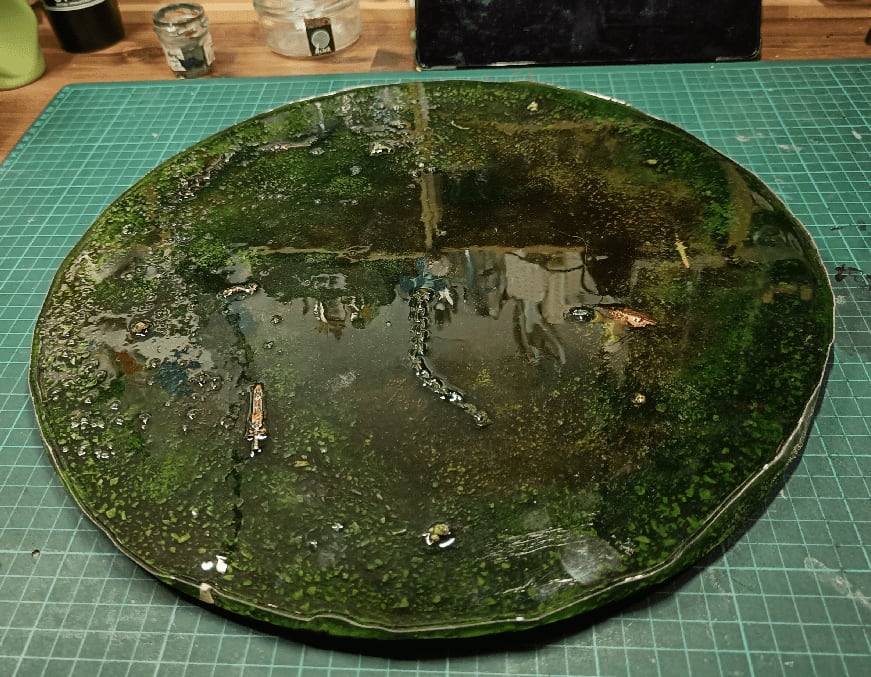
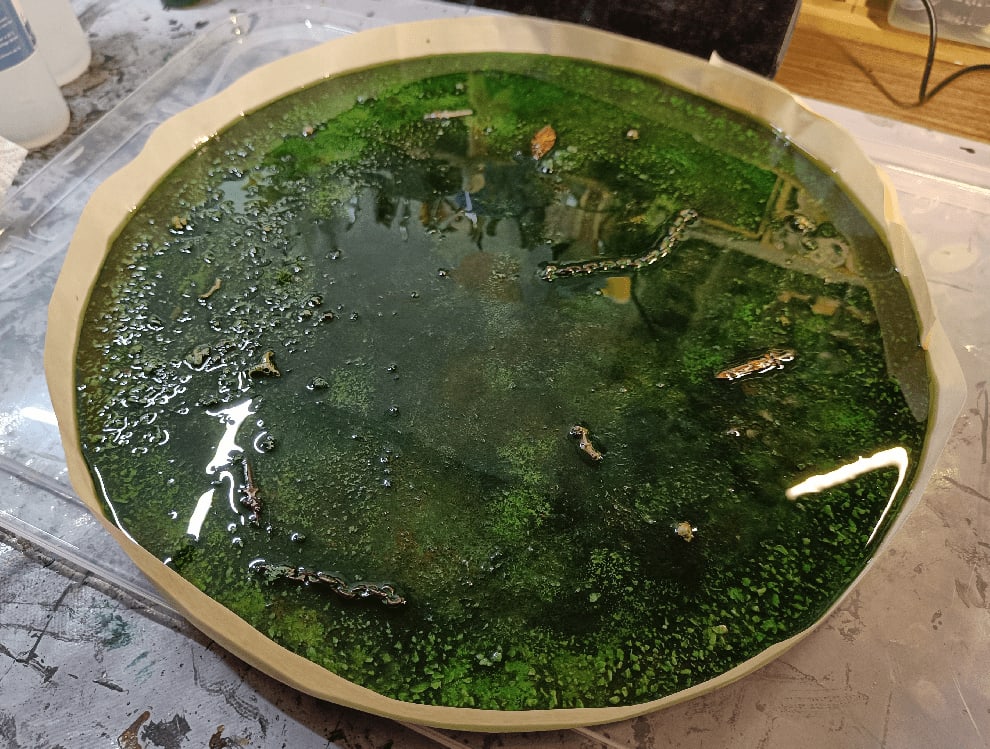
And after one night it was cured (and no leaks \o/) and I could remove the masking tape.
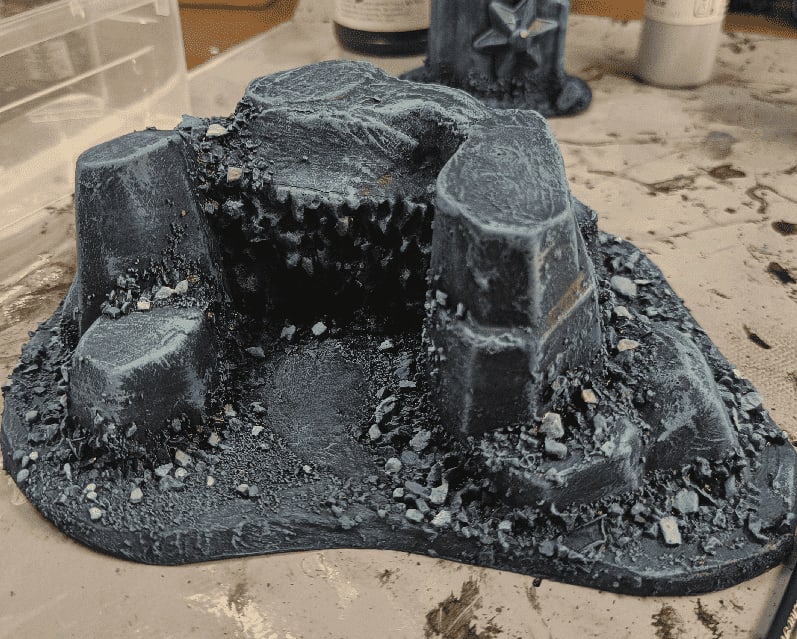
And here is the final piece!
The surface wasn't varnished and I quickly realized that it was taking fingerprints and tiny notches pretty quickly so I varnished it for protection. The only varnish I had was matte, so it dulled the reflectivness a bit, which I actually enjoy better (no picture of that, sorry).
Overall, if I had to do it again, I might not have spent as much time on texturing the foam because most of it is hidden. I might have either gone full speed on not bothering with the three concentric rings and just made it look like a murky swamp, or have created a more frontal and explicit separation between the circles.
There isn't much I would change though, for my second resin pour ever, I'm very happy with the results.
Snow Scatter Playmobil Terrain
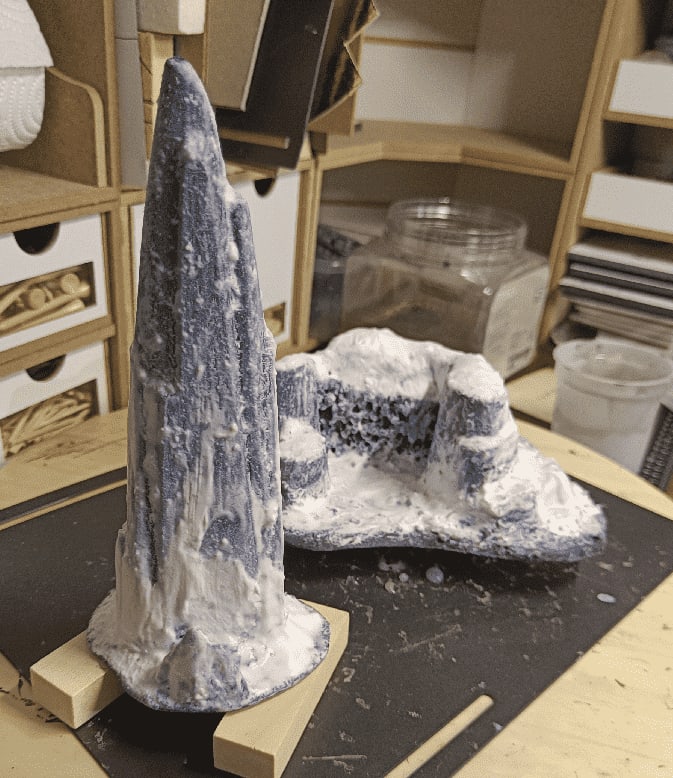
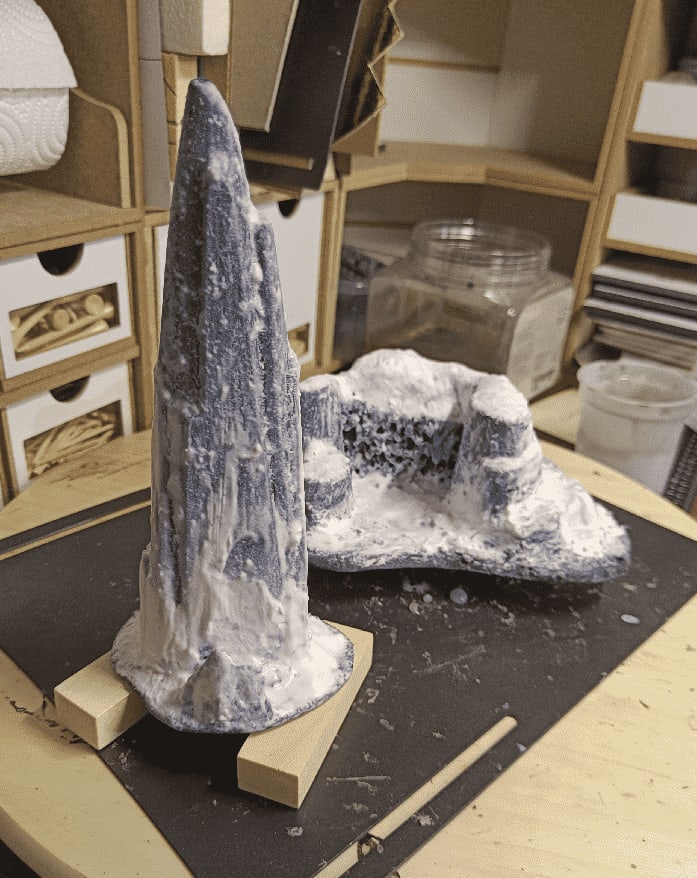
My daughter being in a Frozen-Let-It-Go phase, she asked me if I could create some snow mountains for her to play with her Elsa and Olaf toys.
I used some Playmobil hills and rocks we had laying around and found it a great opportunity to try to build some snow terrain.
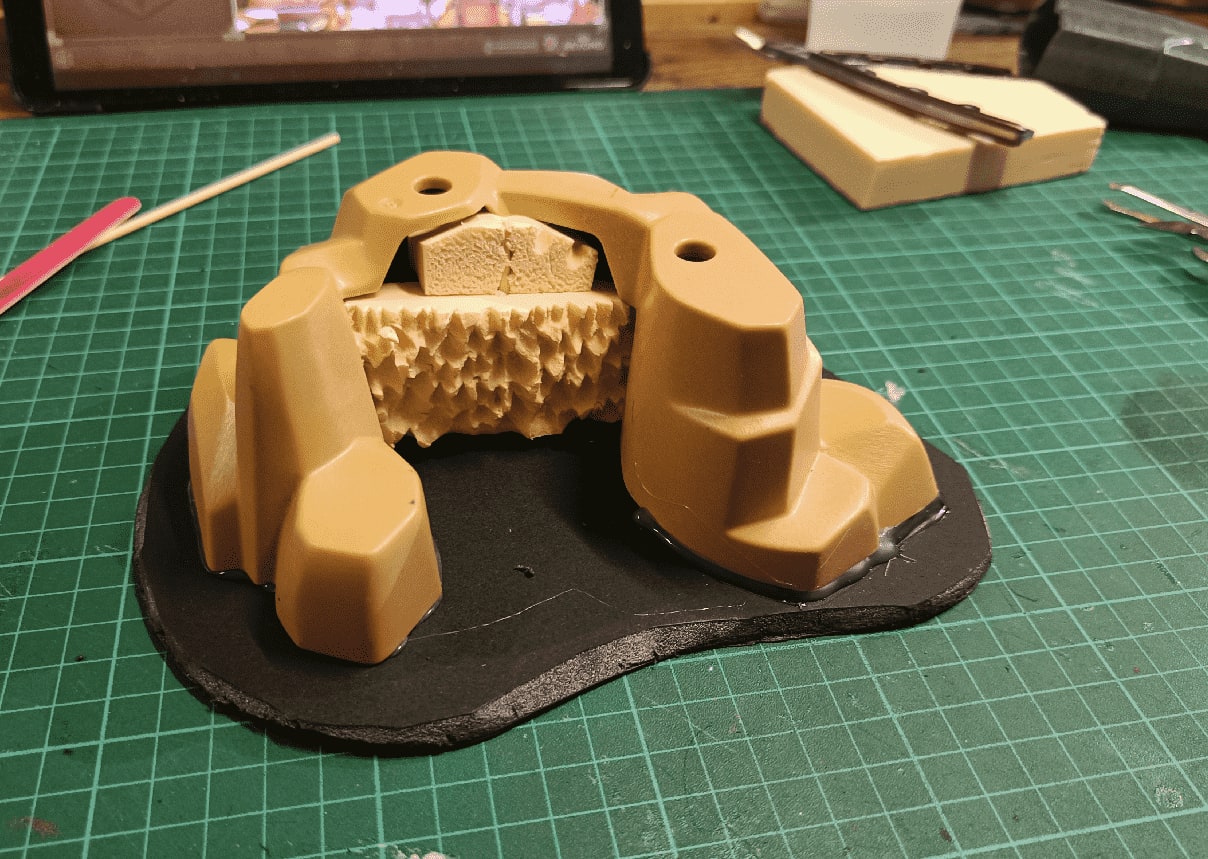
It all started with a Playmobil rock formation glued on top of foamcore. I crammed in some more foam to fill the hole and carved some rough surface using a knife and extracting small bits of the foam.
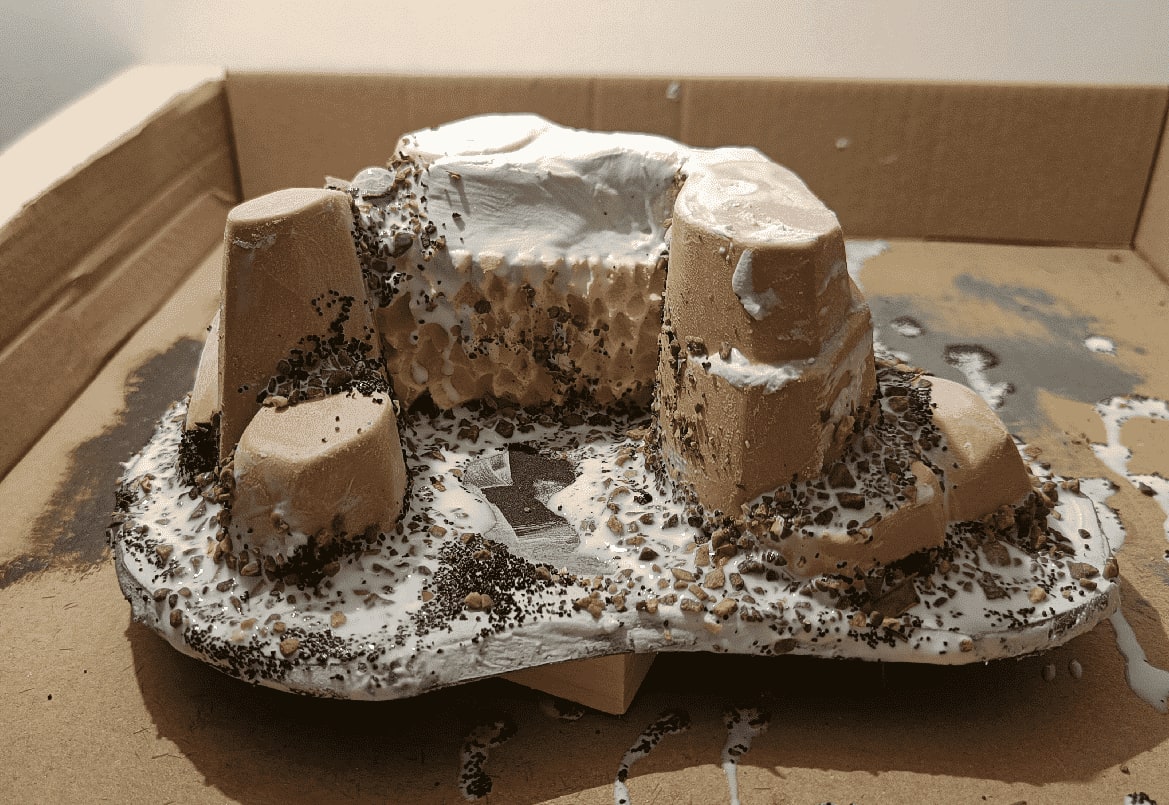
I filled the other holes with spackle and rubbed some on the flat surfaces to give it more texture as well. I then added glue, rocks, sand and more glue to cover it all.
In hindsight that part might have been overkill because I will be covering almost all of it with snow later.
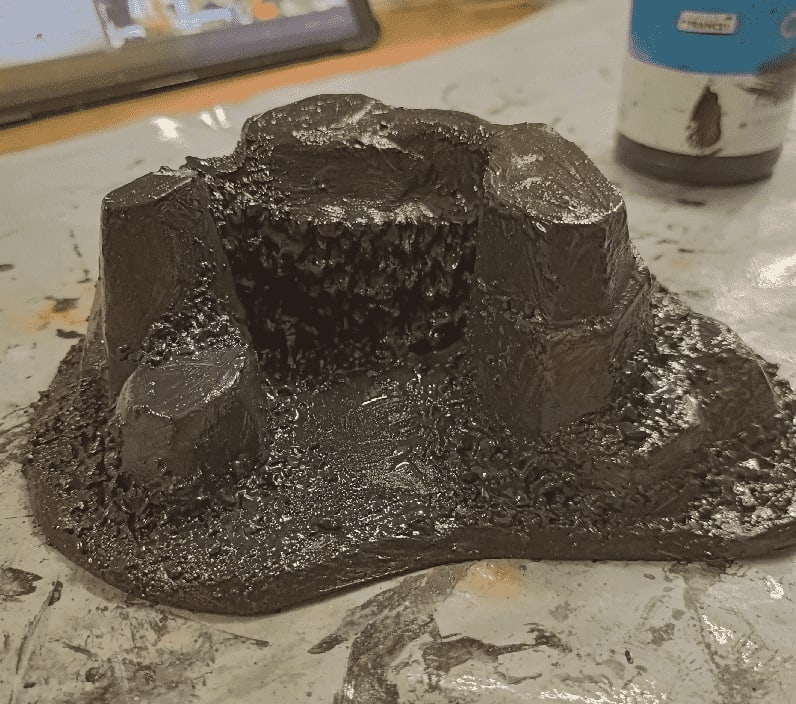
The usual black base coat.
I started with some blue undertones.
And progressively moved onto lighter tones in drybrush.
Once again, not sure it was useful as it will all be covered in snow later on.
Continuing on the useless detailing, I colored individual stones to break the visual monotony.
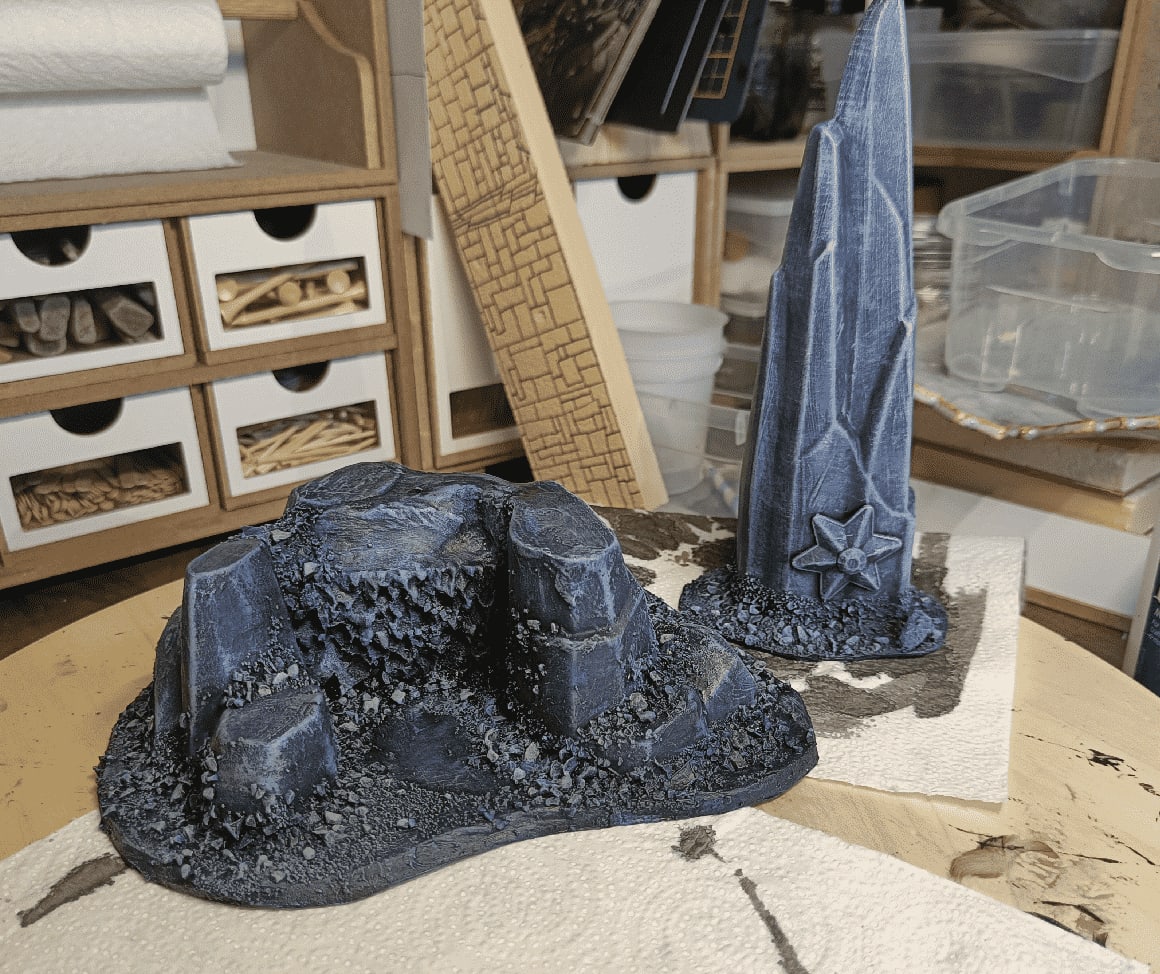
I also worked on a second, similar, piece: an obelisk at the same time.
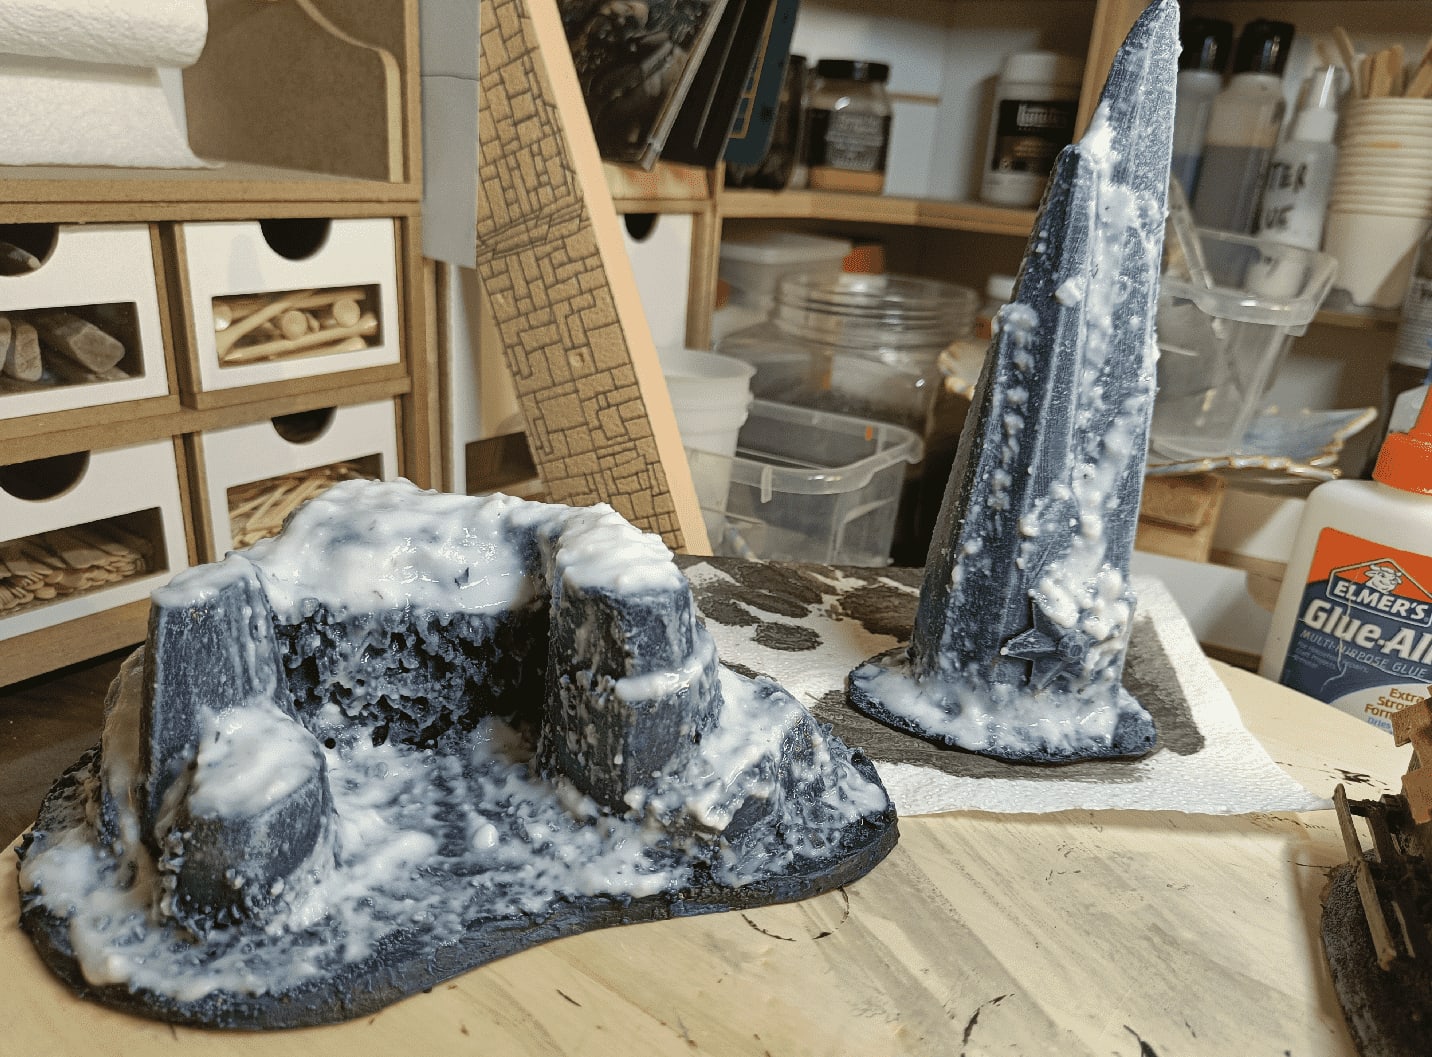
I baked a mixed of water, PVA glue and baking soda to create fake snow. This looked like a great idea at the time, cheap and effective.
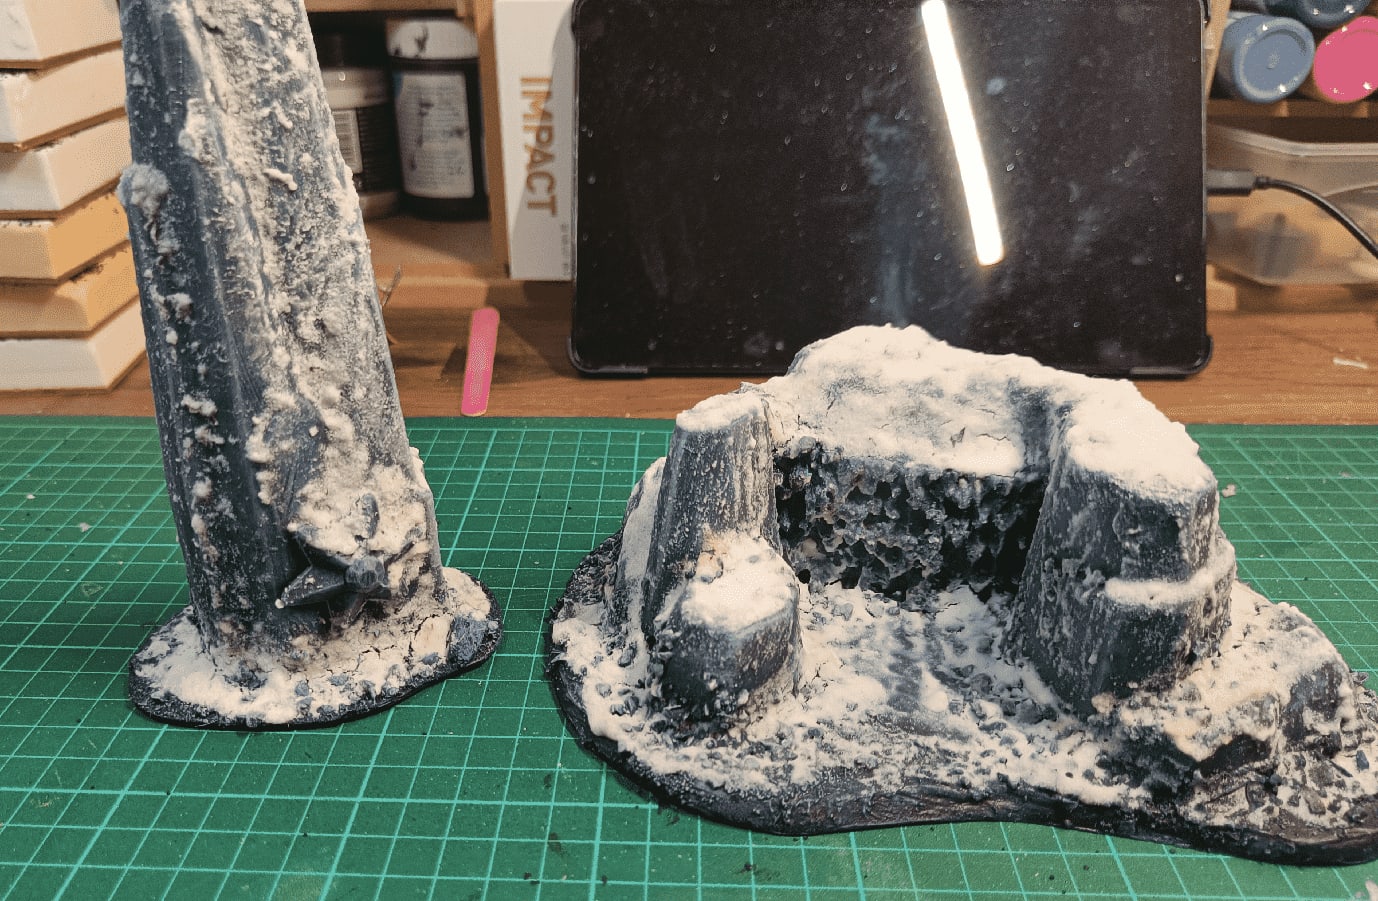
But after letting it dry for a few days, cracks started to appear. This could actually be an interesting feature on an icy lake, but here it just felt wrong.
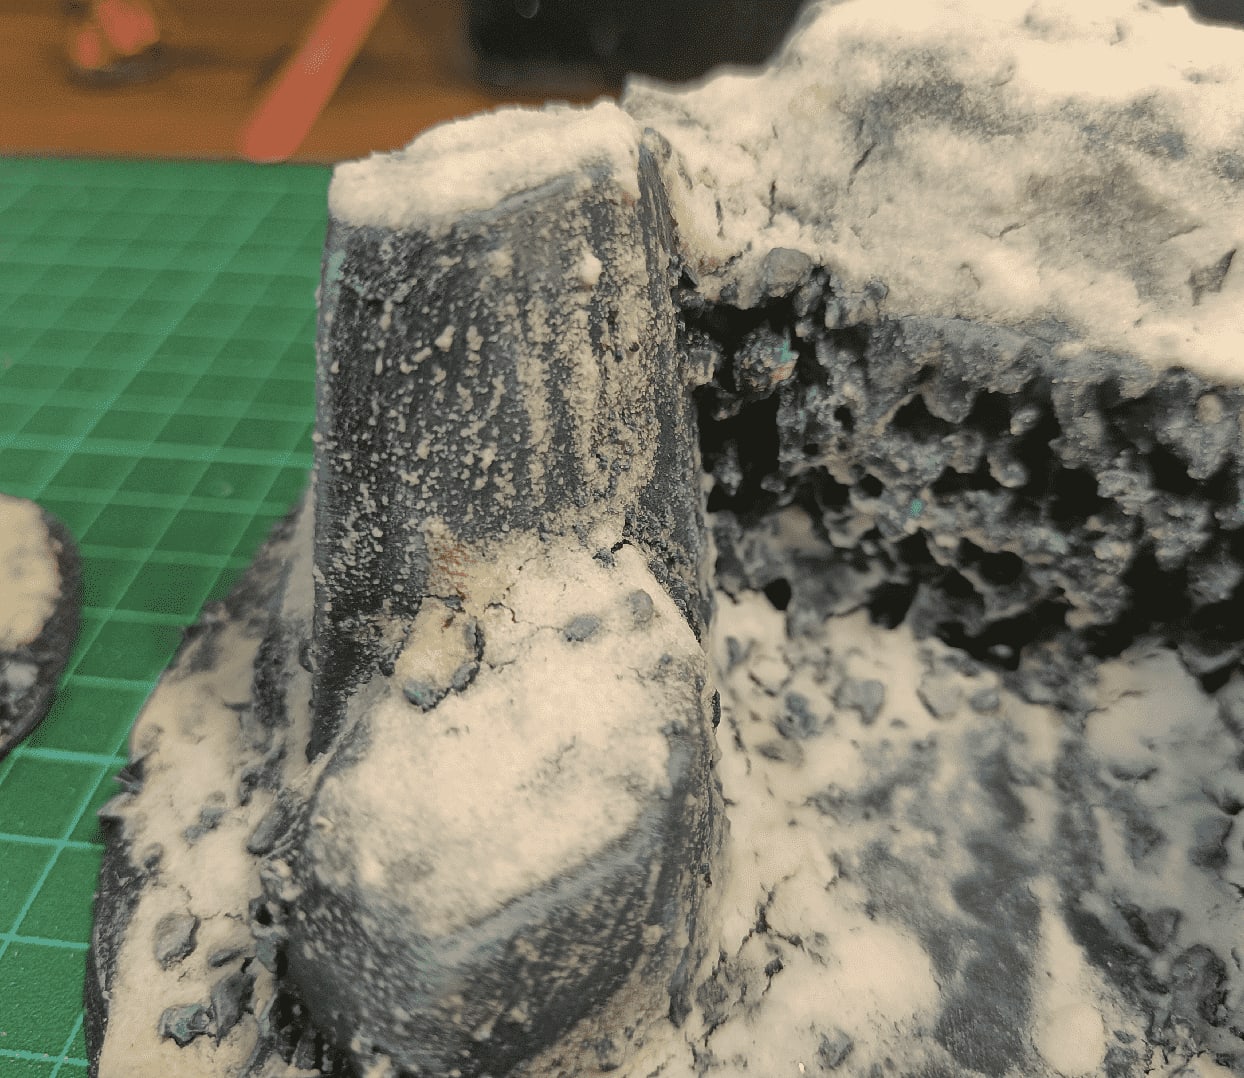
Even worse, the "snow" started to turn yellow where I had touched it when it was drying. Some would say it adds to the "realism" but I was aiming for a more pristine snow effect.
I finally went on an bought some official diorama fake snow (AK Terrains Snow and AK Terrain Snow Sprinkles) and covered back my creations with it.
Overall they work as nice pieces of scatter terrain (and toys for my daughter), but if I had to do it again, I would spend less time detailing what would end up below the snow and would use professional snow directly. I would still use Playmobil rocks as the base as they are very durable and offer nice shapes, but I might try to add some glitter to my paint or fake snow to make it a bit more shiny, like real snow is.
Night Goblins
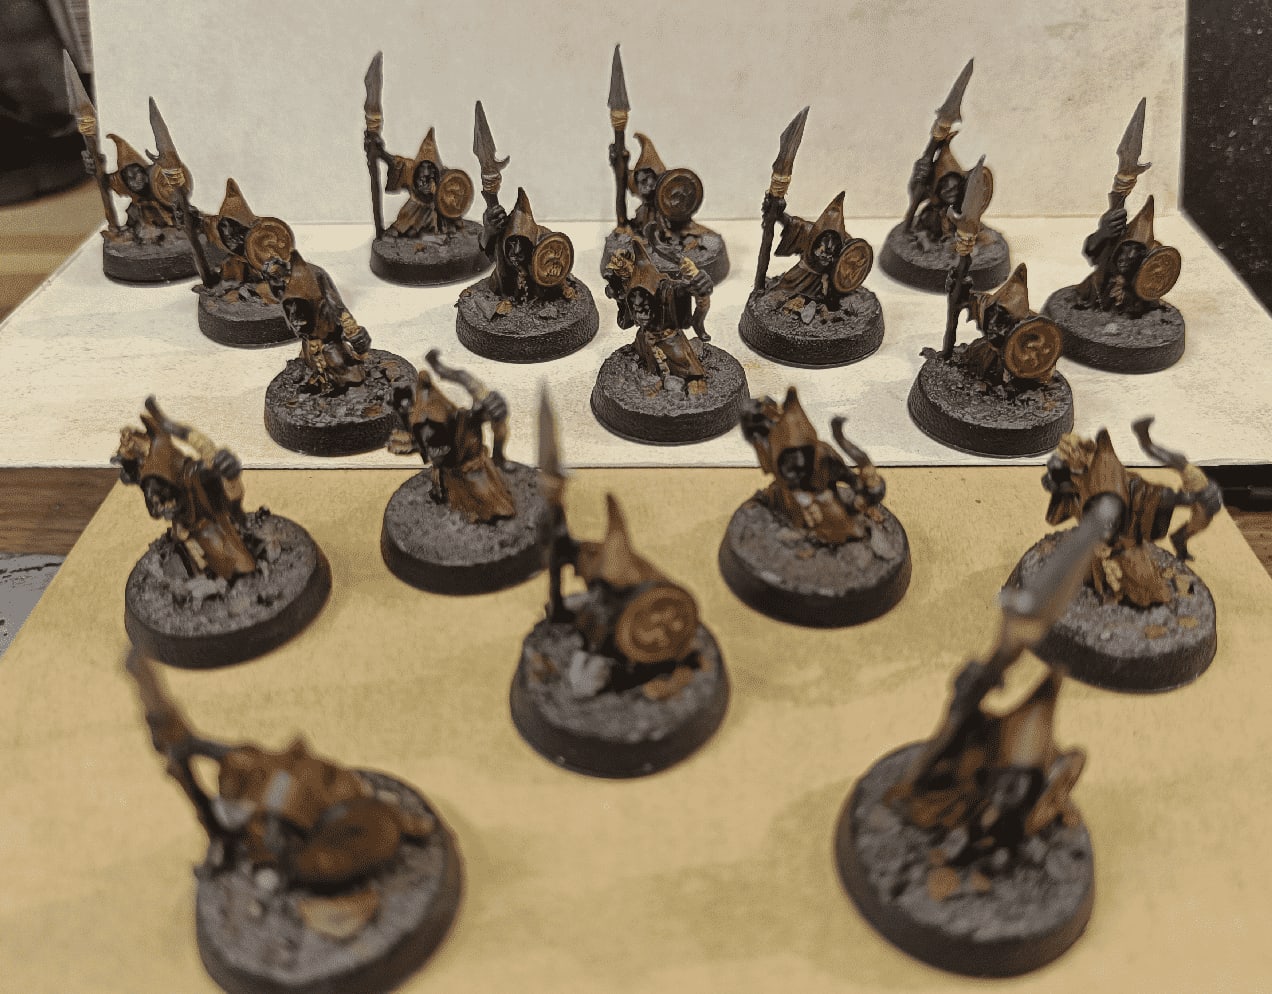
A little break from painting terrain, I wanted to paint some miniatures. I picked those night goblin out of my pile of unpainted minis, mostly because I liked their sculpted more than having any specific use in a game.
I have so many unpainted minis, I'd rather paint what I'm excited about more than what I could need in a game. I realize that I'm more inclined in putting specific monsters in an encounter if I have the right miniature to represent them, so I'd rather paint nice minis so it gives me more opportunities for encounters.
I also decided to apply some of the techniques I learned in crafting terrain to those little guys. Instead of spending a lot of time on minute details that won't be seen, I went with the tricks I know that help giving a nice effect with little effort.
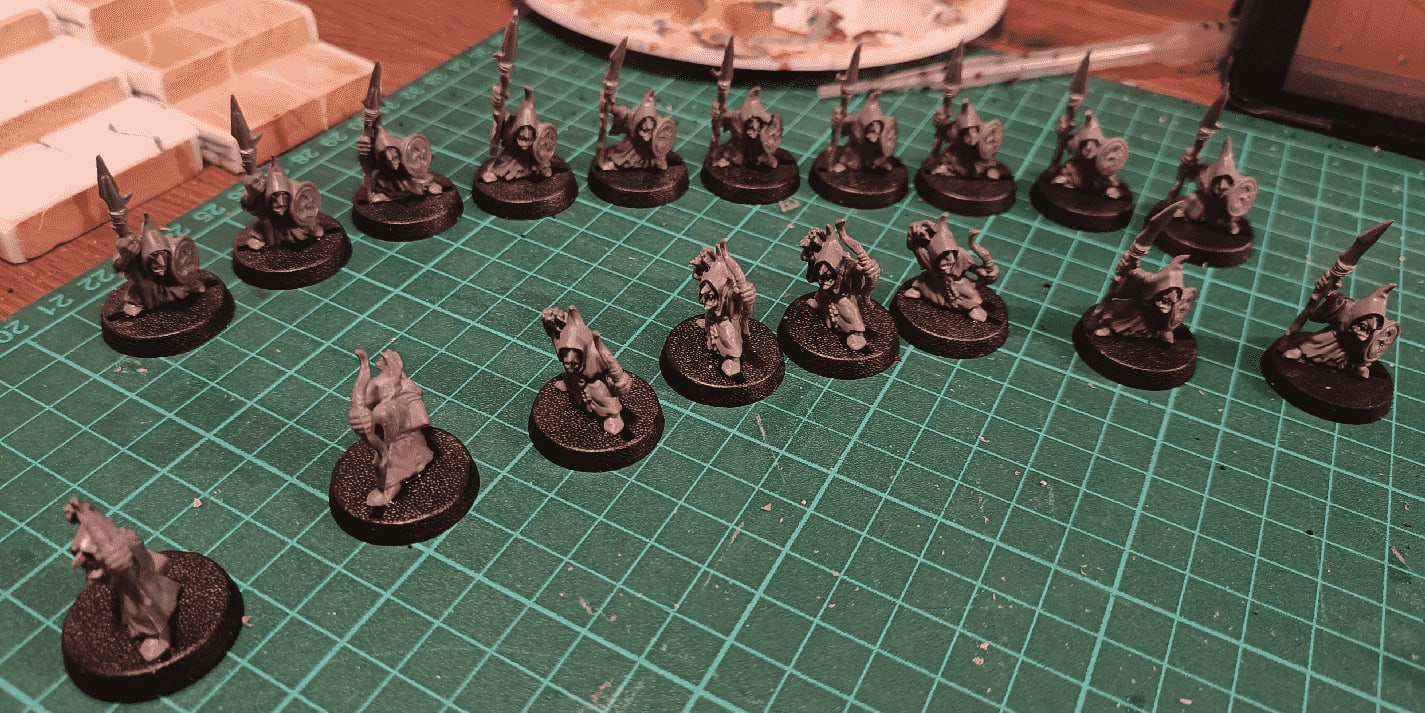
I started by picking a nice group of those guys. Some with lances and some with bows. About 8-10 of each, which is what I think is the maximum I would ever need in a given encounter. I find that painting in batches is where I enjoy painting the most. I also tried to pick a variety of sculpts so they don't all look the same.
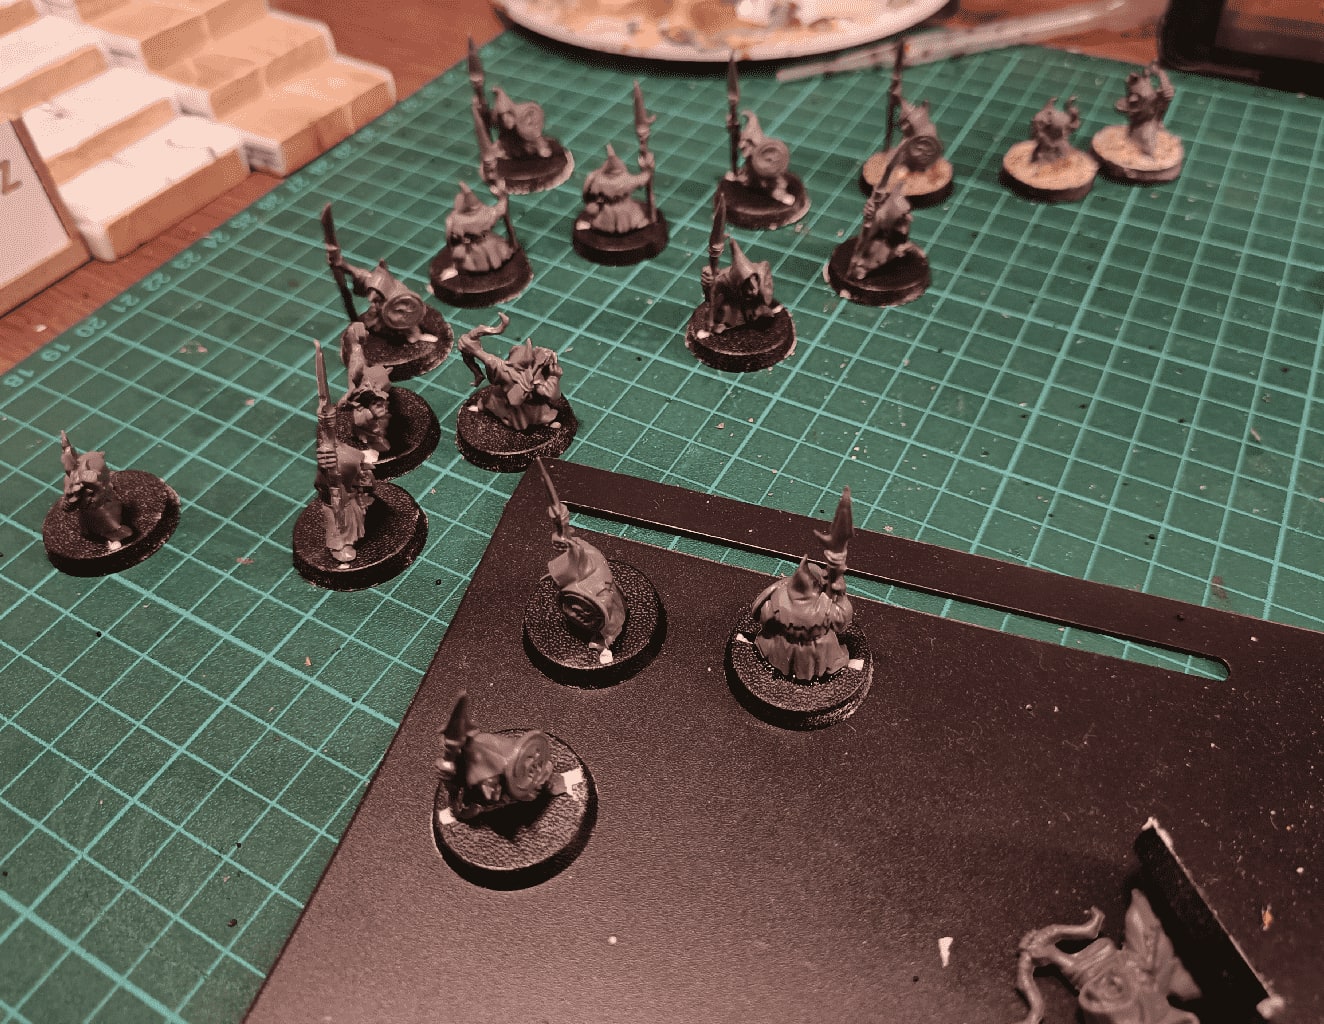
As they are from the era of "plastic-bar-between-the-feet", I needed to fill the gaps of the bases. I used some modelling paste for that. It took some time to dry, but I really took my time on this project, not rushing a phase before going to the next.

I then based them using a mix of small rocks and sand. I removed any excess from the sides with my fingers.
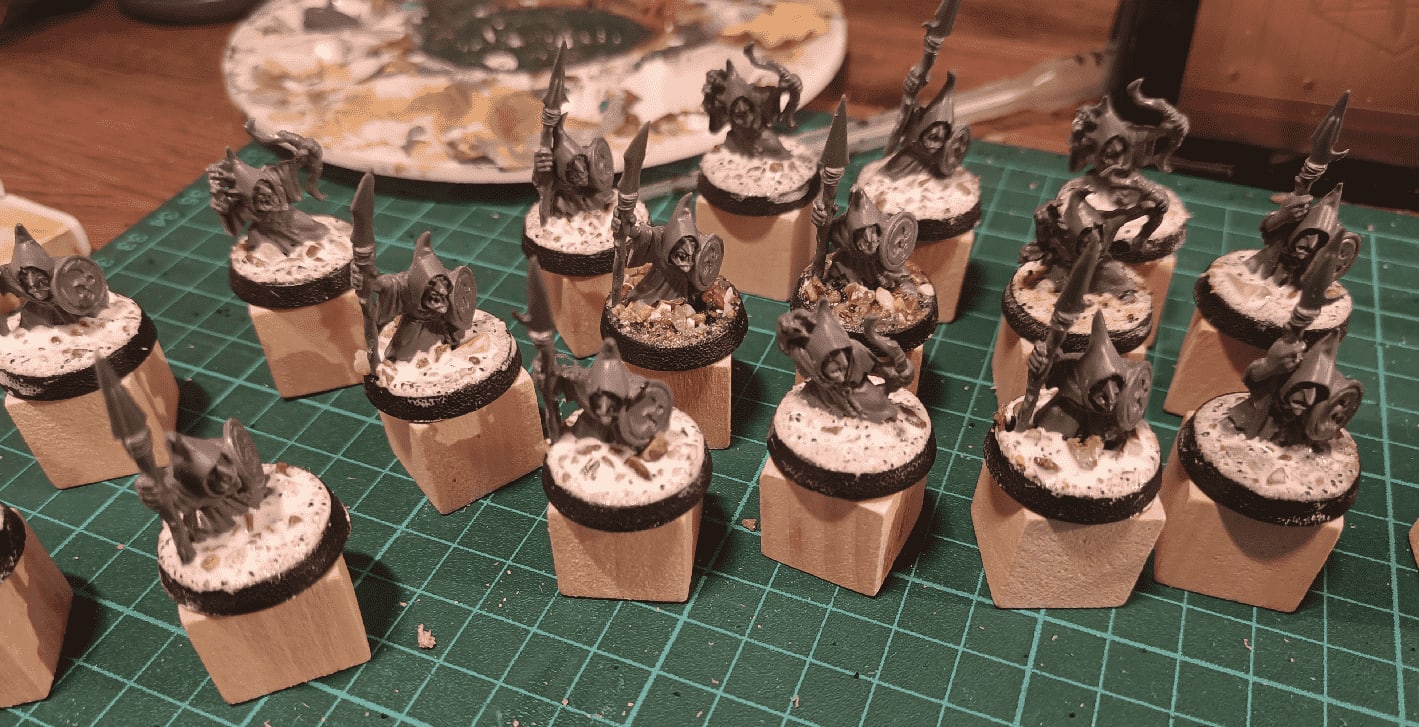
Once dry, I added very diluted PVA glue to the base (a 50/50 mix glue/water) to really soak it up and seal it for good. No more loose pebbles when manipulating them.
All those steps overall took me several days, as I was letting it dry in between each phase during the night. As I was working on other projects at the same time, it allowed me to work on other steps while this was drying.
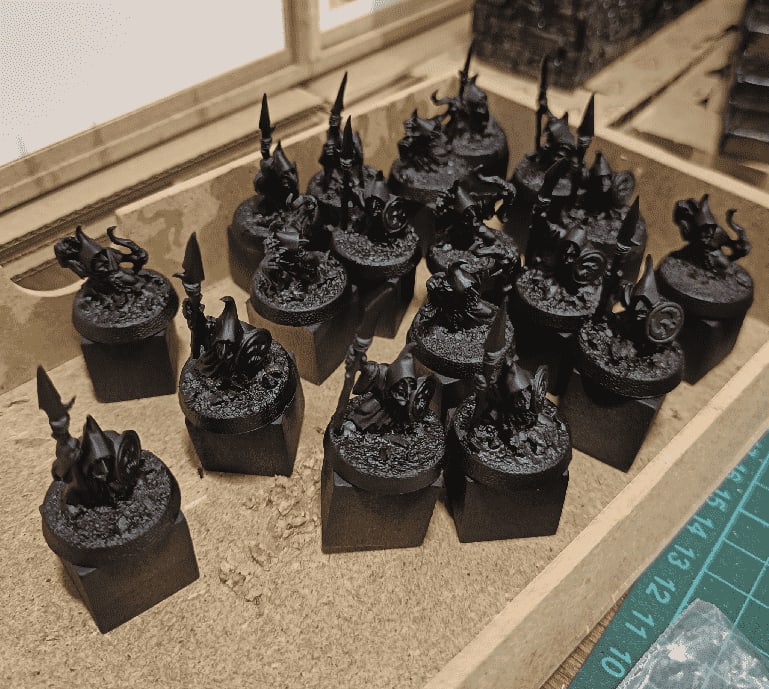
I then spray painted them black because hey, they are night goblins after all.
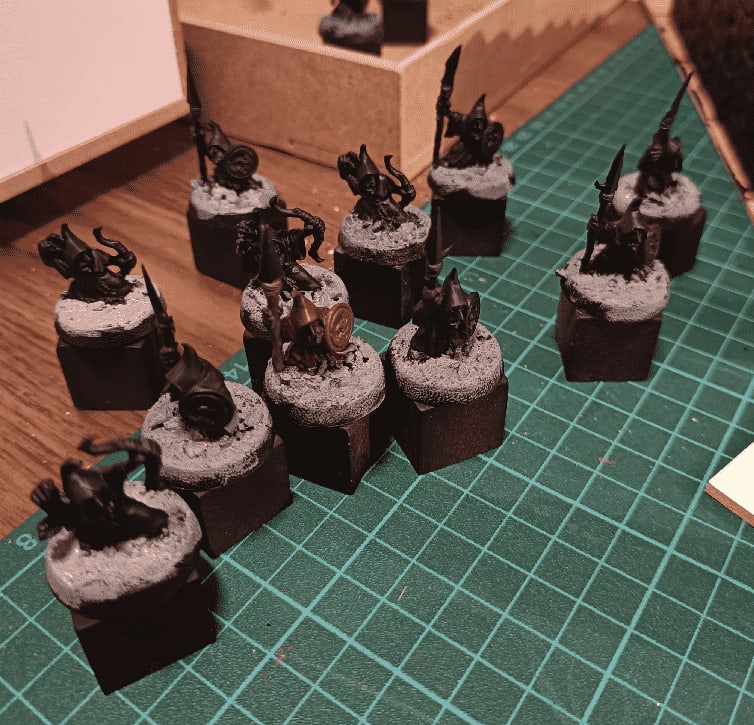
I started with the bases, because I thought I was going to do a heavy and rough drybrush on it and it seemed easier to do it before painting the rest.
Then the robe, with a brown.
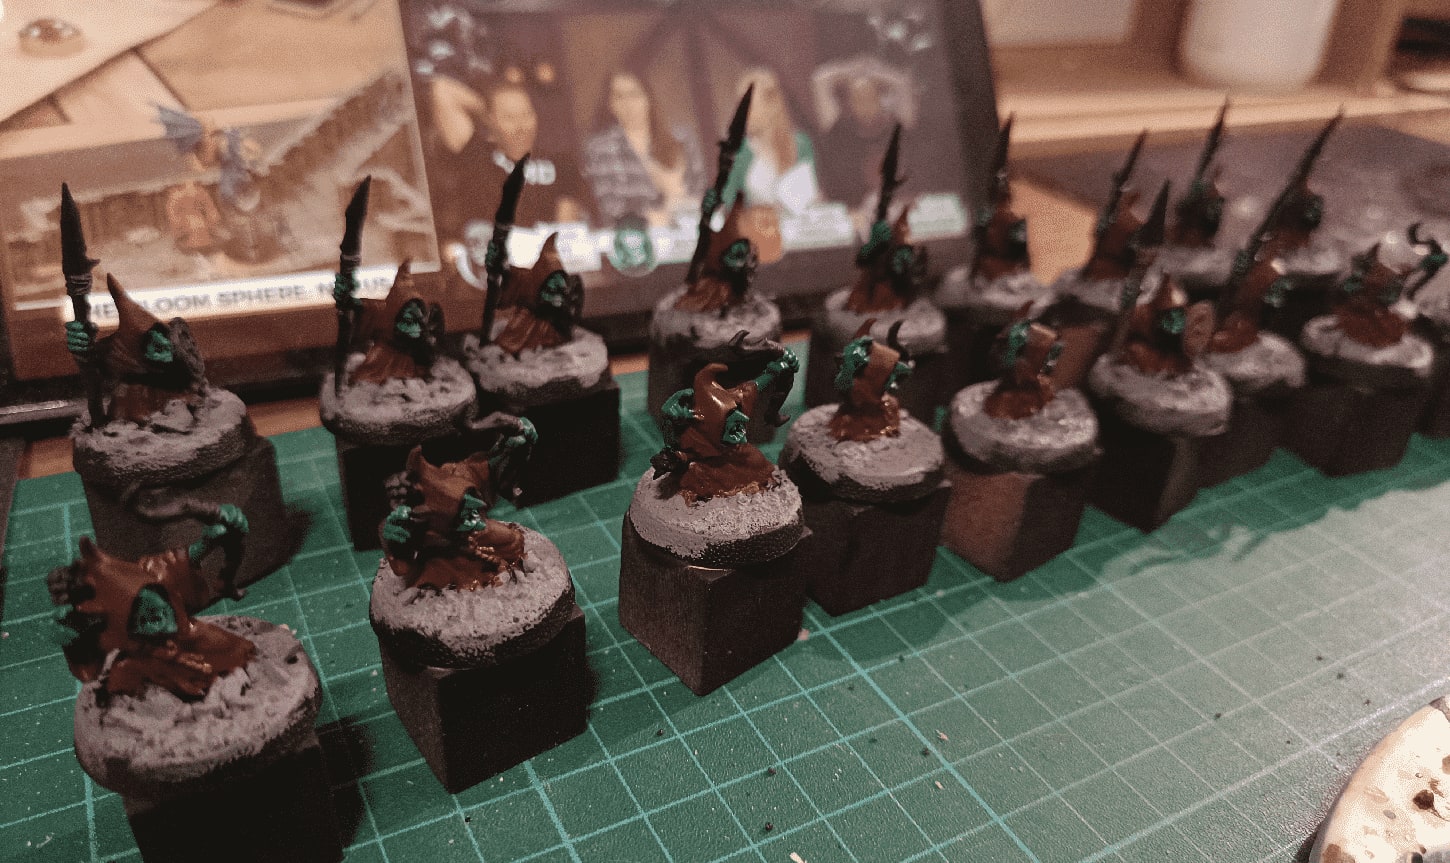
Then the skin in green.
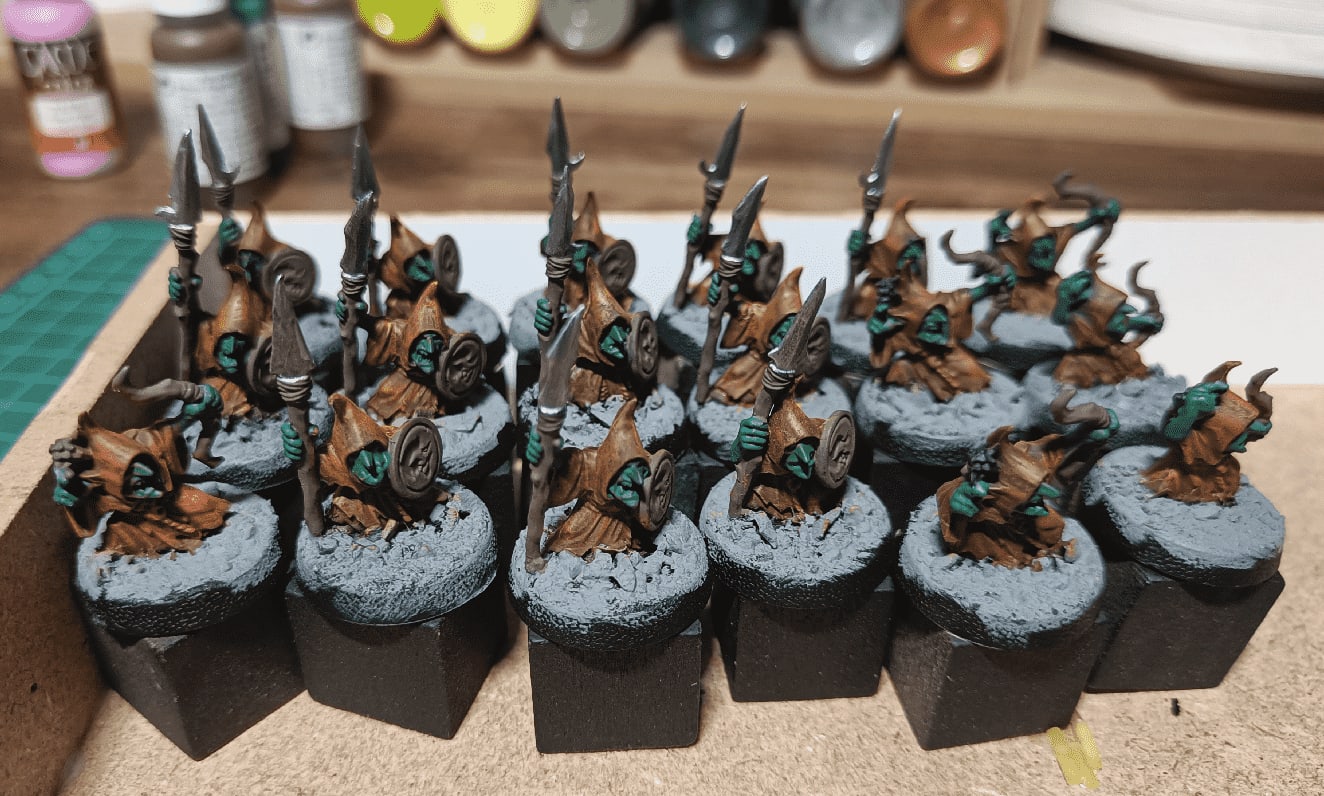
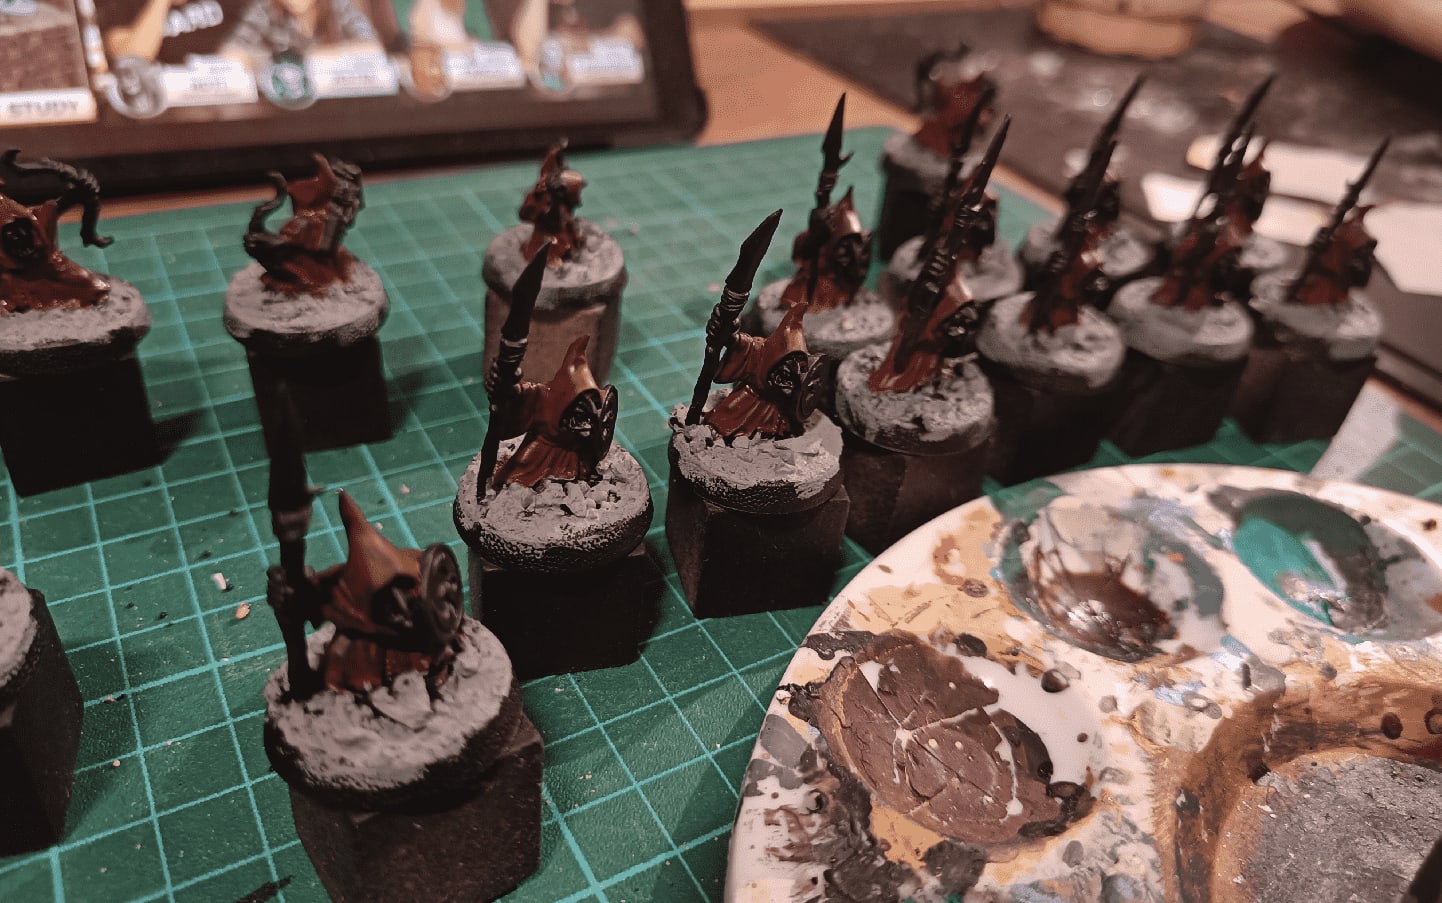
Now that the base tone where applied I continued with the weapons and metal, and applied a drybrush on both the robes and the skin, with a lighter shade of the base color.
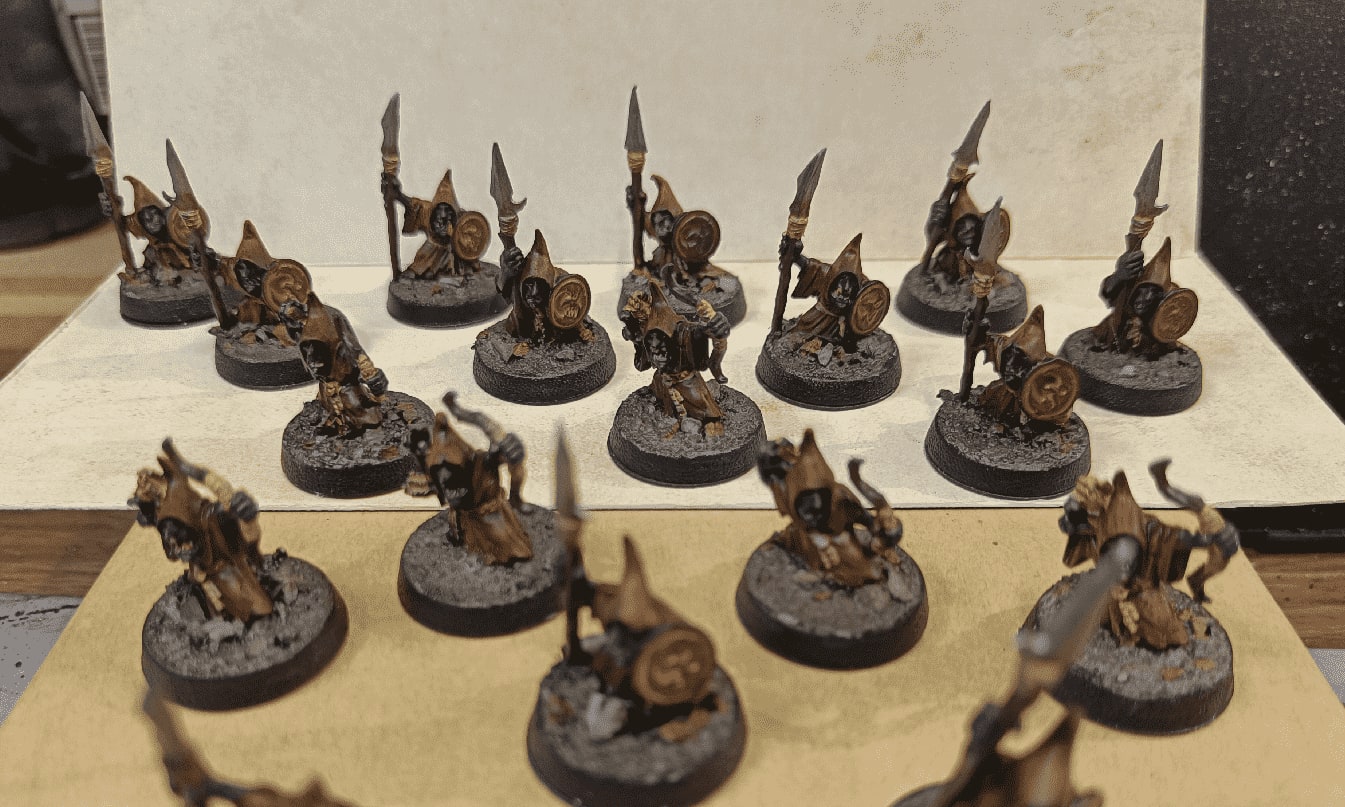
I finished in some details here and there with the same beige color (bow bandages, belts, etc), painted the teeth (black background and white dots) and applied an overall brown wash.
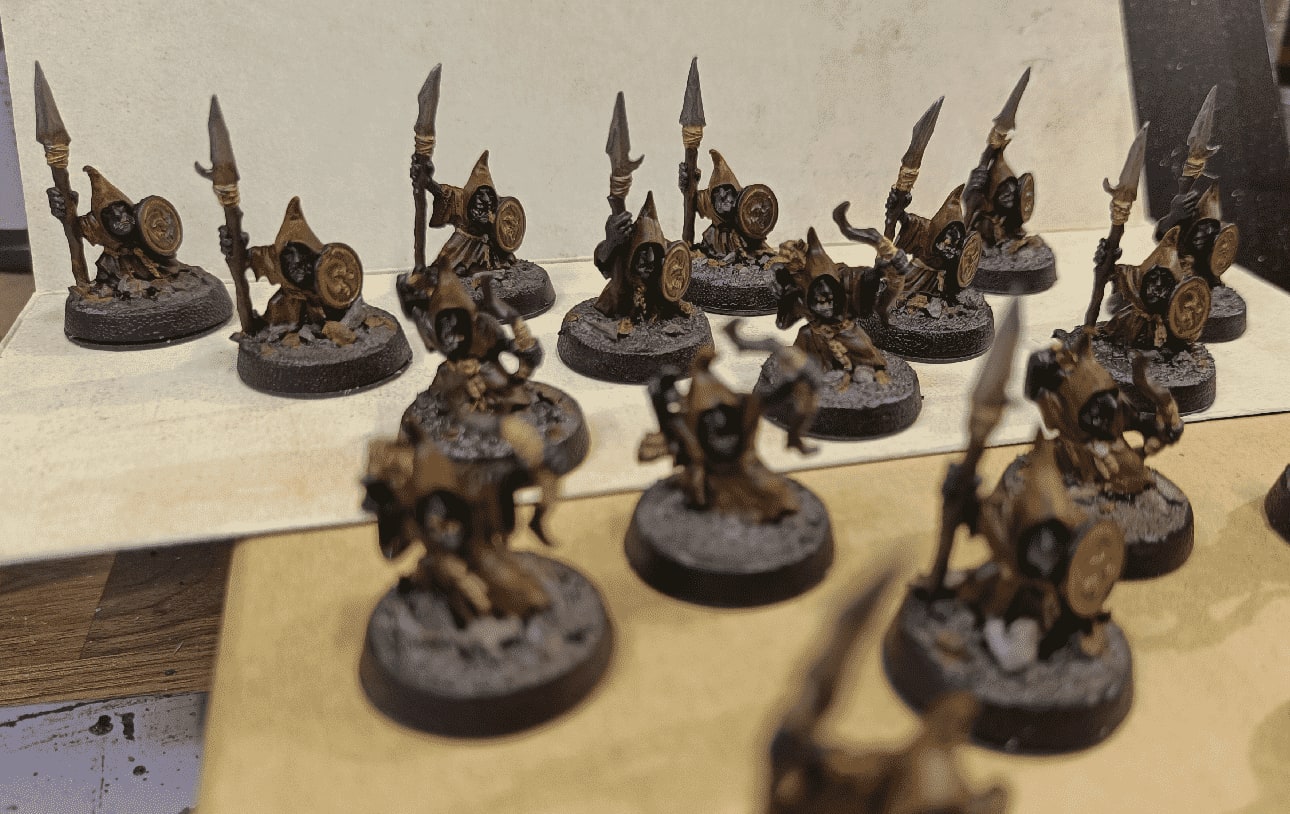
The result is a dark group of night goblins. The black basecoat + dark colors + drybrush + brown wash gives this dark and dirty overall look. It fits well with this unit, but I might need to find ways to paint more brighter colors for other units in the future.
Tavern Dressing with Kaplas
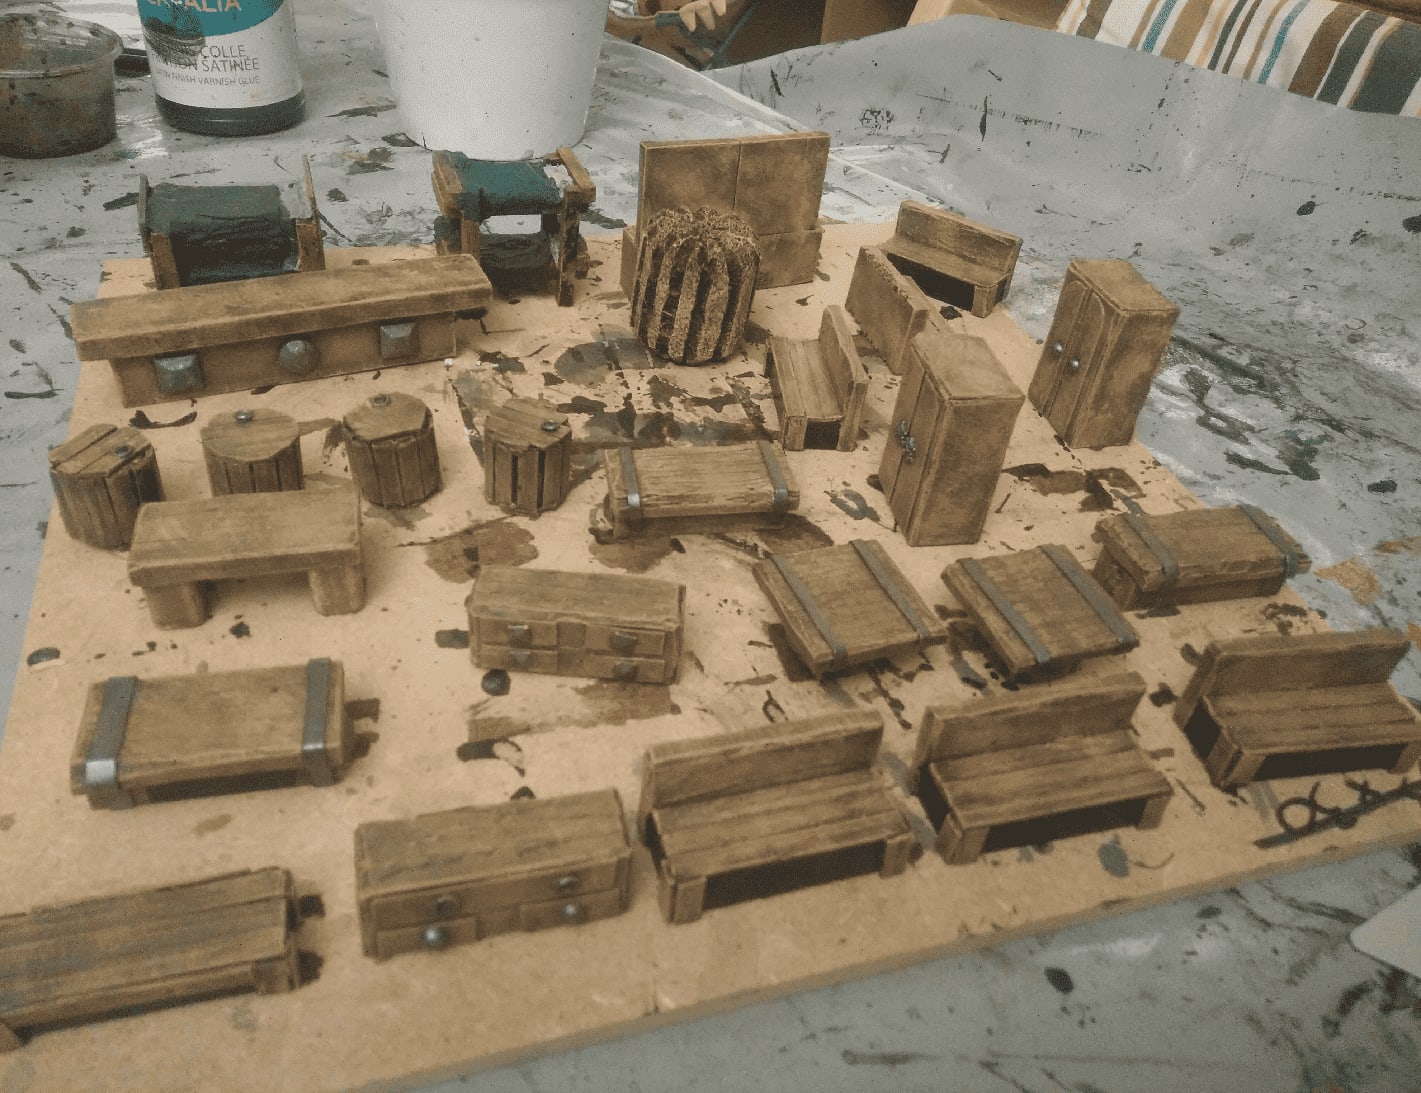
Sometimes I need to quickly furnish a room with some dressing to give it some character. Most dungeon lairs have a bit of furniture, especially if they are inhabited by humans. So I decided to craft a bunch of stuff that could work either in a tavern (PCs always visit taverns at some point), or any bandit lair.
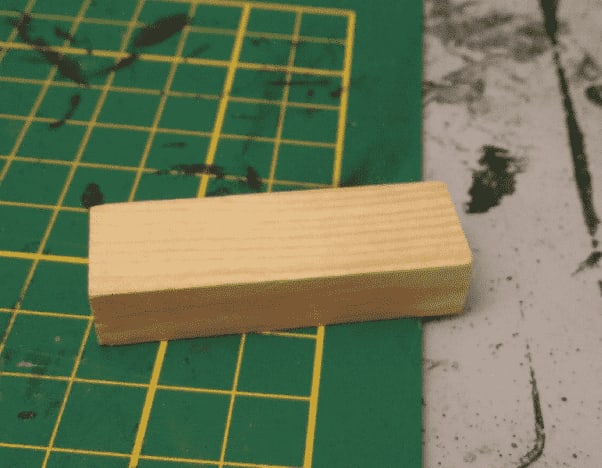
Most of the above props are crafted from this simple Kapla-like piece of wood.
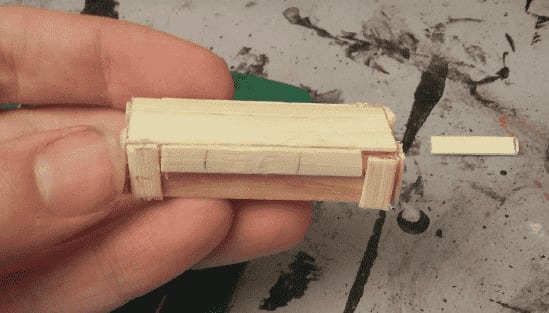
Add some bamboo sticks and you can simulate a table.
Stack a few and you can have a bar.
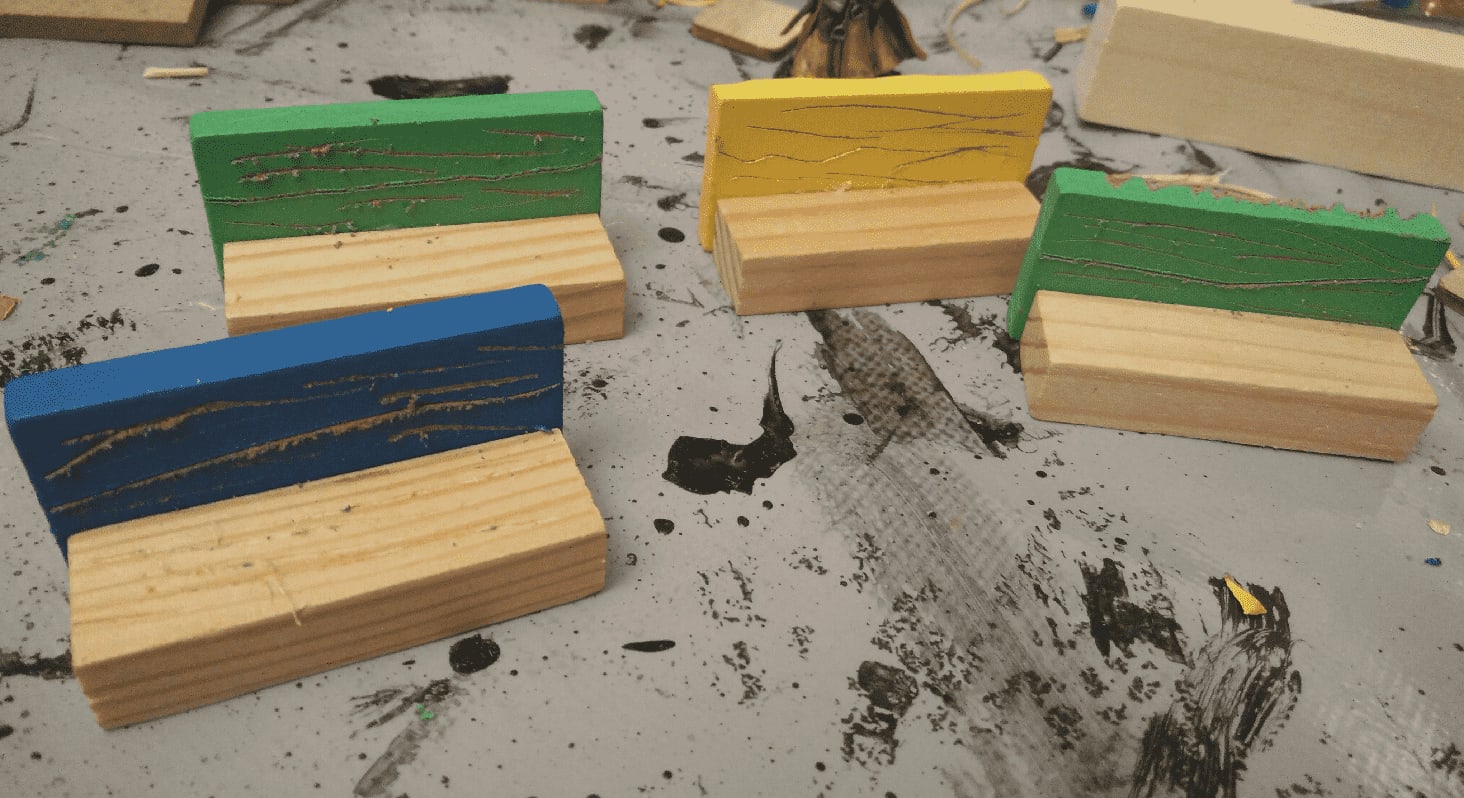
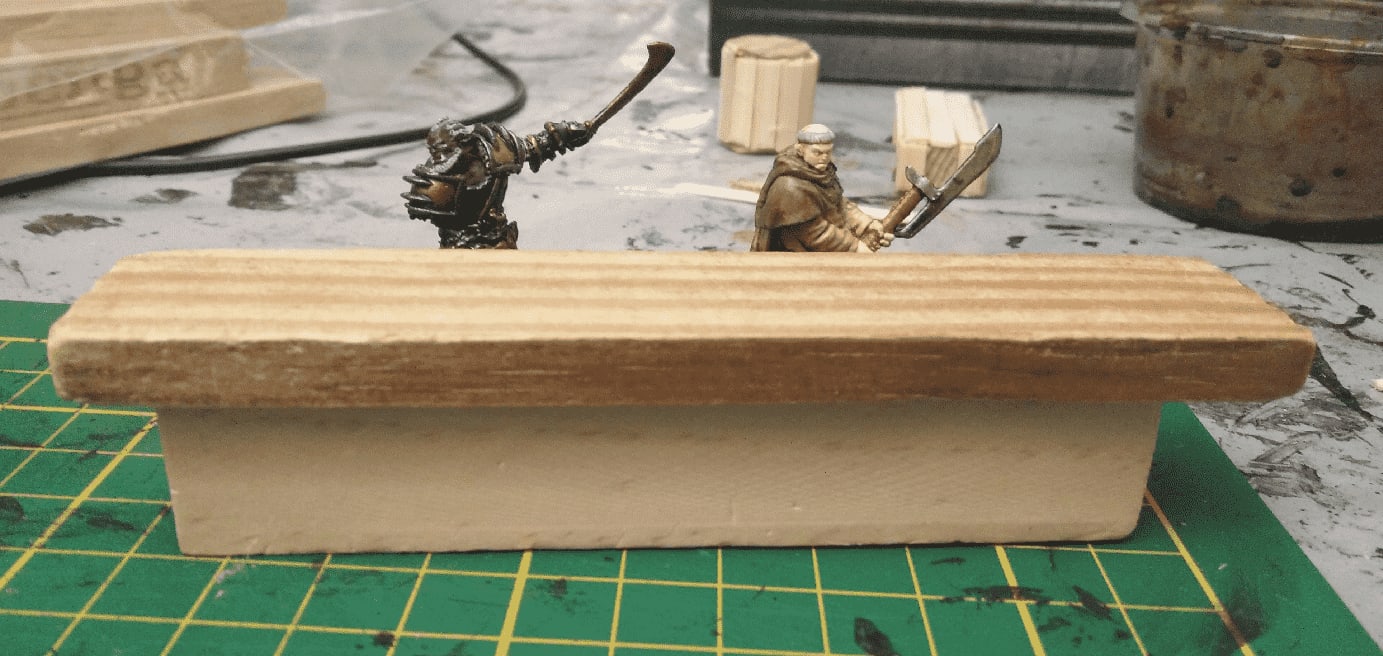
Glue some together for some benches.
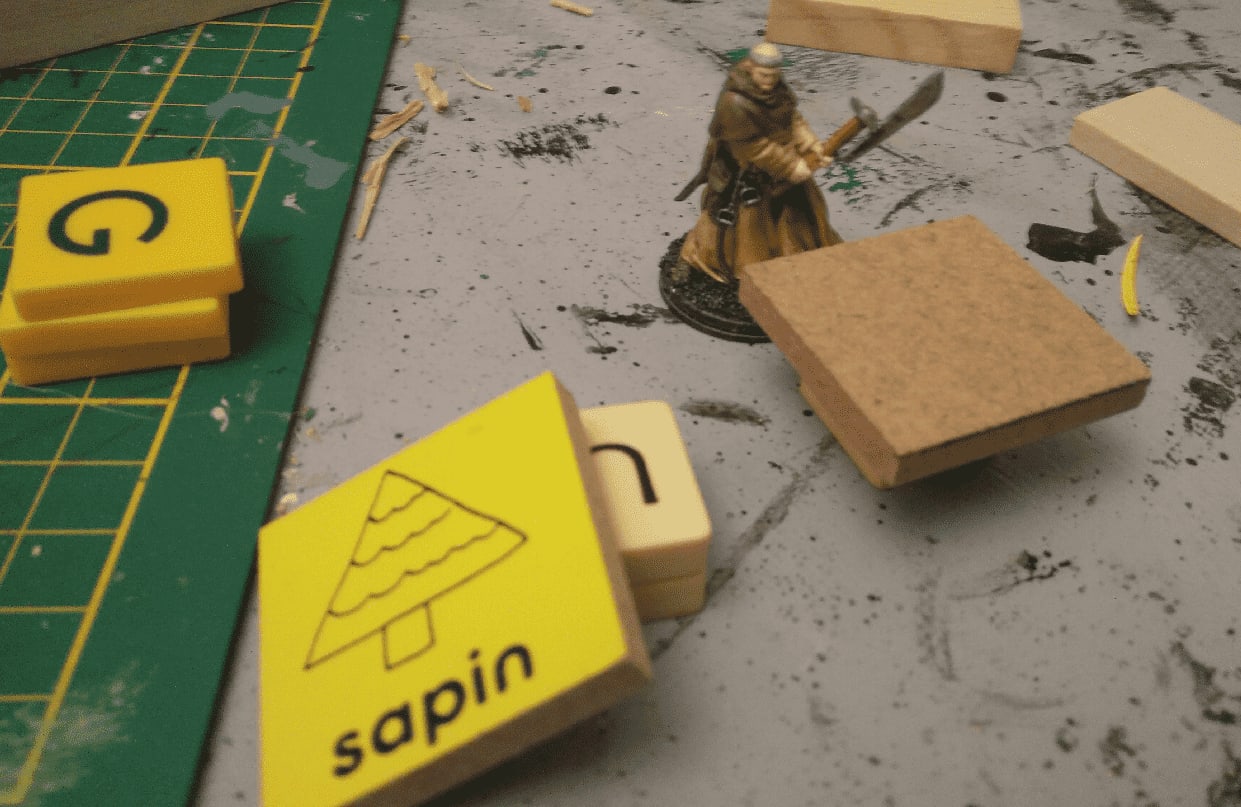
Add in some scrabble pieces and other wooden parts for tables.
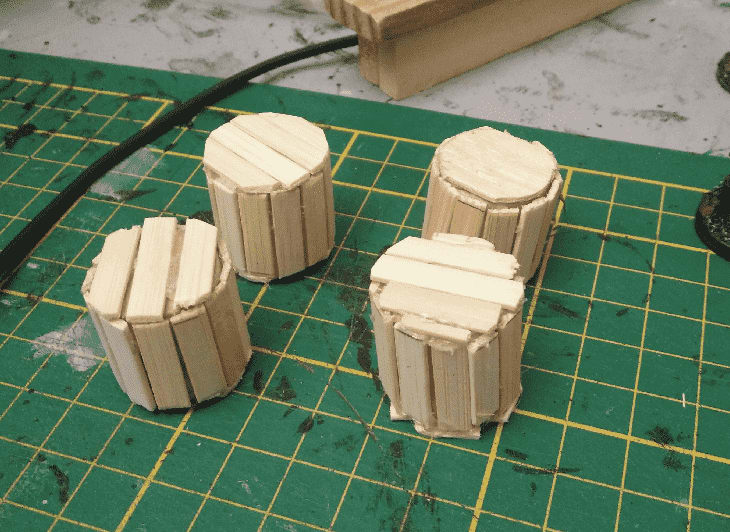
Decorate some rounded ones with more bamboo sticks for barrels.
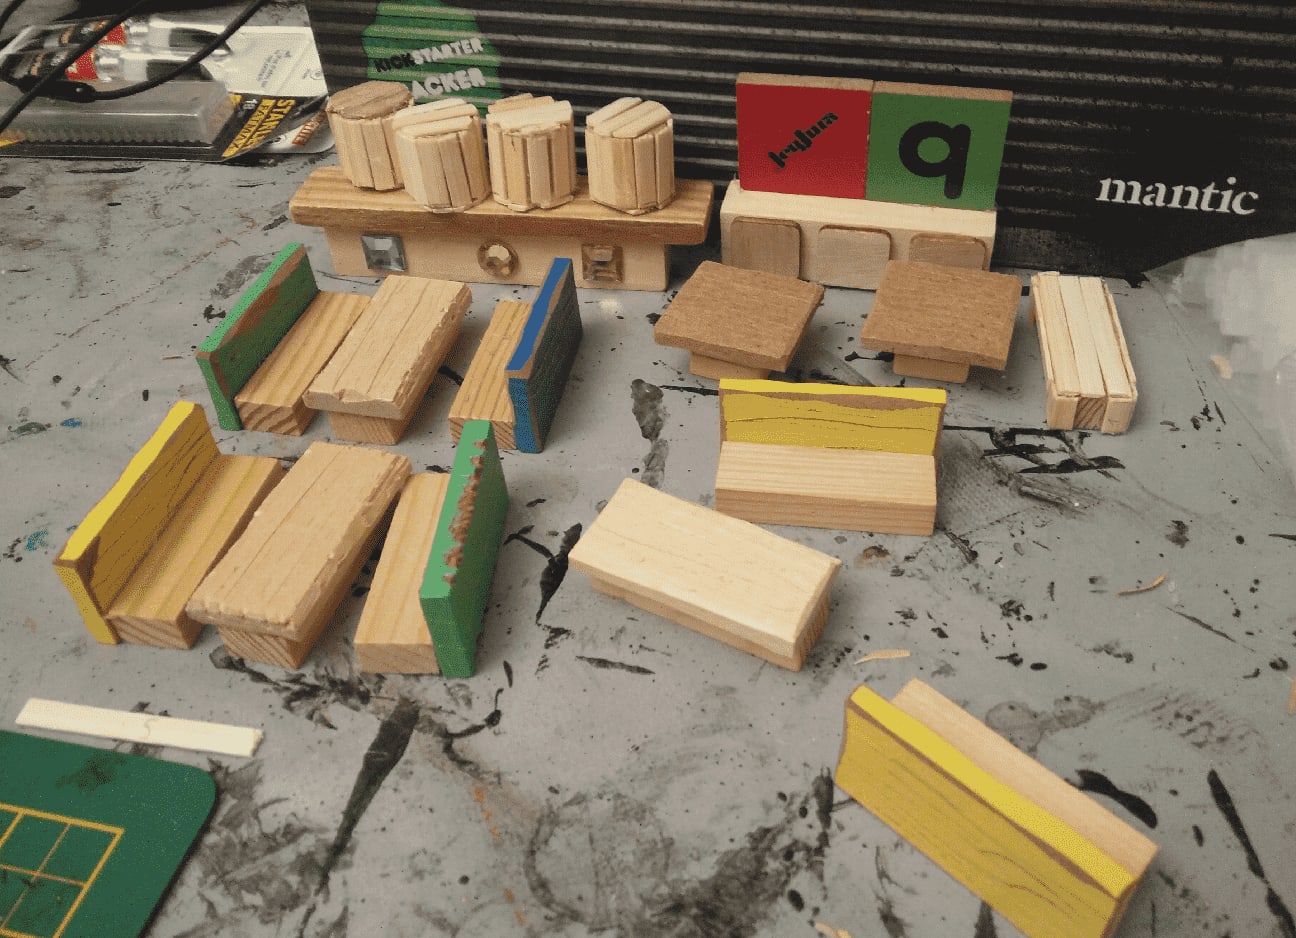
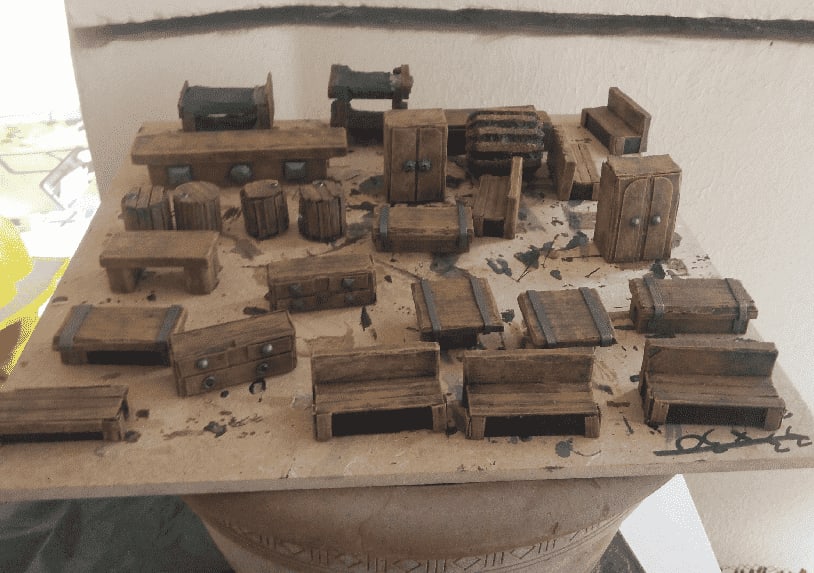
And soon, you have a pretty decent tavern set.
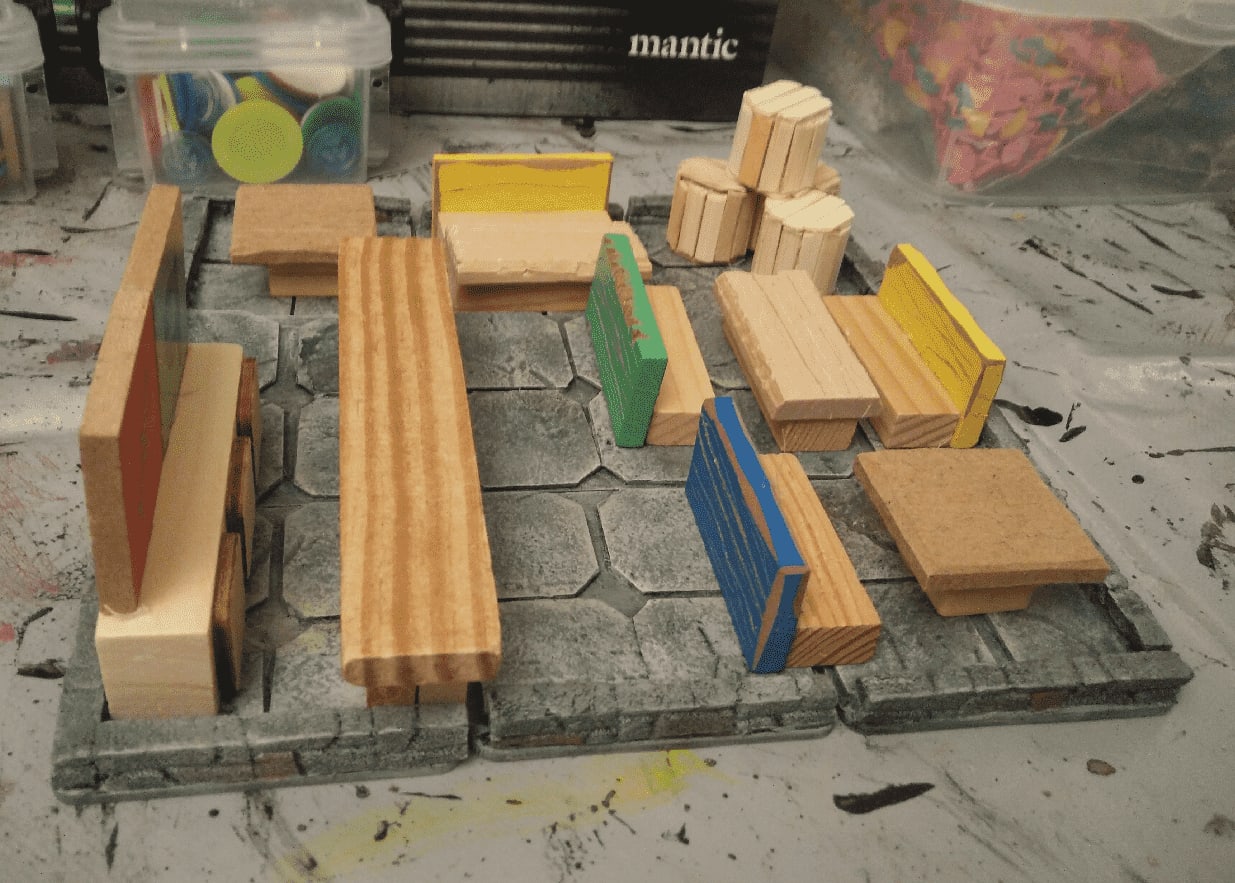
Once displayed on dungeon tiles, it does look like a tavern. A bit crowded, though.
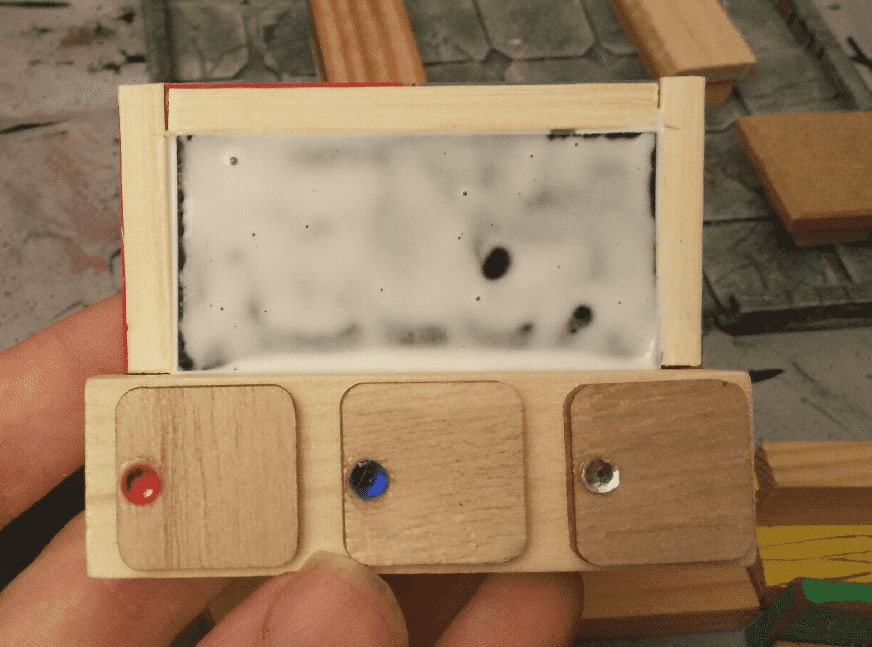
I tried to create a mirror effect by applying a lot of glue on the frame, hoping it would create some shiny surface (spoiler: didn't work).
I "decorated" the tables by adding strips of cardboard on top to simulate metal bardings, and square plastic jewels to add some decoration and hide the underlying Scrabble material.
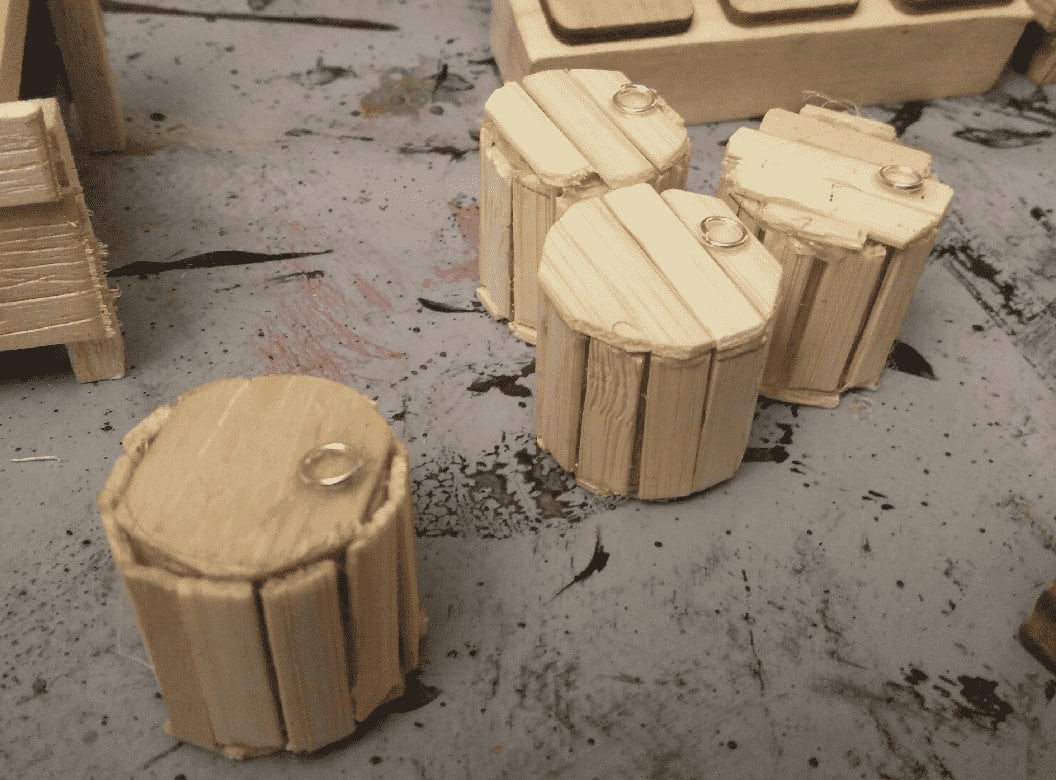
I added small jewelery rings on the barrels.
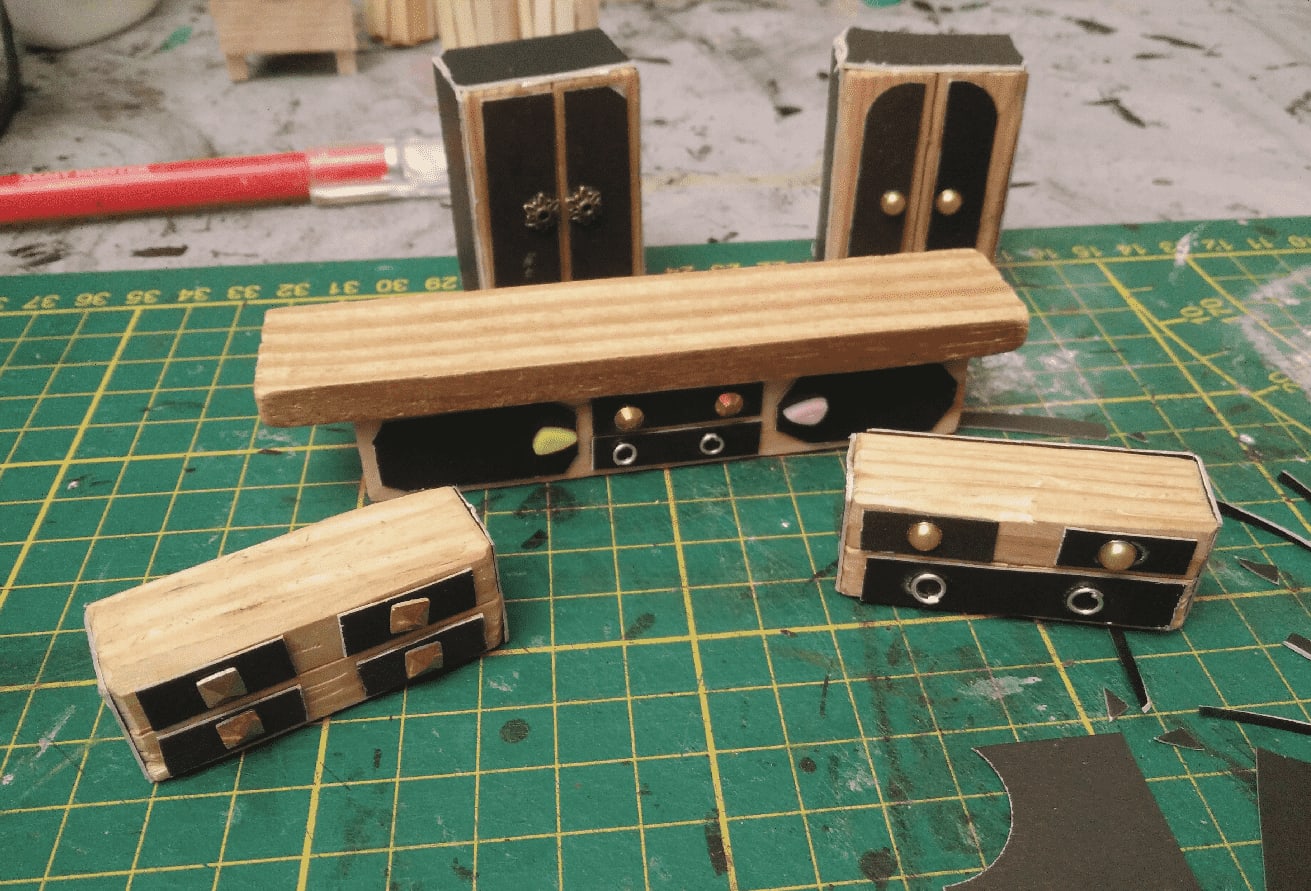
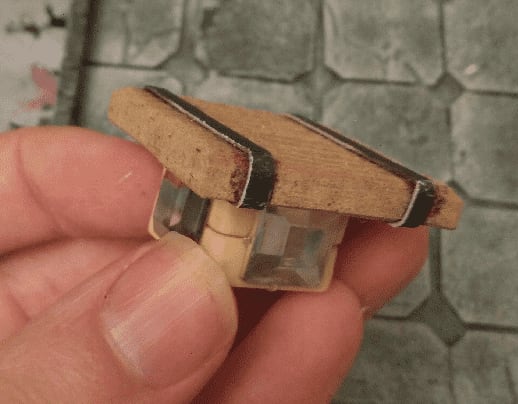
I also went on decorating more of the sticks with carboard and fake jewels to create wardrobes and cupboards.

The a heavy brown overbrush.
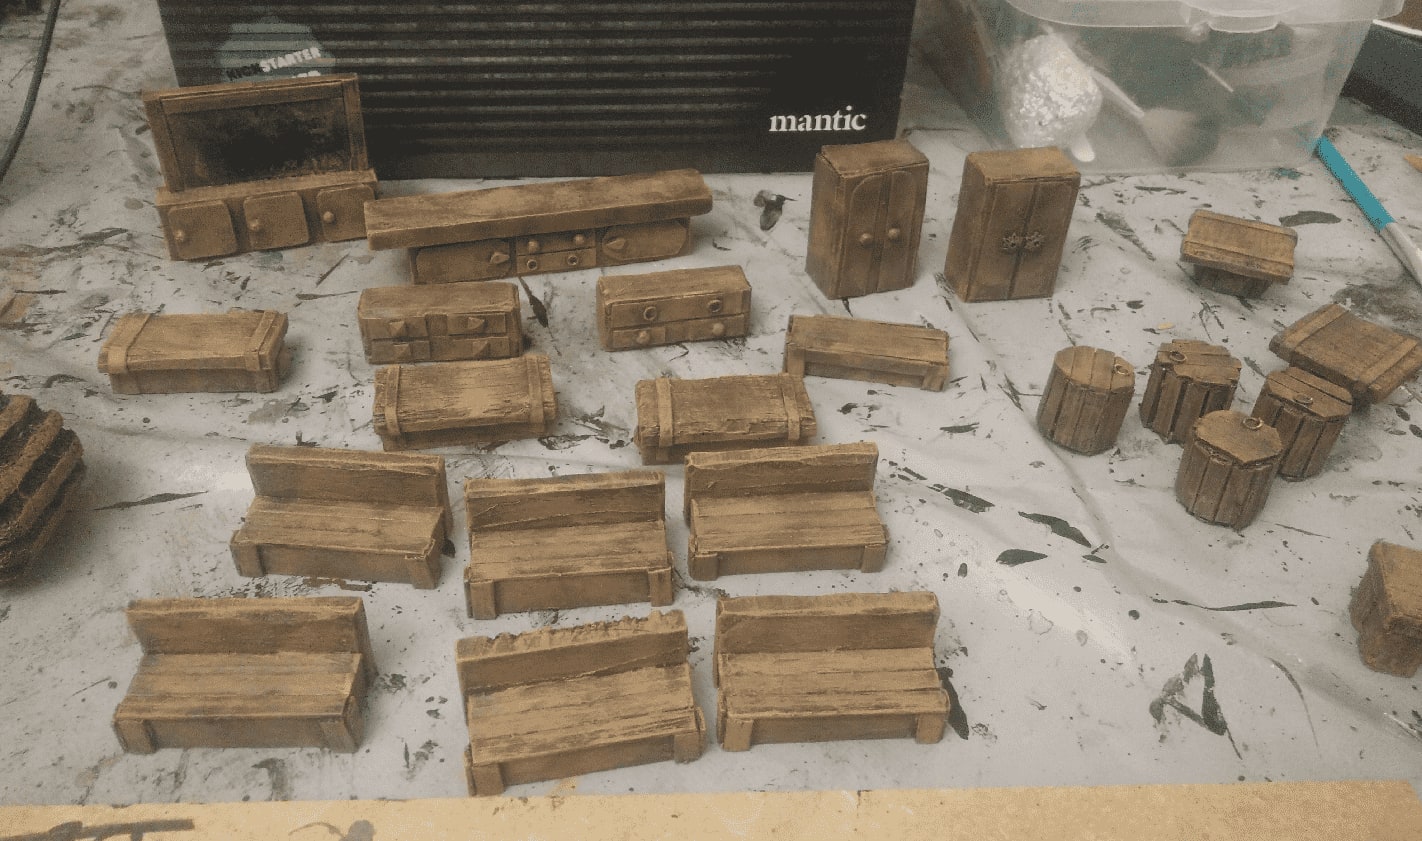
Lighter drybrush to give it some wood aspect.
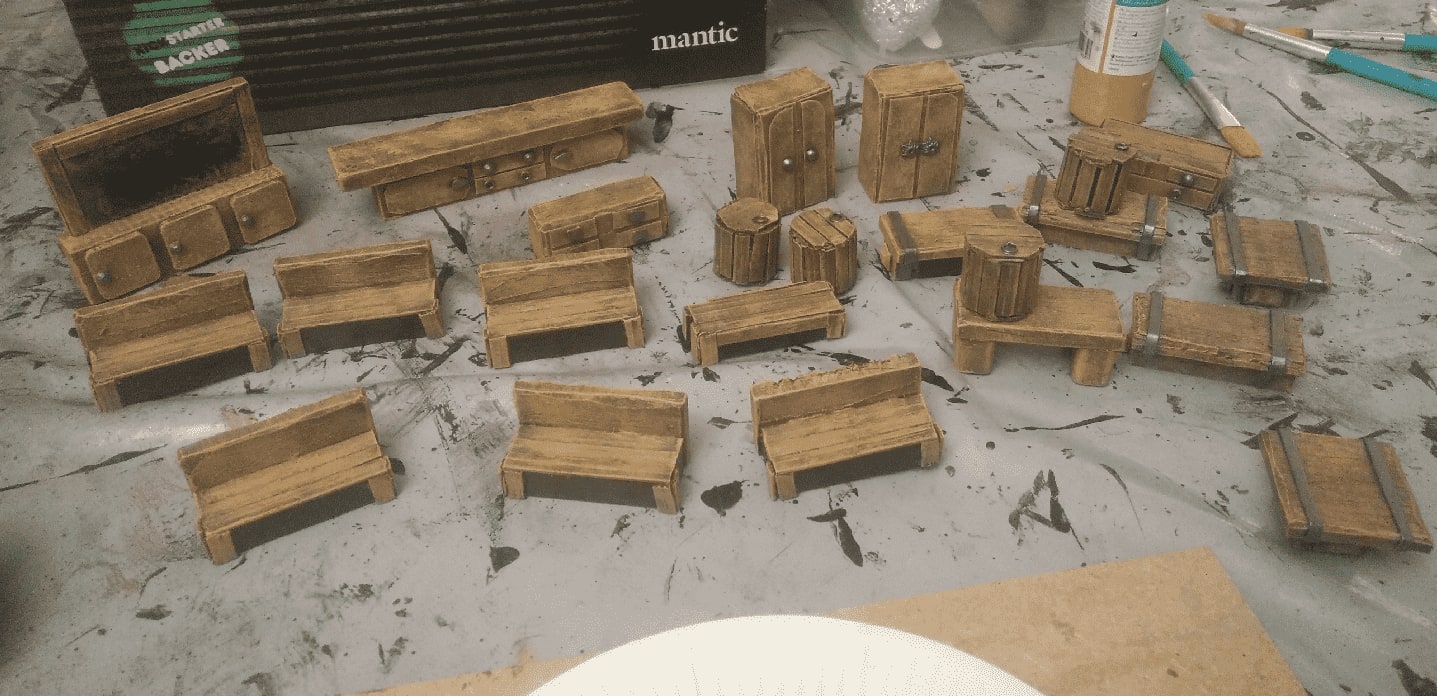
Painting the metal details and the underneath of the benches black.
And a final black wash to darken the wood.
This was a very satisfying craft. It only required simple tools and materials. The main ingredients are wooden pieces (that you can easily find in second hand shops, from games like kapla or jenga). You add in a bit of cardboard for details, and fake jewels for relief. Black, brown, lighter brown and silver for the paint, and a black wash.
The resulting pieces are sturdy; you can through them in a bag and they will not break, and immediately convey the atmosphere you're looking for.
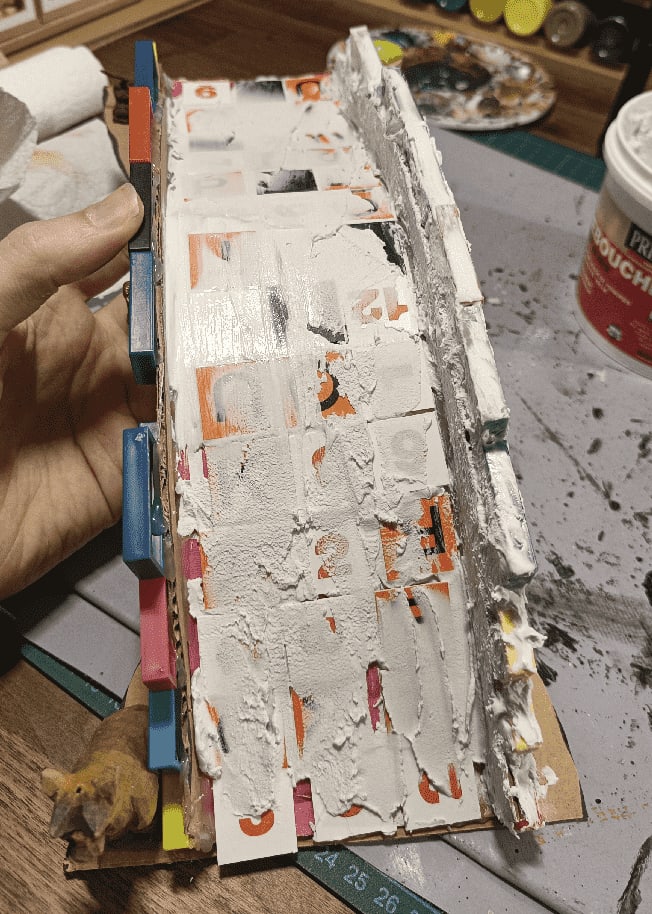
Quick Cardboard Bridge

I didn't have much inspiration when I started this bridge. I took the materials I had lying around: some cardboard. I thought "hey maybe I can make a bridge out of it". I remember the crafting pages of the White Dwarf of my youth, where talented people explained how the terrain I saw in my Warhammer Battle army book were made. I vaguely remember one about turning cardboard into a bridge, so I tried to do it from memory.

I don't have much pictures of the early stages of the build. I just went on as inspiration struck me. I cut first one of the arches, then used it as a template to cut the other one. I then cut a strip to act as the floor and glued it between the two arches. I trimmed of the edges so it stoped exactly at the end of the arches. To stabilize it, I added some flat bases on each side.
Then I glued bits and pieces I had in my bits box. I used some kind of plastic domino on the sides to act as stones. I added some plastic pillars underneath, and various toys with interesting shapes.

I paved the floor with plastic squares.

I then textured the interior of the bridge with some spackle, to cover the corrugated interior of the cardboard.
I did the same on the floor, to merge a bit the squares together.

I then used a wet sponge to dabble on it, to try to muddle it a bit.

I also applied some more on the outside, to cover the geometric shapes, and give them a more organic look.

Finally it was time for painting.

I first drybrushed everything. I knew I would cover the bases with flocking later, so I didn't bother.

I painted the floor in earthy tones, to symbolize all the mud and dirt from travellers.

The previous attempt at texturing this floor helped convey the effect of mud on top of square stones.

Then I tried something new. I actually painted that part with my 3 years old daughter. We picked some colors, and she applied them inside the rectangles.

We added a black wash on top.

I had an issue here. It's not the first time it happens to me, and I'm still unsure why. When applying the wash, it did remove layers of the paint I had put before. It was not the wash itself, but applying the wash with a brush removed the paint, just like it was water paint (but it was not, it was acrylic craft paint).
I used to have this issue with my cheap acrylic metallic paints, which is why I know only use more expensive Citadel or Vallejo metallic paints in my crafts. But it was the first time I had this issue with regular gray/brown craft paints.
Maybe it was something in my wash recipe. Maybe the matte medium, or the flow improver? Anyway, I've now switch to a much more simpler wash formula (water and china ink), and never got the issue again.

The last step was to cover all the imperfections with flocking. As you can see, there were a lot of places where the underlying materials could be seen, so I hide them. Flocking stuff is almost cheating. It's almost as good as the black wash.

More pics of the various angles of the build.

The slope is a bit too steep for miniatures to fit correctly, they tend to fall backwards.
Ultimate Dungeon Terrain: Caves

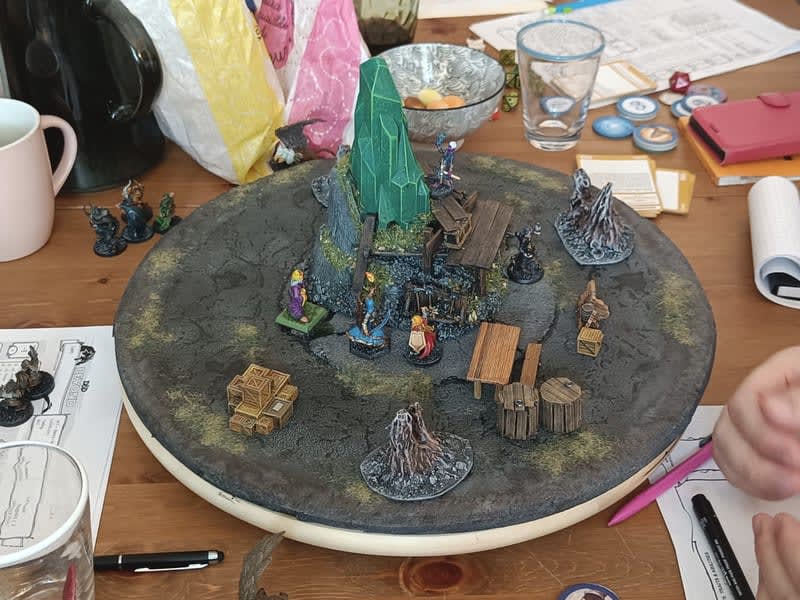
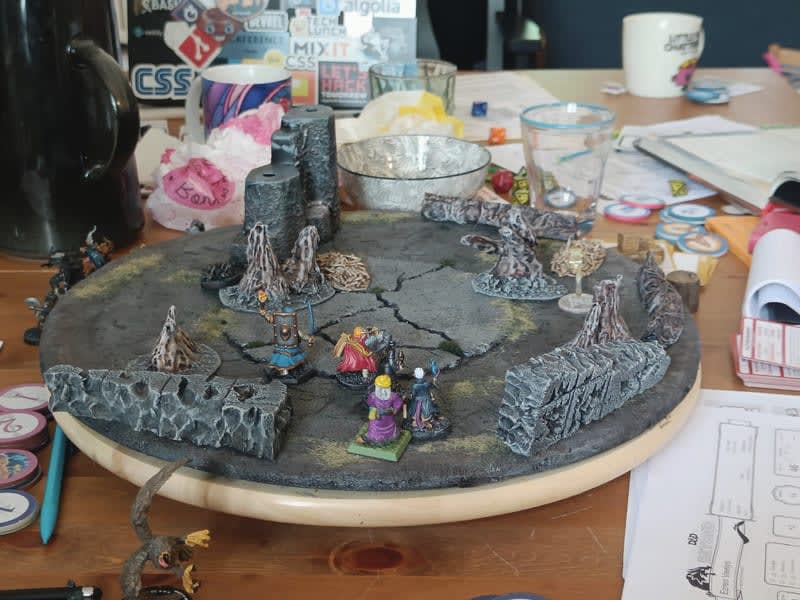
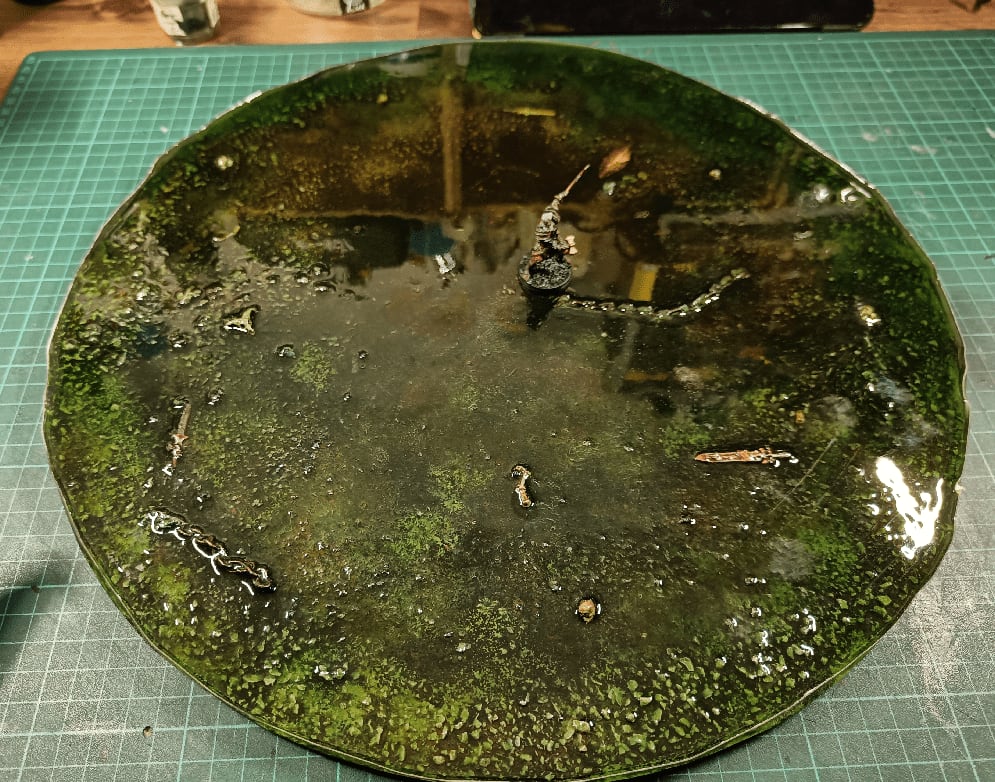
The four encounters above took place on the same board; I only had to change various walls and dressing to make them very different places. This all thanks to the underlying UDT, or Ultimate Dungeon Terrain as it is know.
The idea if to have a circular piece of terrain as a board, divided in three concentric circle. Each circle represents an abstract zone, used for abstracting distances. The center is the "here", anyone here is in melee range of each other, and they are all within earshot as well. The second ring is for "there", anyone here can attack the central circle using range weapons. The outer rim of the board symbolize "somewhere else", miniatures here are not even in combat, they might have fled, or will arrive later.
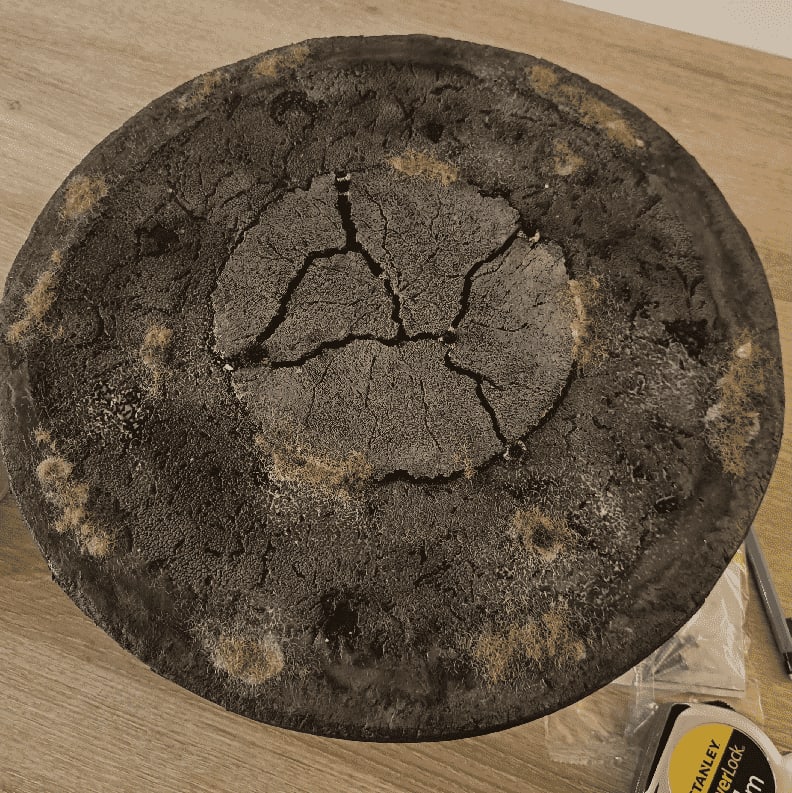
In some encounters we didn't even used those abstract zones, we just used the board as terrain. Because it's sitting on top of a lazy suzan, it can rotate so all players can enjoy the view.
Overall, we all found it very practical, but we didn't really used the abstract zones, and many of us prefer the ease of using squares for movement, rather than abstract zones. So I think I'll craft more of them, but add a grid on it.
Anyway, to build it at the exact dimensions, I actually used my lazy suzan as a pattern and cut the circle around it.

I beveled the edges and used this board as a pattern to cut on a textured wallpaper I had.
I then roughly marked the three zones. I used a paper plate I had laying around to draw a perfect circle in the center. And also if I ever need to craft a new one, I'll be able to reproduce the exact same dimensions.
I glued the wallpaper everywhere except on the outer rim.
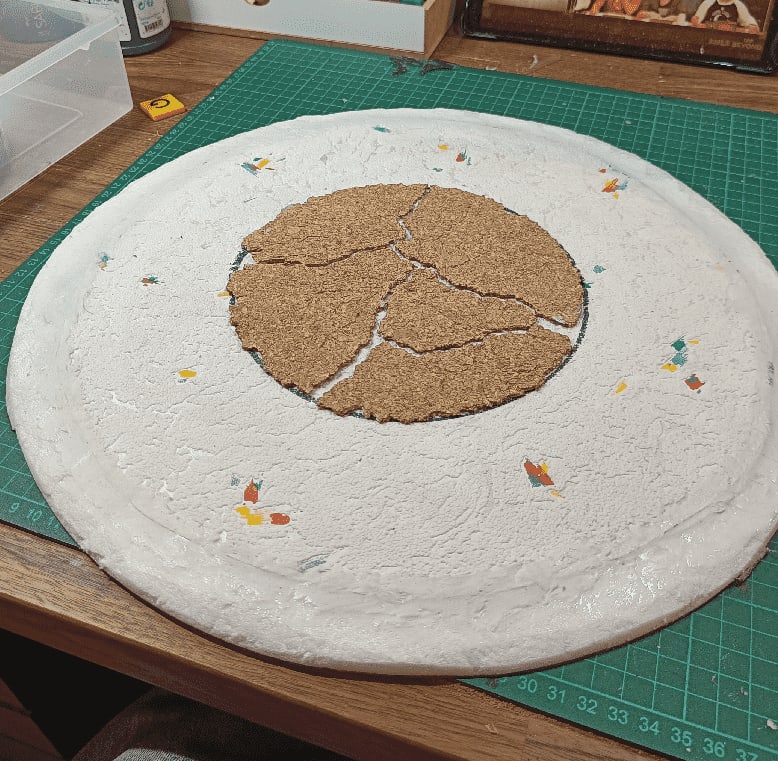
I added broken cork at the center, to symbolize broken stones. In retrospect, adding this kind of elevation wasn't a good idea, as it prevents putting some terrain elements flat.
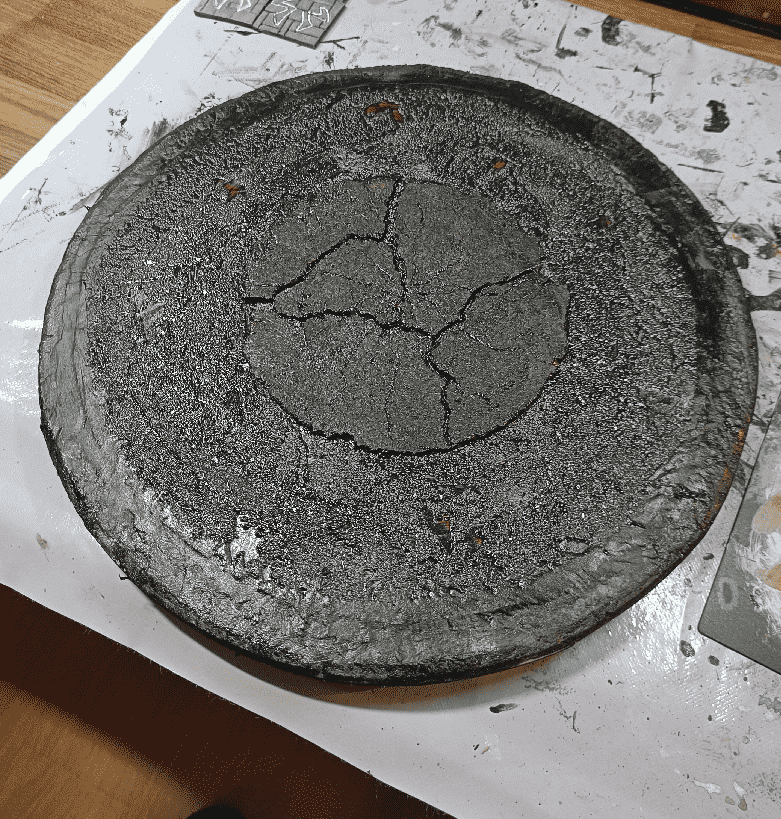
Painting black, using modpodge to solidify it.
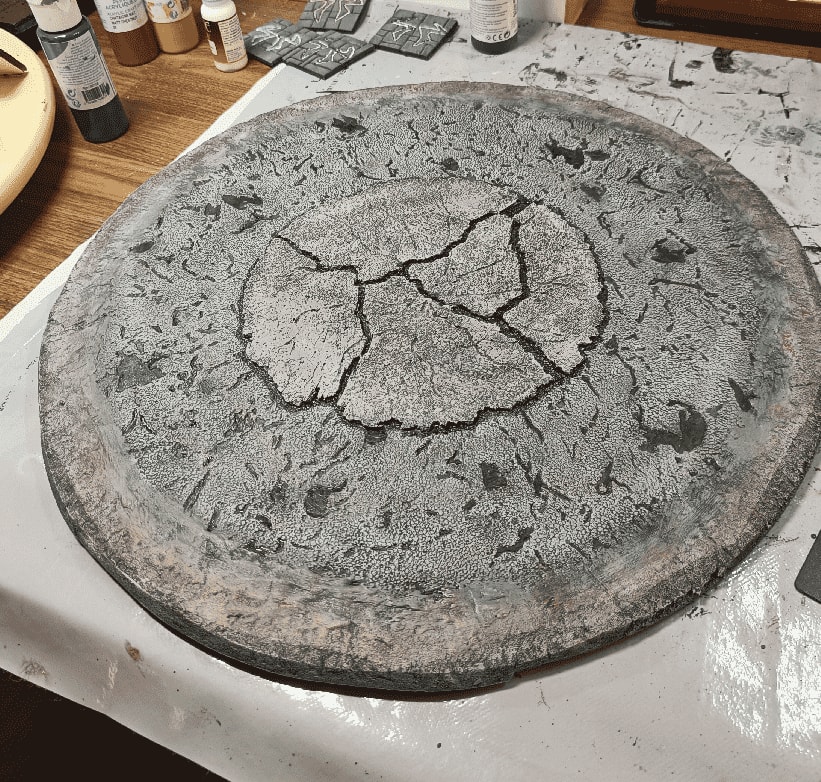
I tried to use different colors for each part, but it was too subtle and didn't look very good.
The wash didn't help either. Some people pointed out that it looked like a moldy chocolate cake, and I can't blame them.
I finally added some flocking.
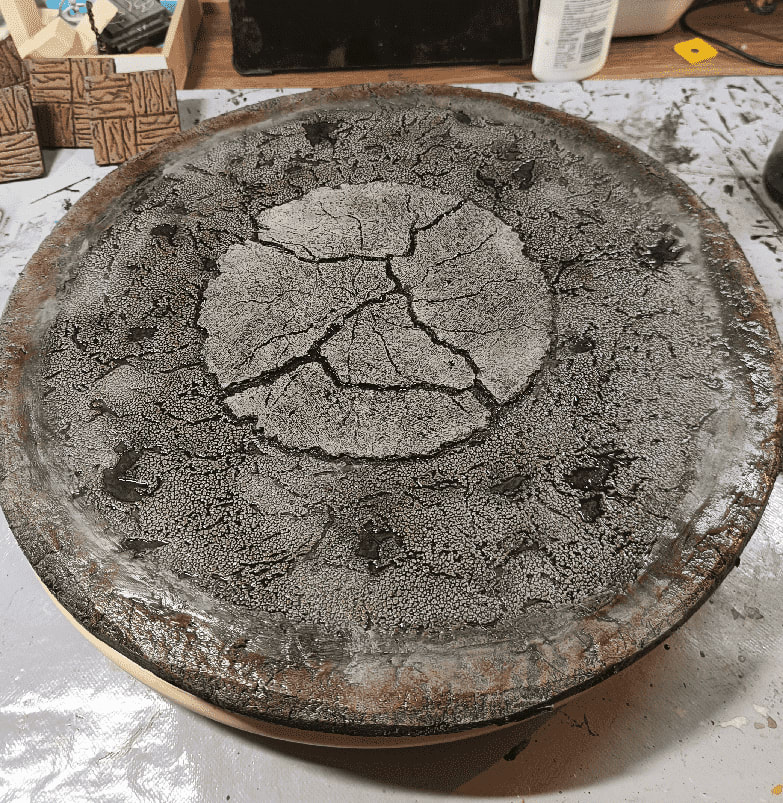
Overall it turned out to be a trusty piece of terrain and I will be most certainly be crafting more, for other types of environments.
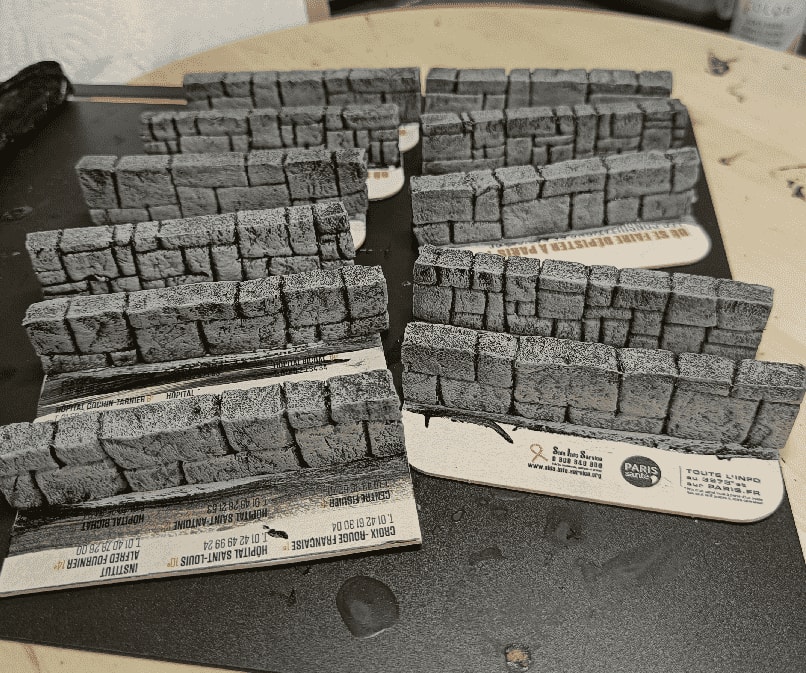
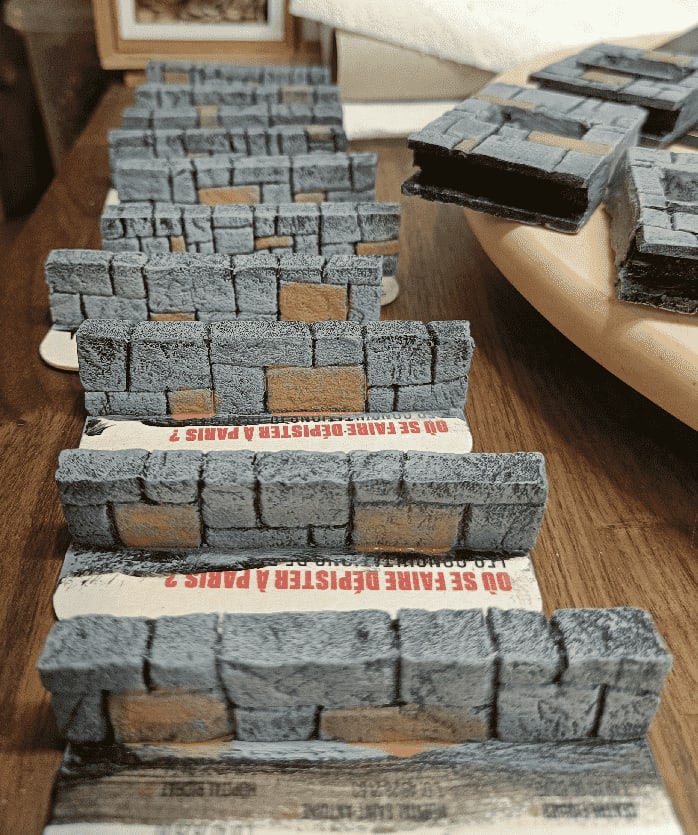
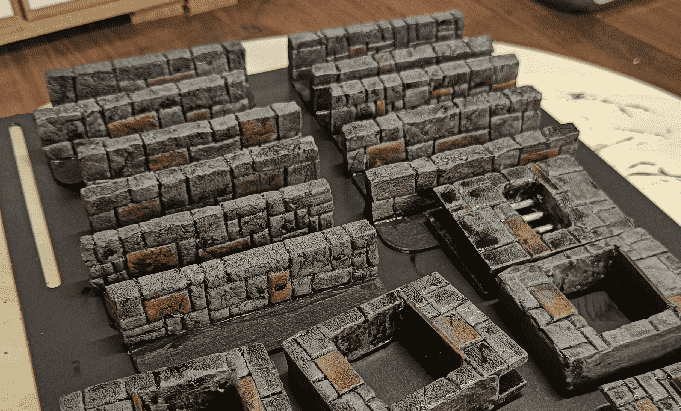
Stone Walls

To separate the various rooms, I built some small stone walls. The dungeon tiles already have them included in the tiles, but for the larger rooms I needed a way to symbolize the walls, so I could clip on some more wall features.
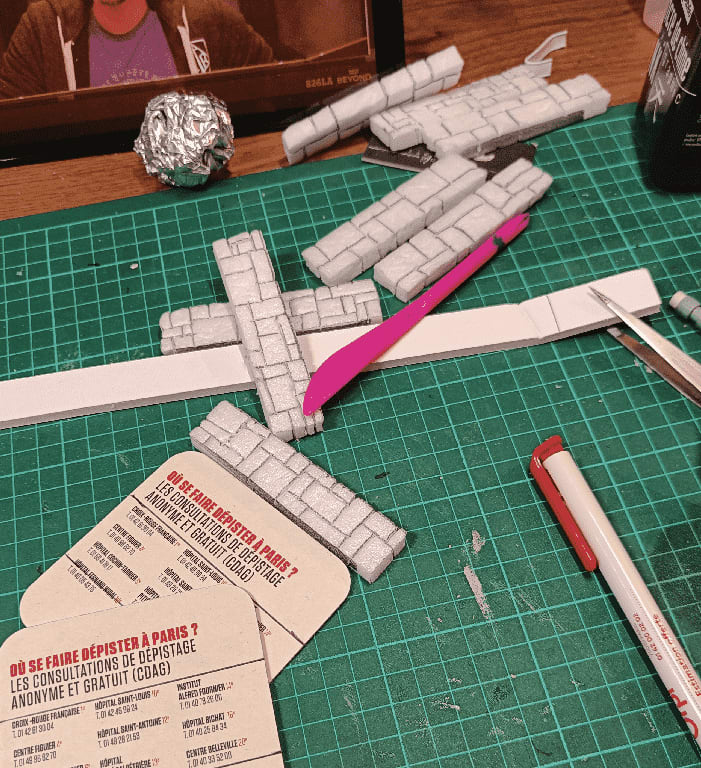
I started with some cardboard for the base, and the same foam for the wall itself that I used on the tiles.
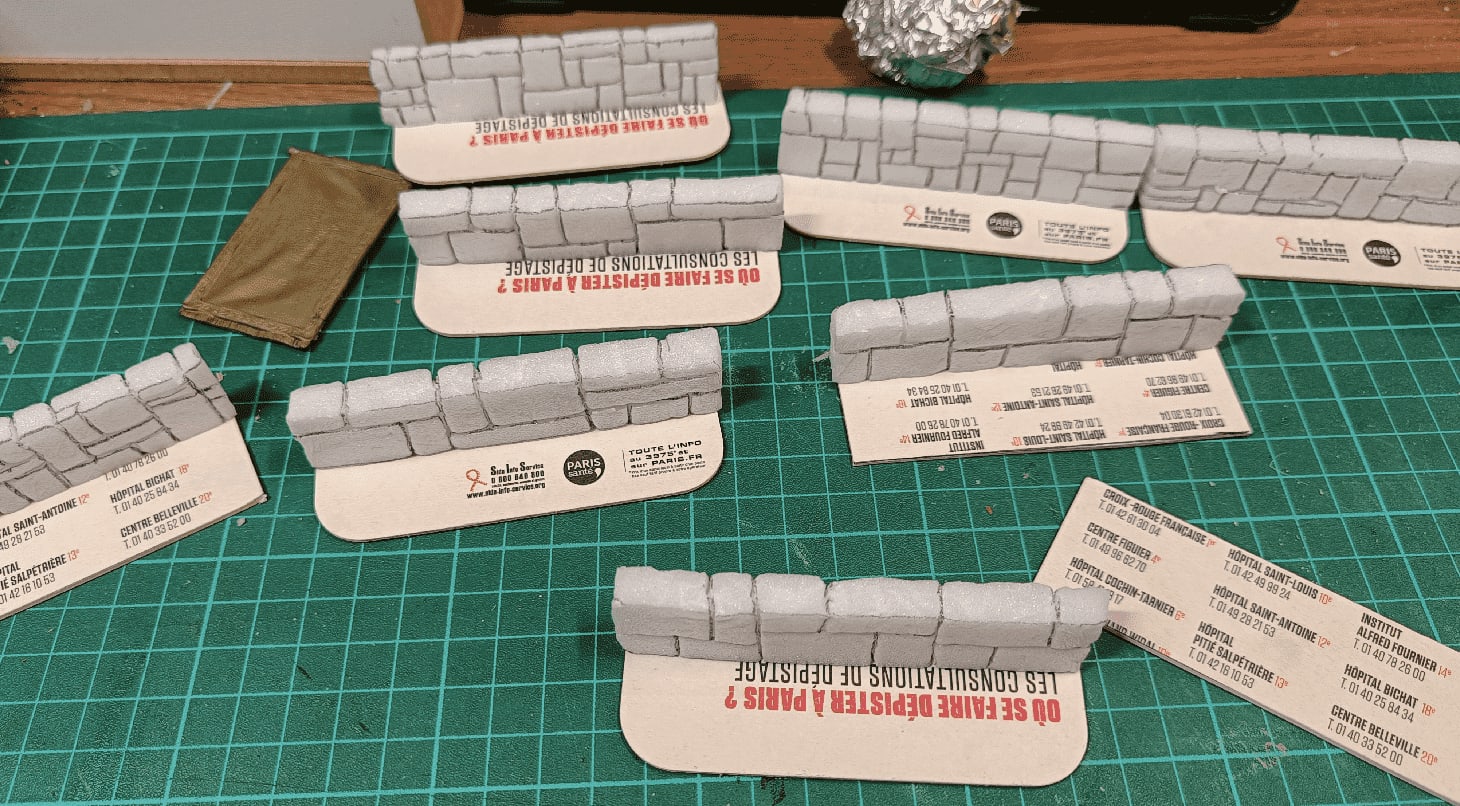
I needed the base to be quite large, for it to stay stable on the table, and also so I could insert it under the larger rooms to stabilize them in place. It means I can't really use them in free form, because they need to be positioned close to a larger room, but they have the perfect size and height for that purpose.
I did a very quick overbrush on them. They are supposed to be almost invisible in play, just to mark thresholds, so I didn't want them to distract from other more important set pieces.

The top part was the hardest to paint, as it is full of small holes and didn't take the paint really well. In the end, adding the brick grooves on the top was enough of a hack to make it look like a real wall.
I also painted two bricks in brown on each side, for variation.
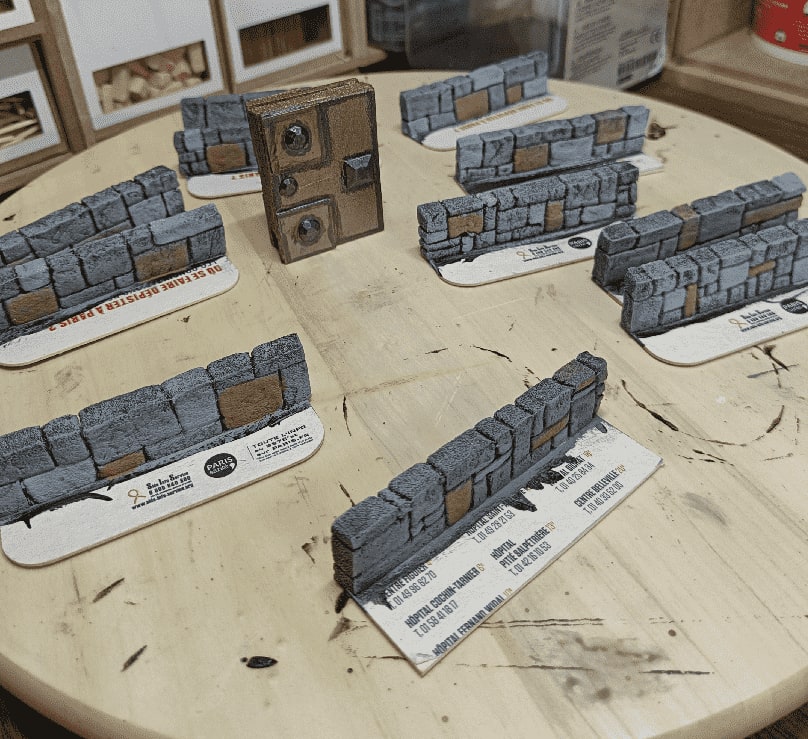
And two others in a much lighter gray.
All of it was finally muted after the final wash.
SkyLander Skeleton Hand

The final boss of the campaign spent most of his time hidden behind a giant skeletal hand, as seen on the picture. I didn't initially planned that, but because I had just found the perfect mini in a garage sale, I gave him the Bigby's Hand spell.
This is one of those occasion where the story is influenced by the miniatures you have, as opposed to the opposite.
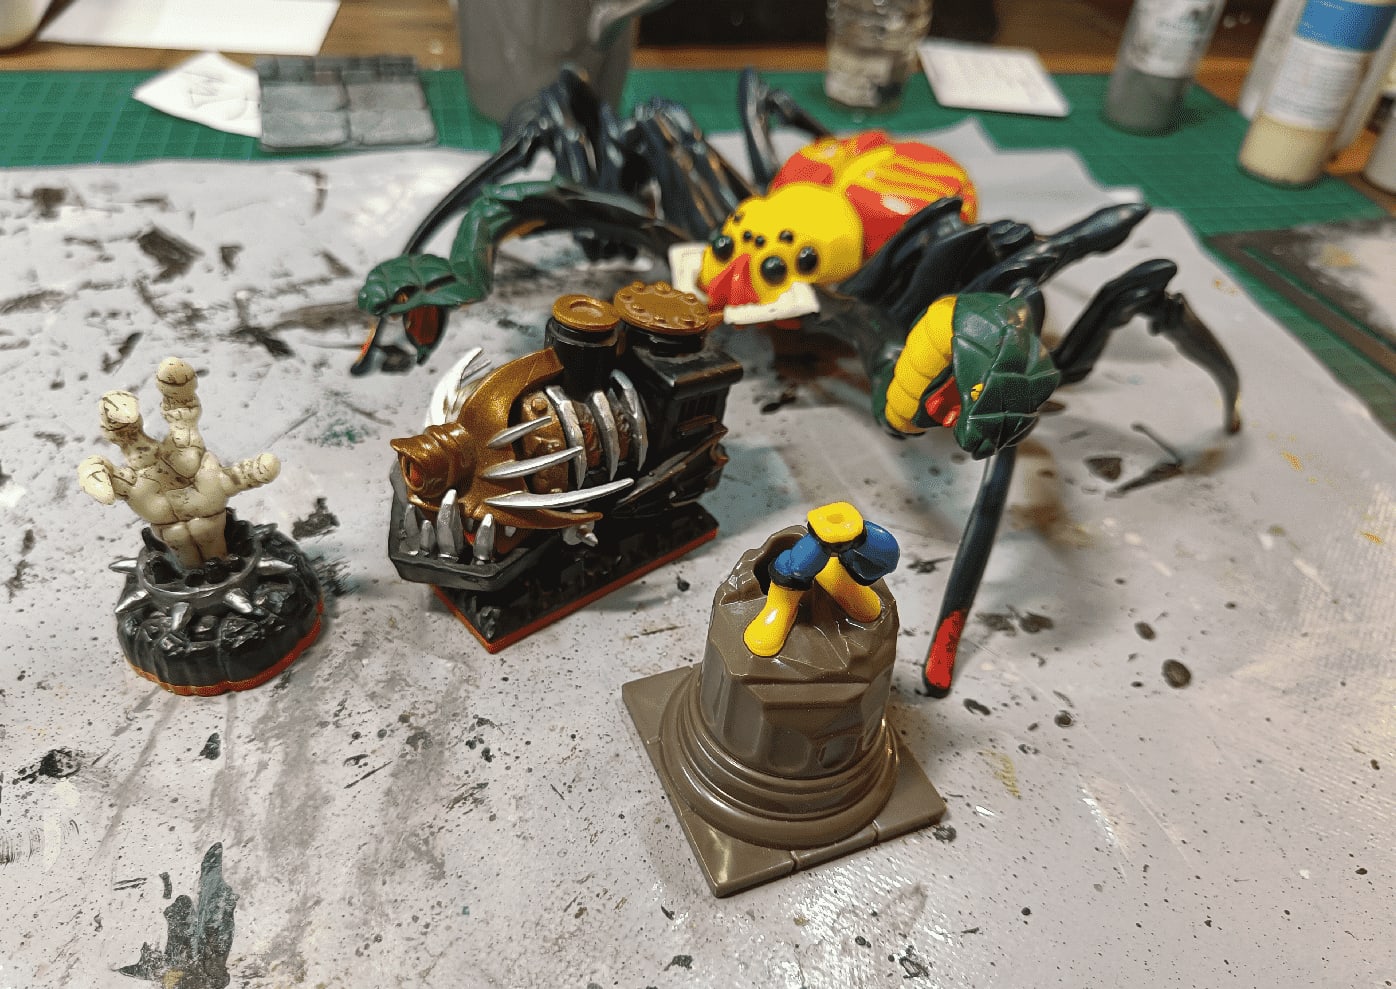
This was the catch of the day at the garage sale. Two SkyLander miniatures, a broken pillar super-hero thing and a giant, horrible, spidersnake. I haven't yet done anything with the last elements, but the hand was a quick job.
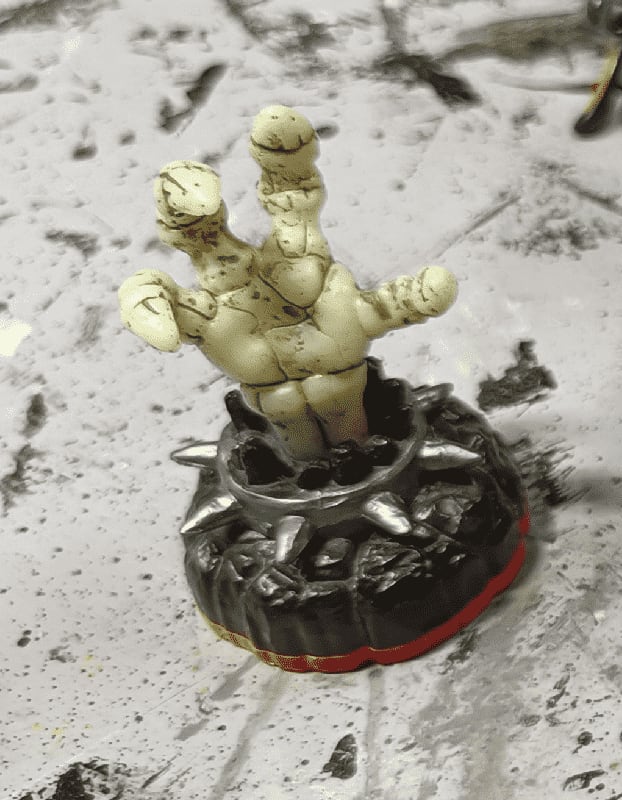
It already looked pretty gnarly without any touch up, but I wanted it to look less like a toy, and more like a threat on the board.
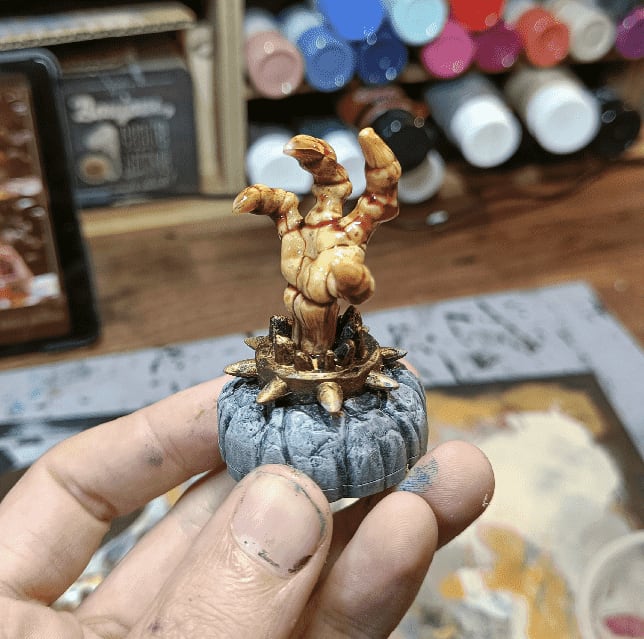
So I painted the base in my usual stone colorscheme. At first I wanted to remove the actual hand from the base, but those things are heavily attached and I gave up. I painted the spiky thing gold and the hand in bone tones. I then added a red wash on top, to make it look bloody.
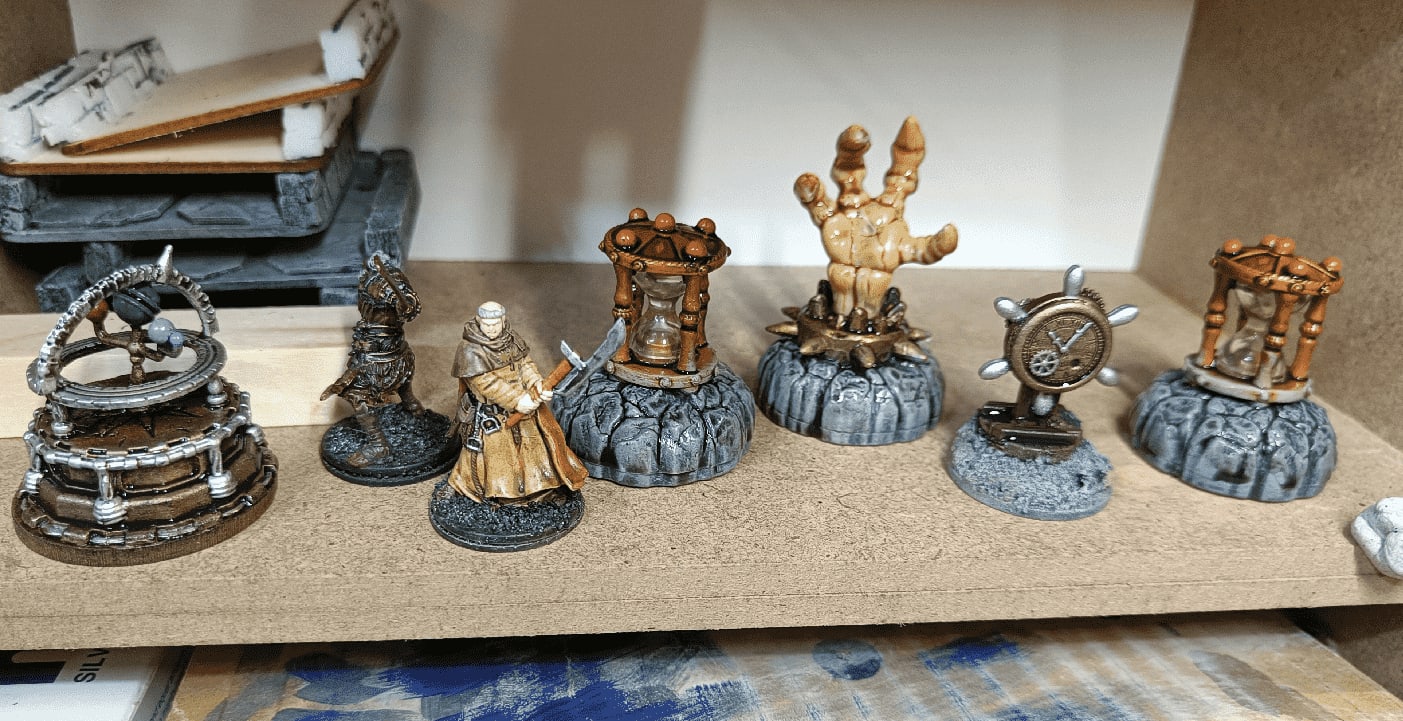
Here it is on the shelf, with a few other props for this scenario.