Dungeon Dressing
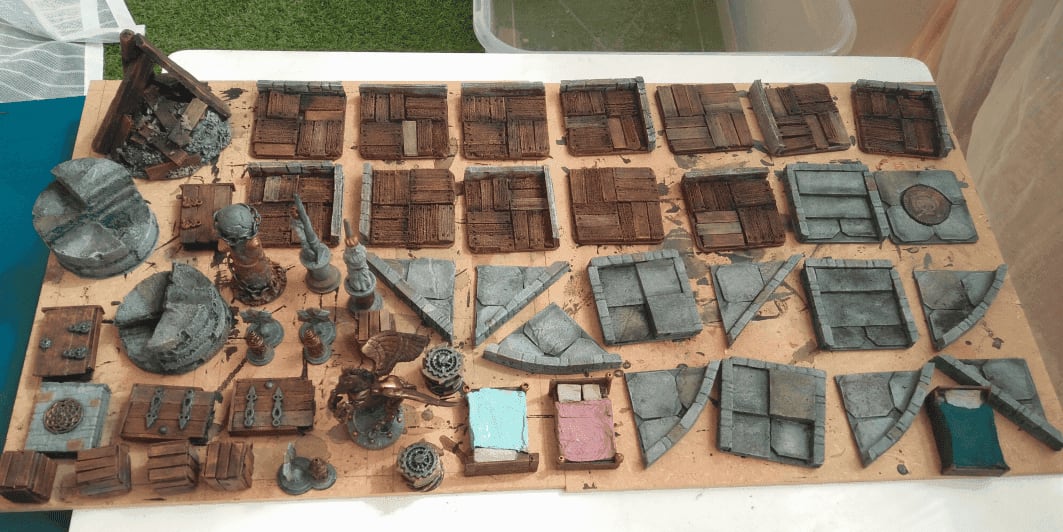
To go with my dungeon tiles, I made a bunch of dungeon dressing pieces. I mostly picked bits of stuff lying around in my bits box, and painted them.
I didn't have a clear idea of what I wanted to build, nor which scenario I would use them, but I wanted generic enough dressing that could be used to improvise a dungeon.
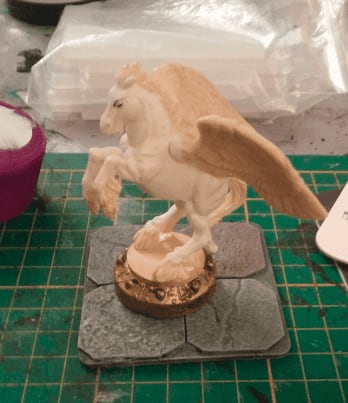
I started with a pegasus plastic toy, glued on a round token to act as a pedestal.
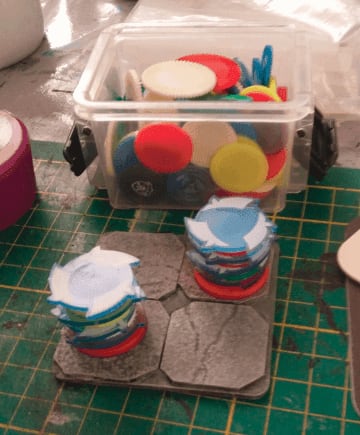
I then glued various tokens I had. I'm not sure which board game they are coming from (I got them in a bag in a garage sale), but I thought they could make a nice trap.
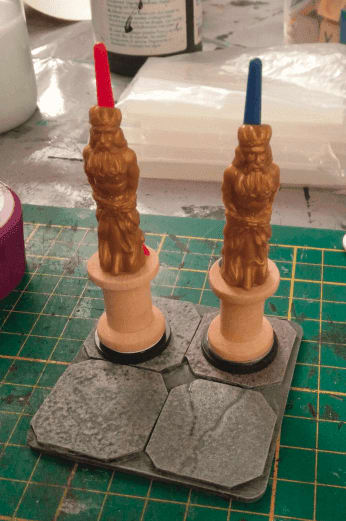
Those were figureheads of two ships I got in another toy. I glued them on a sewing spool to act as a column.

And those are... I'm not sure. I picked another weirdly shaped token as a base, and added some indian/runic beads as well as stuff coming from a Frozen board game. I imagined that once painted they could act as some elaborate tombstone.
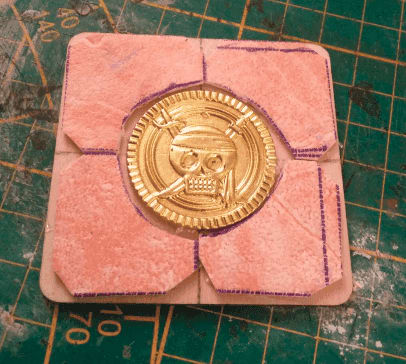
And a pirate gold piece to act as a trap.
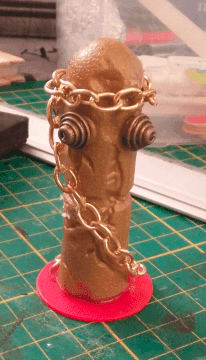
This, I'm not even sure what it was initially. I think it was supposed to be a broken cannon, that I glued vertically. I added more beads to give it an omninous shape and a chain because why not. This is so weird that I expect my players to wonder what the hell this is.
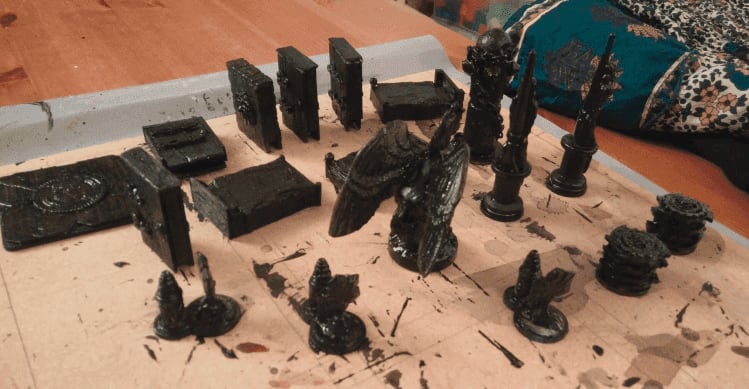
Traditional coat of black before painting for real.
Those dressing pieces gave me a nice respite from painting all those gray tiles.
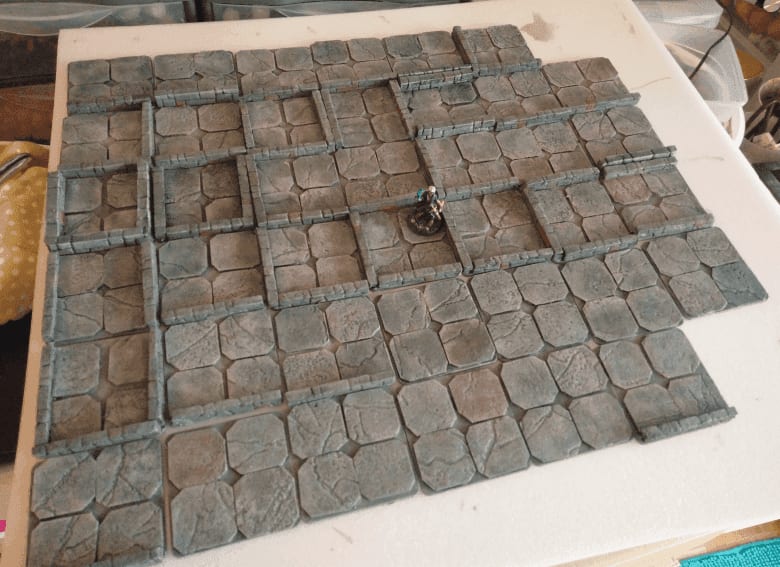
Wyloch-style dungeon tiles

I made some dungeon tiles, inspired by Wyloch. I used completely different materials though, but kept the same overall idea.
First, I'm really bad at cutting stuff in a straight line. Wyloch seems to be able to cut cardboard with very high precision and have all his tiles of the exact same dimensions. I can't do that.
I also don't own a proxxon like Black Magic Craft, so I can't cut foam either.
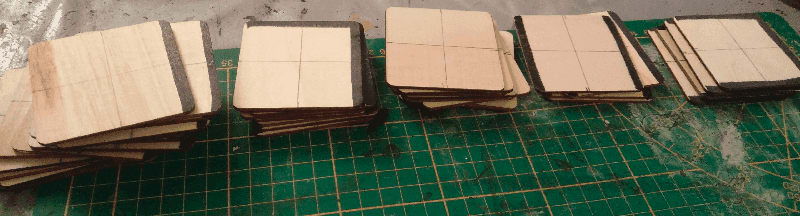
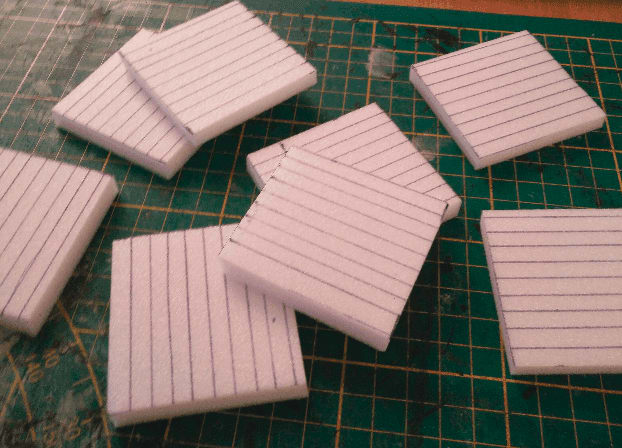
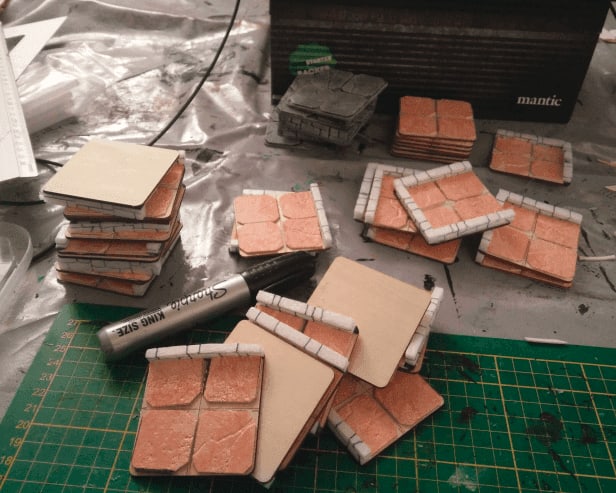
That's why I ordered a bunch of cheap square wooden tiles online. That way I'm sure they all have the exact same dimensions, and I don't need to bother cutting them at the right size.
I draw on the sides with a black sharpie where the walls would go.
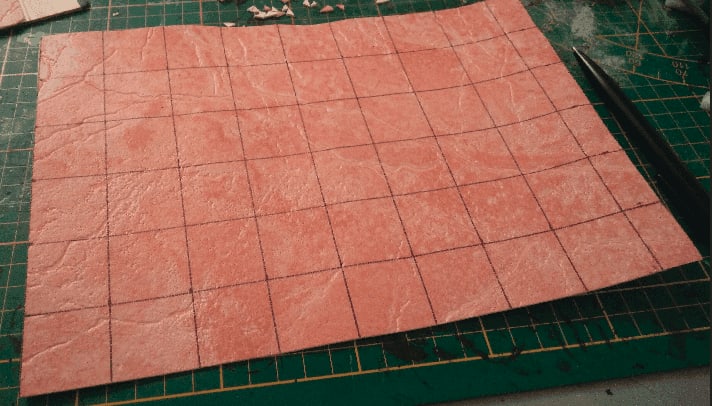
I then cut individual squares in a sheet of textured wallpaper. This one I found in a second hand shop, and it has a nice stone texture.
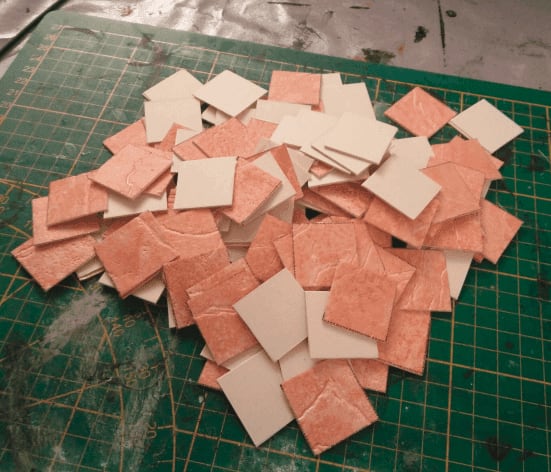
I cut this into lots of squares.
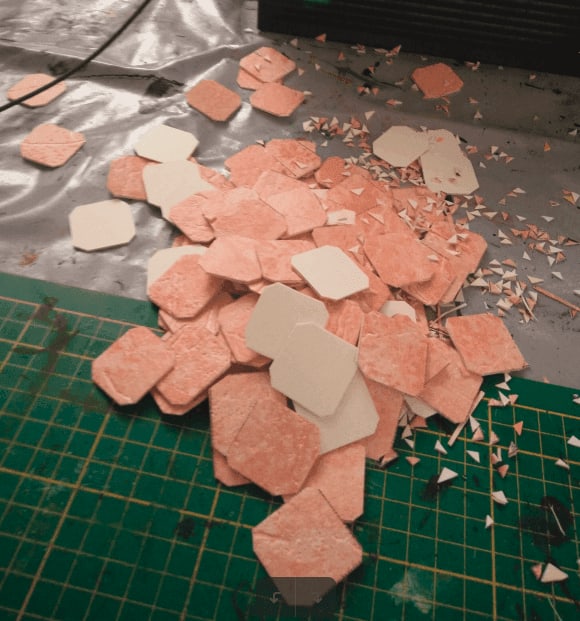
I then cut the corners of each square, to better visually mark them, and create a mess on my table.
I then glue them to the base tiles. I had to cut some squares so they don't overlap with where the wall will go, but because it's wallpaper, it's pretty easy to cut.
I also started working on the walls. As previously mentioned, I'm really bad at cutting at exact dimensions, so I'm using my foam board thickness as my wall thickness, making sure I have a consistent thickness for all my tiles.
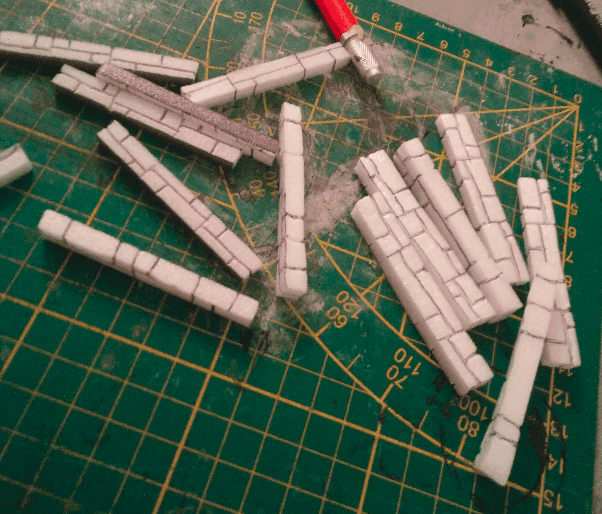
I then texture them to look like stone. The foam I use seem to have a different texture on its top/bottom than on its side, resulting on the final wall texture not looking uniform.
Honestly, for a bunch of dungeon tiles as I'm making, it's good enough.
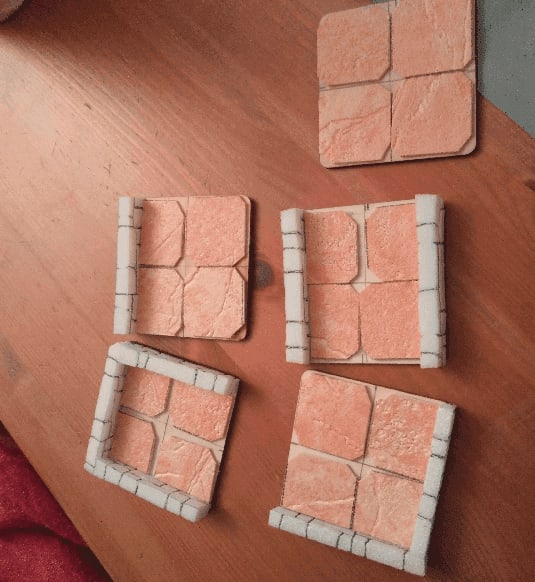
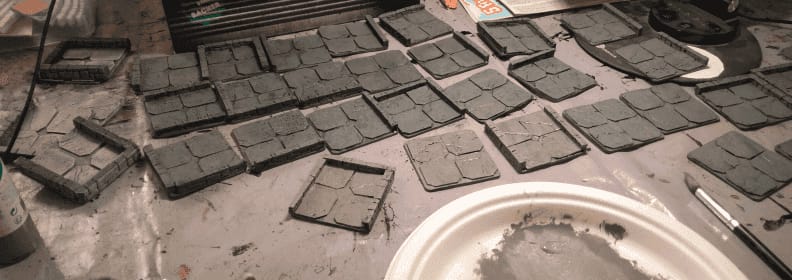
Some examples of the various tiles configurations.
And here we go, making more and more.
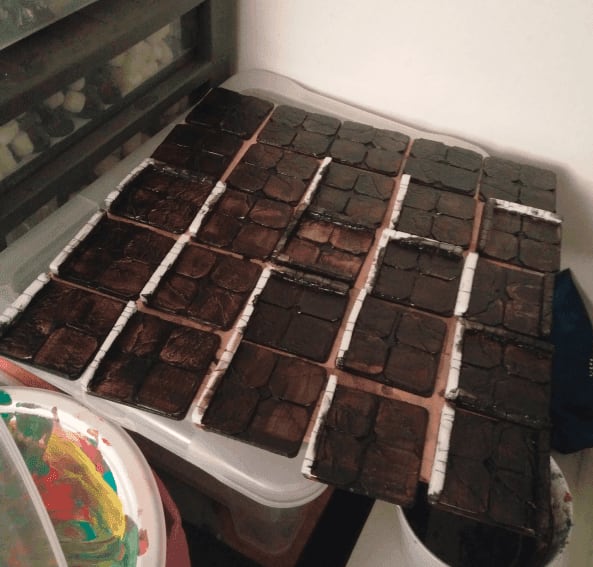
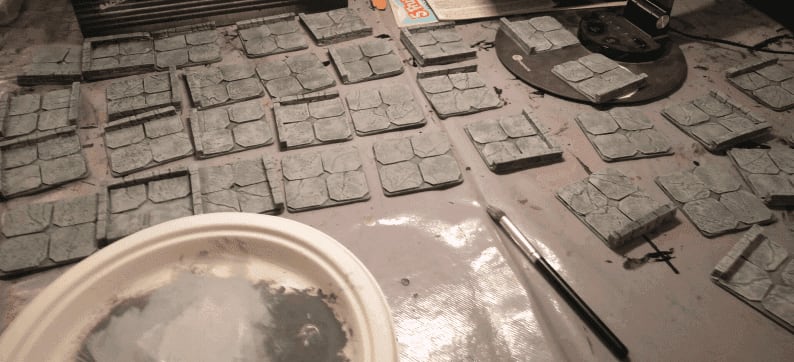
Then, covering them with black mod podge (here you can see corner pieces I made also). The wallpaper actually absorbs paint much more than I anticipated , so I had to do several layers.
I also need to paint the floor and walls in two passes, otherwise I couldn't actually hold the pieces in my hand.
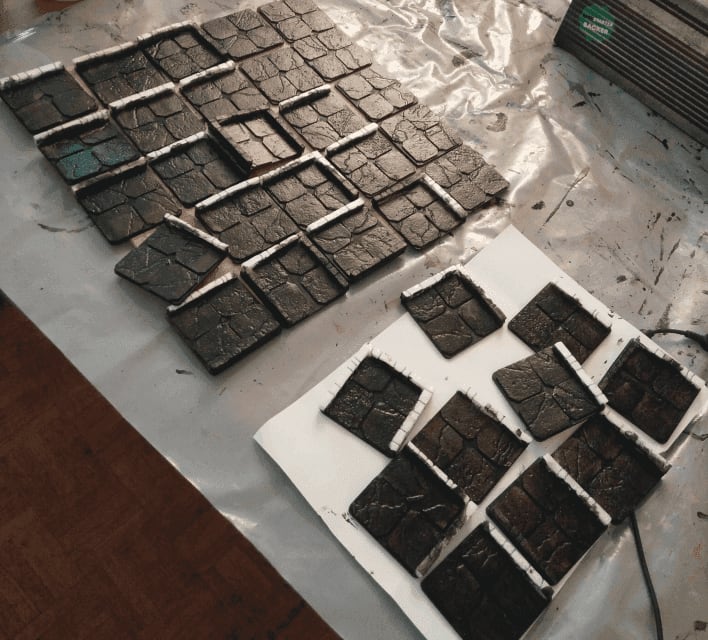
Initial gray overbrush.
First light grey drybrush.
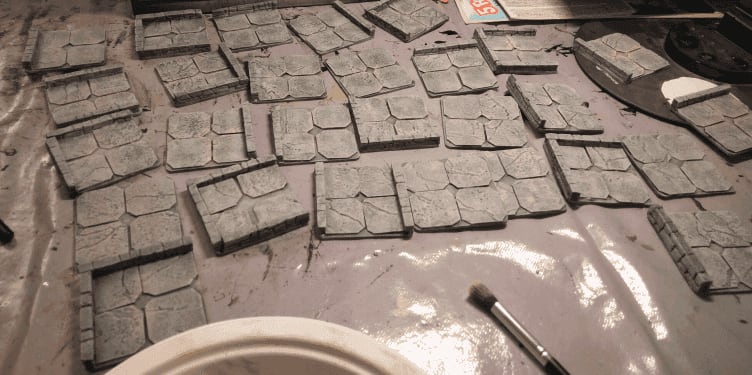
I set another even lighter grey drybrush on the square sides.
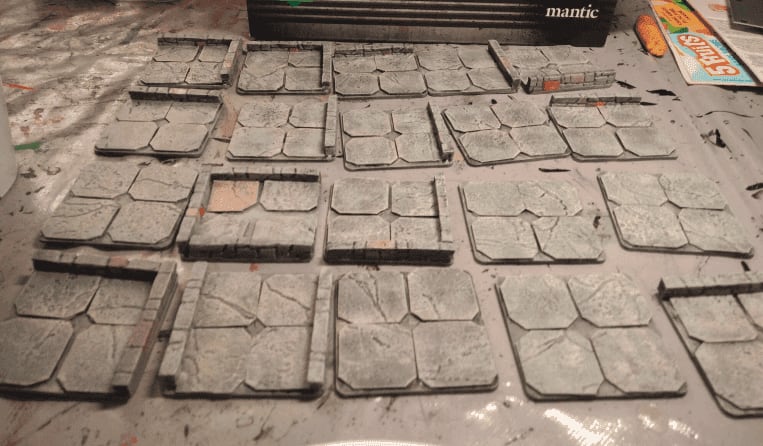
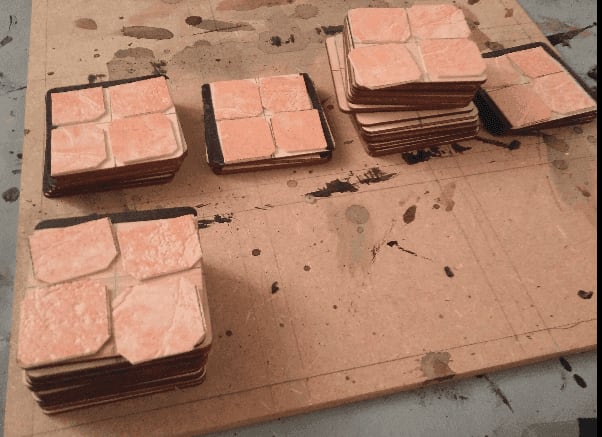
Coloring some squares and wall bricks in red.
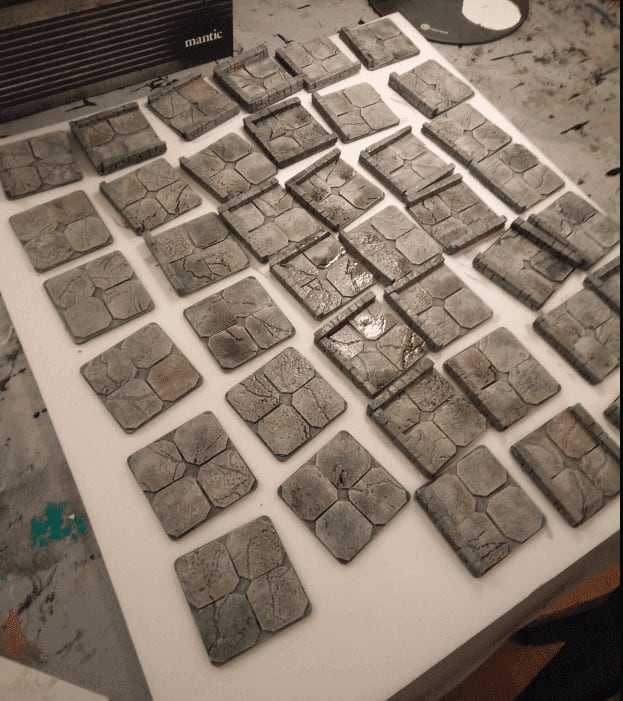
And applying a black wash on all of them, to enhance the stone effect.
And that's it; a way to generate lots of various dungeons.
Crates
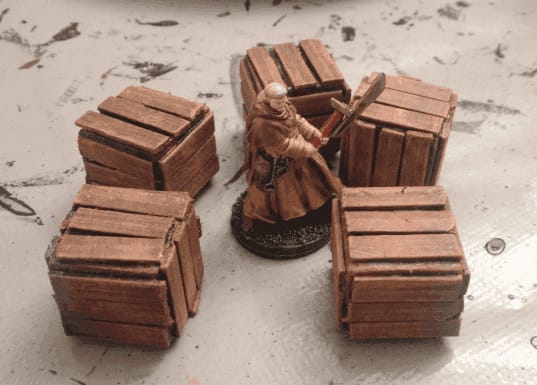
This is a quick post on how I made some crates for scatter terrain. They don't look perfect, but just good enough to add some cover to an encounter.
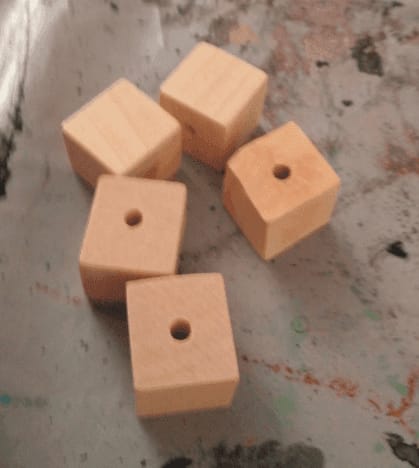
I started with some squared beads I found in a craft shop.
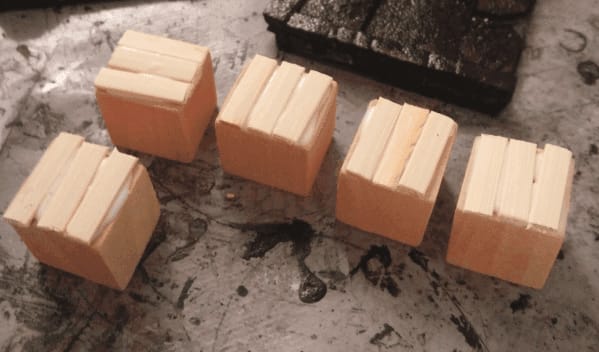
I glued short bamboo sticks on the sides.
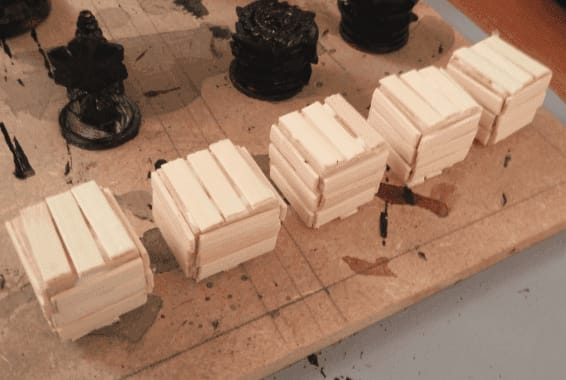
Covering all the sides took a while, as I had to wait for the glue to dry on one side before doing the next one, so I span it on several evenings while working on other projects.
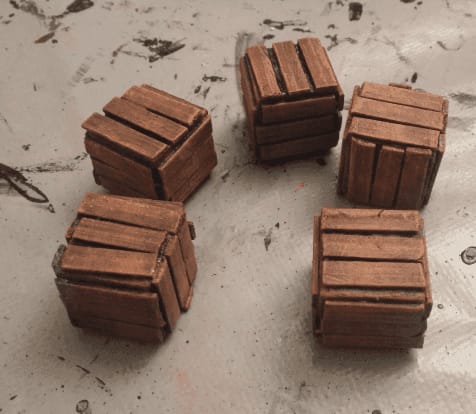
It's then a first layer of black paint, overbrush of dark brown and two dry brushes of lighter browns.
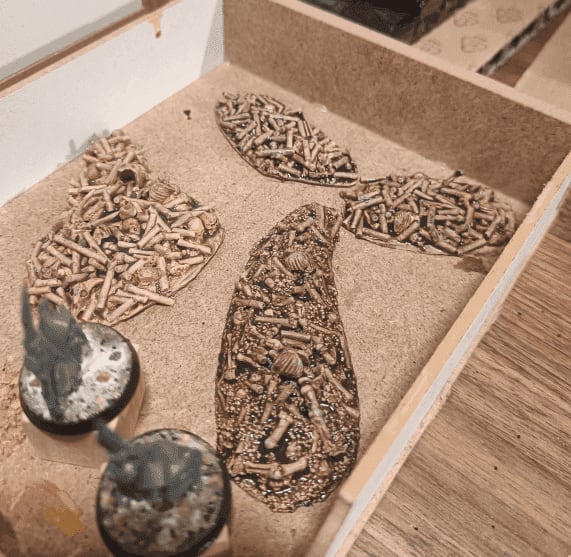
Bone piles
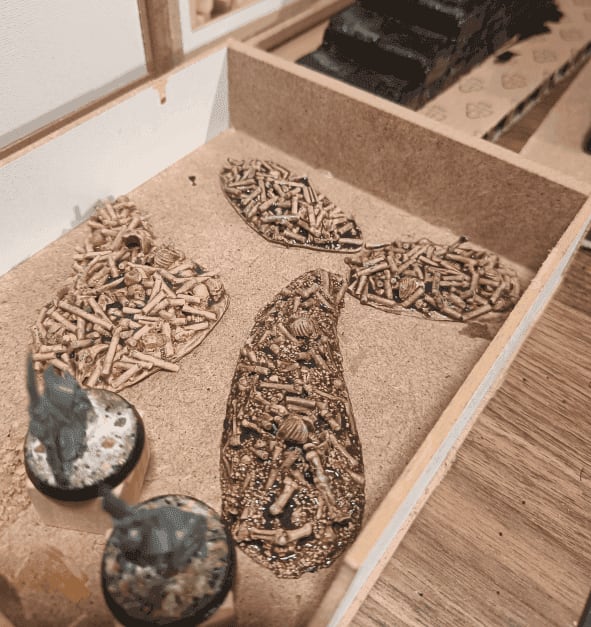
Those are some scatter bone pile terrains. Made mostly from plastic skull and skeleton leftovers, as well as spaghettis.
I cut the basic shape in some plastic, added some Vallejo stone texture on top and sprinkled various bits of plastic skeleton, skulls, spaghettis and fine sand.
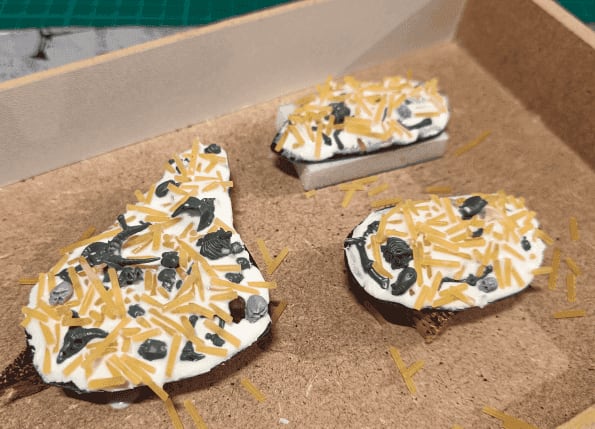
I made several of them, and soaked them in wood glue heavily diluted in water (50/50 mix). This will help all the sand and pieces to really stick together.

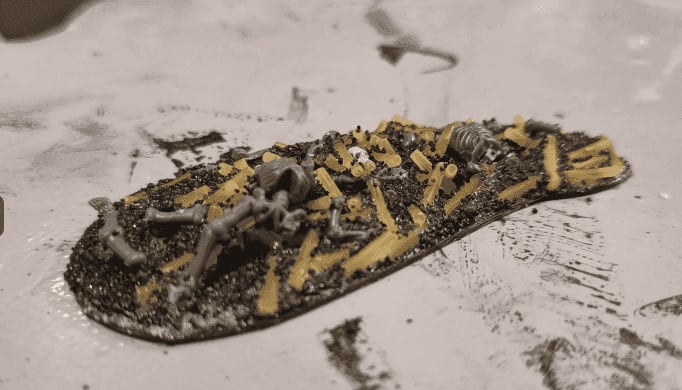
I started with a base of bony/cream color.

I wanted to use this project as an opportunity to test oil painting, so I added some burnt sienna on top.
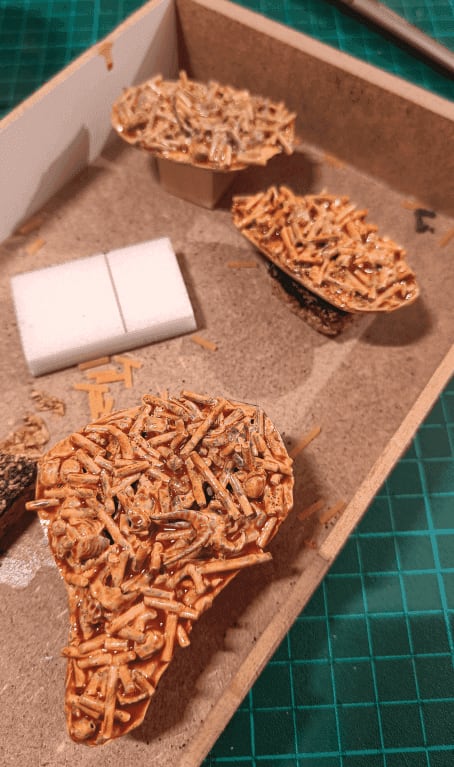
I thought the result were not dark enough, so I added a second diluted layer.
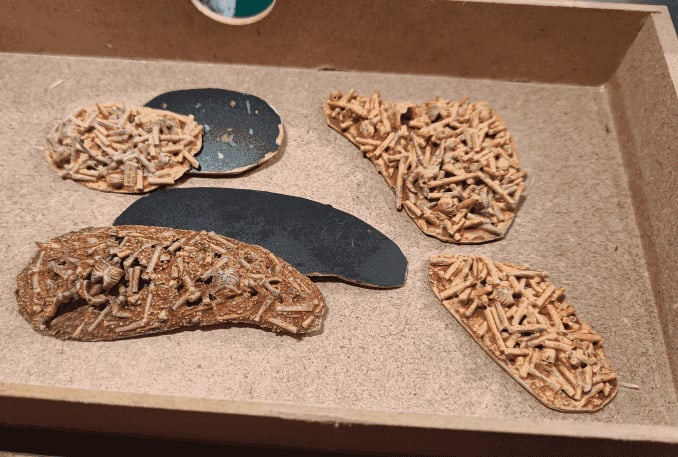
I think that at that point I forgot that I wanted to use oil paints and I started drybrushing them out of habit.
This doesn't look so bad, so I kept going.
I then added the traditional wash on them. I wasn't sure where to go next, so I left it at this.
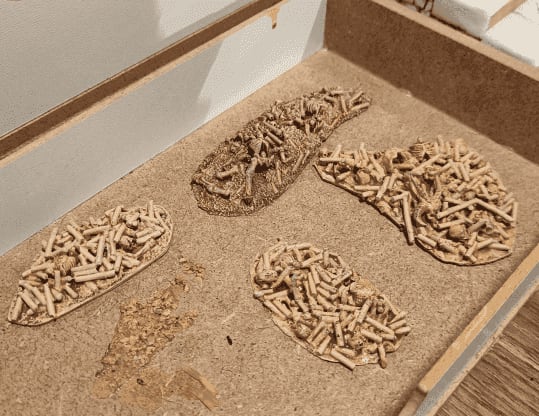
If I had to do it again, I would keep adding the fine sand, but I would first dry brush in various tones of brown the whole piece, and then pick individual bones with cream paint and brown wash.
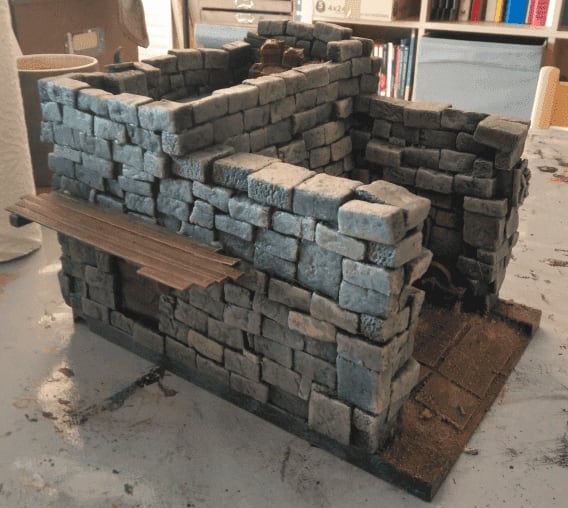
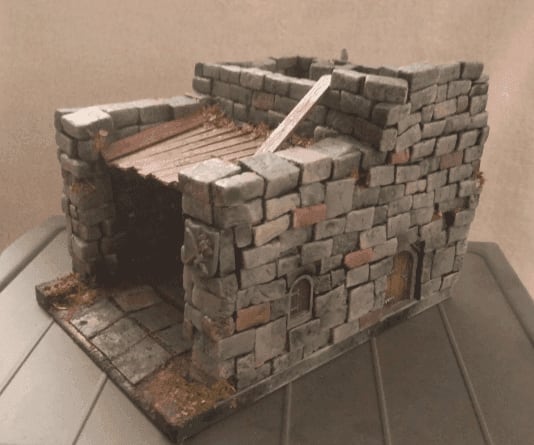
Blacksmith forge
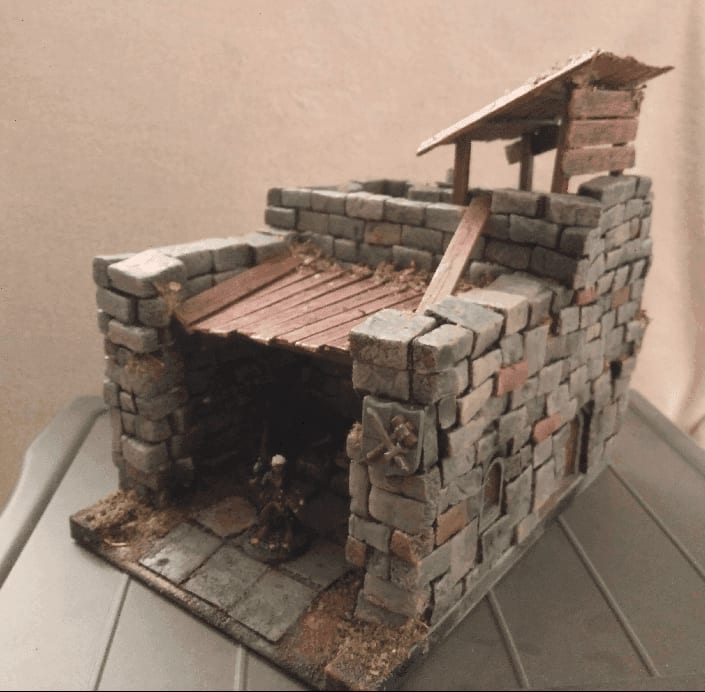
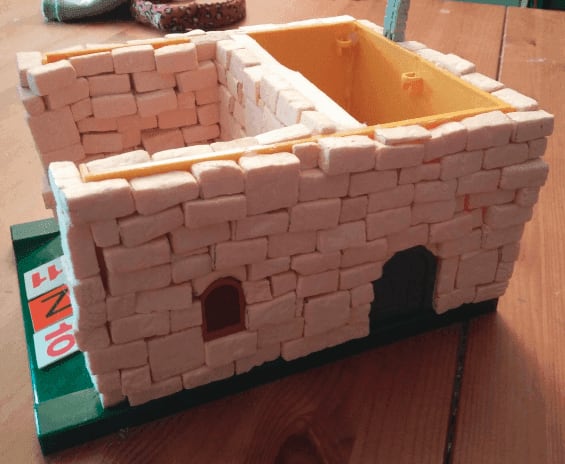
I made a blacksmith forge out of the structure of a toy. Honestly, I could have made it without the structure underneath and it might have actually turned just as good, but I like the constraint that using a pre-made structure adds.
This is the original toy I found in a second hand shop.
The plastic was very brittle, so I started by removing all the walls and unscrewing it. I would then glue it back together, but I didn't want any small part to break as I was working on it.
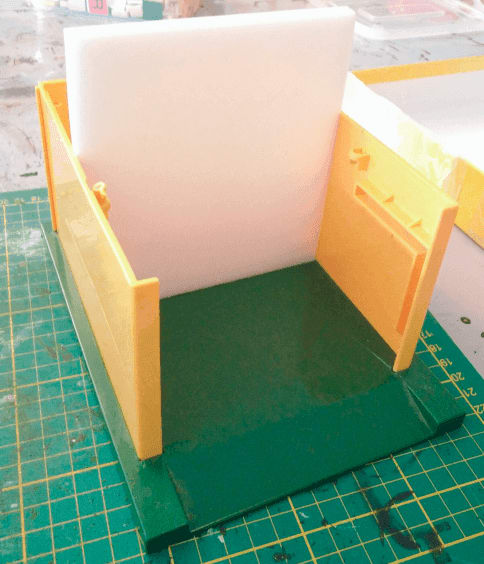
It was also a bit too deep, so I added a fake back wall with a foam board. I thought it could also act as some kind of house for the blacksmith.
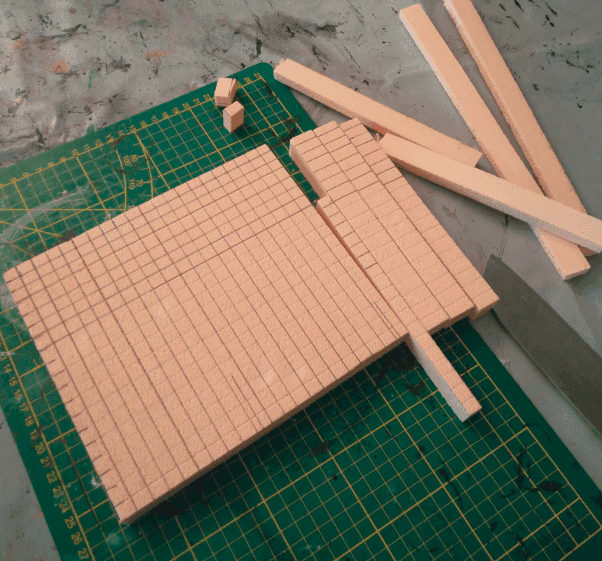
I started working on cutting foam in bricks.
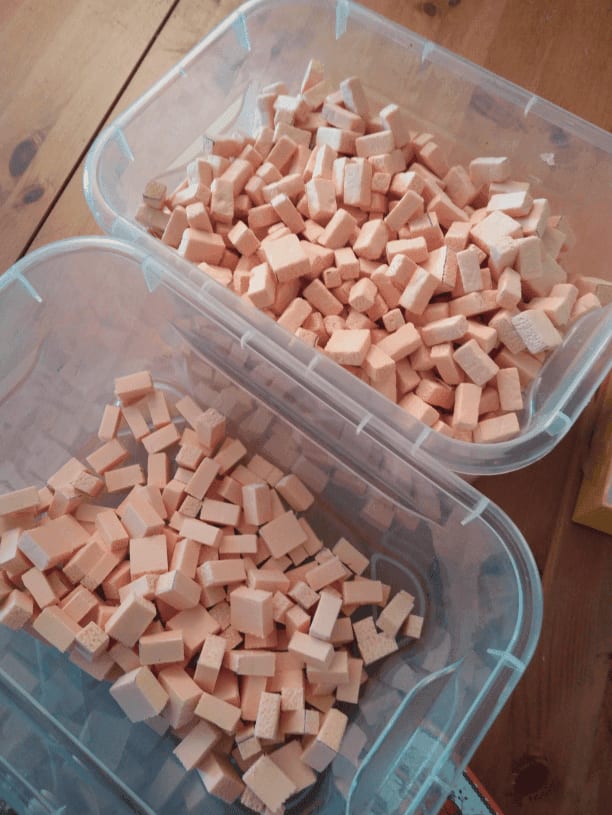
Which gave me a fair amount. I textured them by throwing them in a box with some real stones and shaking it until the stone texture was embedded in the foam bricks.
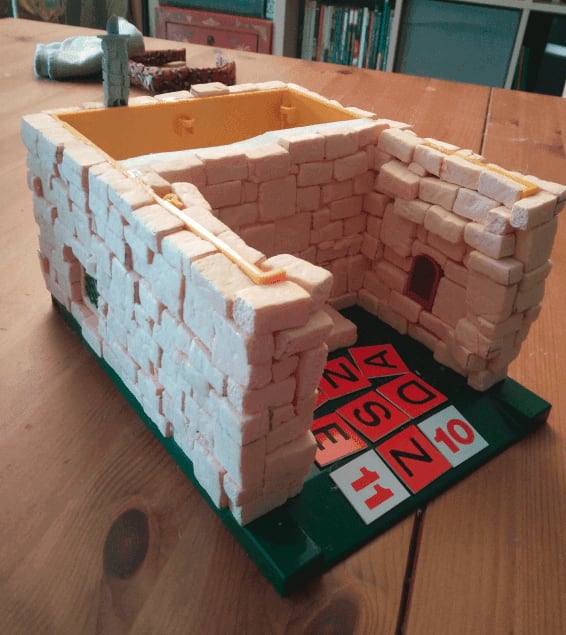
And then, it's just a matter of gluing the bricks one by one on all the walls. I do it with a glue gun, applying glue on the back of each brick and gluing them to the walls.
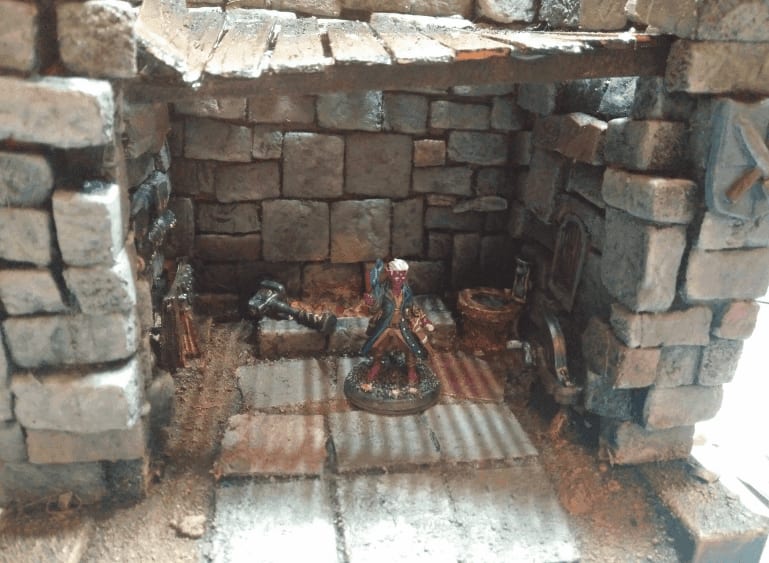
I added some windows and doors from Lego pieces and miniature leftovers I had.
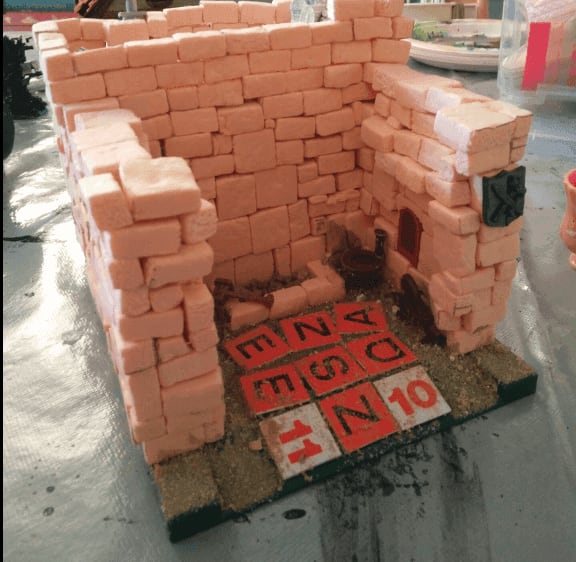
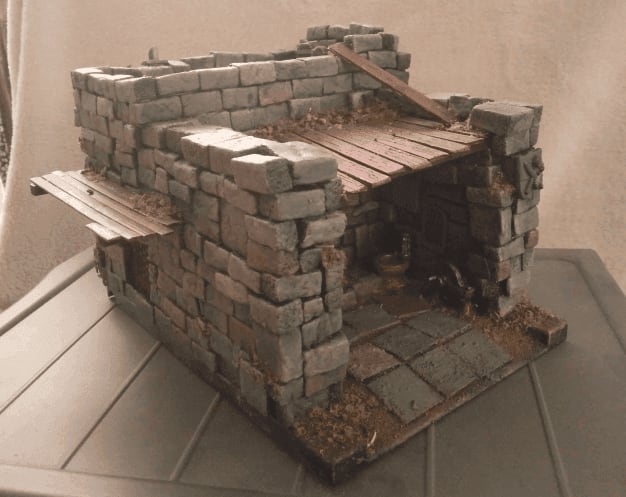
I decorated the forge area with some more toys and miniature stuff.

Upstairs I engraved the floor with some tiles pattern, and built a shack out of some balsa wood and popsicle sticks.
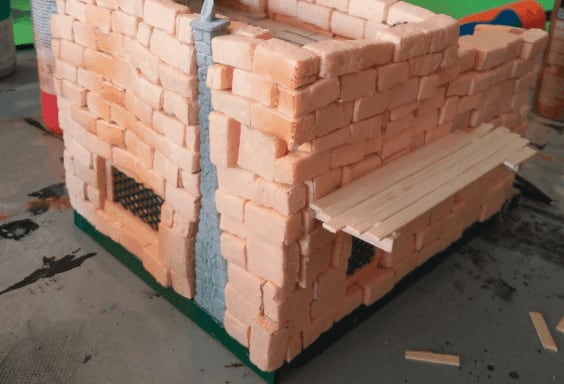
To make the side slightly more interesting I ever get to play a skirmish game with this terrain, I added a small wooded part.
After a first overbrush of the base colors.
View from the other side.

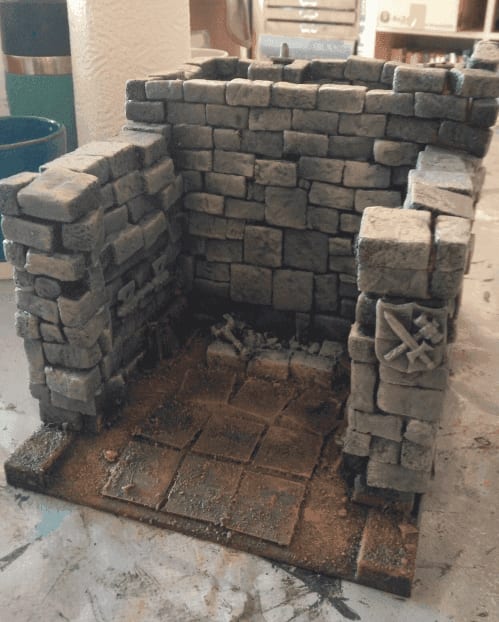
Painting stones in various colors for variety, using highly diluted paint, and adding a glow effect on the embers.
Added ramshackle wooden planks as some kind of ceiling. Not sure it makes sense that a forge ceiling would be made of wood but hey.
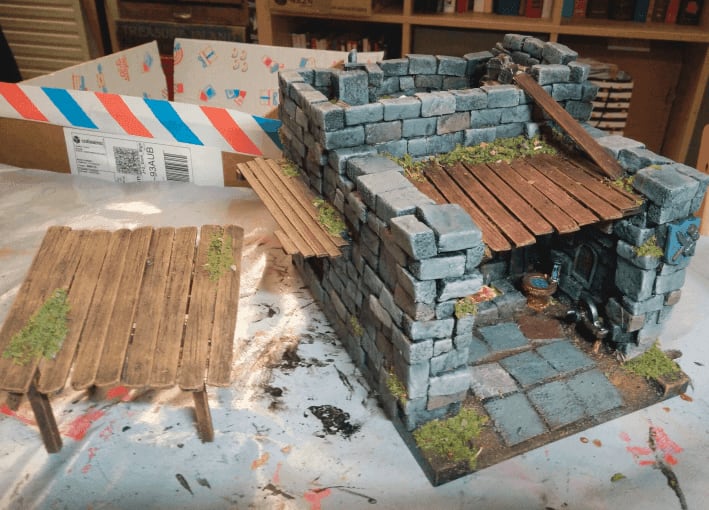
The top shack is not glued, for easier storage and also because it can be used in other contexts.
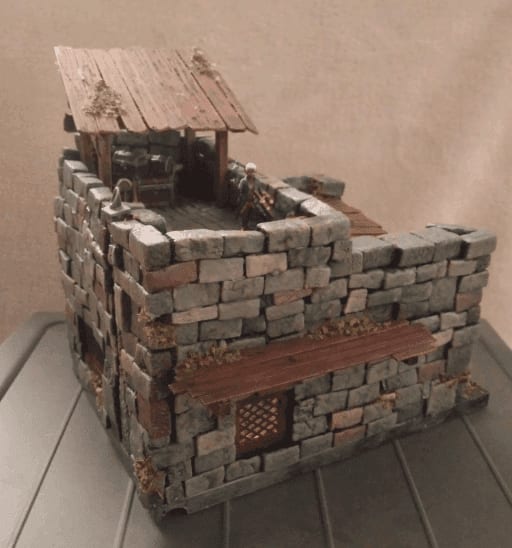
Final glamour shots from various angles.
Wooden toy Mordheim House
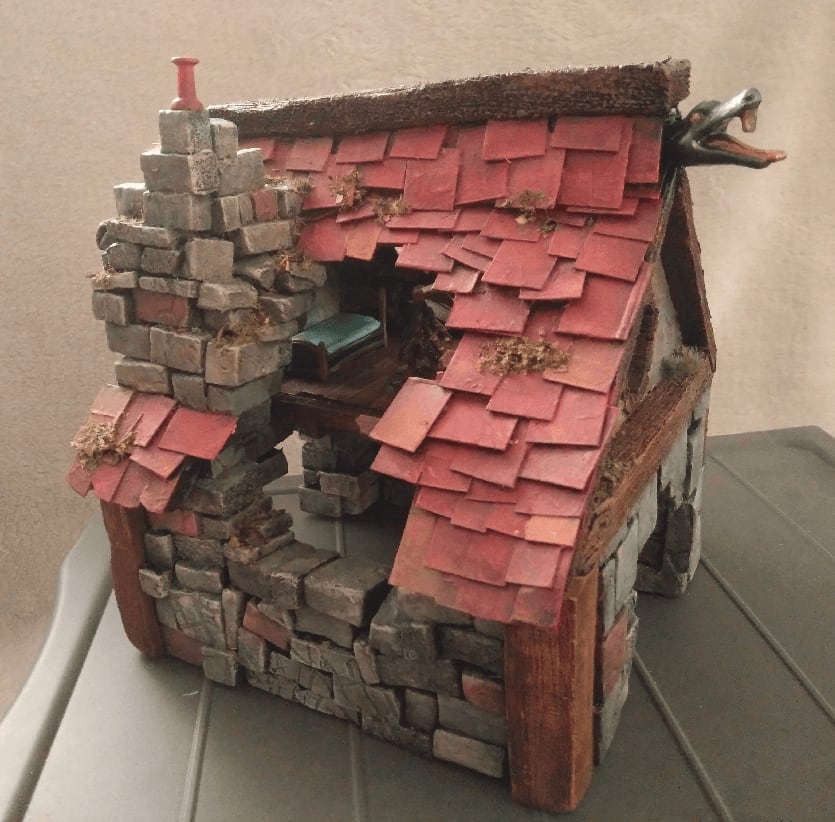
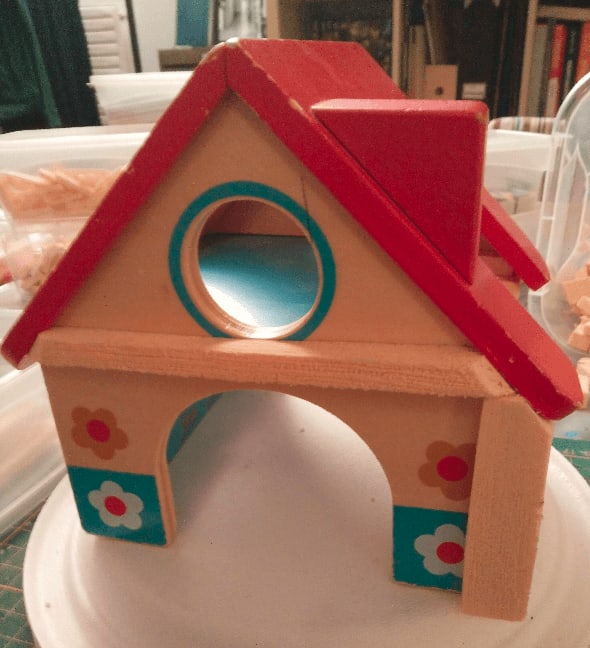
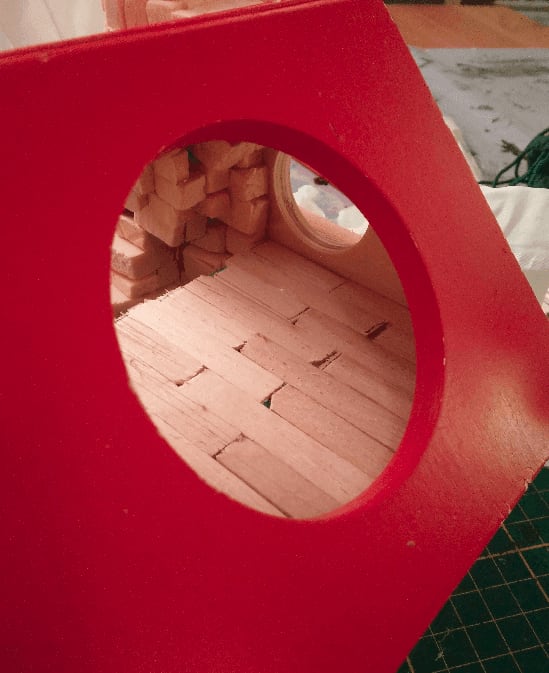
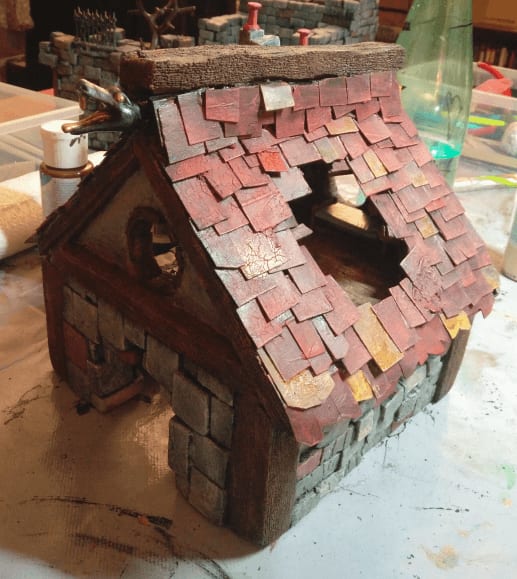
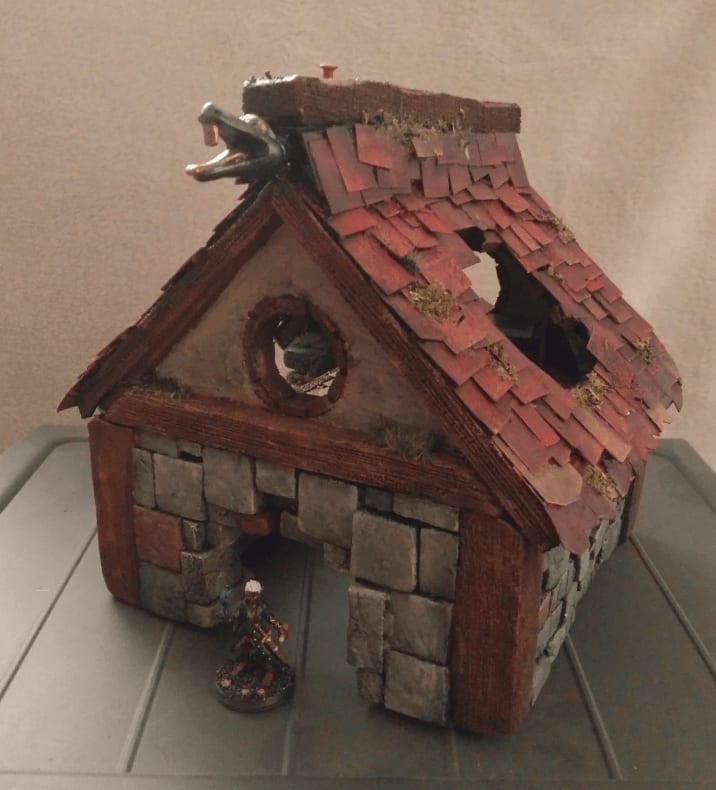
This is a ruined city house, with its roof destroyed by a fallen meteor.
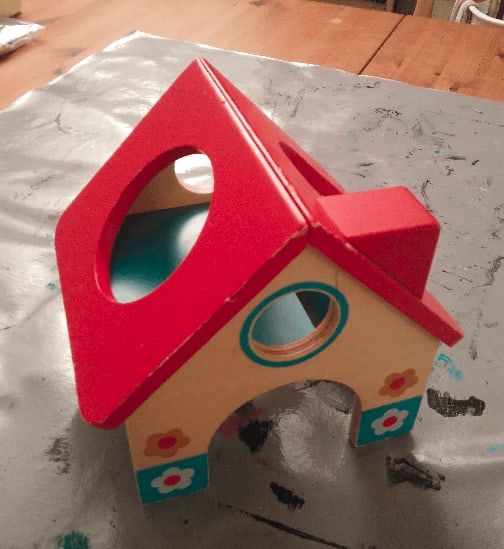
And it all started with this nice looking little wooden house. I had seen it in my local second hand shop a couple of time. I picked it a few times, wondering what I could do with it, and always put it back. I thought the scale was off, and that fixing the giant holes in the roof would be a pain. And even if I did, it would make playing in it pretty hard.
Then one day, it occurred to me that the giant holes might not need fixing; that they might actually be desirable if I wanted to craft a meteor-destroyed house.
Walls
So I started adding wooden beams on the outside, to better delimit the ground and first floor. Those are made from insulation foam, and textured with a wood scraping brush.
I also put the same kind of wood/foam at the house angles. I hat laying bricks at angles, so this provides a nice shortcut to cover the angles and still make it look like some kind of medieval construction.
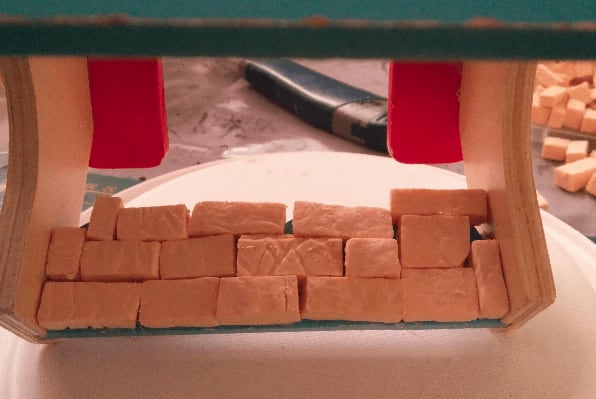
I then started laying bricks on all walls, even the interior ones. I decided not to glue this build on a base. Because the structure is already so durable (trust me, it's some really heavy and strong wood there), I knew I could just pick the build and lay it on the board anywhere and it wouldn't need a base.
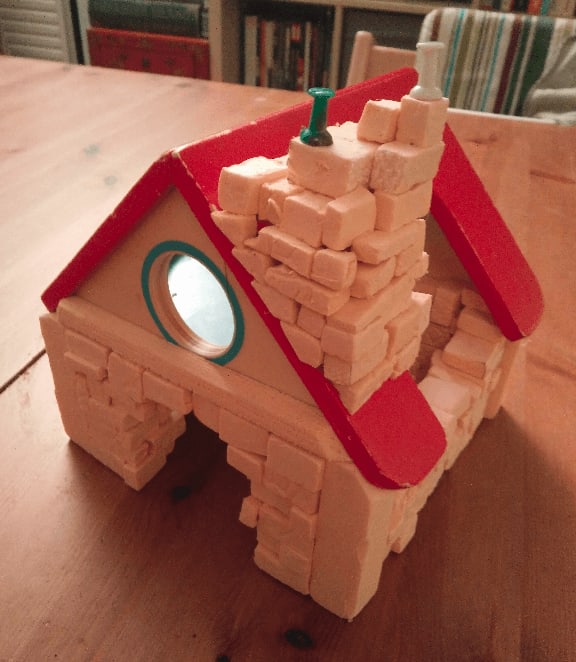
More bricks, and a chimney. I glues some pins at the top of the chimney to simulate a top exhaust. Not sure if the illusion works though.
More and more brick laying. This took some time, but I did it while listening to the Dungeons of Drakkenheim podcast (very fitting in terms of atmosphere), so I had a good time.
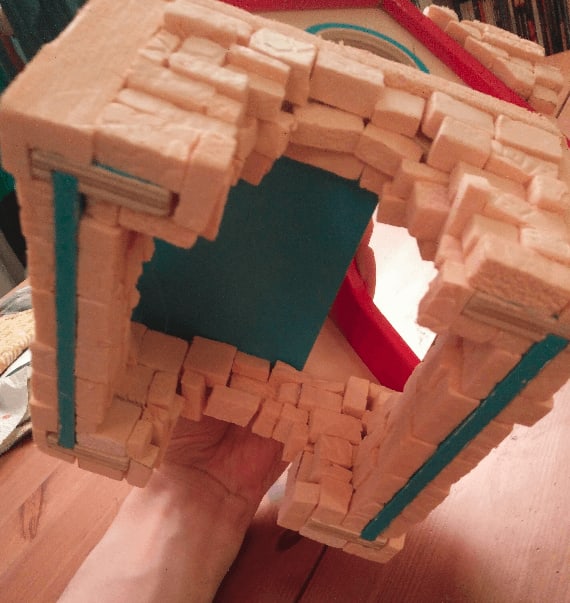
Almost there. As you can see, I can hold the whole structure in one hand and everything stays attached. This is one of my most (if not the most) durable builds.
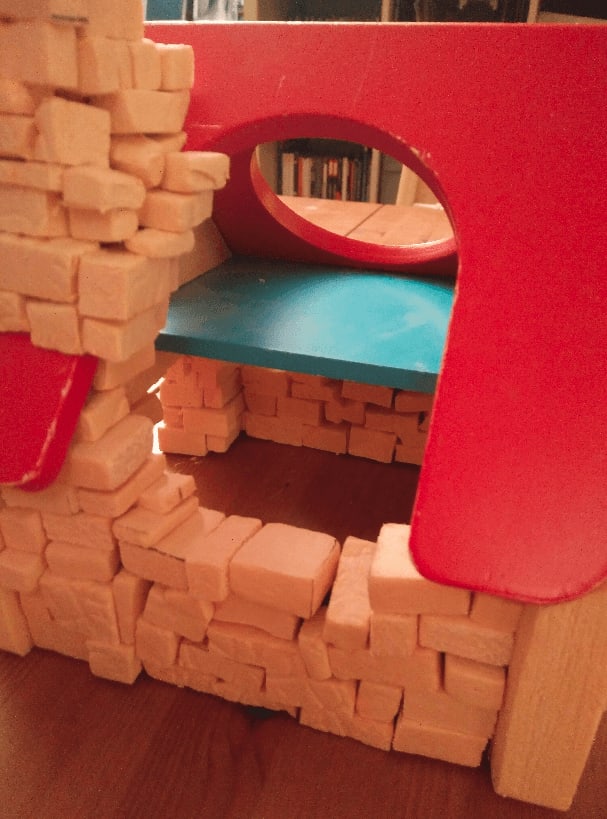
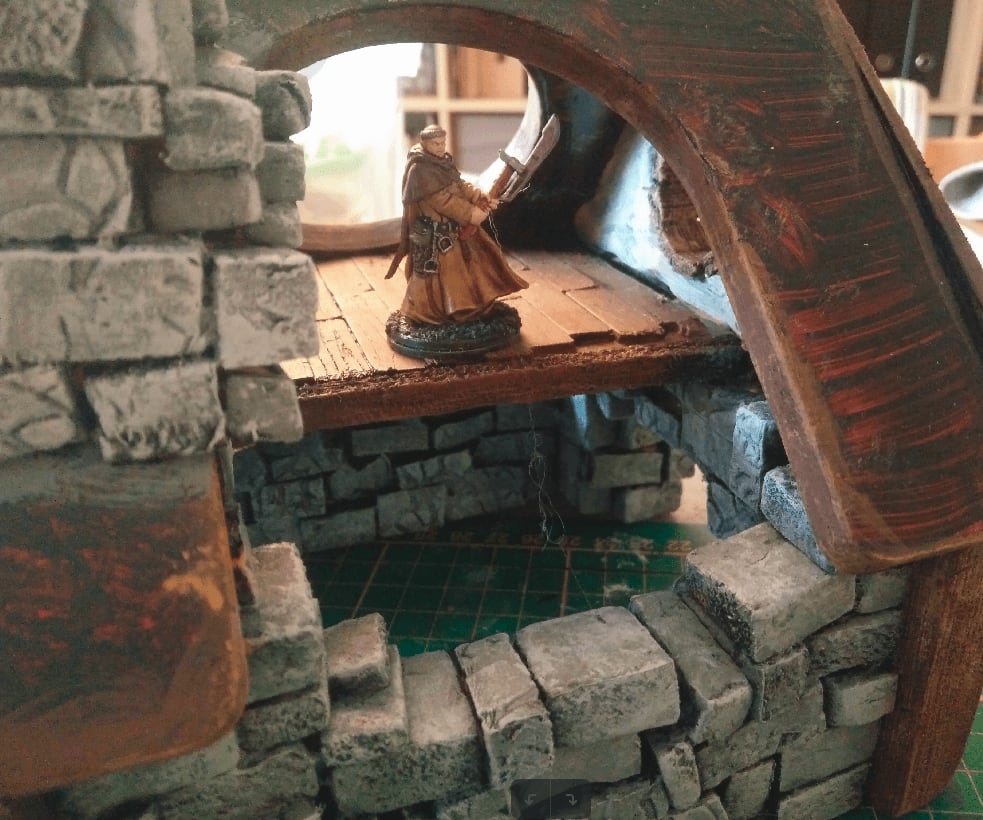
Floor
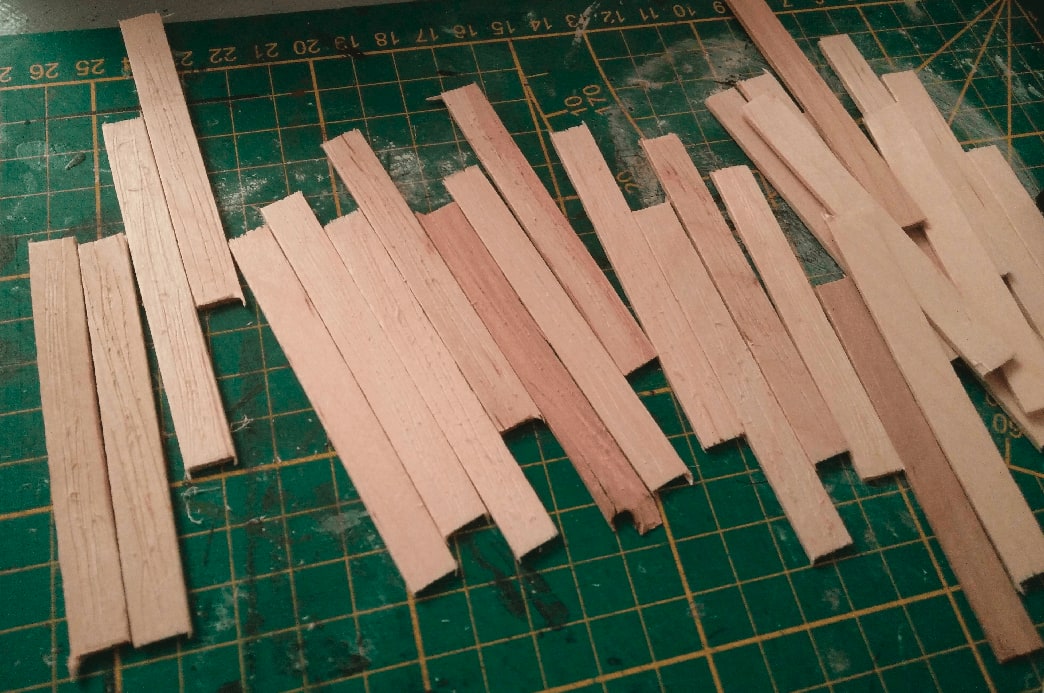
Now is time to cover the top floor with some wood. I took a lot of ice cream sticks, cut their rounded ends and textured them to add wood grain.
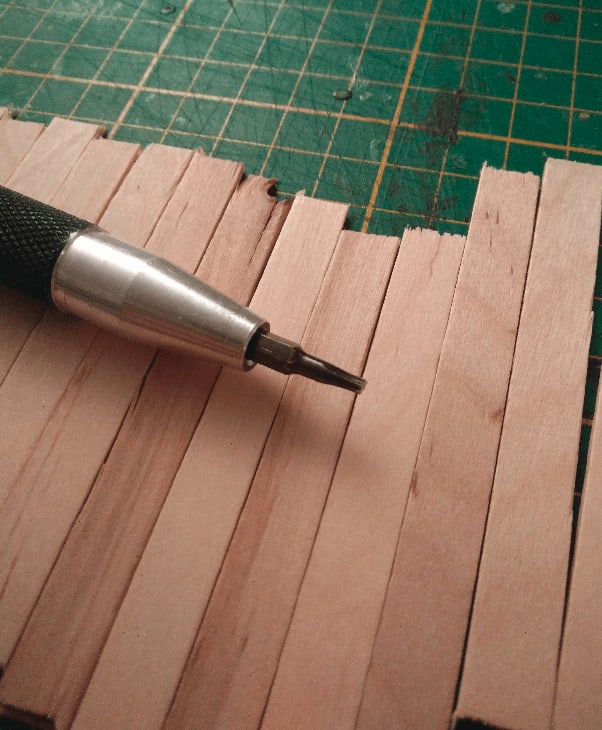
Here is what I use. It's a corx screwdriver, it has a star-like shape and with two or three passes on a stick, it simulates veins of a wooded plank.
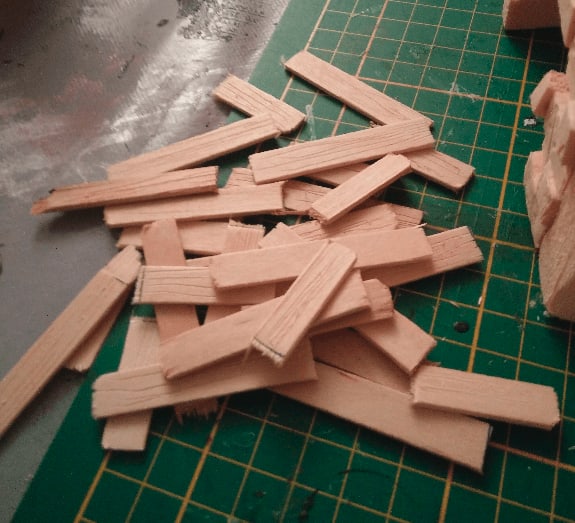
Then I cut them into smaller bits, so I could glue them into some sem-irregular pattern (one long and one small, in alternate rows).
For durability, I used a glue gun to glue them all, but this required some precise timing as I had to glue them quickly before the glue got cold and some were sometimes hard to get to.
Upper walls
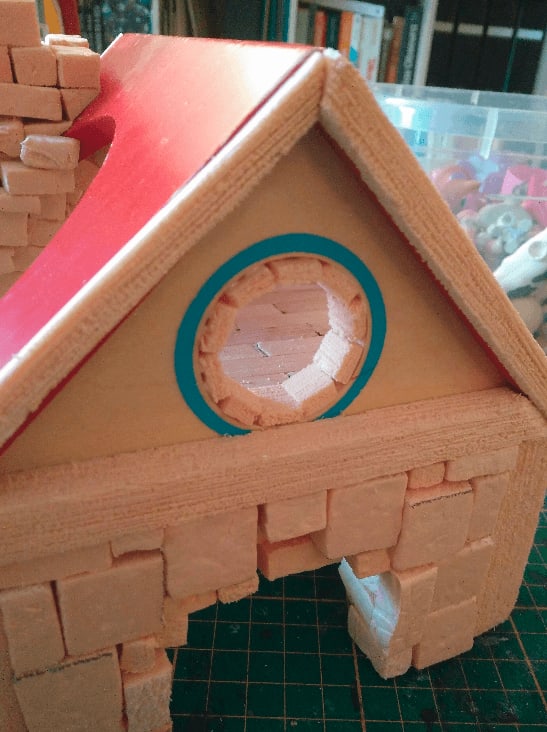
I wasn't exactly sure at first about what to do with the round windows. I decided to glue small "wood" blocks all around it. It does not make much sense from a real-life POV, but the crafting result looks good.
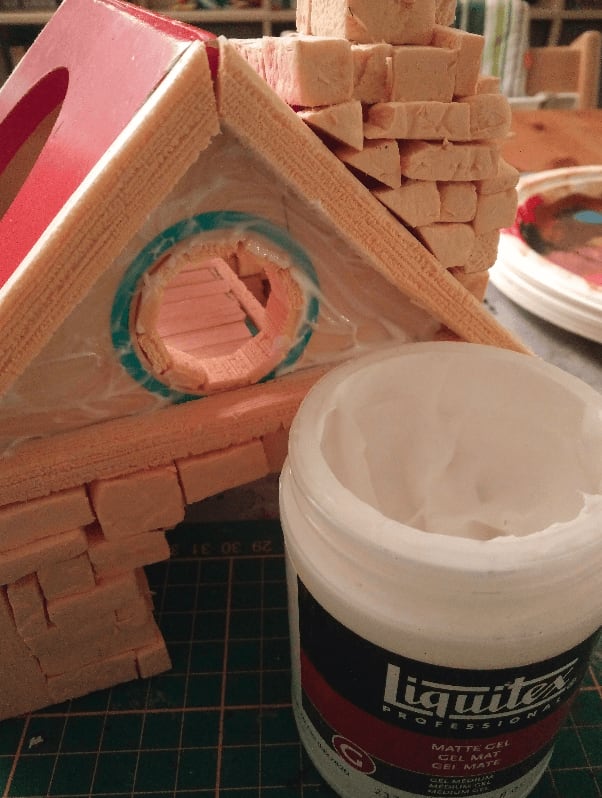
Covered the first floor walls with some matte gel to give it some texture.
Painting
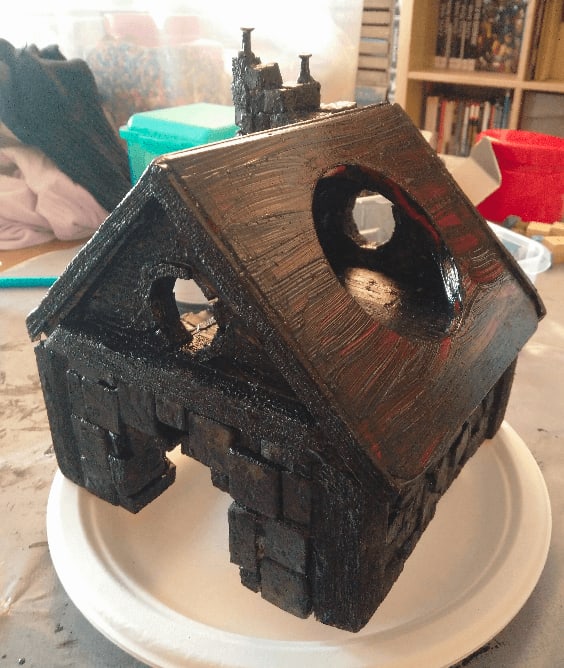
And then started painting. My modpodge/black paint mix was a bit too diluted. I used china black ink instead of craft paint thinking that the coverage would be better but... china ink is very liquid compared to craft paint and even if the pigment is stronger, it also added a lot of "water" to my mix, resulting in a way less covering result.
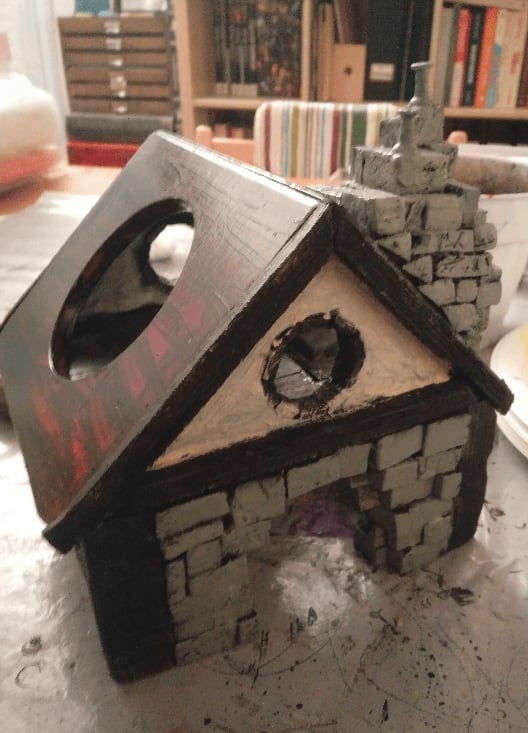
Still, I started painting on it. In hindsight, it was a mistake. I should have covered the whole structure in a second (or third) layer so it would be completely black. Because I skipped this step, the underlying red can be seen between the cracks of the bricks in some places.
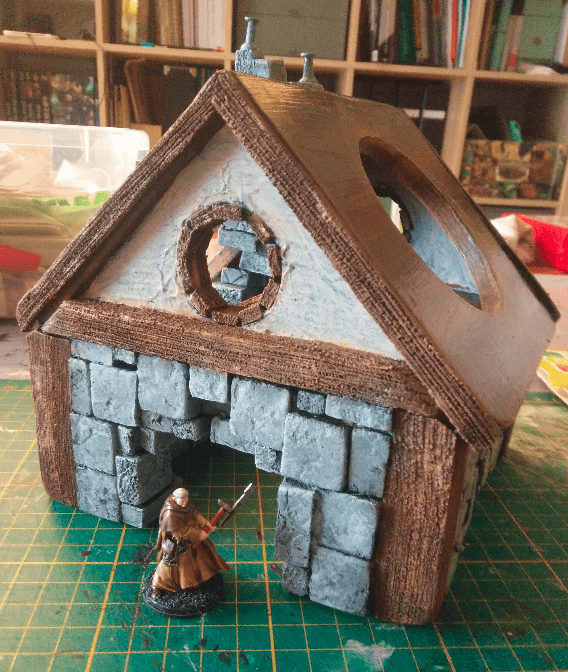
After a few coats, it starts to look good!
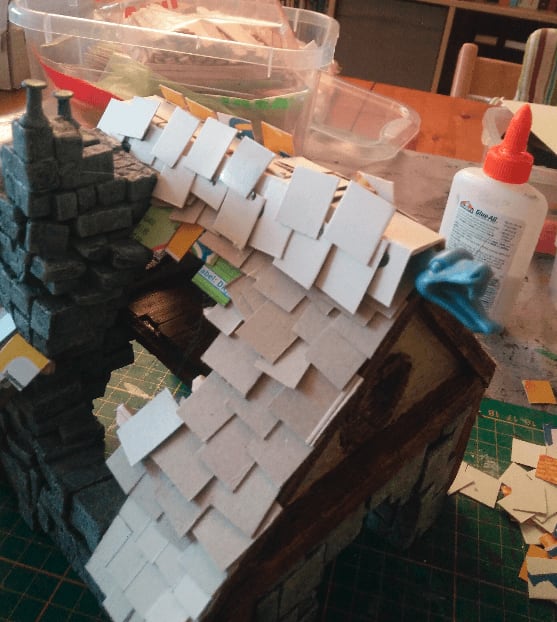
Roof
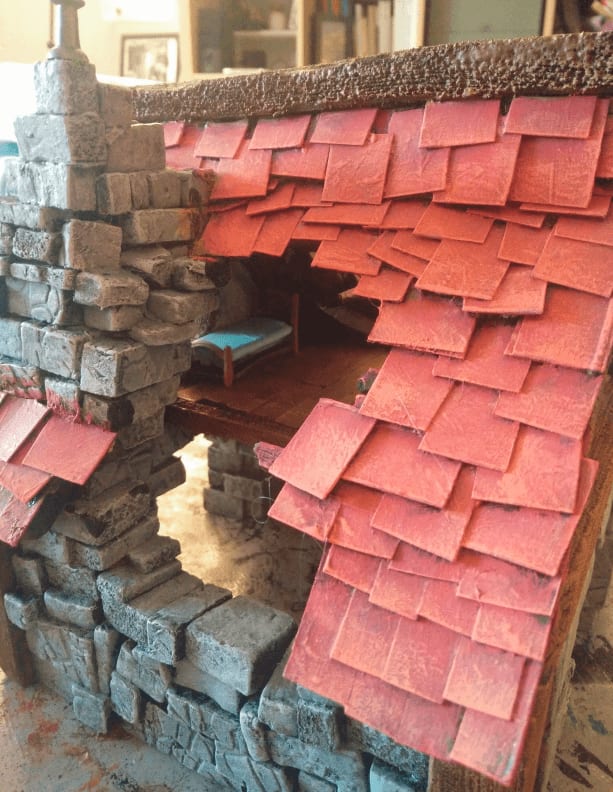
With a mini for scale. Now what I need to do is add the shingles around those giant holes.
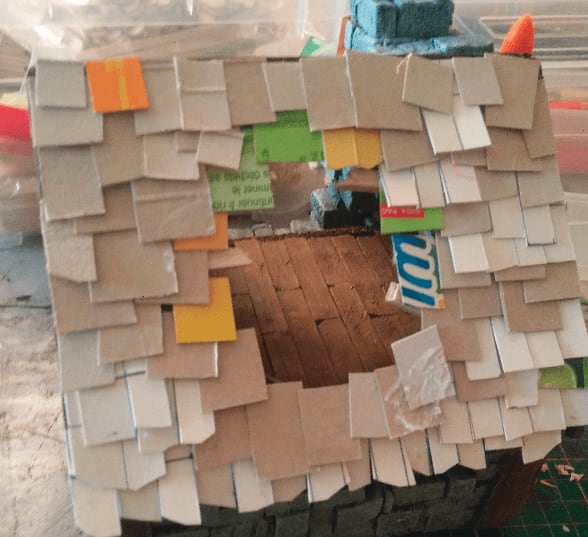
I went with shingles of greatly varying sizes, to give this a disarrayed look, which is how I envision the old cities of the Warhammer world, with their crumbling turrets built in defiance of gravity.
For the top ridge, I wanted to add some decoration and had this plastic snake laying around, so I glued them and covered it in more shingles. In hindsight, this was a mistake. The final look of the top of the roof is weird, and I should just have cut the snake head and glued is below the roof line.
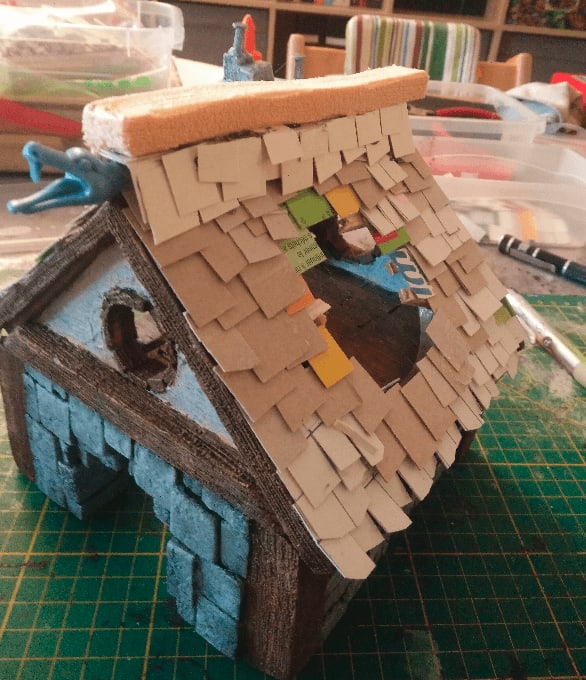
To kinda make up for my mistake I added another wooden beam on top. I honestly can't say if it's better or worse.
This time I applied several coats of my highly diluted mixture, to be sure to cover all the shingles well (I don't want to have any Golden Grahams logo showing through!)
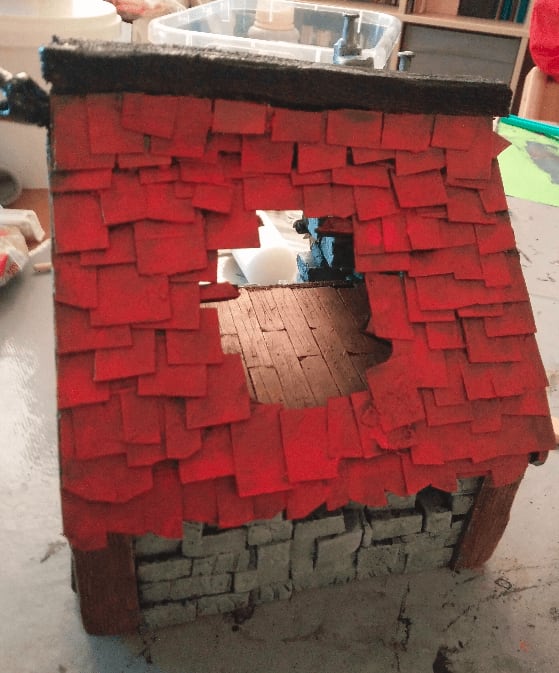
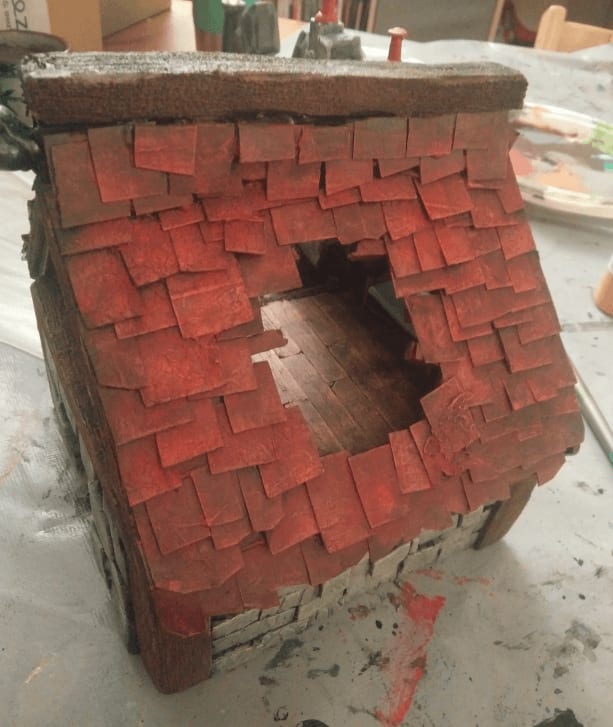
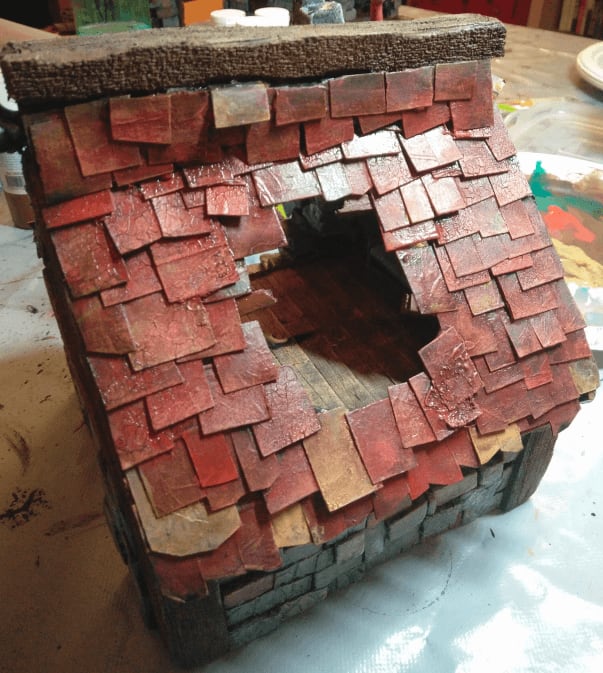
First coat is a deep red.

Drybrush of a more orange red.
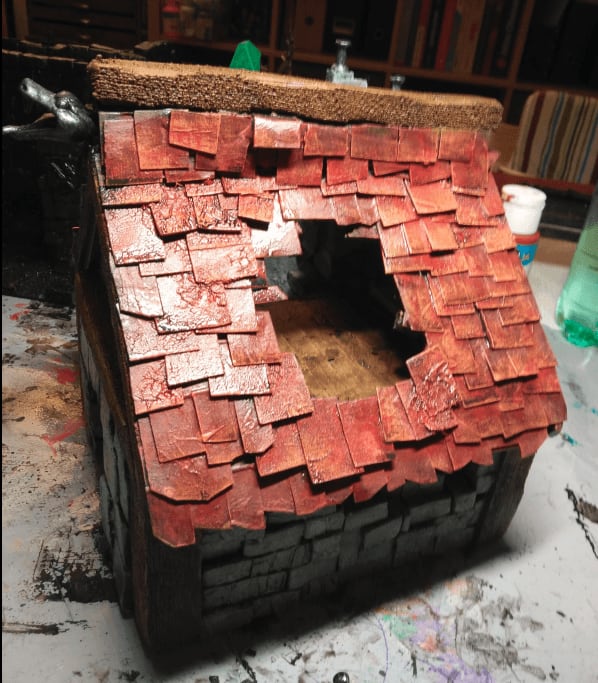
And finally a real orange on the last layer. The several layers of mixture I added to the shingles added some irregular grit which is a fortunate side effect.

The effect under my desk light was very dramatic!
I then added a wash, which had the unfortunate effect to create rippled on some of the shingles. I think it's because the pigment of the paint somehow interacted with the plastic coating of the cardboard, dissolving it. It sure added some interesting texture to the build but not what I had been looking for.
And once dried, it gave way to that pretty nice gritty effect.
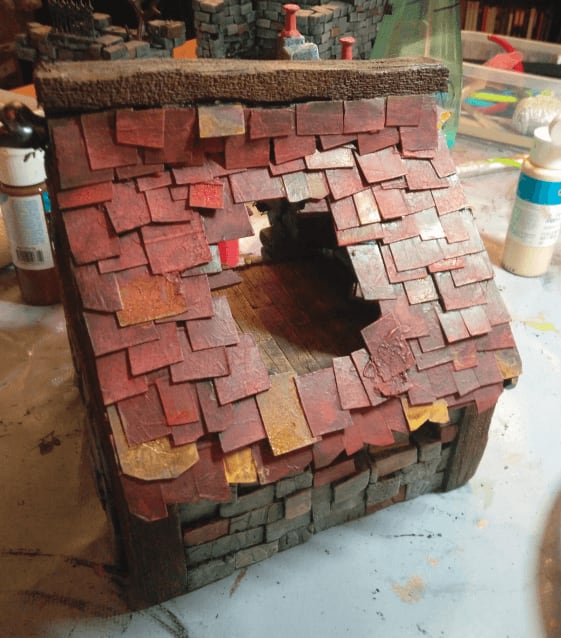
I went on and colored more individual shingles in various tones of red and orange, more like a real roof.
This, alongside a similar effect done on the wall stones gave a lot more life to the build.
I added another wash on top; otherwise the colored shingles were way too visible.
And then, we could move to flocking the whole piece.
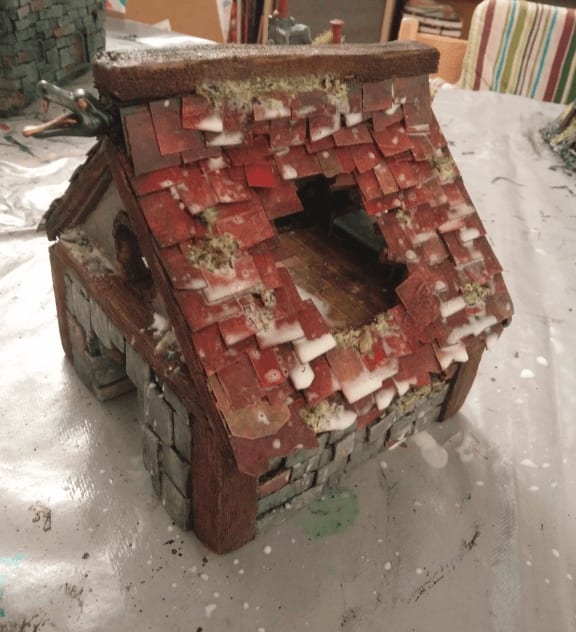
And putting watered down PVA glue on everything to really seal the flocking. This phase is still a bit scary to me. The build looks like a real mess at that stage with all those white splatters everywhere. Thankfully it all turns transparent when it's absorbed by the cardboard.
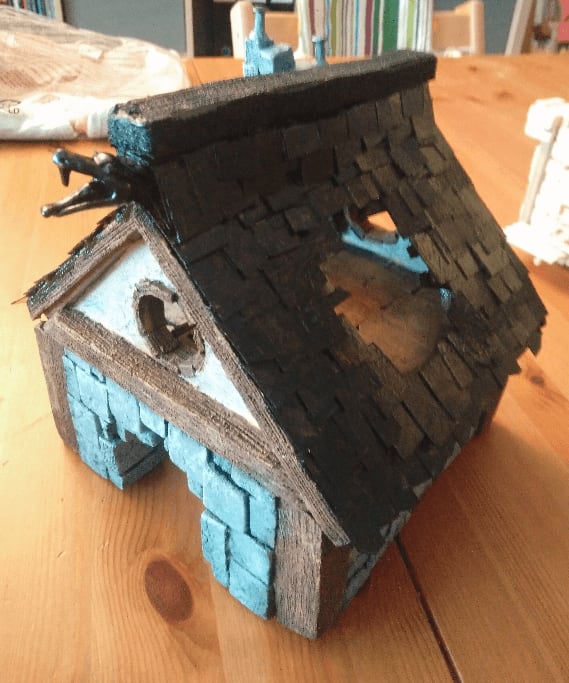
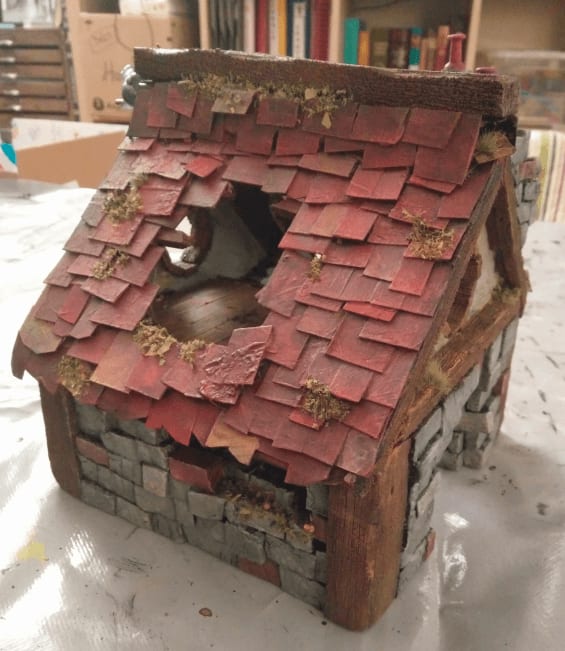
Final result
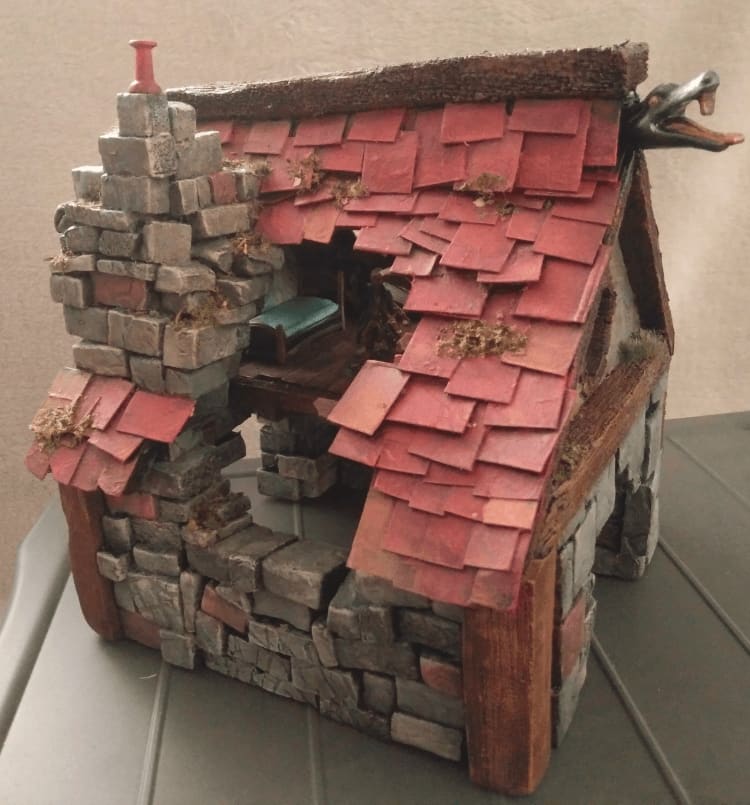
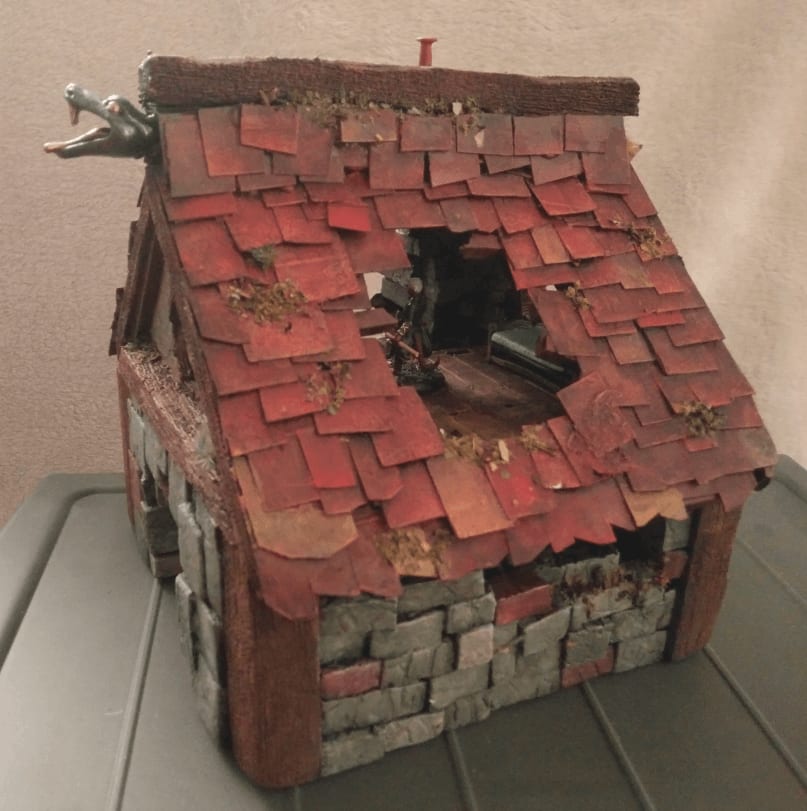
And a few glamor shots of the final results. I'm very pleased with this build. Mostly because it is durable and that's one of the main qualities I look for in my builds. But also because it conveys this feeling of decrepit city hit by a meteor very well.
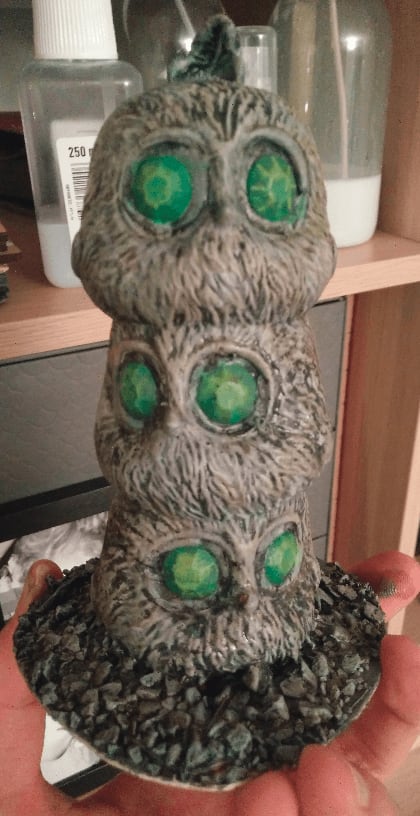
Three-headed bird statue
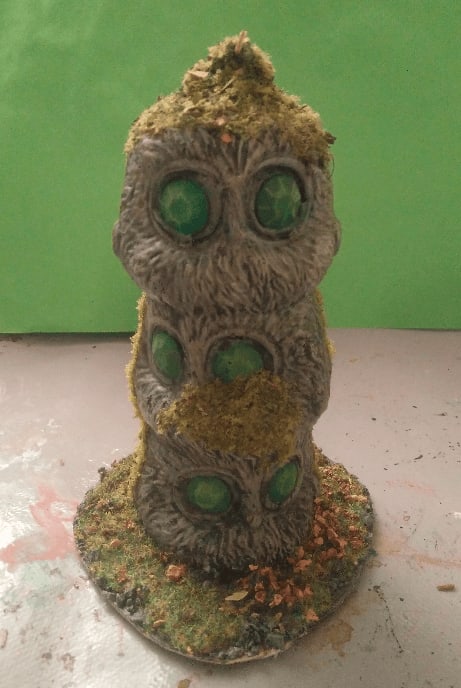
You walk into the jungle and come face to face with this horrible statue. Three bird heads stacked on top of each other, their eyes emerald green. What do you do?
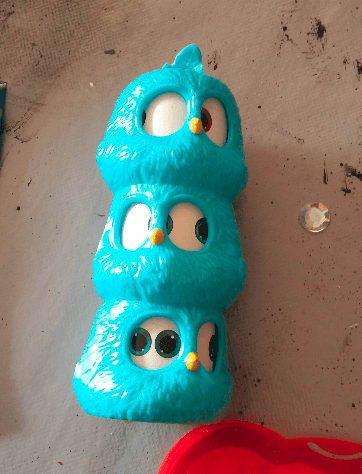
This all started with this weird Angry Bird / MacDonalds toy.
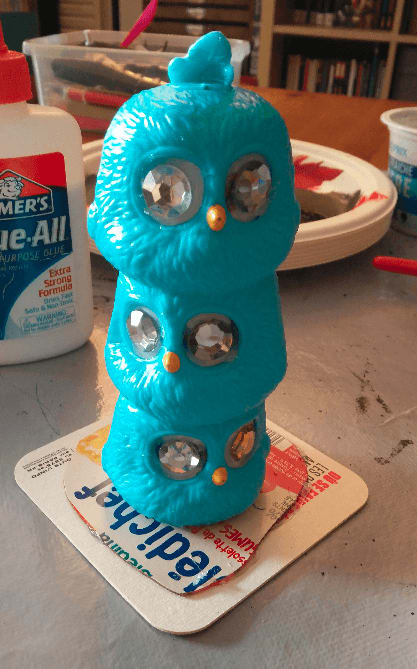
I glued it on a piece of plastic to secure it in place, and glued some cheap plastic jewels in place of its eyes.
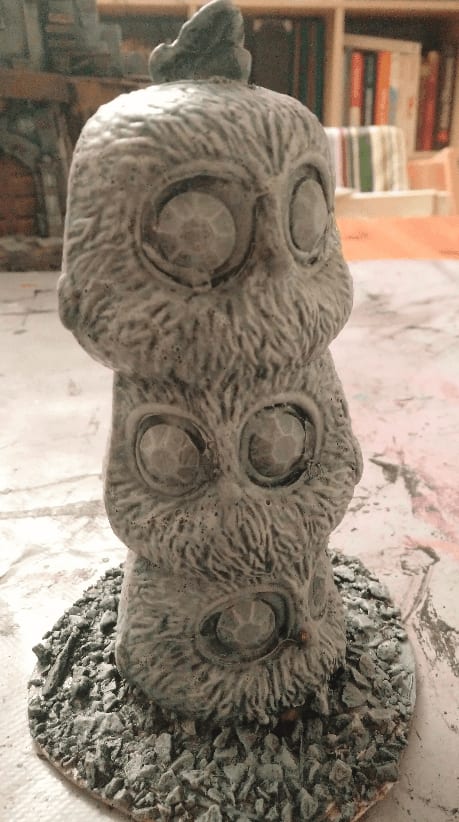
Then, I let the magic of the drybrush turn this into a statue.
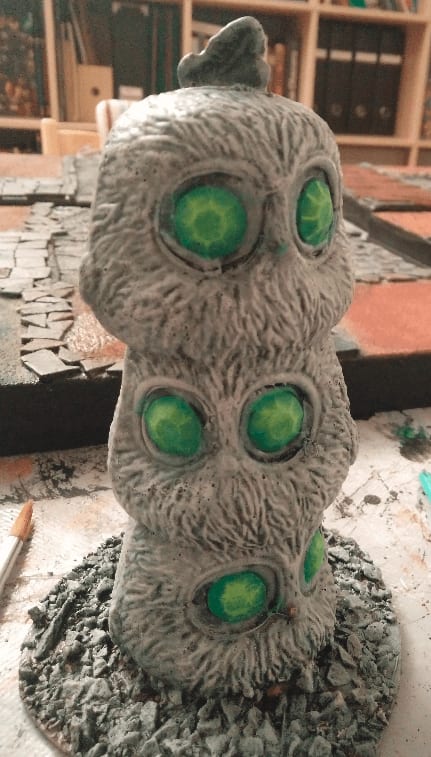
I painted the eyes emerald green and added a drybrush of a yellowish green on top.
A dark brown wash on top.
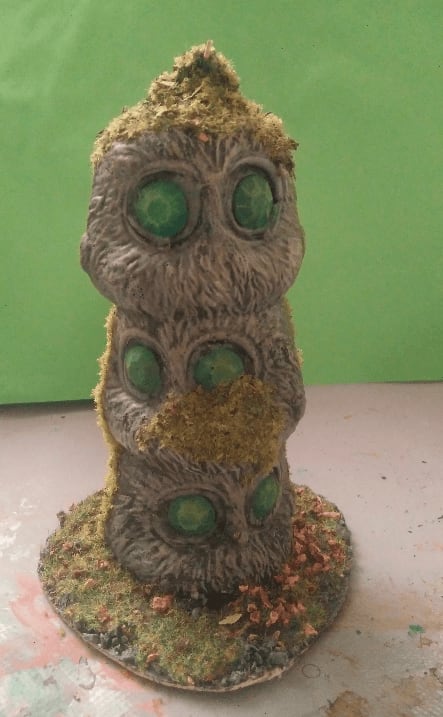
And heavy flocking to give it an air of forgotten statue covered in moss.
That was a very quick build, and to be honest I didn't expect it to look so great. The original toy is pretty goofy to begin with, but the addition of the emerald eyes on top of the cartoonish birds gives it an aura of weirdness.
Street Gargoyle Statue
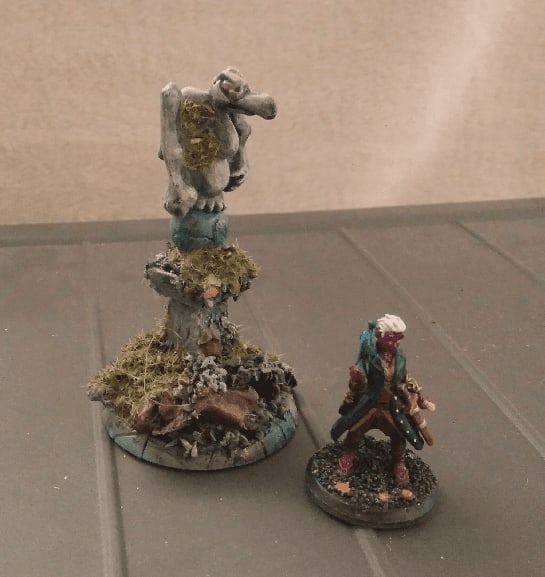
Covered in moss and abandoned, this statue guards the streets of a city that has been deserted for a very long time.
This is tiny piece of scatter terrain that would fit well in a Mordheim-like setting.
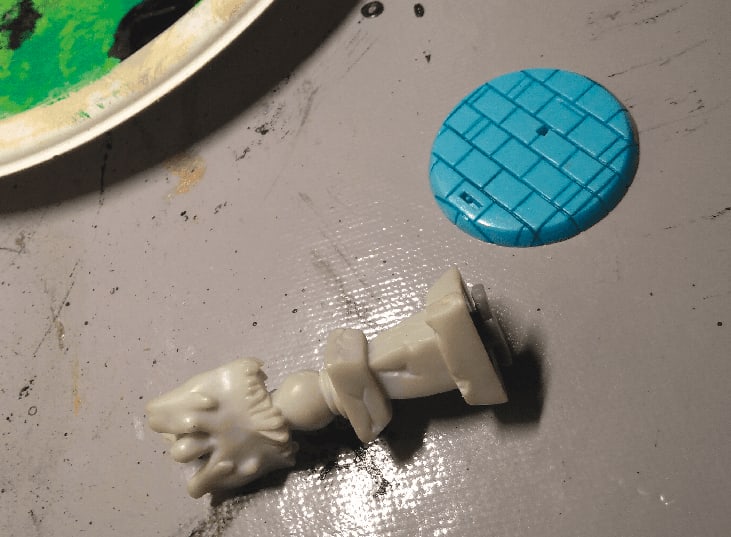
As usual on this blog, it started with some second hand toys. The blue base comes from a Pet Shop toy, and the gargoyle itself is taken from an Halloween-themed board game.
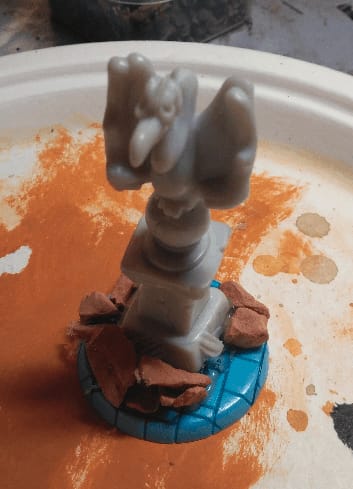
I glued one on top of the other and added some rocks to cover the mess I did with the hot glue.
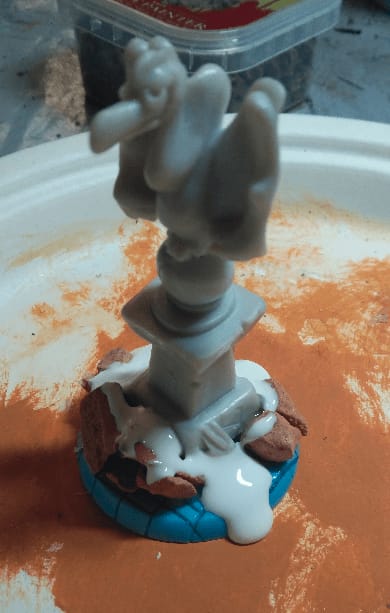
More glue...
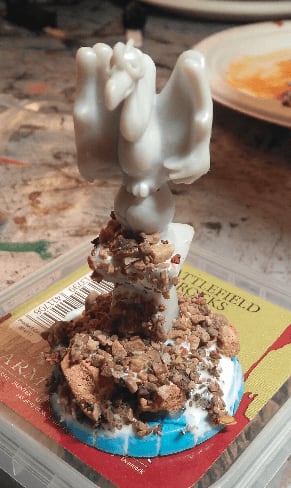
And more pebbles, rocks and dirt.
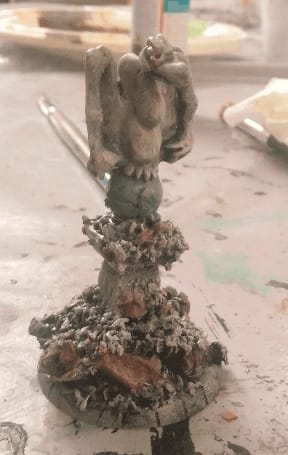
Drybrushed everything gray, then painted a few pieces brown to make it look like rubbles. Also painted the orb green because why not.
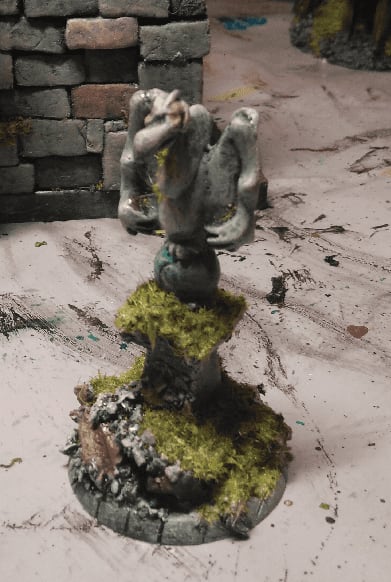
With a bit more flocking. I might have been too heavy handed on that one.
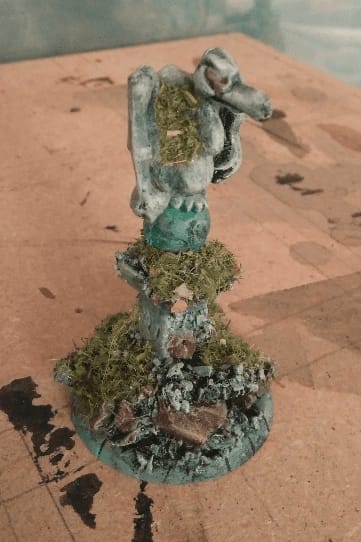
I'm happy with the final result. It's durable, made of blocks of plastic. It's stable because the base is large. It's ubiquitous, I can put than on almost any board and it won't look out of place.
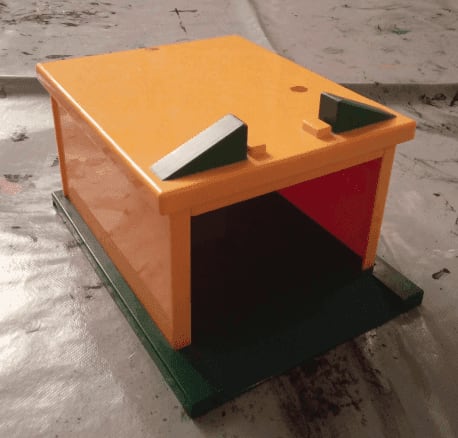
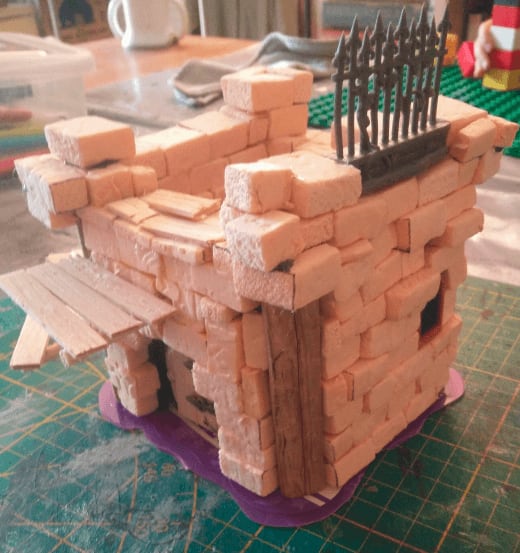
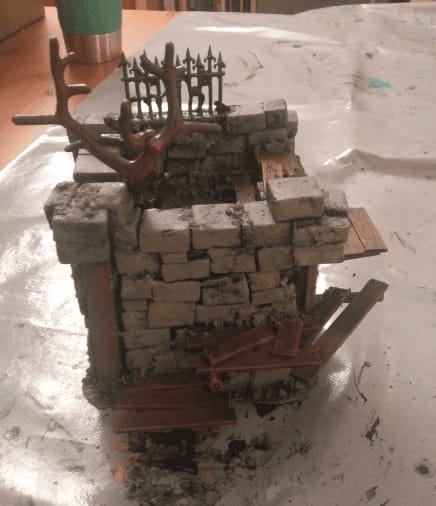
Abandoned guard post
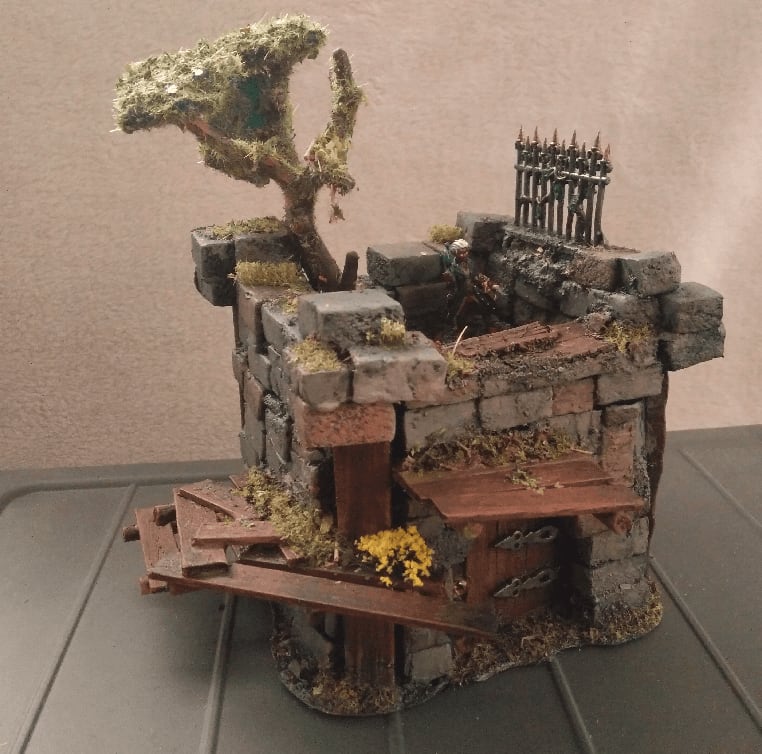
I imagine this as a forgotten guard post, hidden inside a forest, possibly the entrance to an underground bandit camp.
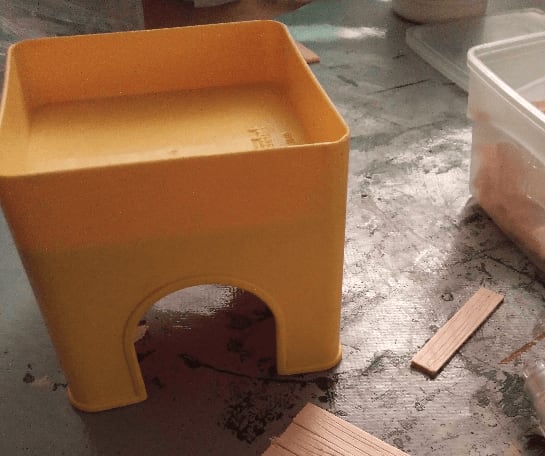
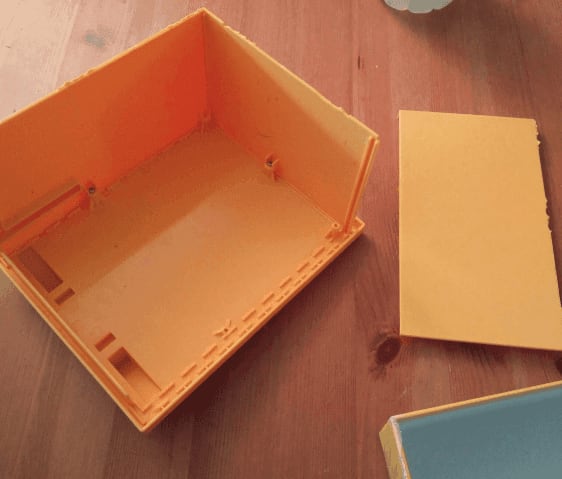
The original shape comes from this plastic toy; initially part of a set of stacking toys that I borrowed from my daughter. I like to re-use existing shapes and add texture to them, and I felt it had the perfect shape and scale for a small tower.
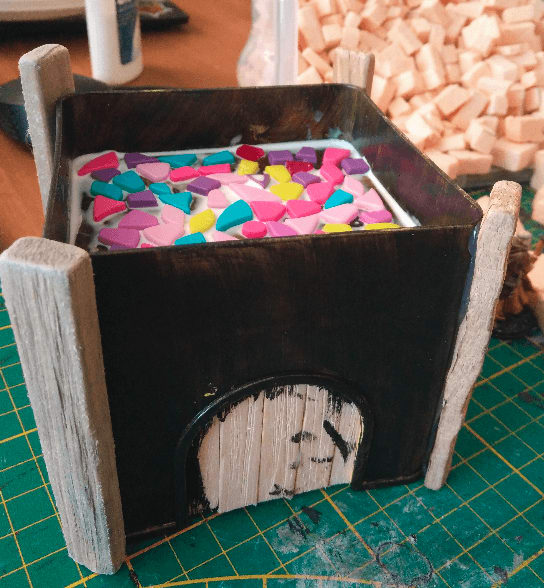
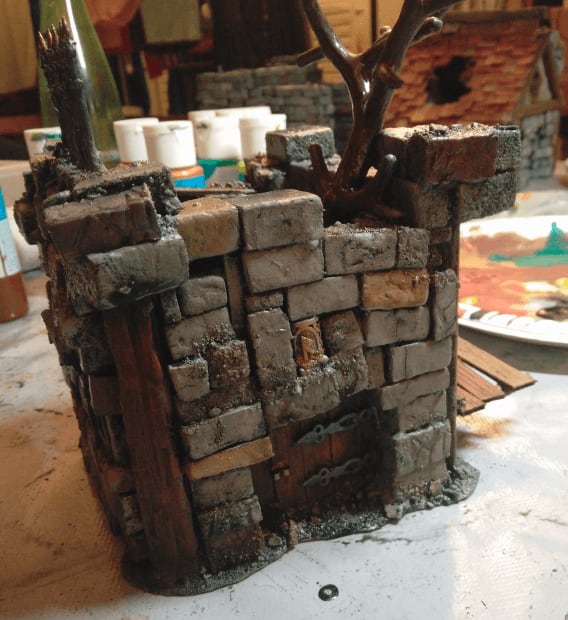
The doors
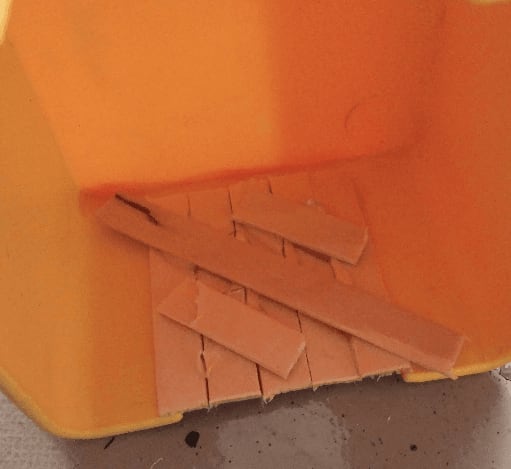
I started by gluing some ice cream sticks in the inside of the door frame, reinforcing them on the inside.
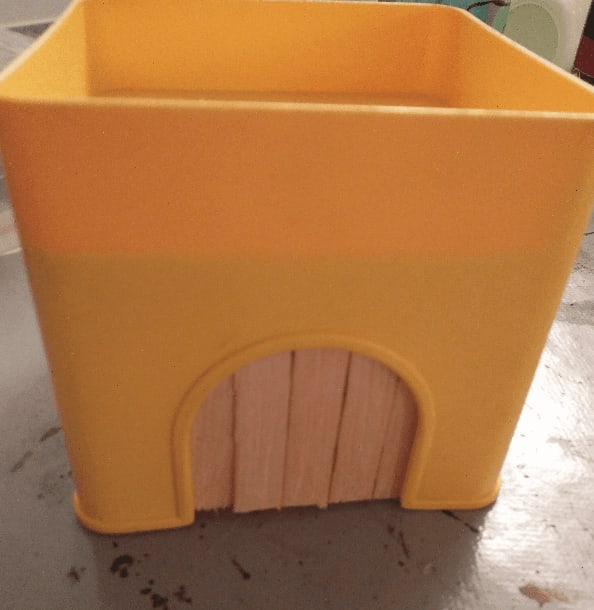
Looks legit from the outside, all I need will be a door handle and some visible hinges.
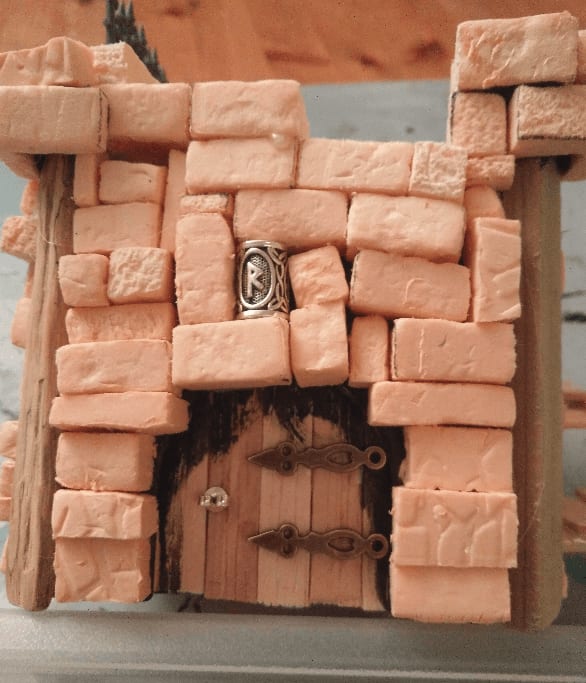
I added them once the bricks were layed, using an ear ring blocker as the handle and decorative watch handles as the hinges.
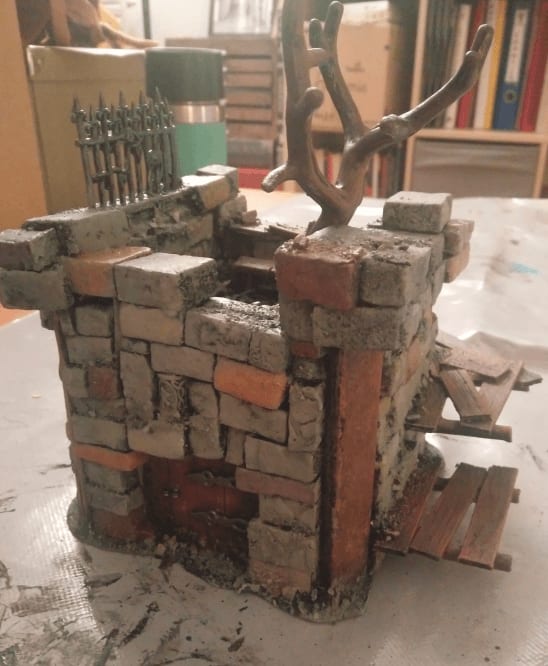
The walls
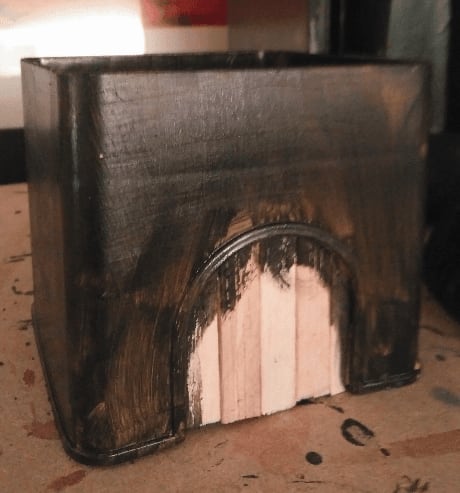
I knew I wanted to cover the walls with foam bricks. What I learned on one of my previous projects is that I should always paint the wall black before gluing the bricks, otherwise the initial color would show through the cracks between the bricks.
I glued decorative wood sticks at each angle. I hate to lay bricks in angles, it's too finicky, so I usually try to find lazy ways to cover them instead. Here it looks like structure beam. I'm not sure it makes any sense, architecturally speaking, but it looks nice.
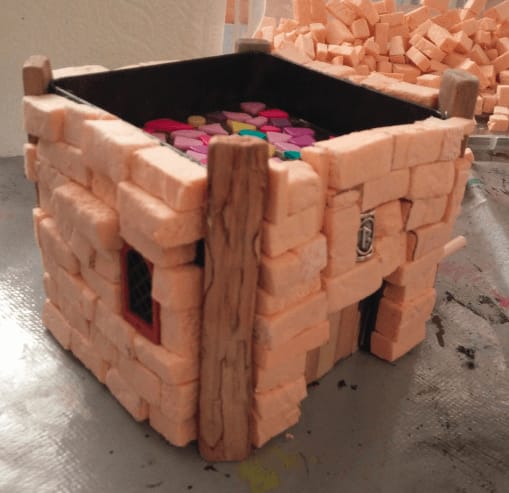
Now, with a glue gun and a lot of patience, I glued foam bricks all around it. I kept an opening to add a window (it's a Lego piece) and some runic bead above the door to act as an ornament. In hindsight it looks a bit out of place (being a round bead in a largely square building).

I covered it all up to the first floor and kept gluing bricks to add some kind of ledge around the first floor. Large enough so miniatures can stand on.

The I picked this metallic fence from my bit box and fitted it on one side. As you can see from the background, my daughter was playing with her own fantasy beasts at the time.
The stairs

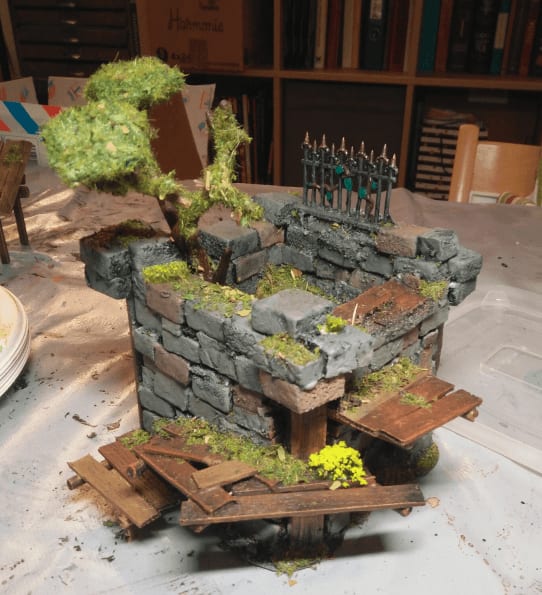
The structure was a bit plain with it being "just square", and I wanted to add some interesting bits for playability, so I started building some decrepit scaffold around it. It's basically wooden skewers that I inserted in the foam (or in spaces between foam bricks) and glued.
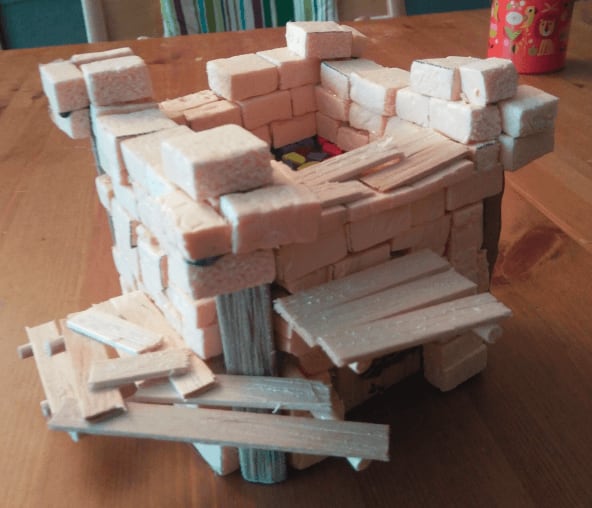
Then covered with textured ice cream sticks in an haphazard manner.
The first floor
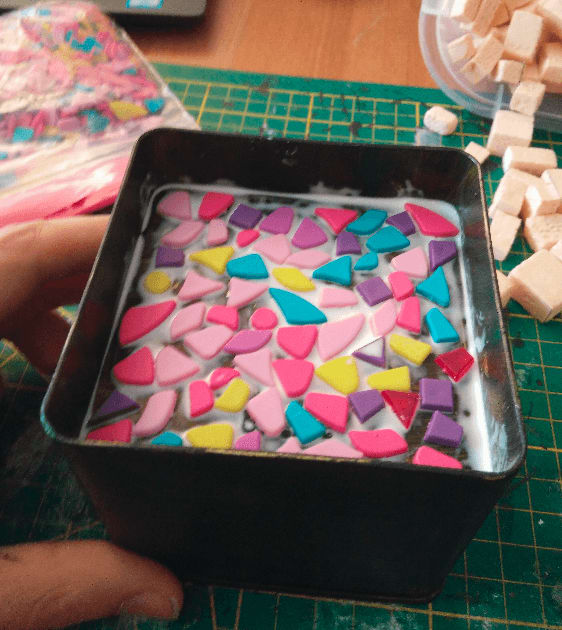
I recently got my hands on a bag of those colored plastic pieces. I think they come from some kind of puzzle toy. I found their shapes interesting and wondered if I could use them as irregular stones for flooring.
Debris
I finally glued it to a plastic base. It's made from the top of a baby food box and perfectly fit the shape of the building.
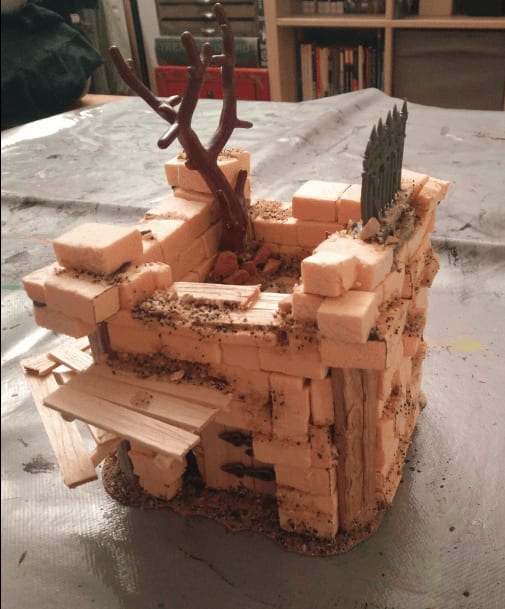
Glue on the base as well as on any the top of most protruding bricks, then sprinkle of fine sand. In hindsight, I should have sprinkled larger sand grains first and finish with the fine one. I also glued a Playmobil tree on top.
Painting
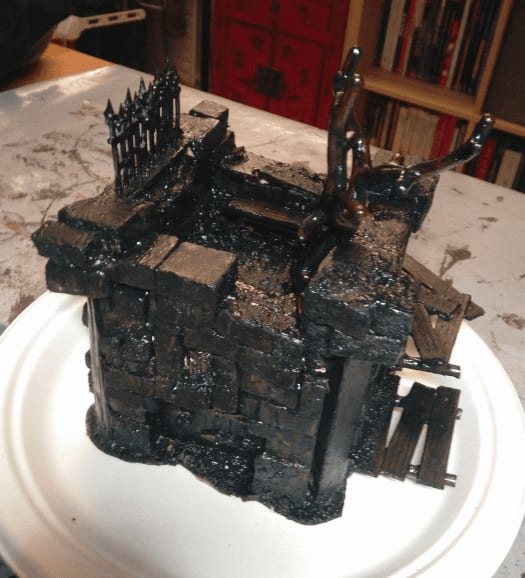
And on to the first coat of paint before the real painting could start.
Overbrush on the wood and stone.
More drybrushes in lighter tones on the wood and stones again.
Picking some stones with highly diluted paint of various colors to add some variety.
Adding a black wash to tie everything together and make it look all dark and grimy.
Leaves
This was the first time I attempted to make some kind of tree. I found that the shape of the Playmobil tree was pretty nice, but it was missing foliage. I have a box full of those Playmobil tree, so if I can make great foliage, I could create a whole forest pretty easily.
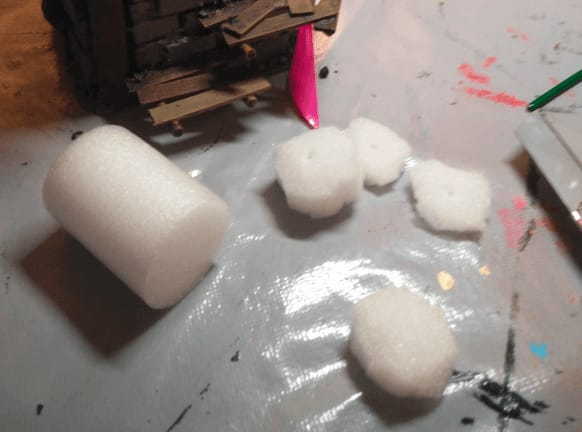
I had those foam cylinders from a packaging laying around, so I thought it could serve as a base for foliage. I cut them in irregular round shapes.
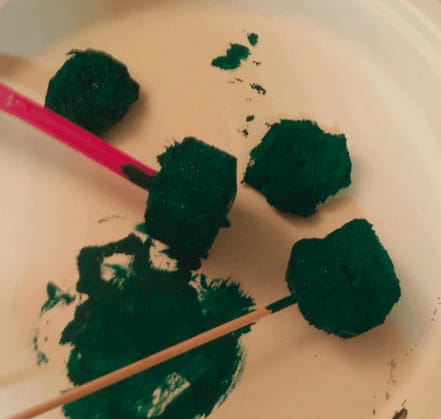
Painted them green.
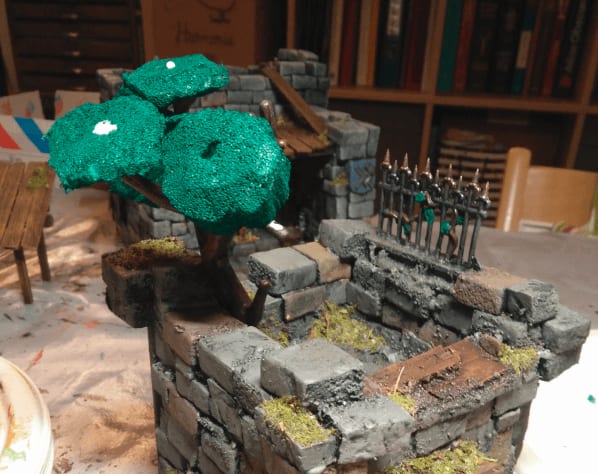
And glued them on the tree (I also added grass flocking here and there as well). The tree do not look as good as I imagined it would.
Covered with more flocking. Didn't much improve the look, but I decided to leave it like this. My tree foliage technique is not yet working, but for a first try it's not too bad. I'll have to try again.
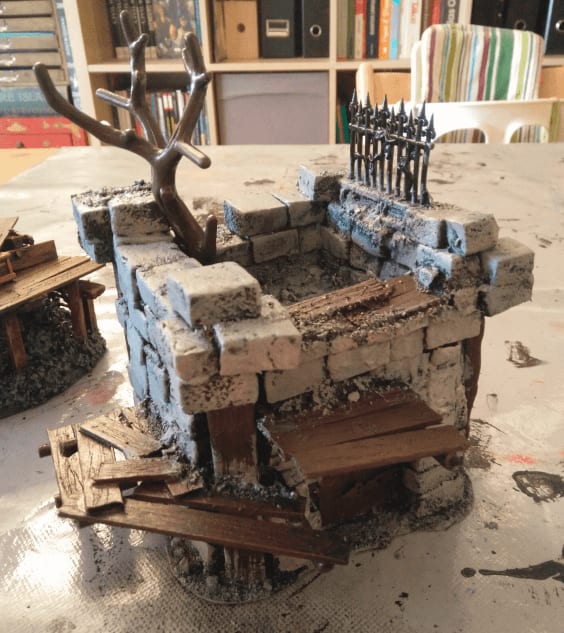
Final result
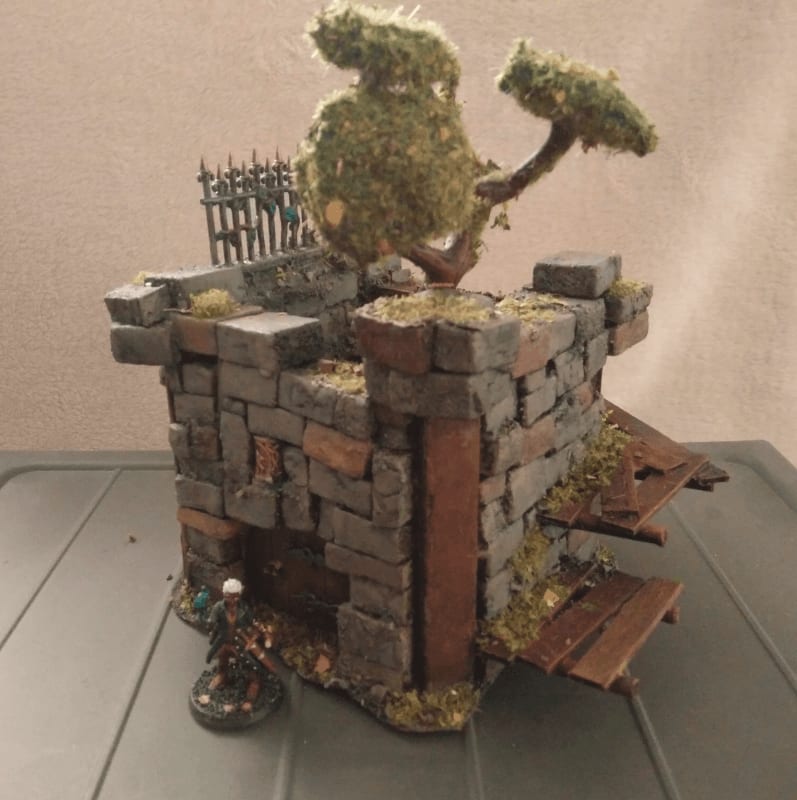
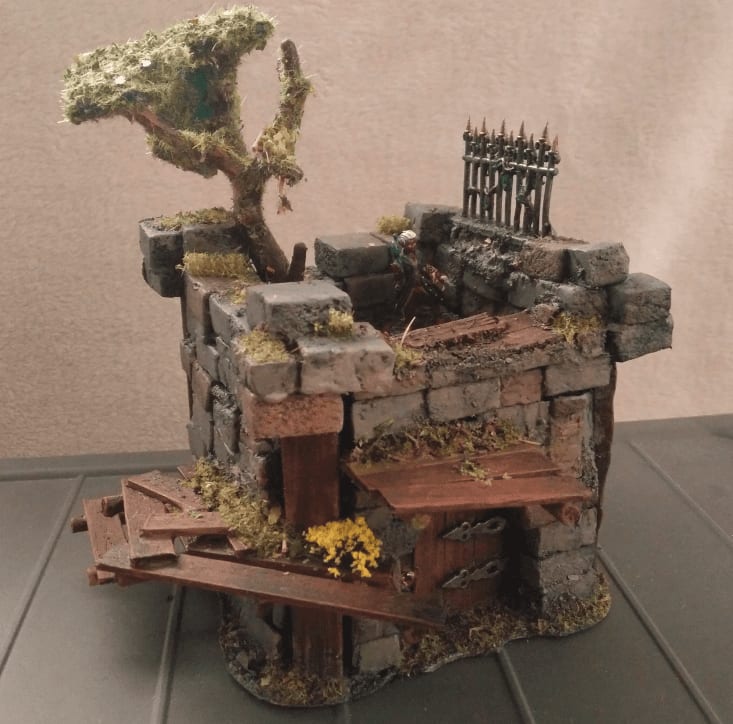
And here is the final result.
Overall I like this build. The structure is pretty solid as it's made from one block of plastic. The stone brick effect looks good enough (the wash and tinted bricks adds a lot to it). The scaffold around it, even if pretty basic breaks the monotony. Doors look like doors. The only downside is the tree that looks a bit out of place but hey, I'll turn that into a RP element: look for the abandoned guard post with the weird looking tree on tops
3x3 textured wallpaper dungeon tiles
This was a proof of concept to test a new material I found: a roll of textured wallpaper and seeing if it would make acceptable dungeon tiles.
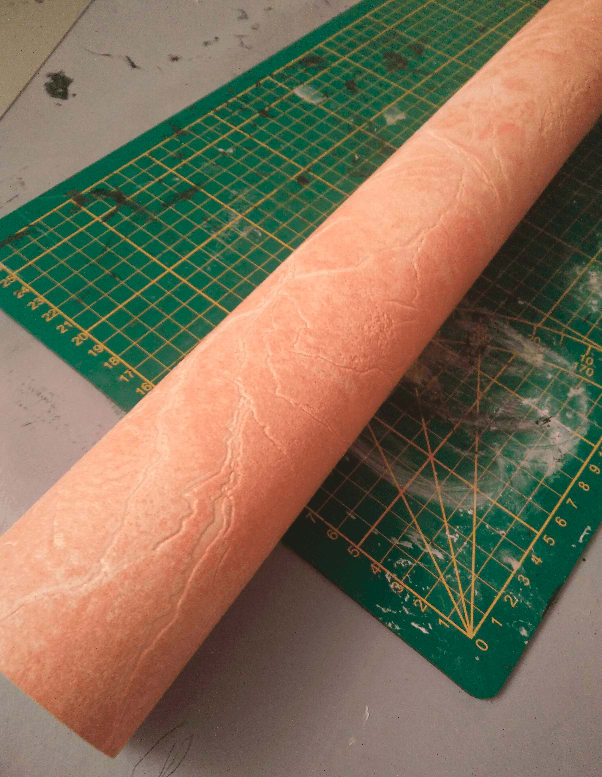
This all started with this roll of textured wallpaper I found. It has a nice texture that looks like crackled earth, but I imagined that if I were to cut it in small squares, it would make perfectly acceptable stone slabs for some kind of dungeon floor.
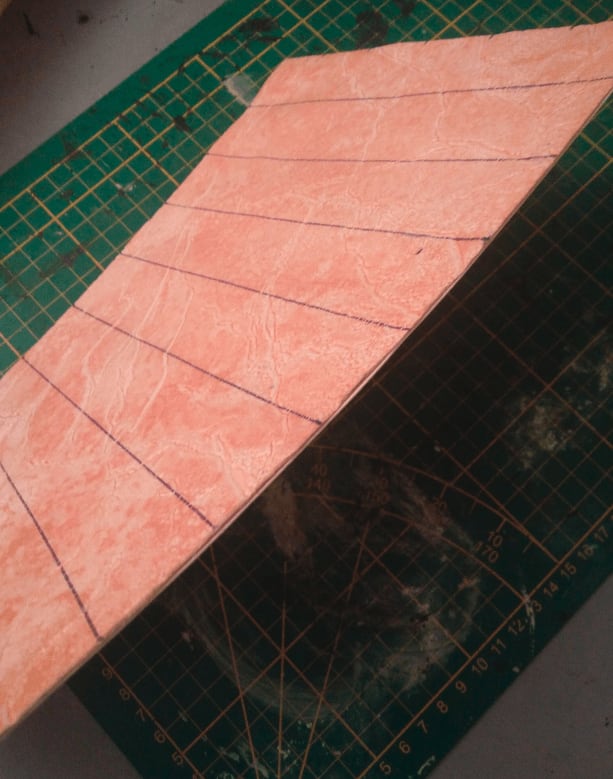
But, as is, it is a bit too flexible and thin, so I glued it on a piece of cereal box cardboard and started tracing squares of 2.5cm on it.
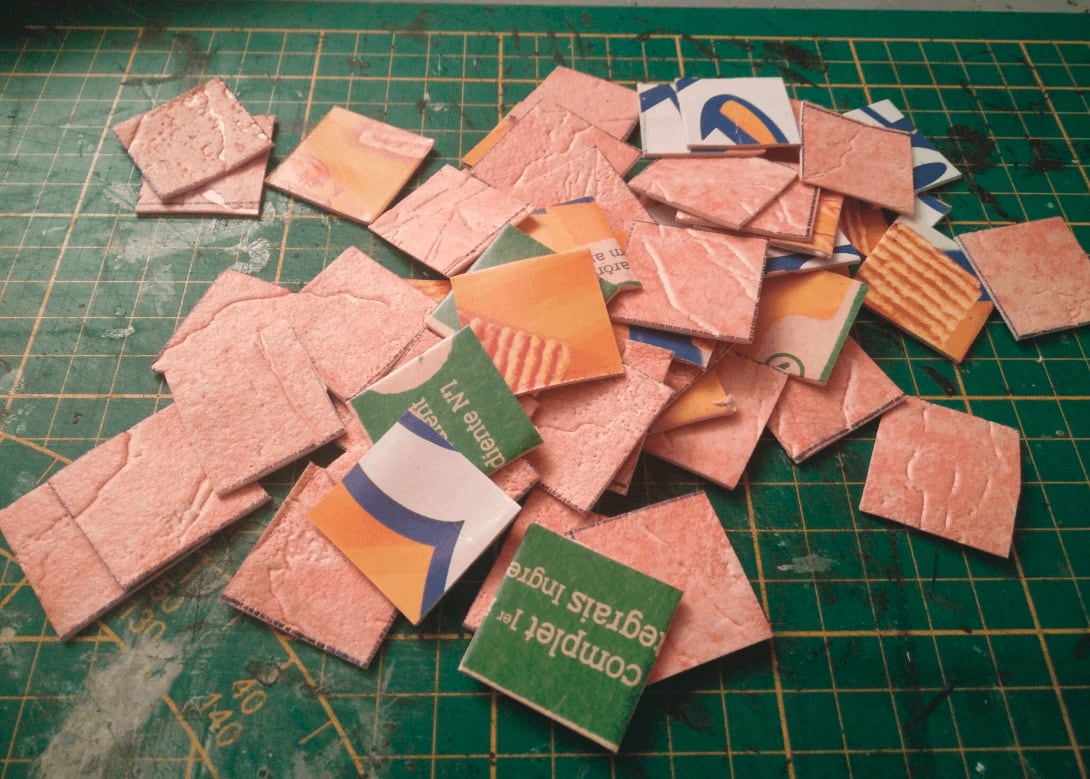
I cut the squares with a pair of scissors and got a nice pile of stone slabs. My initial gut feeling was right; this looks great.
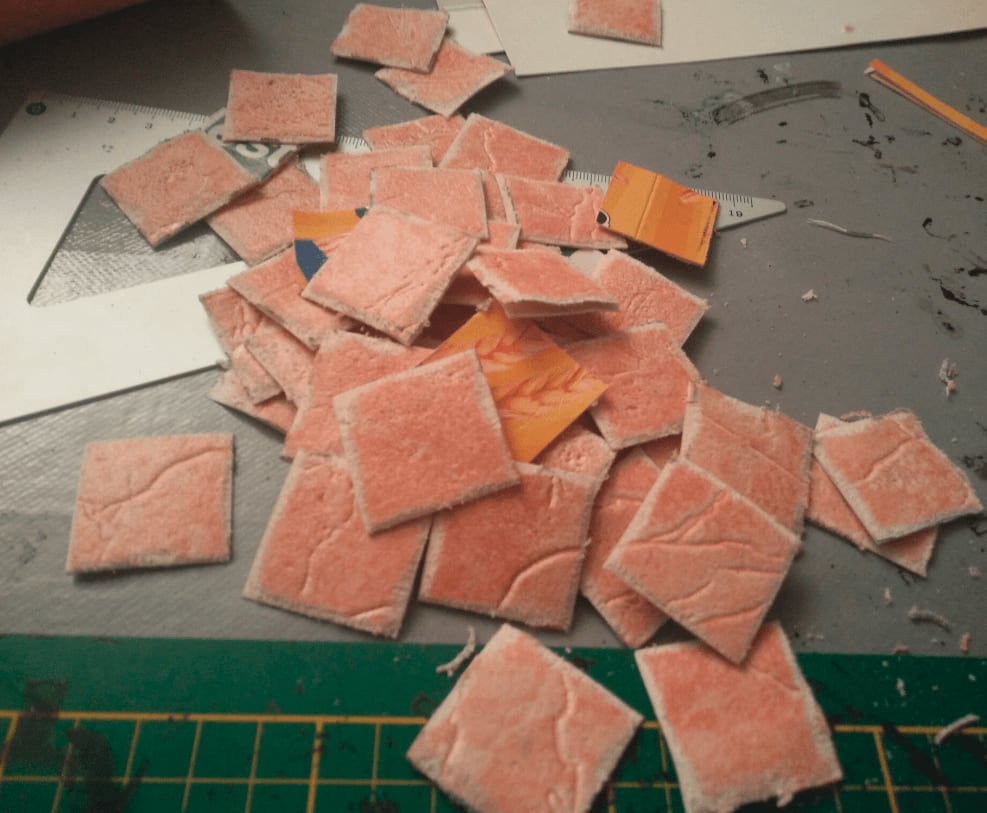
I started sanding the edges because I thought that simple gluing the squares next to each other on a dungeon tile would not look right; I wanted to add a bit of detail that would make them look like actual stone slabs instead of simple squares.
This took some time, made some noise, and created a lot of dust and blistered fingers, but I did it.
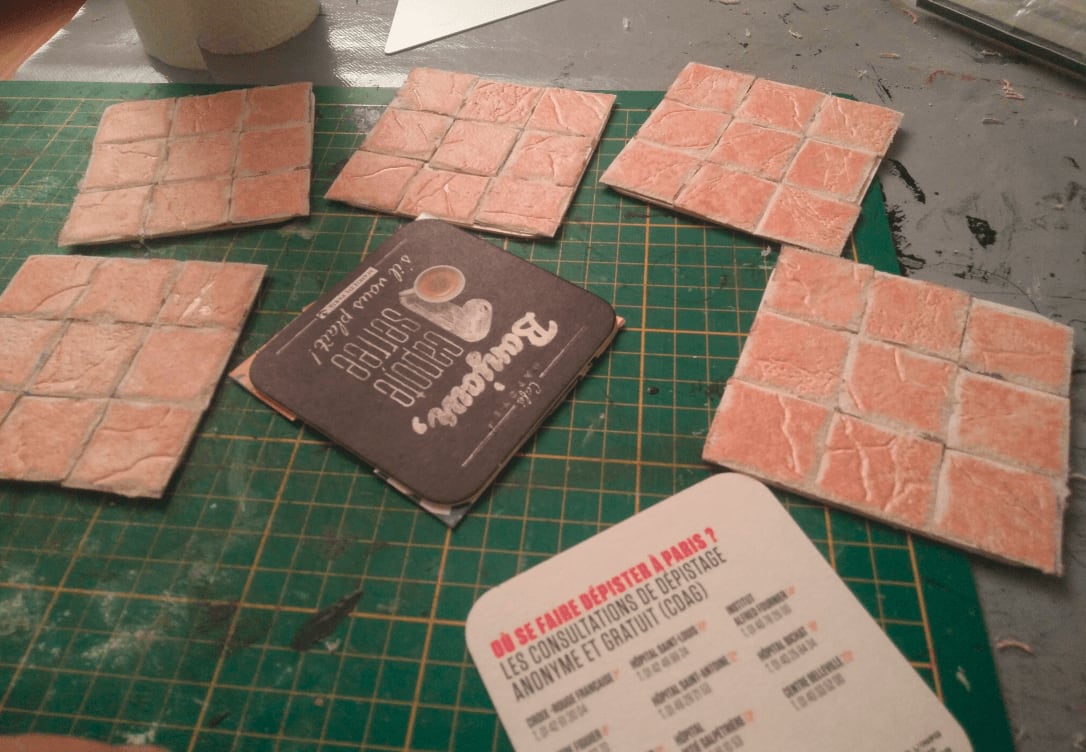
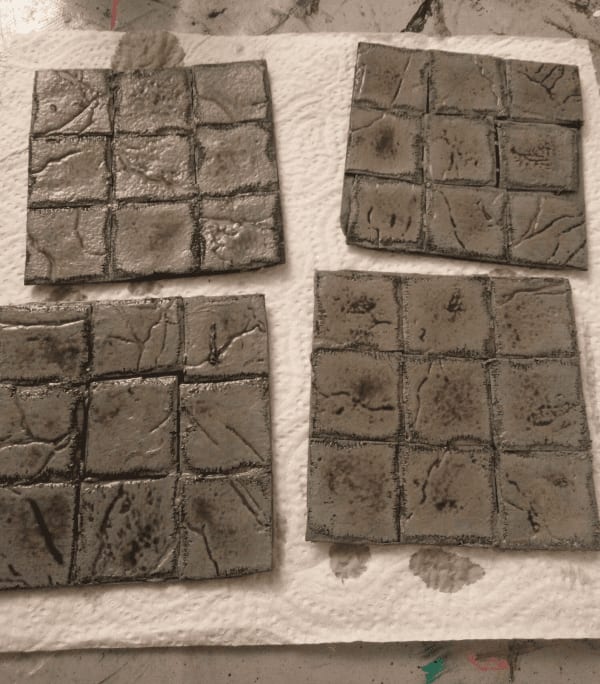
I glued them on some beer mat I found in the same second-hand shop.
The final effect looks promising. The only issue is that the squares are a little too small for my taste. 2.5cm is fine in theory to put a miniature, but in practice it's barely enough and I'd rather have 3cm squares. Well, it was just a proof of concept to test the wallpaper anyway.
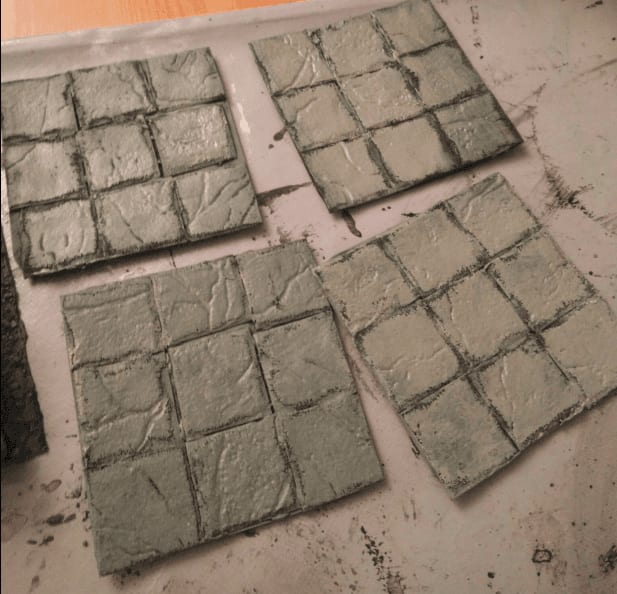
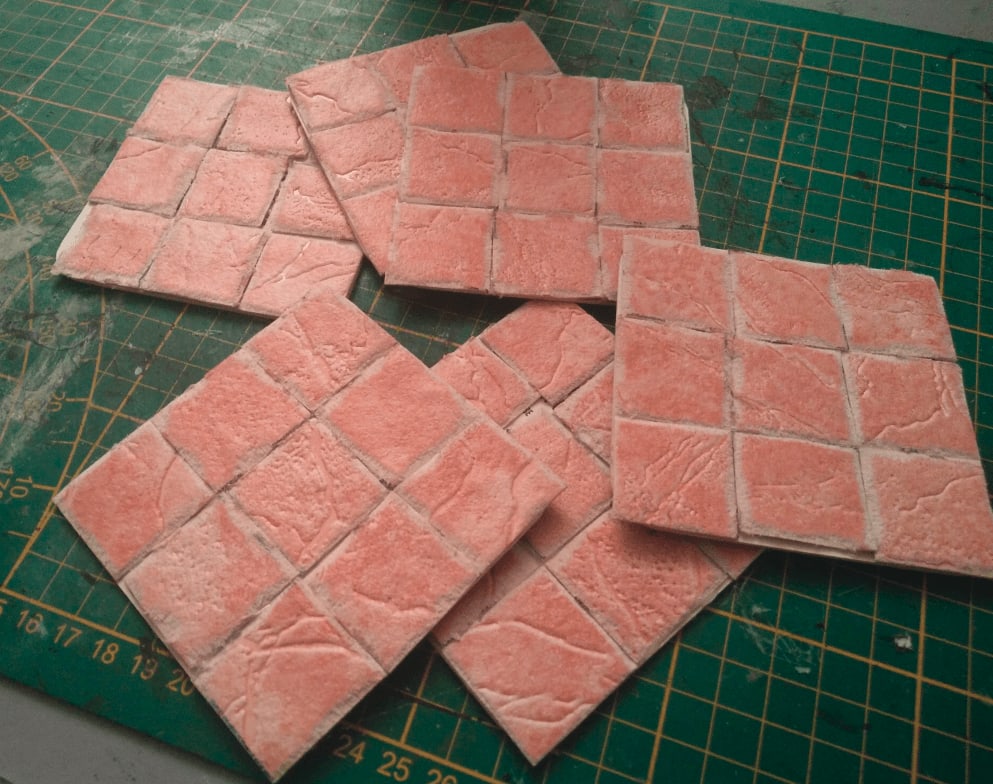
Grey overbrush on black coat.
And black wash on top.
What I learned
- The initial texture still shows even through the various layers of glue and paint, so the drybrush is pretty effective
- This soaks water really well, which is nice for keeping the texture, but also make it warp a lot due to the white glue I was using
- The sanded borders I did do not look very good once painted, and take a very long time to make. I would cut the corners Wyloch-style next time.
- 2.5cm per square is too small