Frozen Castle Warpstone
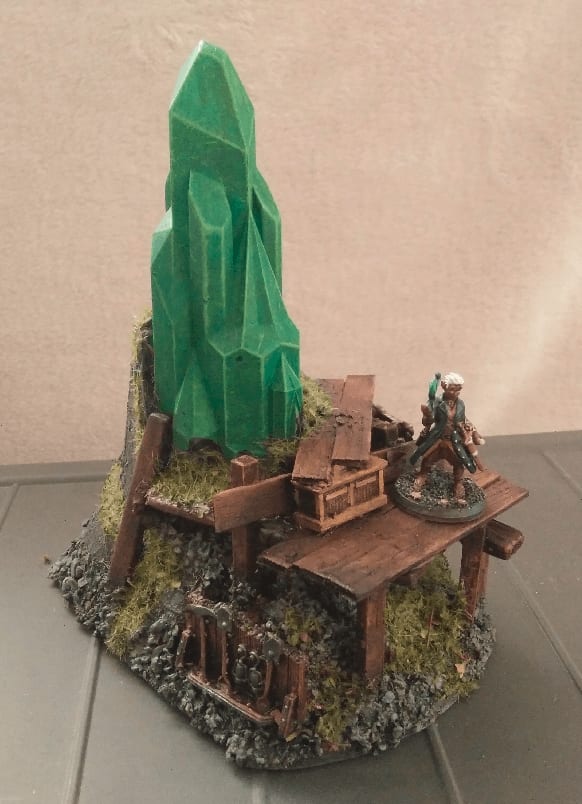
This is an excavation site for a large shard of Wyrdstone/Emerald.
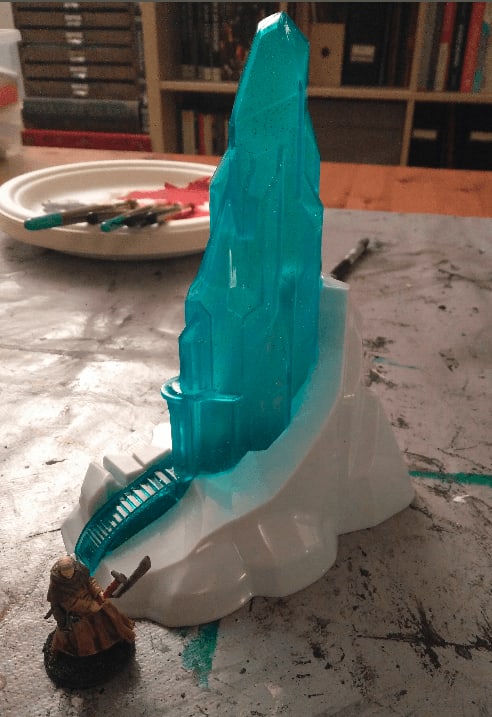
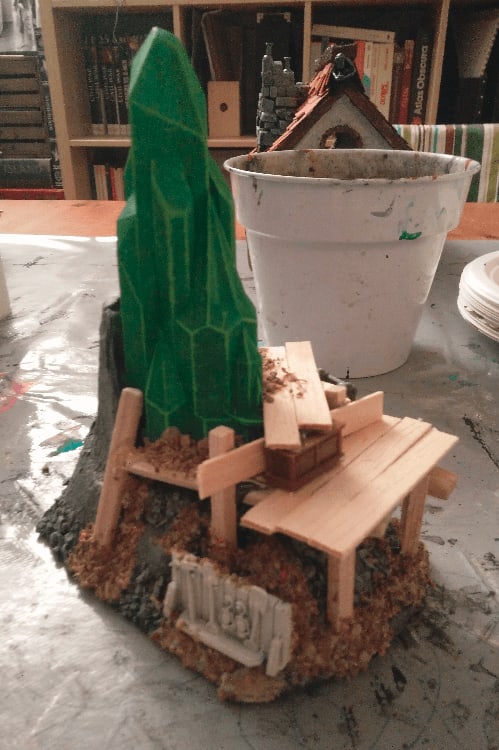
This all started with this Frozen toy found for 1€ in a second hand shop. At a different scale from originally intended, I thought it would make a nice Warpstone/Wyrdstone marker.
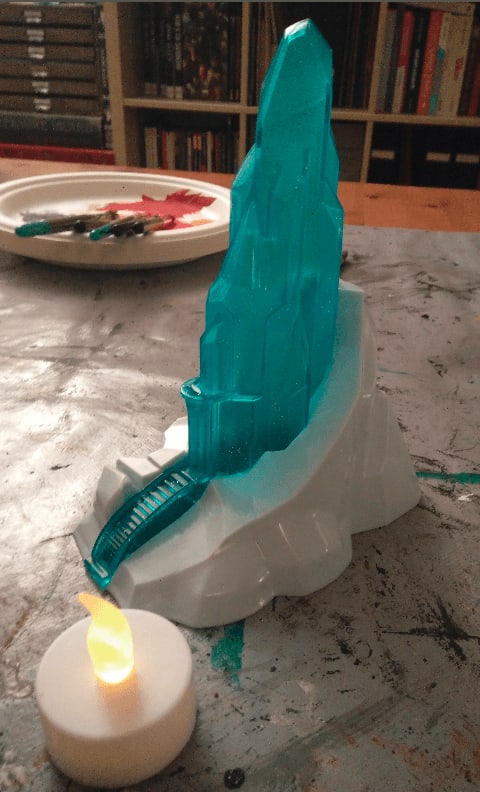
It's also hollow and translucent, so I thought I could fit a little light inside and have the flickering effect make it look like the stone was pulsating.
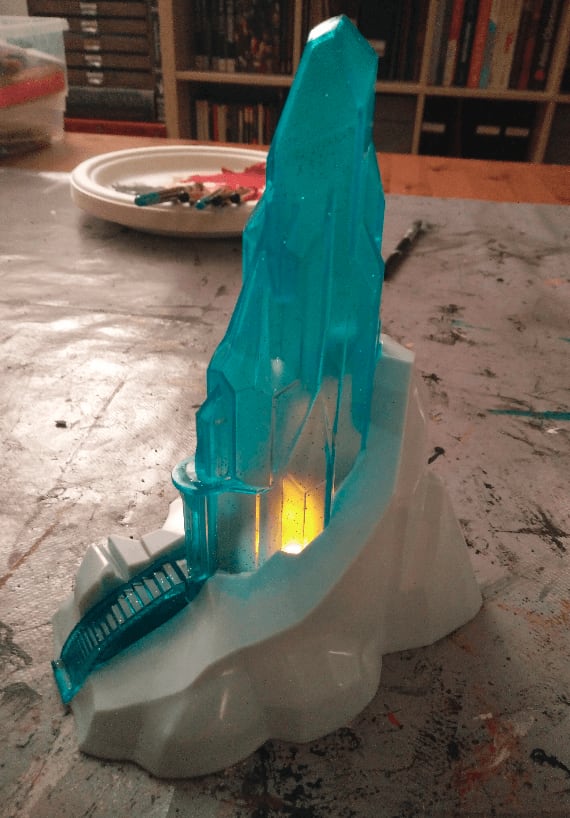
My initial test looked promising, the only issue was: "how would I be able to keep the translucent effect but turning it green instead of blue?"

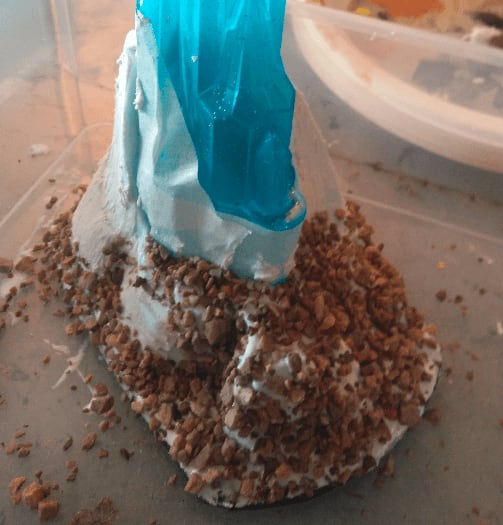
I cut some foam to the shape of the bottom part and fitted a light inside. Not pretty, but it's also not meant to be visible.
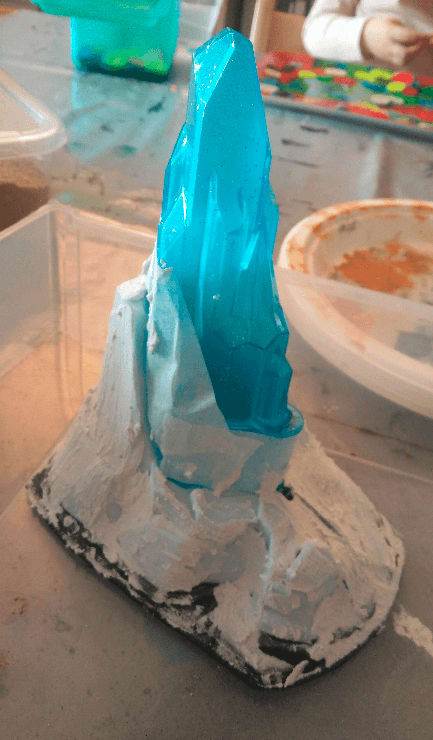
I protected the base of the shard with some tape and applied filling paste on the base, to give it a more rugged look than the smooth plastic it was.
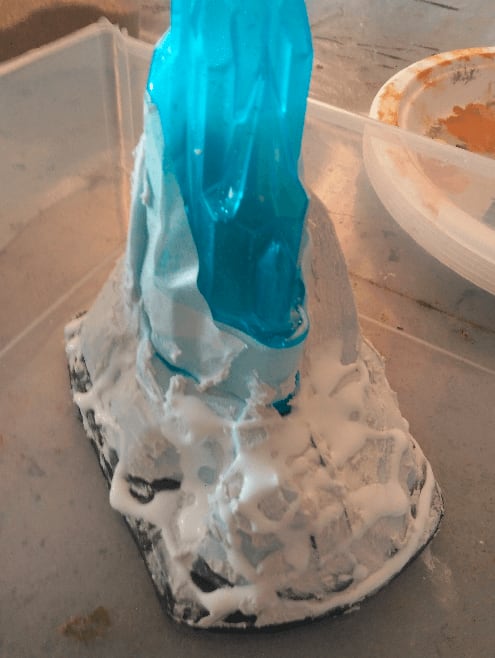
Once dried I applied a fair amount of wood glue...
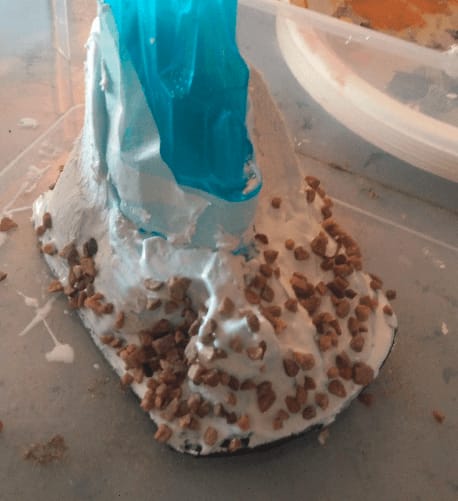
...and sprinkled various sizes of gravel...
...pebbles...

...and sand. I then let it dry.
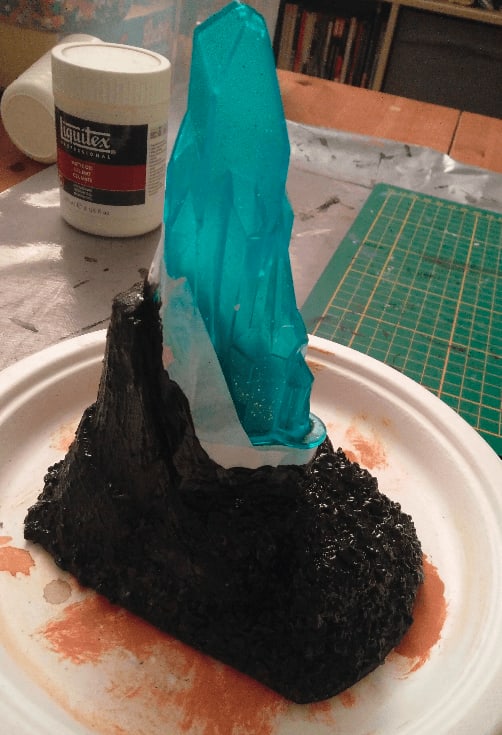
And applied a coat of black mod podge to act as a base for the paint, as well as really fit the gravels/pebbles/stones in place.
I could then remove the tape.
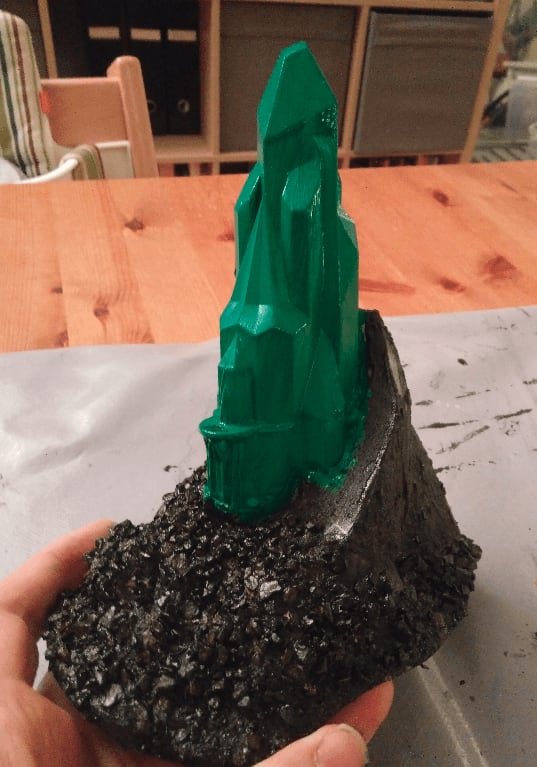
And start painting.
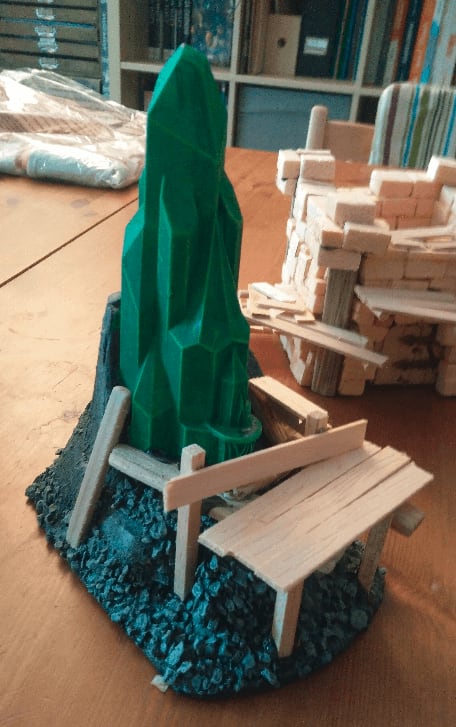
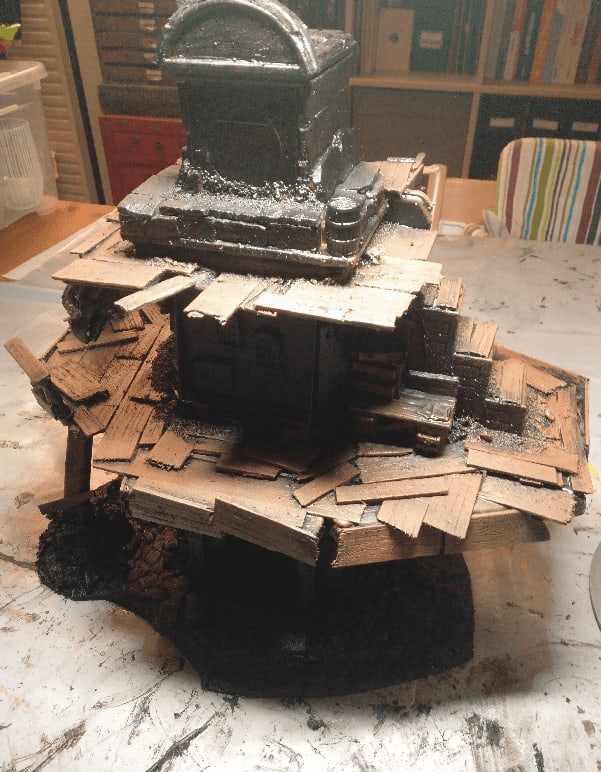
I then did a drybrush of a lighter green on the stone. In order to hide the parts that were definitely not on the right scale (the entrance door and stairs), I decided to cover them with some makeshift scaffold built from balsa wood and ice cream sticks.
I now had the idea of turning it into some excavation site, where a team had already started getting this large piece of green stone from the earth and still had their scaffold and tools around.
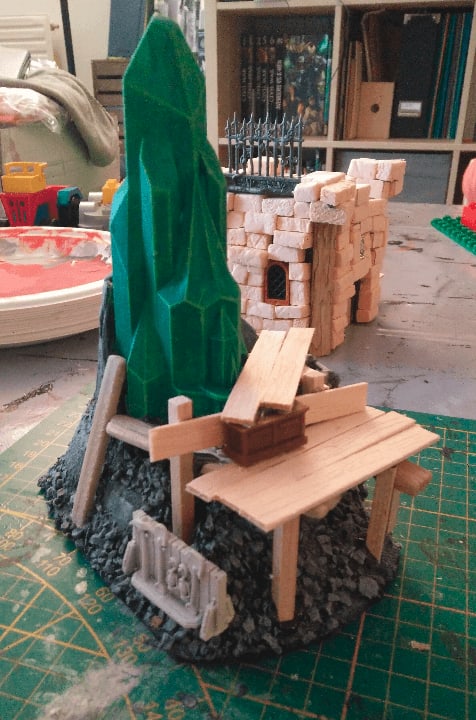
I added a few details like this rack of tools and chest (coming from a Mantic kickstarter).

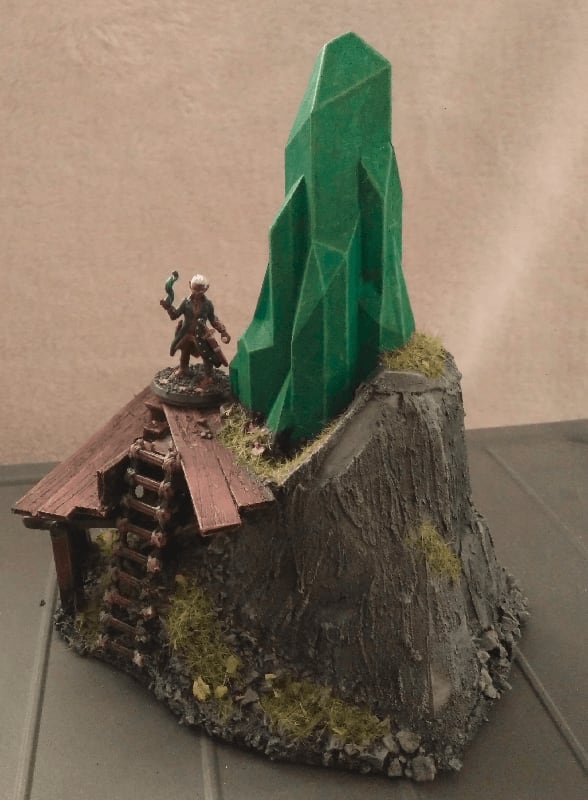
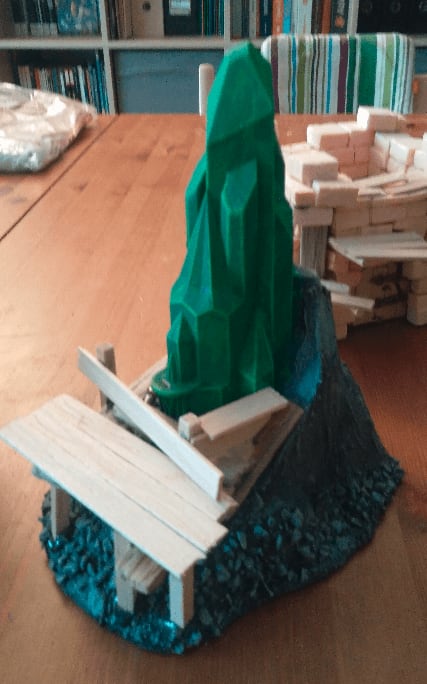
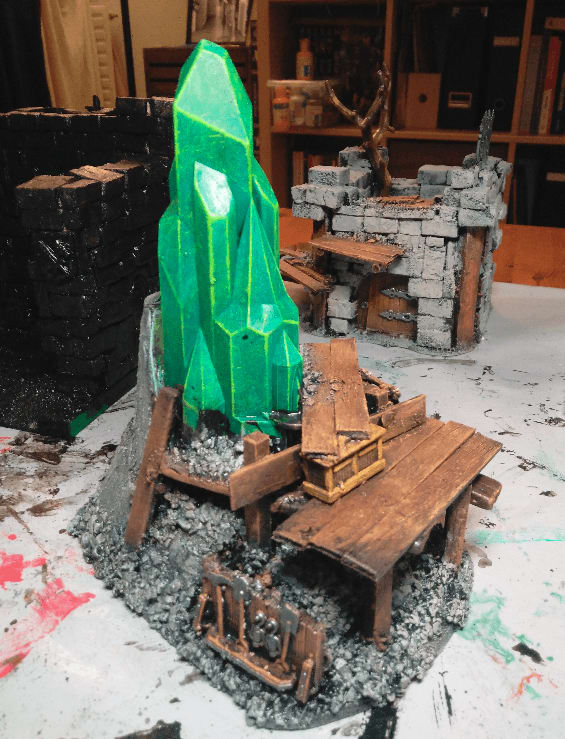
And a ladder on the other side. At this point I must say that I usually base coat and paint the whole terrain at once when crafting, but here I knew that it would be hard to paint the stone underneath the scaffold if I built everything at once, so I built it in two steps.
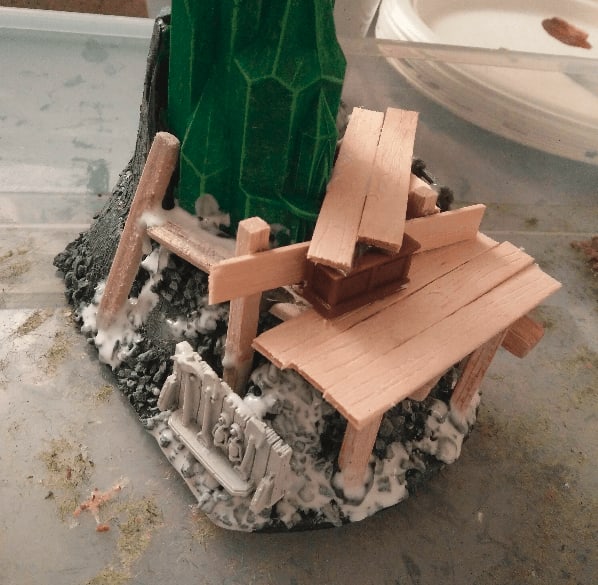
Covered the feet of my scaffold with more white glue again.
To add even more stone rubbles, to better merge together the various layer of the build. I'm learning to not be afraid of adding more and more layers of details, even if it means going back over something I previously painted.

And painting again in black mod podge the new addition (I painted a bit on the actual stone, oops).
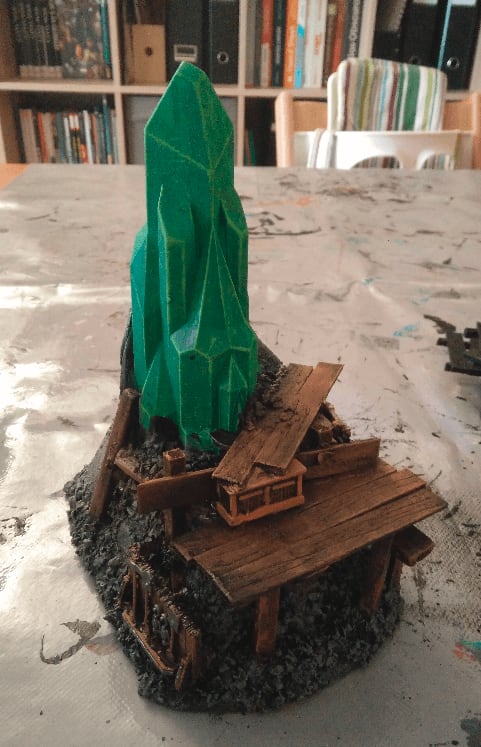
Then painting the wood with the usual three brown drybrushes, from darker to lighter.
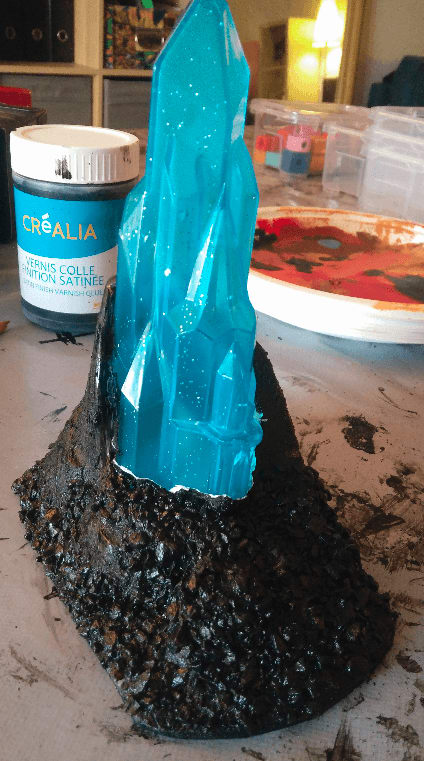
Another shot under a brighter light. As you can see, I completely abandoned the idea of having the candlelight pop through the crystal. My paint if pretty opaque, so you really need to have complete darkness in the room to barely see the light inside.
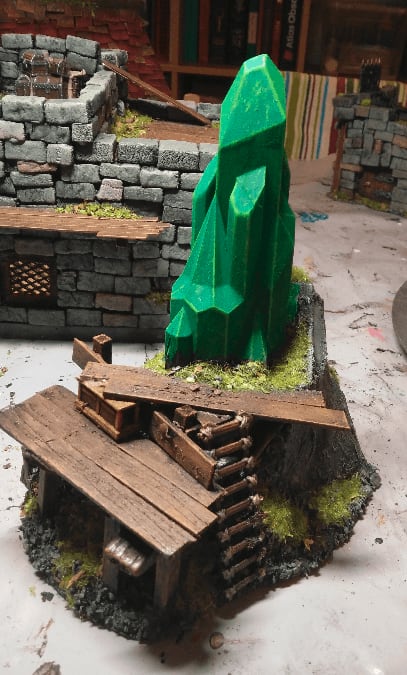
And finished with a little bit of flocking to cover the parts where I painted over the crystal or couldn't paint properly.
And the final glamor shots!
Zombicide Green Horde Tiles - Part 2
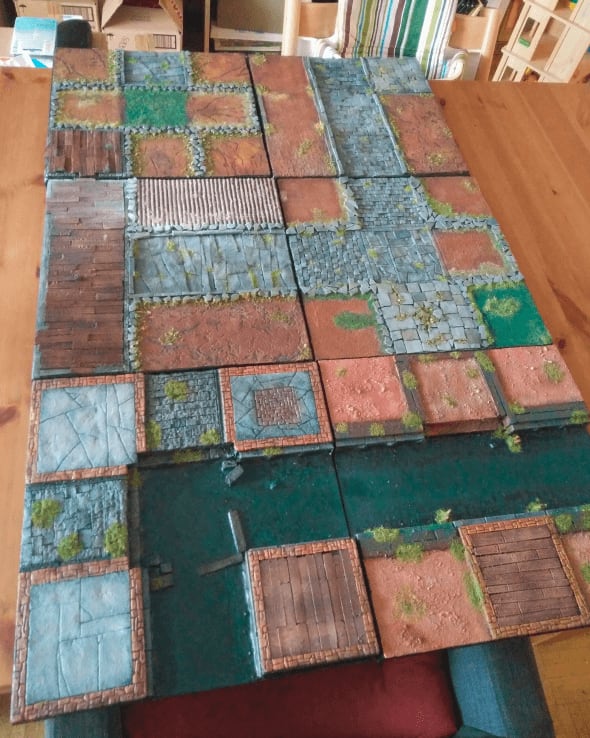
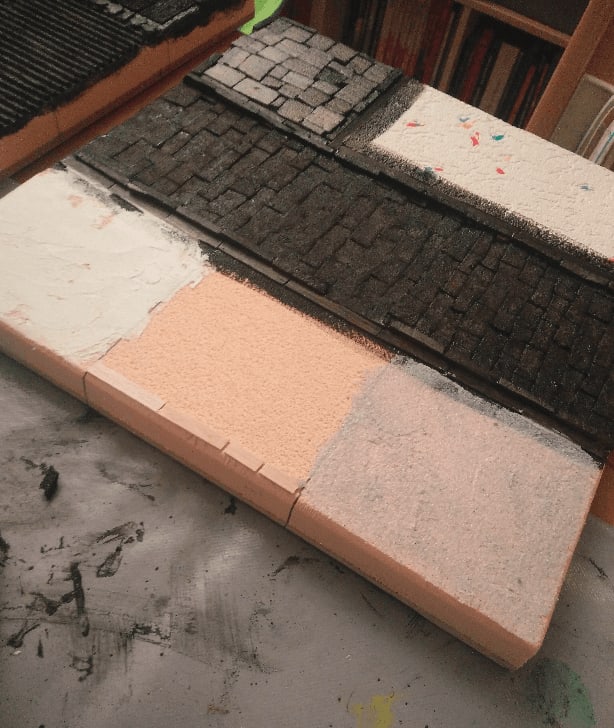
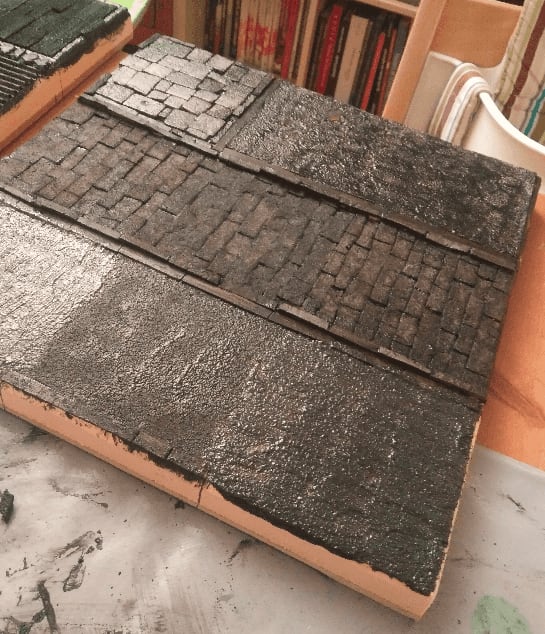
I started working on my second set of tiles of Zombicide Green Horde. I'm building the tiles in the order they are needed in the base scenarios, and not in their "alphabetical order". Note that on the retail game, each tile comes as a hard cardboard tiles, printed on both side. Mine are insulation foam mounted on MDF board, and obviously only playable on one side. So, it takes a lot more space!

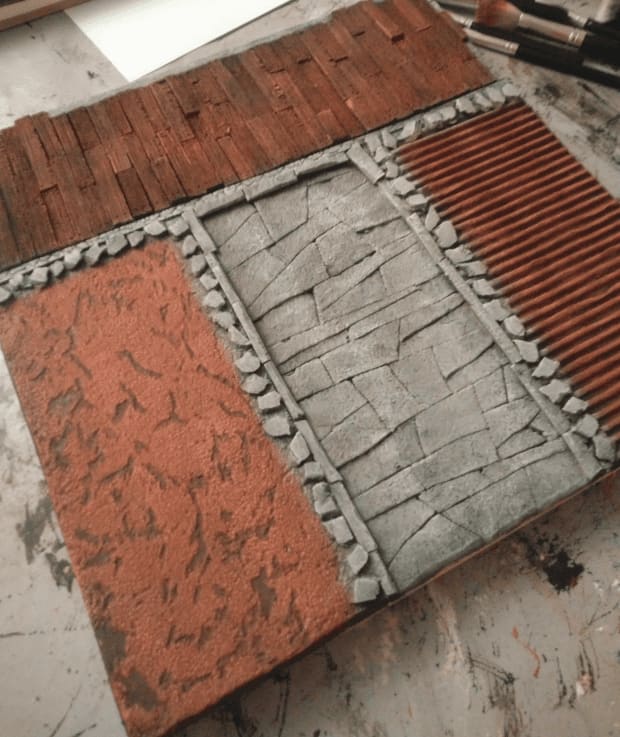
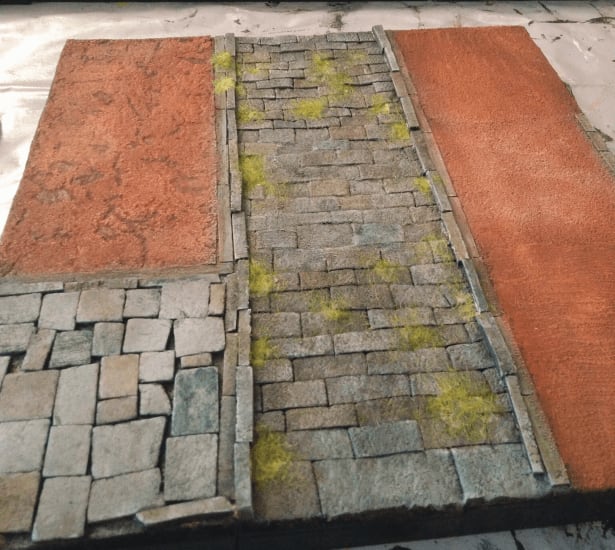
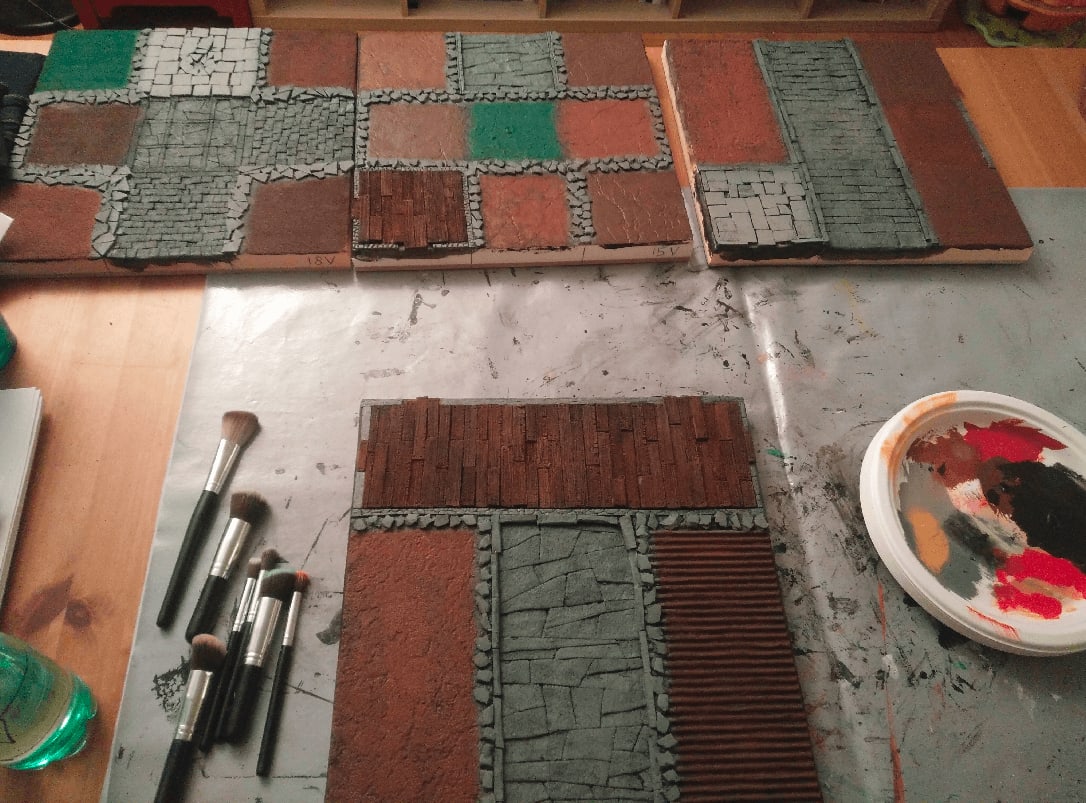
I started by cutting the foam to the right size and glue it to the MDF boards. Then, I started texturing the paved roads. I tried several different patterns. Initially it was to break the monotony of the boards, but in hindsight I feel it would have been better to stick to one pattern and actually use it on all boards, to have the boards work well together visually.
Still, trying different patterns gave me the opportunity to try different techniques and see which one render the best results, and also which one require the less amount of work.
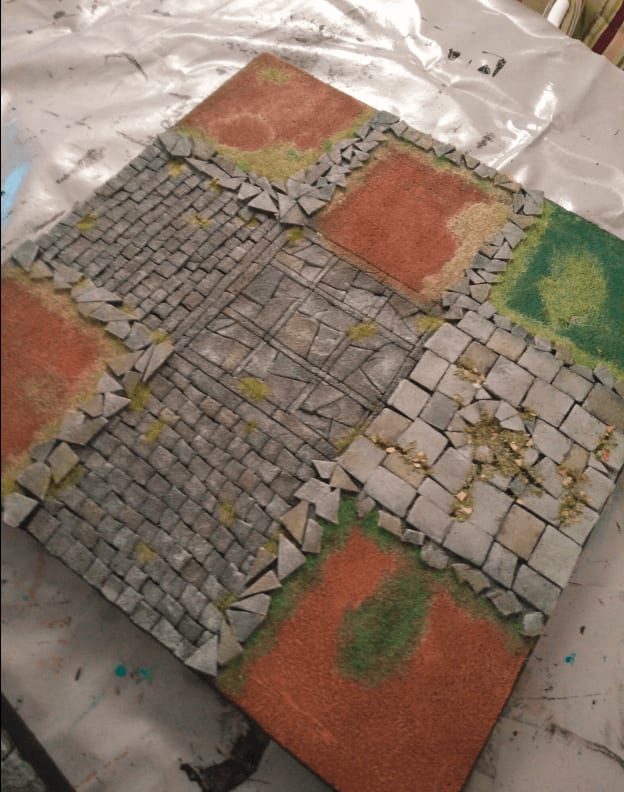
Tile 15V
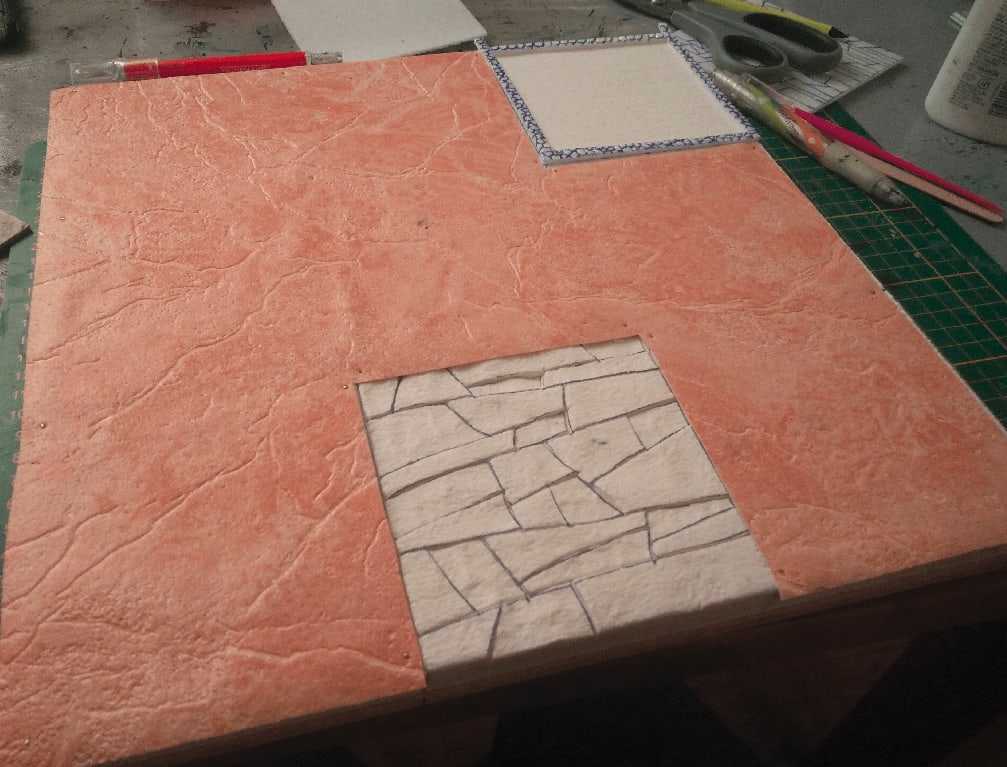
One the tiles was mostly covered on dried soil, so I used a roll of textured wallpaper I found in a second hand shop as the basis.
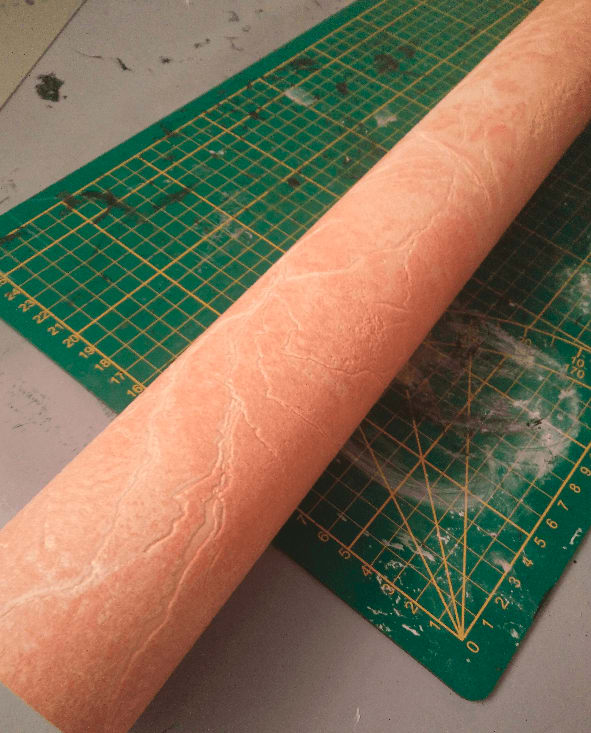
This is the thing I bought for ~2€. I can make dozens of tiles with that if the experience proves successful.
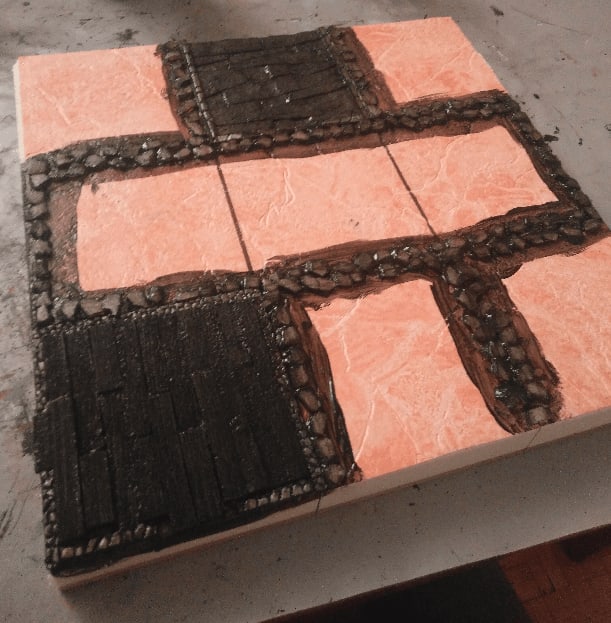
I then added wood planks made from foam, and lots of little rocks to mark the places where hedges should go. When playing with the official cardboard tiles, hedges are directly printed on it, so you know for sure where your line of sight if blocked. With my custom tiles, I wanted the same kind of information, but I wanted it to be unobtrusive with the actual tile. The compromise I found was to use those small rocks as a boundary.
The rocks are made from a think board of foam that I cut into small pieces with my nails; this gives them an uneven and jagged look.
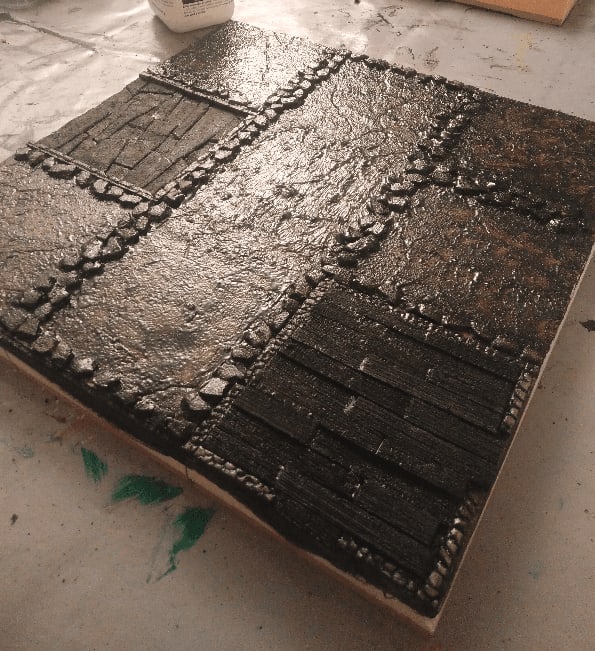
Everything looks better with black. I was a bit wary at first that my brush strokes would be too visible on top of the textured wallpaper, but it dried pretty flat and the initial texture is very visible underneath.
After the initial covering in colors, I also repainted the cracks in the floor with a darker paint.
Added a wash on top to further bind the effect together.
More details added, especially painting some stones in various shades.
Adding more flocking, mostly to delimit the areas. Maybe I should have used less.
And sealing the flocking with liquid white glue. This looks a complete mess at this stage.
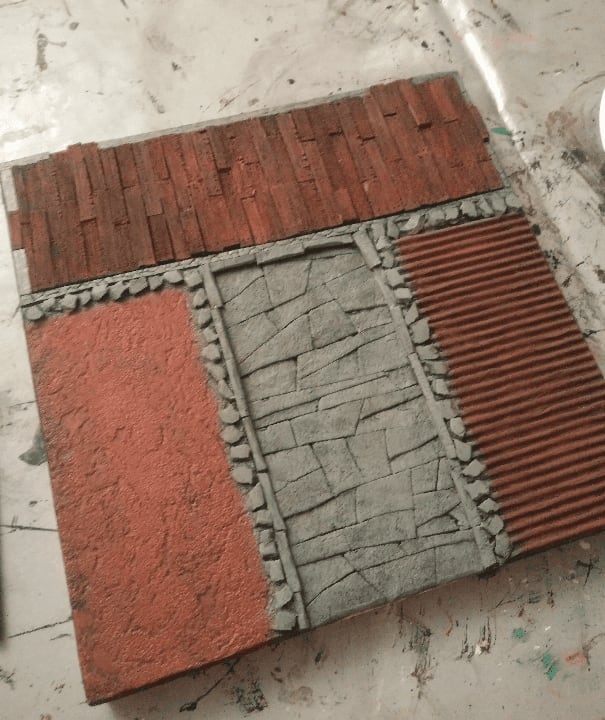
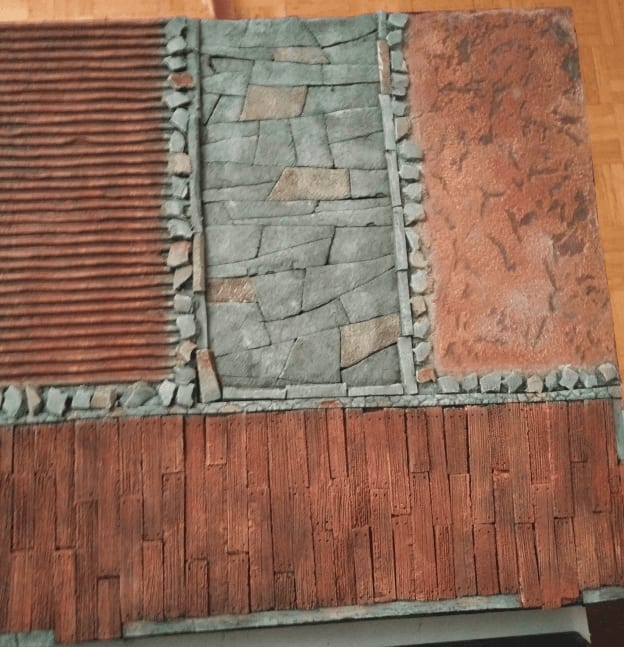
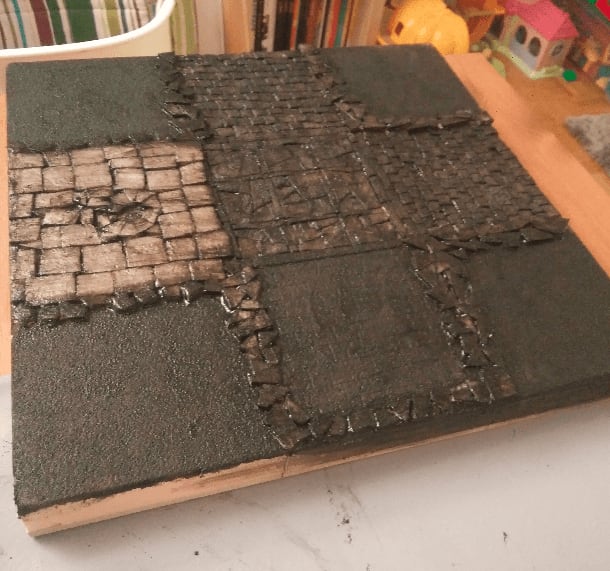
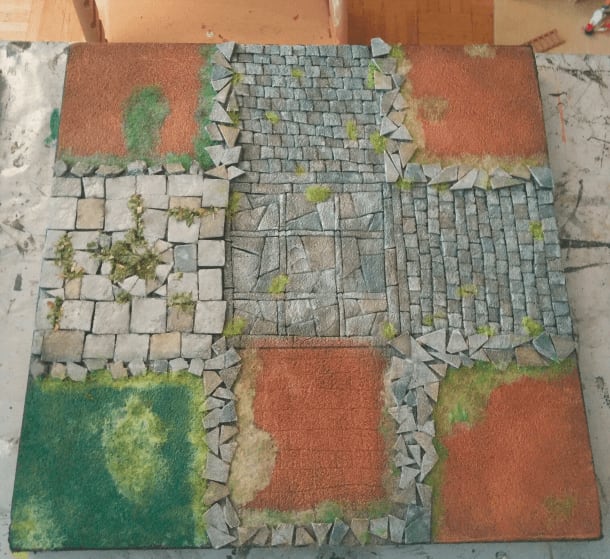
Tile 12V

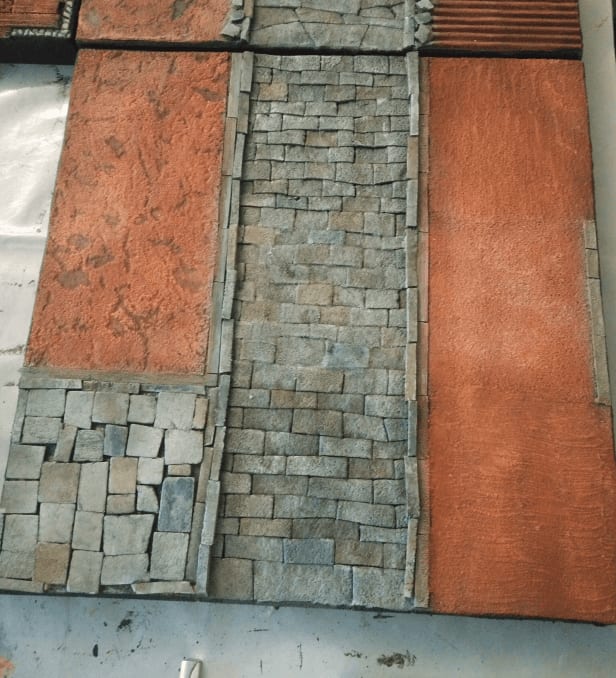
For this tile, I tried other recycled materials to texture the various not-road segments. On the left, it's another textured wallpaper I found, and on the right it's simple cardboard to simulate grooves of a field.
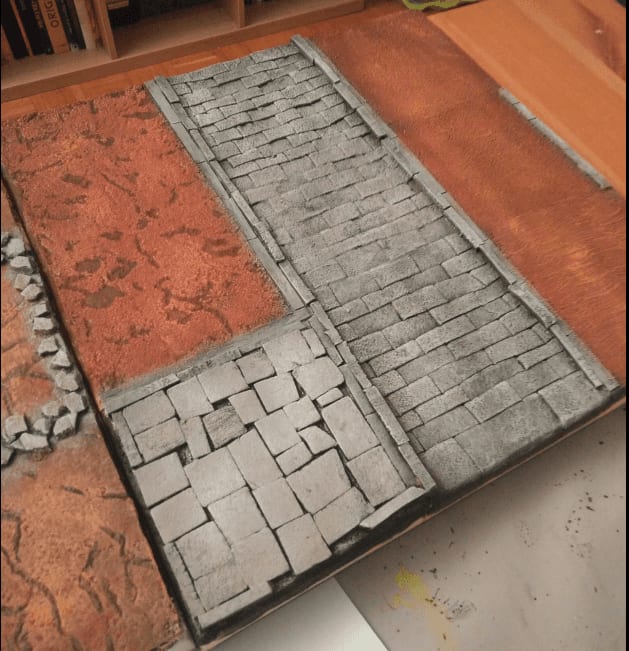
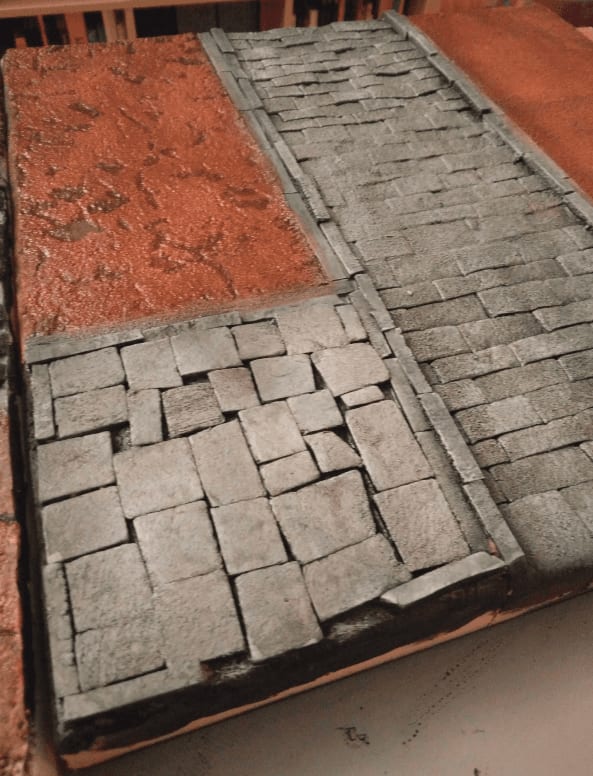
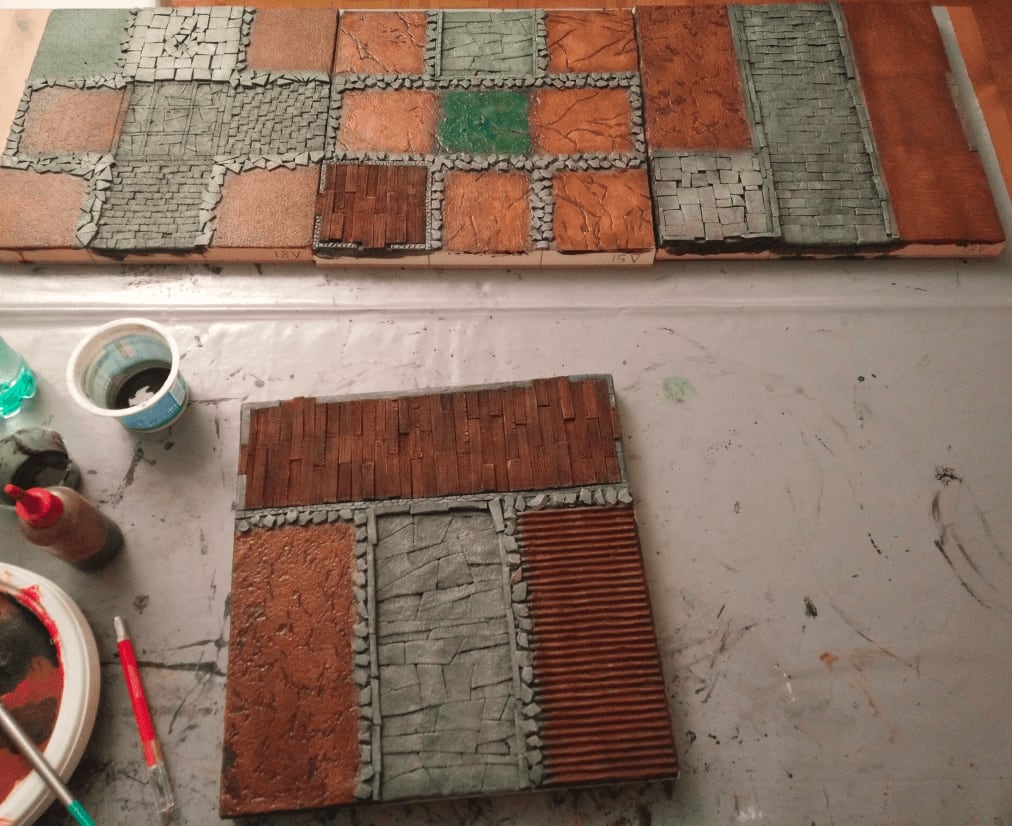
For the main road I carved large stone slabs. They are easier (and faster) to carve than regular straight stones. I know this renders pretty well on dungeon tiles and walls, so I wanted to see how it would turn out for street paving.
The top house floor is made of planks made from foam, of varying thickness, giving this uneven look.
The traditional first coat of black mod podge.
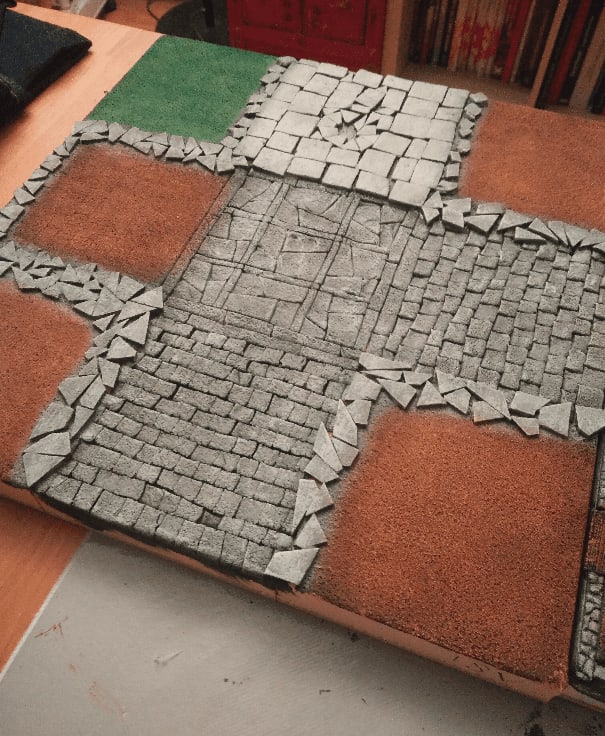
And some base colors added.
I reinforced the patches of dirt on the left with some dark paint.
I'm not sure what happened, but the wallpaper started to turn white in spots. There must have been some kind of reaction with the highly diluted wash I used.
I covered it by re-applying paint on top.
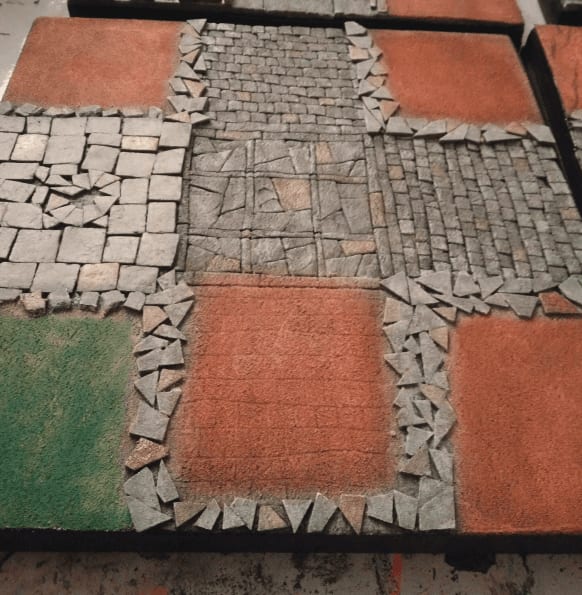
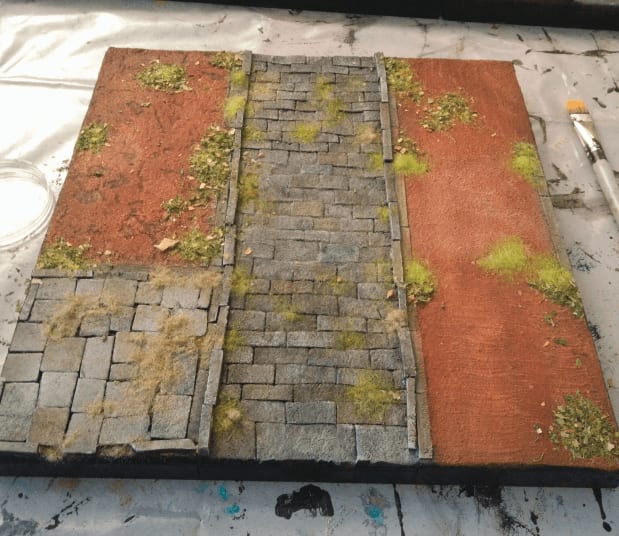
And the flocked preview

Now fixing the flocking with highly diluted white glue.
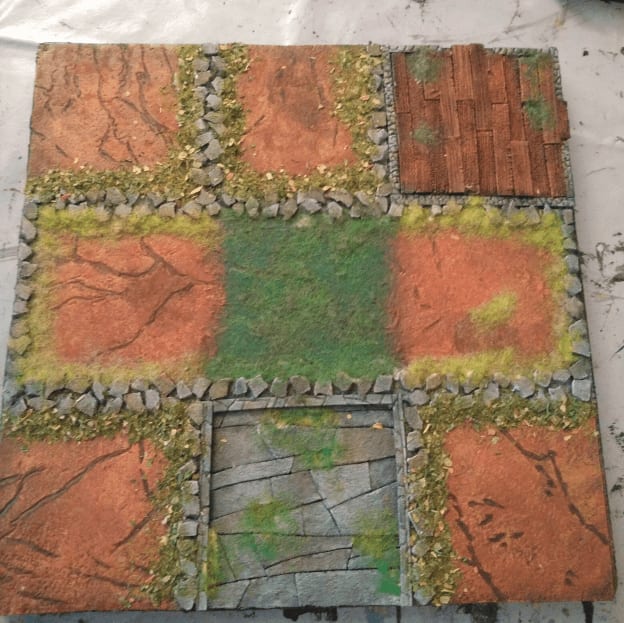
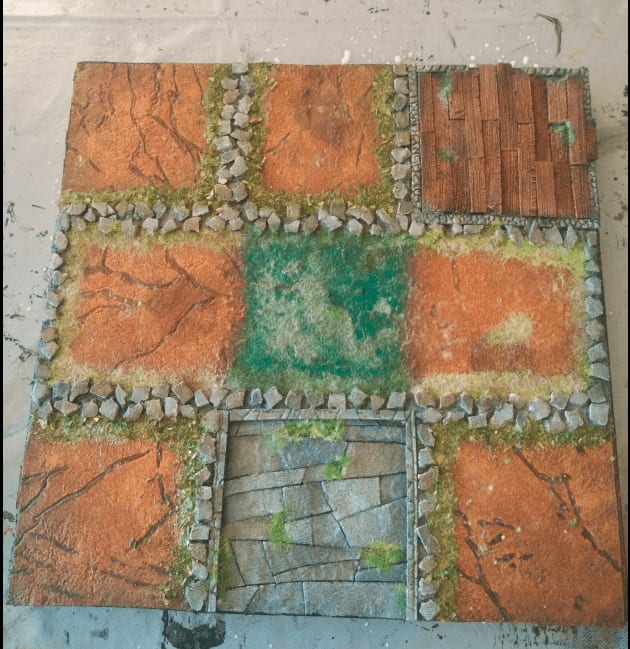
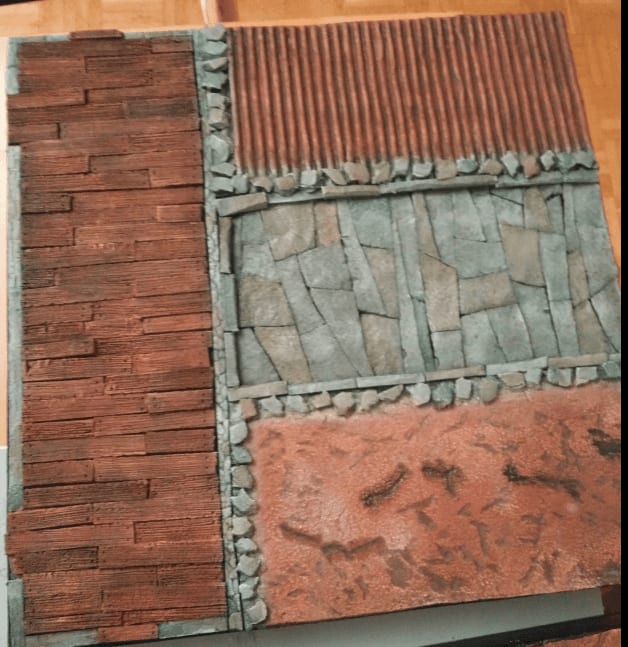
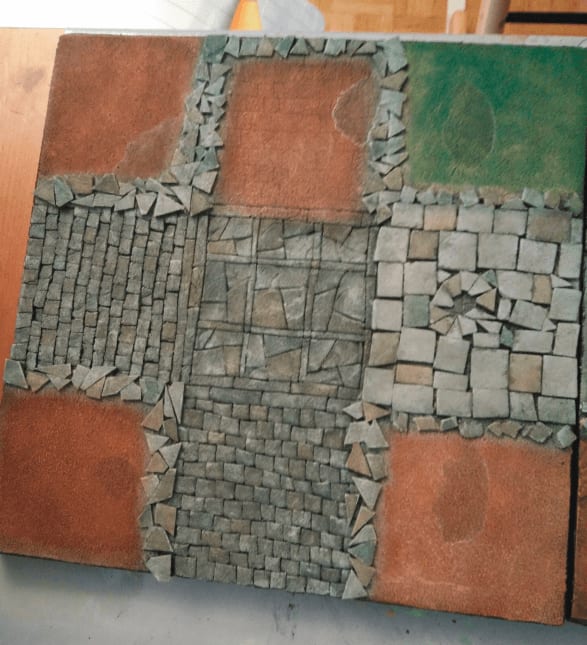
Tile 18V
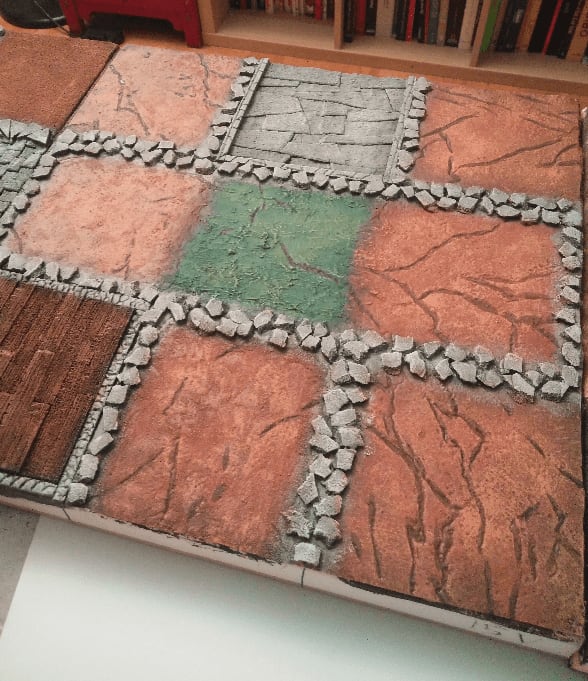
For this tile, I applied the same logic of marking the hedges with small rocks. I covered the ground of the earthy squares with a mix of water, baking soda and white glue. This gave them a rugged look but I think I should have used more baking soda, or added some sand or pebble to make it look like even more like dirt.
I made a mix of green and brown for the various tiles. Drybrushing the rocks also had the nice side effect of doing a smooth transition to the ground.
I painted some stones in various shades using highly diluted paint.
The highly diluted paint somehow reacted with my previous layers here as well, creating those ugly white stains.
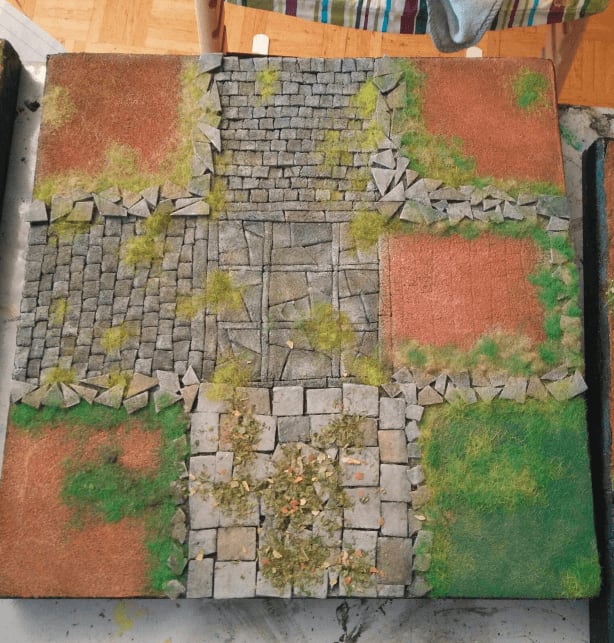
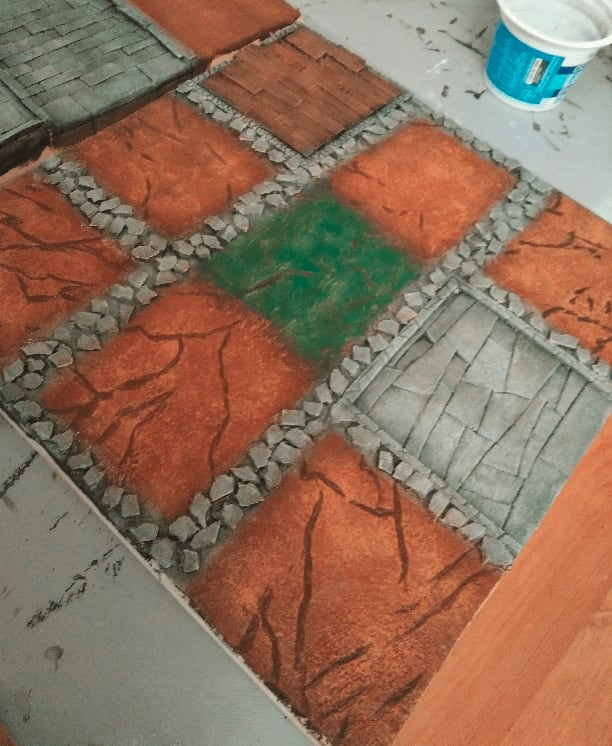
Added a lot of flocking, but most of it will not stick once the glue is dry, so I'll get it back and use in other projects.
I sprayed very liquid white glue on the flocked part to seal them. Everything looks ugly at that stage, but you have to be brave and wait.
Sealing the flocking made the white stains reappear...
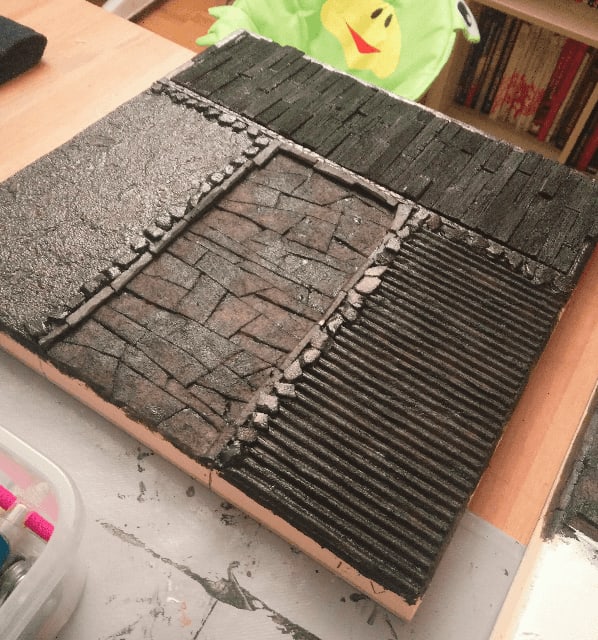
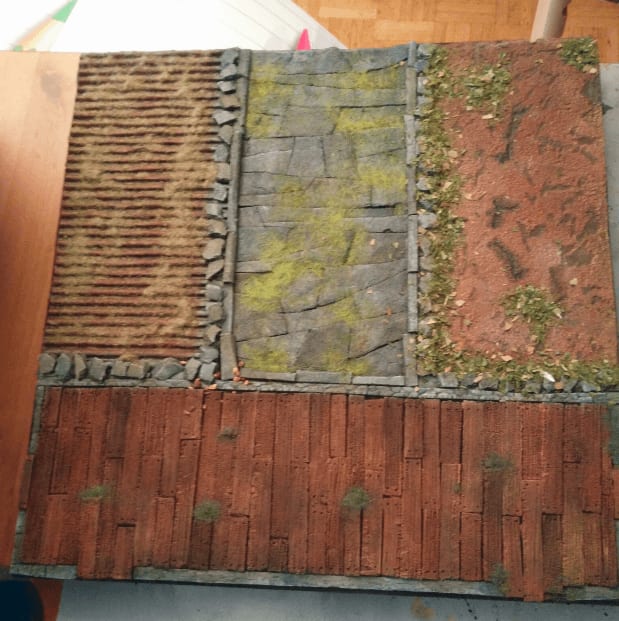
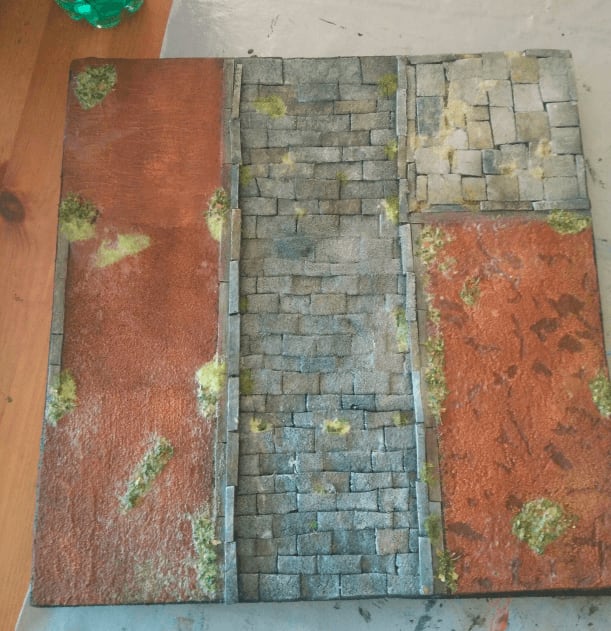
Tile 13V
On this one I tried another delimiter for the hedges; coffee stirrers. I don't know why but in my mind it could have looked like planks left on the floor. It looked way better in my mind than once glued on the board. I think I'll stay with the rocks idea in the future.
I also applied some baking soda/white glue/water mix on the street itself, to see if it would make it look lire it has seen some use, but the results aren't very satisfying.
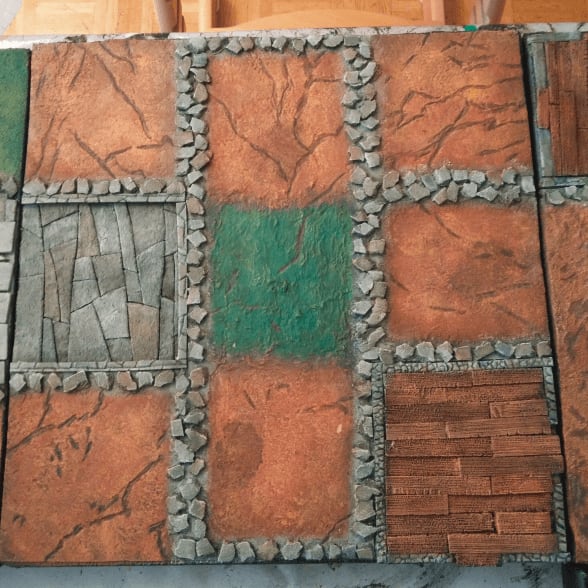
The three squares at the bottom are supposed to be separate on the board, so I tried slightly different textures on them; once again to test what would look the best. Left was filling paste, center was nothing but black mod podge and right is some Vallejo texture.
The textured floor took the drybrushing well. The difference between the baking soda and the raw foam is barely noticeable.
A wash to darken everything. I used to mix black paint, water and some flow improver in very specific measurement. Nowadays, I mix black paint and water and that's it.
Colored some stones for variety.
And added flocking, mostly in recesses of the street.
I also added different kind of flocking to each square. I had just received a batch of flocking, so it was a great way to try it out.
Sealing the flocking.
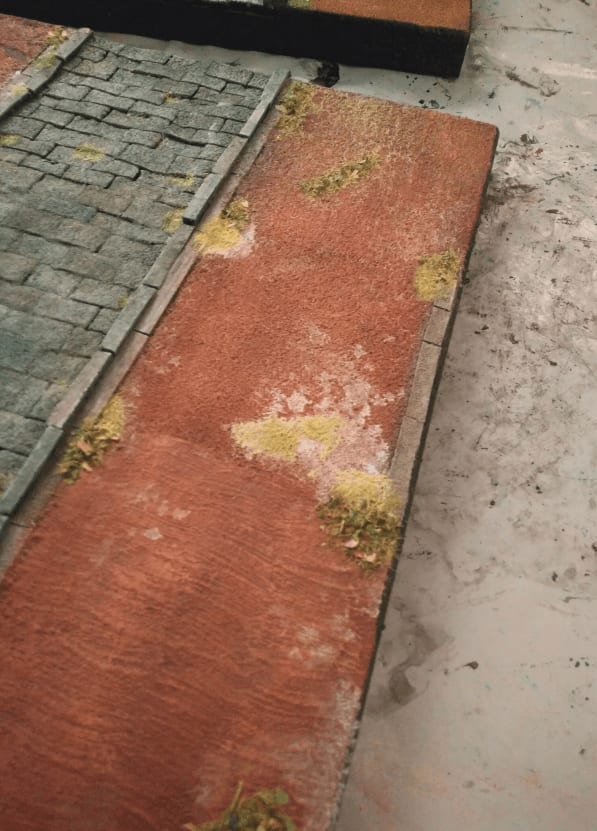
The sealing left some white marks here too...
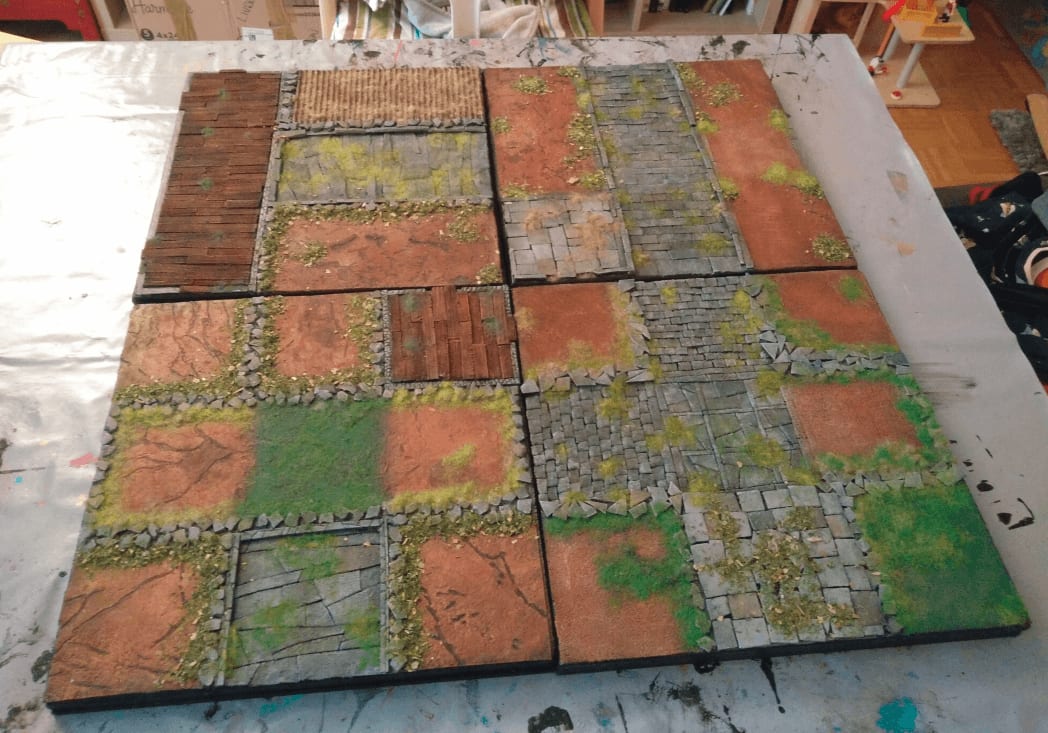
Group shots
Tarnopol Clocktower

This is the abandoned Tarnopol Clocktower, currently occupied by a band of street urchins. And this was made from a second hand Titeuf boardgame.

The original inspiration come from this drawing from "Mariemburg: Sold Down the River", a Warhammer Fantasy Roleplay supplement. It represents the Tarnopol Clocktower, and abandoned building now occupied by a clan of street urchins.
Structure

The build starts with this tower. I bought this in a second hand shop. It was part of a Titeuf board game. I threw away all the other cardboards pieces of the game, and only kept this main element. For 1€, it makes a great foundation for any craft.
You can see another similar tower in the background, from another game. I haven't started working on that one yet.

First step is top open the thing to remove all the moving parts. This will make the build lighter and prevent it from making too much noise when moved around. I also glued the door in place with wood glue.

I cut a base from a hard piece of cardboard, and glued it on it. I also started to cover the first level with wood planks, and glued some larger wooden sticks horizontally to look like beams.
More beam scaffolding on the back, to use as a base for more wood planks, to have the first level go all around the tower.

I also cut the small plastic wall next to the stairs, to give them a better 3d look.

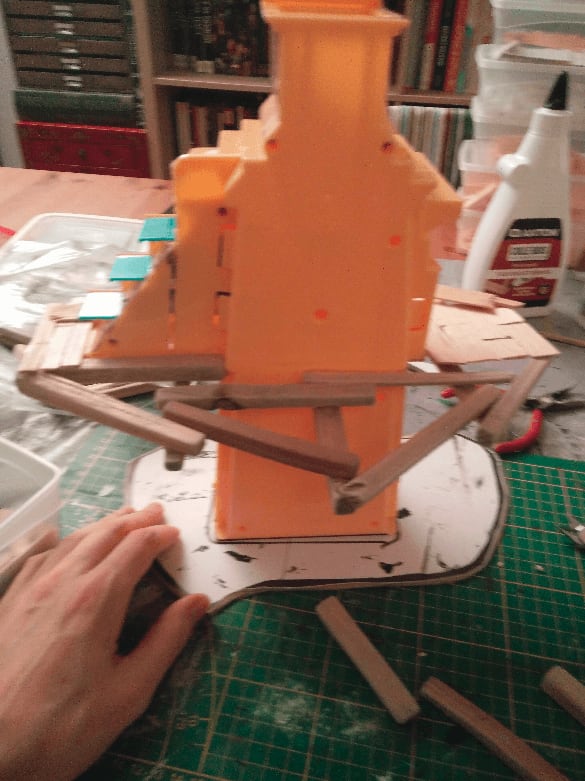
I then started working on the support beams. They don't actually support anything, they are just glued together to make it look like they're supporting the first floor.
On the right I used a piece of foam (I intend to cover it with rubble later), and on the left some tree bark. I also recycled a Pet Shop toy part for the door steps.

I added a bit more details, by covering the front face of the planks. I picked some junk in my bits box to add a broken table, a barrel and some doors here and there. I also added planks on the second floor.
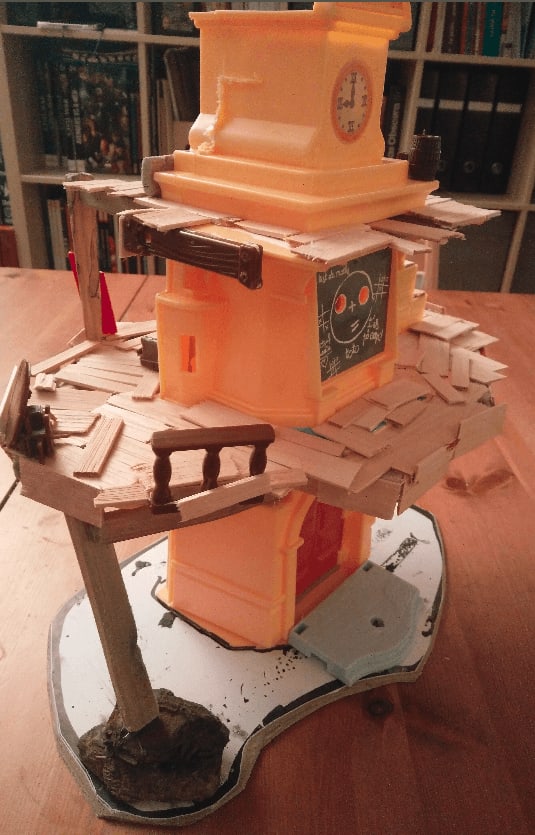
Better view of the kind of details I added.
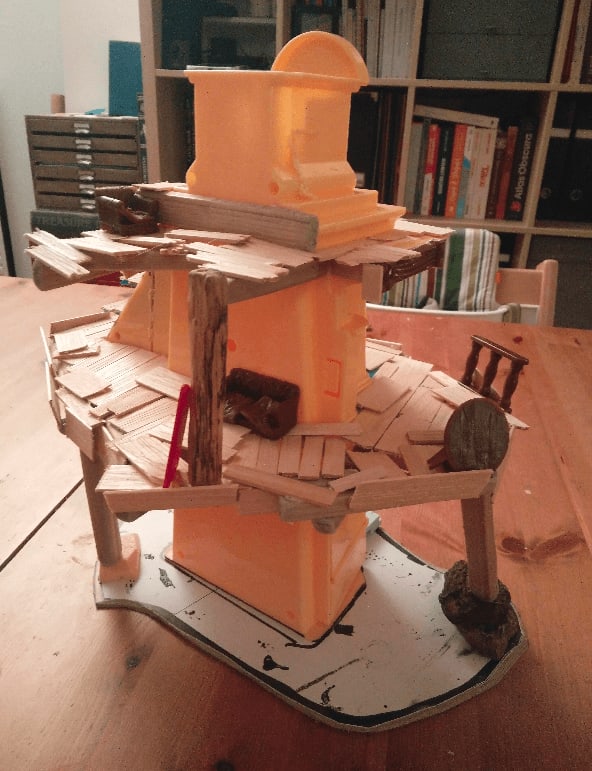
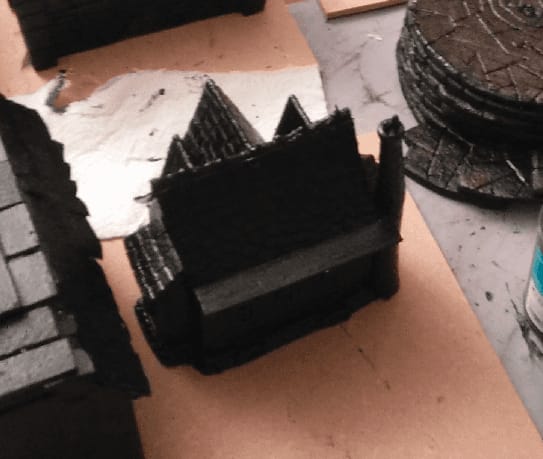
On the back I added a sofa and chair (I had them from the Mantic Crate second Kickstarter) to make it look like this place is inhabited by vagrants.
Adding texture

I then added some foam on the flat faces to give the illusion of a stone structure. For the most part, I put them where they could cover the holes in the plastic. I added two window on the central "blackboard" to cover such holes, and placed them slightly at an angle to make it look like there is a staircase behind.
I also added bricks at the top, and an old desk on the first level. The main idea with the desk was to cover the ugly flat wall behind it, but it also adds to the idea that people are living here and gathering all kind of weird stuff they find nearby.

I kept adding more foam slabs here and there to cover all the flat area. I added a door as well, to break the monotony of this flat wall and give an access to the first floor.

Mostly the job here was to glue bits of stuff here and there to forget it was flat plastic.

Then I started working on the cobblestones. Those are ripped from a thin foam board using only my nails. This give them an irregular shape, and I only had to apply a layer of glue on the floor, and then push them on.

I added a gargoyle from a Marvel toy, as an easter egg.

Covered the whole top.

I added more stone slabs on the floor because there was too many holes and "Pet Shop" engraving on it. I also added bricks on the side to smoothen the transition between the building and the stairs. I even added more bricks around the door to hide the sloppy traces of glue behind.

I then covered the floor with filling paste mixed. I applied it with a brush heavily loaded with water. This allowed me to push the paste in the crevices but still keep the cobblestones visible.

I also dabbed my brush full of filling paste on the walls to give them some texture. A bit went on the couch and door as well, but I didn't care much, it would just add to the old look of it.

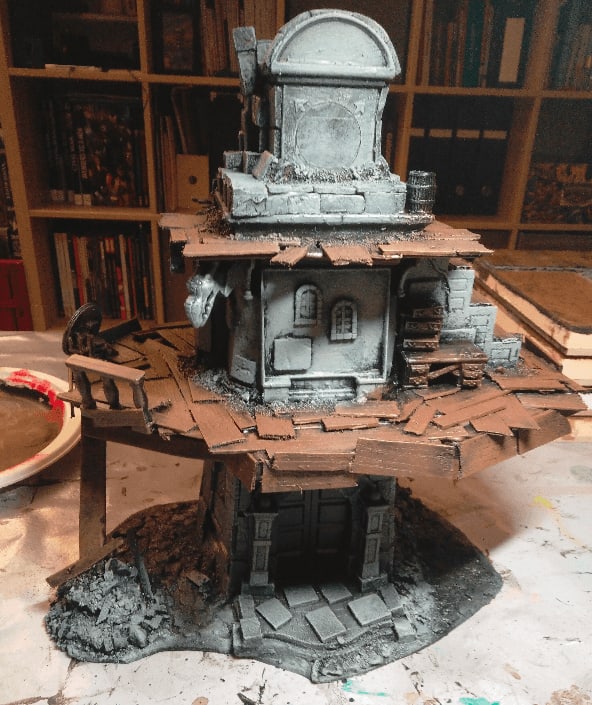
With the foam slabs and texture on the wall, the back wall look much better than the flat surface it used to be now.

And one more full shot.
Rubbles

Now it is time to add the gravel and rubbles. I added a lot of wood glue, then sprinkles on various sizes of sand and small rocks. I started with the largest ones, then added smaller and smaller ones. I threw in a few broken planks in there for good measure as well.
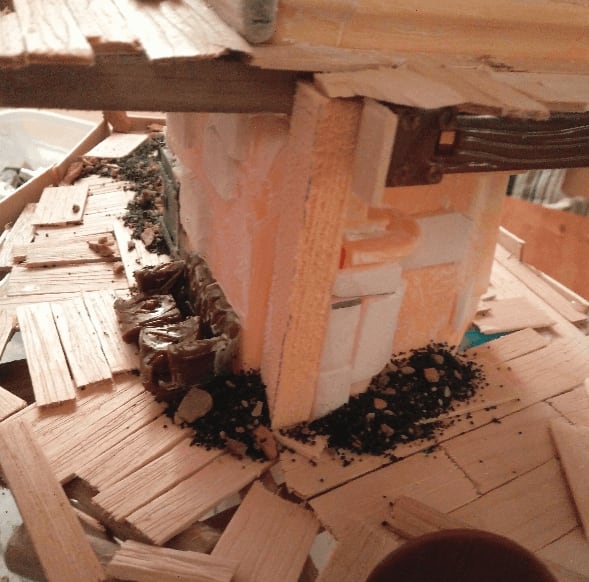
I did the same on the upper levels as well, mostly to cover the seams where the plastic wall and wooden floor met.
Painting
Now it's time to paint.
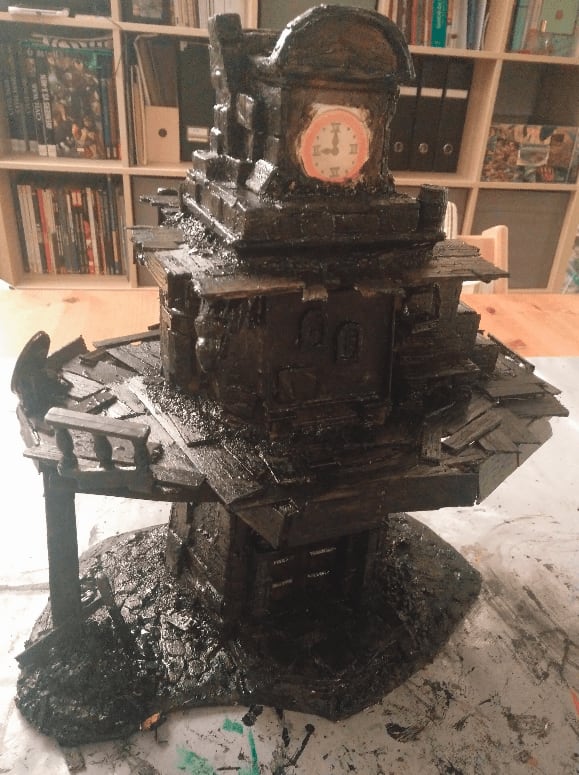
I had to do two coats of my initial black mod podge mixture because I mixed black ink in it instead of black paint, and it made a very liquid final mix, which didn't cover much. This picture is made after the first coat.

And after a second coat. Now we can get to the painting part.
Note that I put some masking tape on the actual clock. I intend to keep the original picture there, so I will remove the masking tape at the very end, once everything is painted.
I started with a first overbrush of dark brown on the wooden areas.
While drying, I did a dark gray overbrush on the stone areas.

Then a red one on the cobblestone. I didn't want the cobblestones to be gray, as I thought it would look too much similar to the actual building. I went with red hoping that the following drybrushes and washes would turn the color into a more natural stone color.

I then worked on brighter and brighter drybrush of the wood and stone. The various layer gave some more depth to both parts.

I applied a wash on everything, to further dark the recesses. At this point I wasn't really happy with the cobblestones as they looked too much like fire or lava to me.

Still, I went on adding more details to the build. Painting individual stones with heavily washed colors (gray and red), to further break the all-gray monotony.
I added some rough highlights on the door, painting each upper part of the panels in a brighter brown.

I finally heavily drybrushed the cobblestones with tan, to tone the red down, and it gave the initial effect I was looking for.

I added on more small details, like some candles or a forgotten purse.

I painted the couch and adding a bit more details.

I even added a forgotten teddy bear at the bottom of the tower, to keep in the theme of the tower being inhabited by orphaned street urchins.
Flocking

I had a lot of fun with flocking. What I initially imagined as an urban building, actually became much more rural once I started adding green vegetation to it.

I used a mix of static grass, cooking herbs (this build smells soooo good) and grass tufts.

Flocking was used mostly to cover all the bits where seams were too visible.

To really seal the flocking in place (so it won't put tiny fibers of static grass everywhere whenever I use it), I coated everything with a mix of wood glue and water. This made everything more durable but had the side effect of really flattening all the static grass, that now look much more like mushy moss. I might buy another type of flocking (made from foam) next time.

More glamor shots for you to enjoy.
And with a mini for scale.

Yeah, this is the "grass flattening" effect I was talking about.

Front porch. Here the sealing glue is still wet, which is why you see this white paste in the flocking.

I finally let it dry on my balcony, with natural sunlight.
Cake Packaging Ruined Building
This is an abandoned temple, made from cake packaging trash.
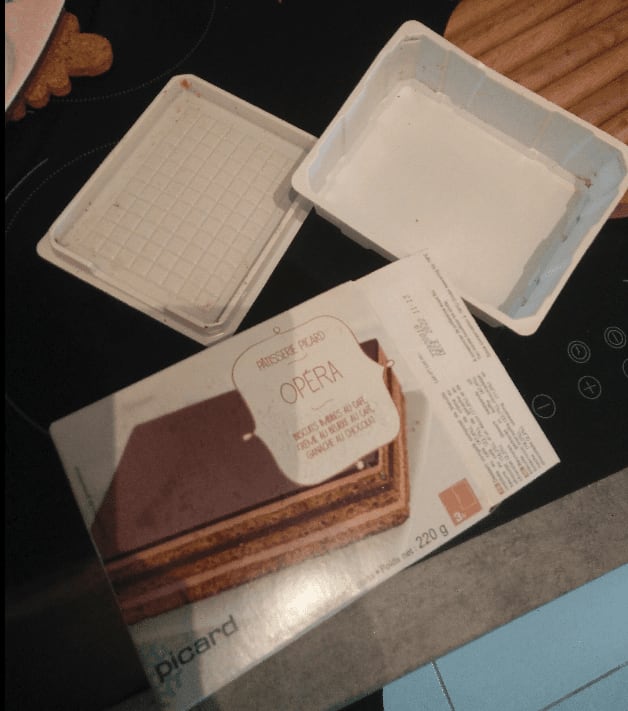
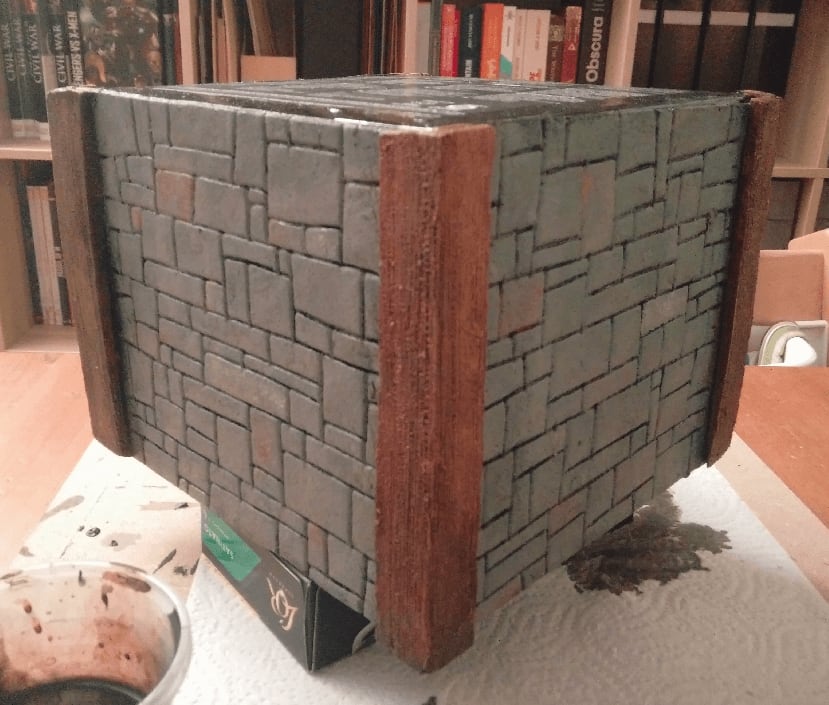
It all started with this packaging. A frozen chocolate cake in its plastic box. The bottom of the plastic box had this engraved squares, and I thought they would look like stone pavement, and the sides could look like ruined walls.
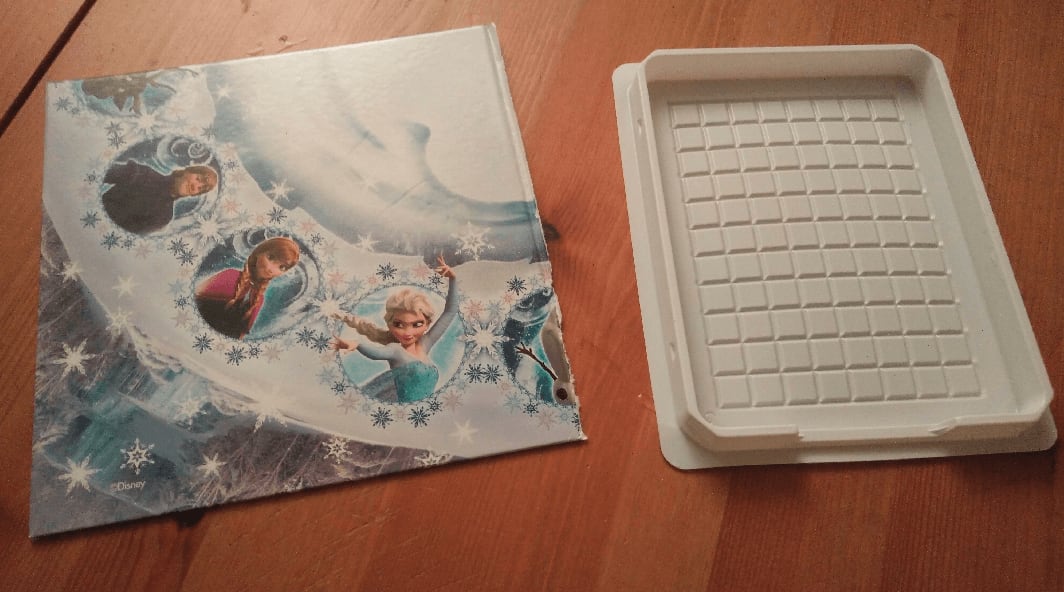
I took a square piece of hard cardboard to act as a base. The cardboard is coming from a second hand Frozen game (I used other parts of this game for another conversion).
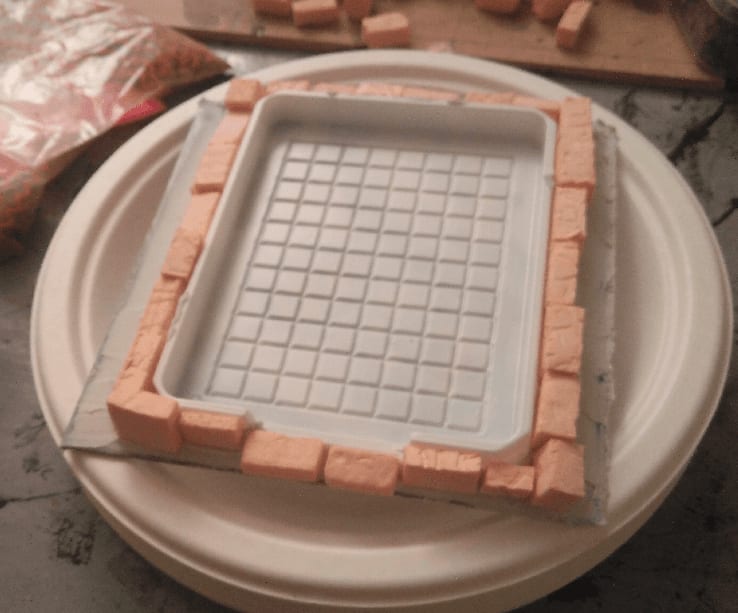
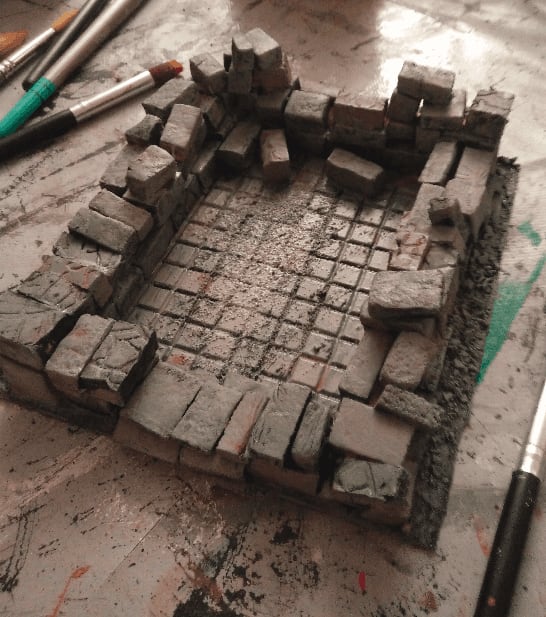
Started gluing bricks all around, and added some filling paste on the sides.
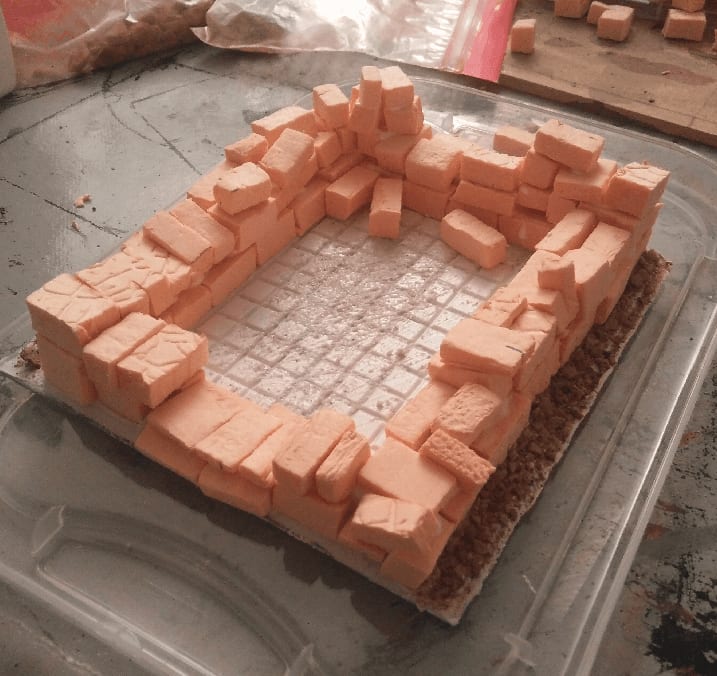
More bricks, and some sand on the sides.
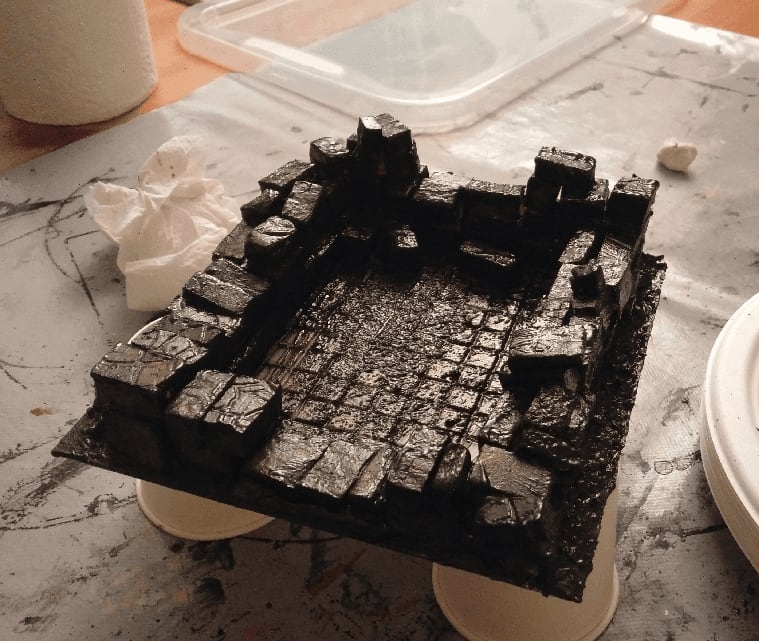
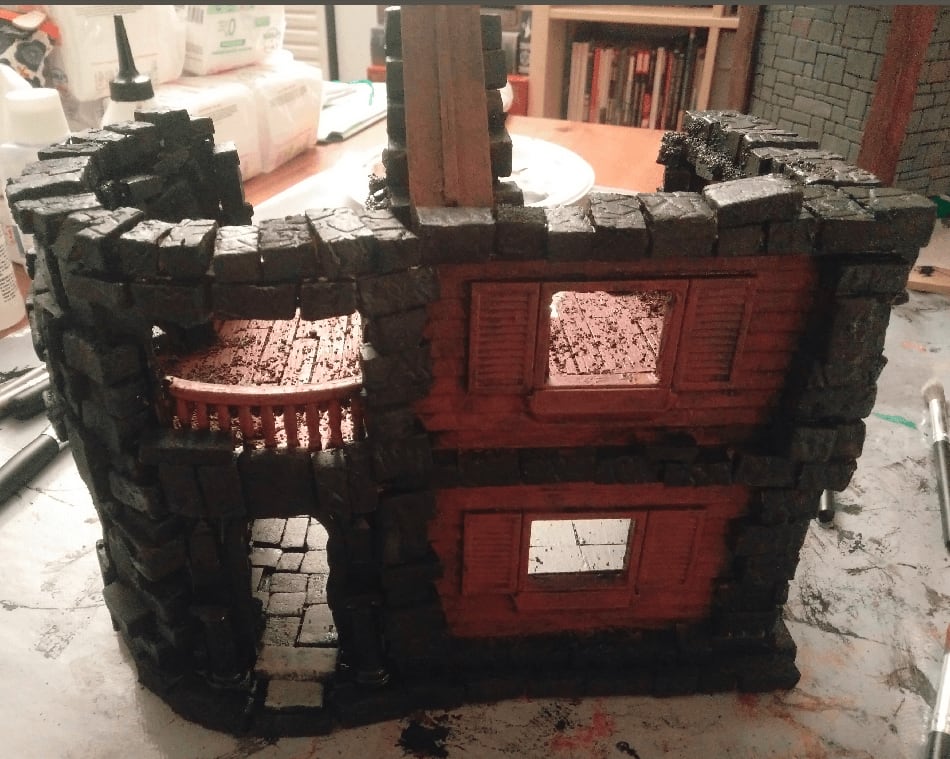
Black paint, and this is where the trouble begins.
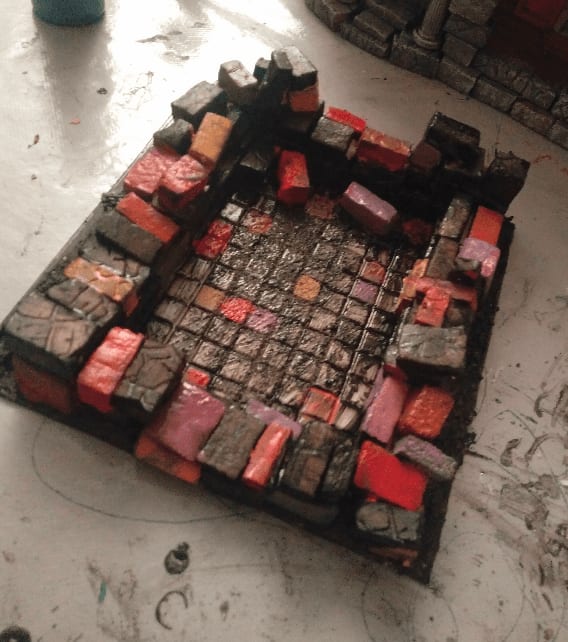
I tried setting some bricks in brighter colors, to give it a kind of roman ruin, with bricks in the red/orange tint. But this made it look like a kid chocolate cake.
I drybrushed on top, hoping to mute the colors, but the result was ugly.

I applied a wash. Slightly better, but the underlying colors are showing way too much and ruining the effect.
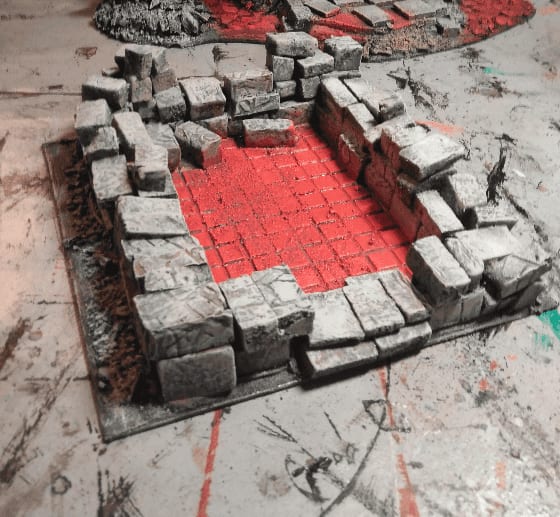
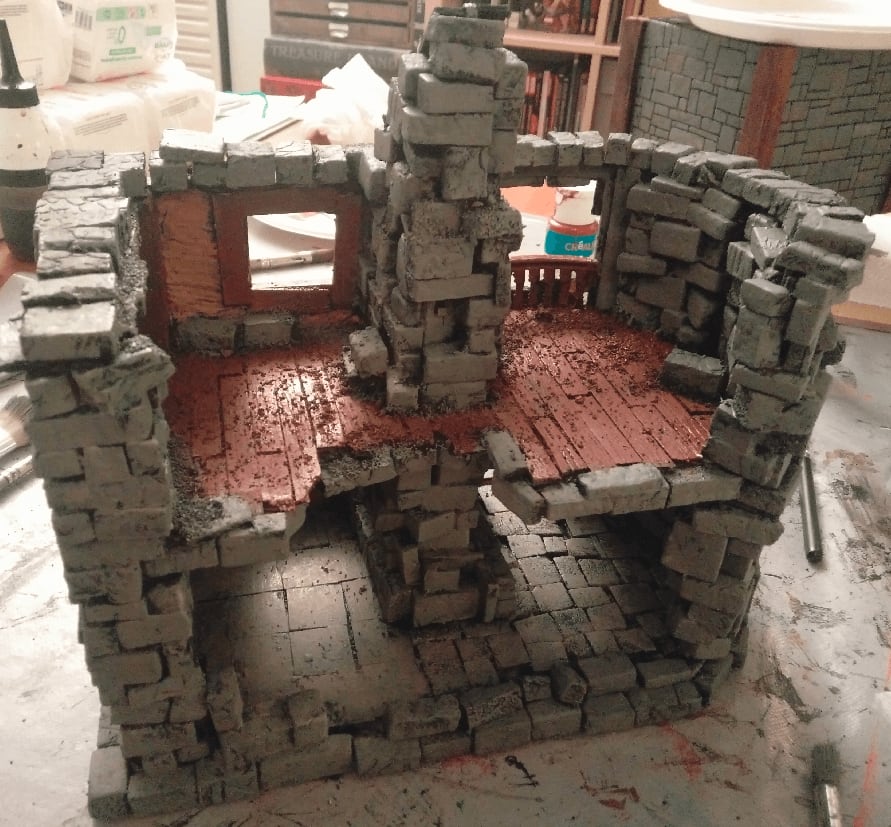
I painted the floor red, to have the eye focusing less on the stones, and re-applied a gray overbrush on all the stones, mostly hiding all the previous coloring job (for the better).
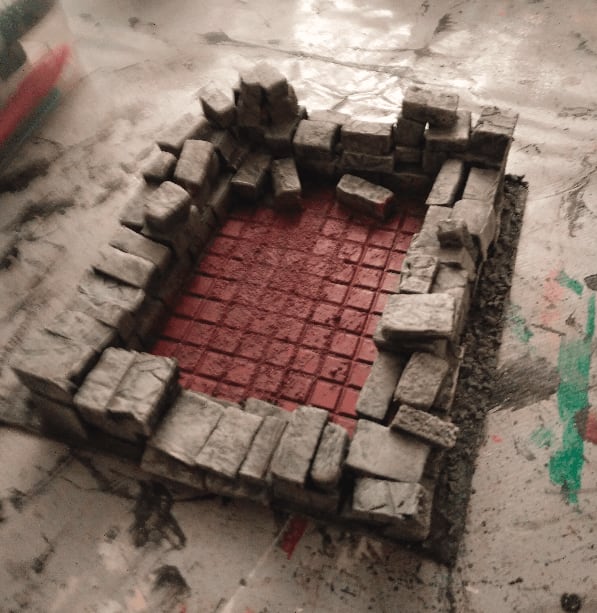
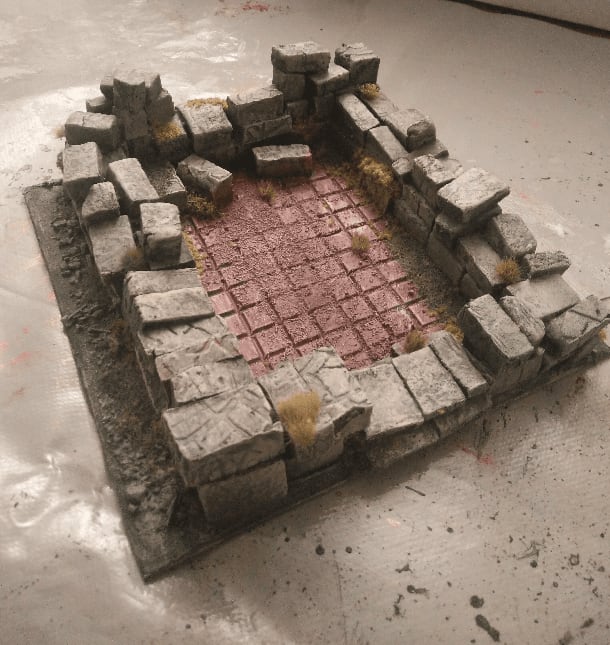
Much better!
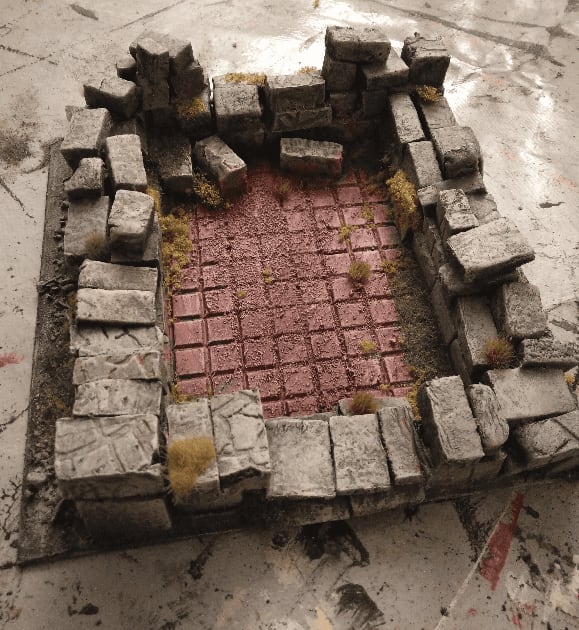
Some flocking later, and it really looks like a ruined temple now.

View from the side, with a mini for scale.
And after a final coat of glue and varnish to keep the flocking in place.
All Along the Watchtower
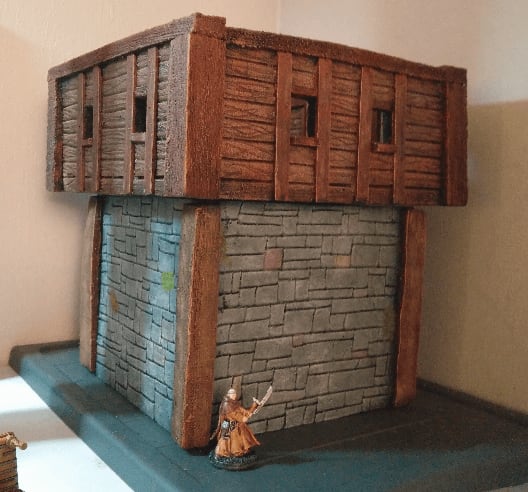
I made this watchtower, with playable interior, mostly from foam.

I do not have pictures before that stage, but this is a pretty good view of the underlying structure. Everything is made with foam, except the vertical planks around the windows.

During the painting process.
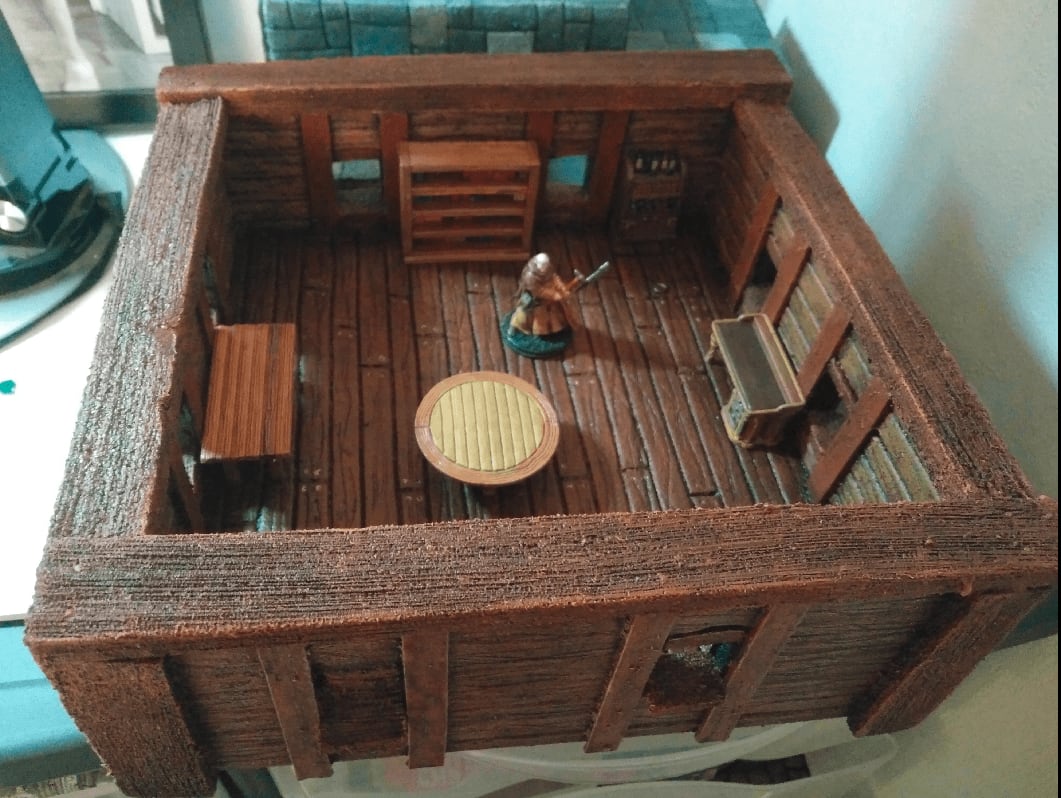
Interior view.
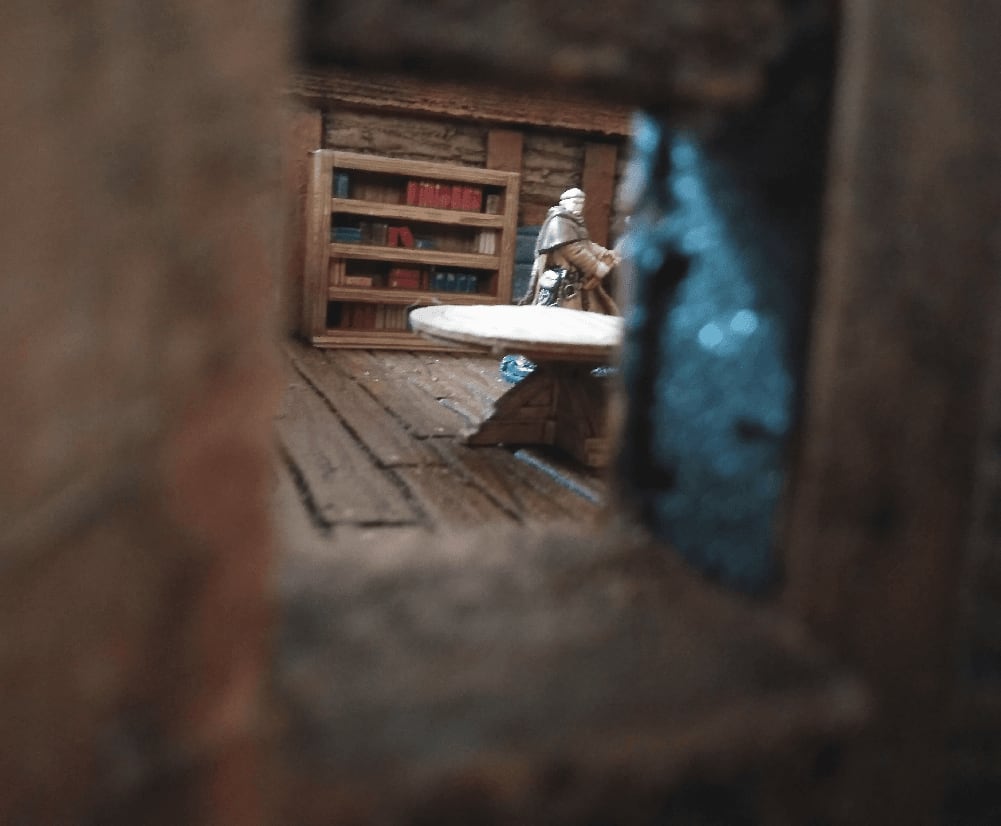
(kinda) artistic shot.
The base
I made the base of the tower from a cardboard box, covered on all sides with a thin sheet of foam (where I carved a stone pattern), and I glued some more foam on the side (where I carved a wood texture this time).
Gray overbrush on the stone, and brown on the wood.
Painting some colors on individual stone to make it look like an abstract painting.
Another drybrush on top to tone down the colors.
And... I don't even remember what I did on that step, sorry. A wash maybe?
And both pieces on top of each other.
This is one of the crafts I'm the most proud of. The top level wood really looks like wood, and because I coated it in modpodge and varnished it, it is also very durable.
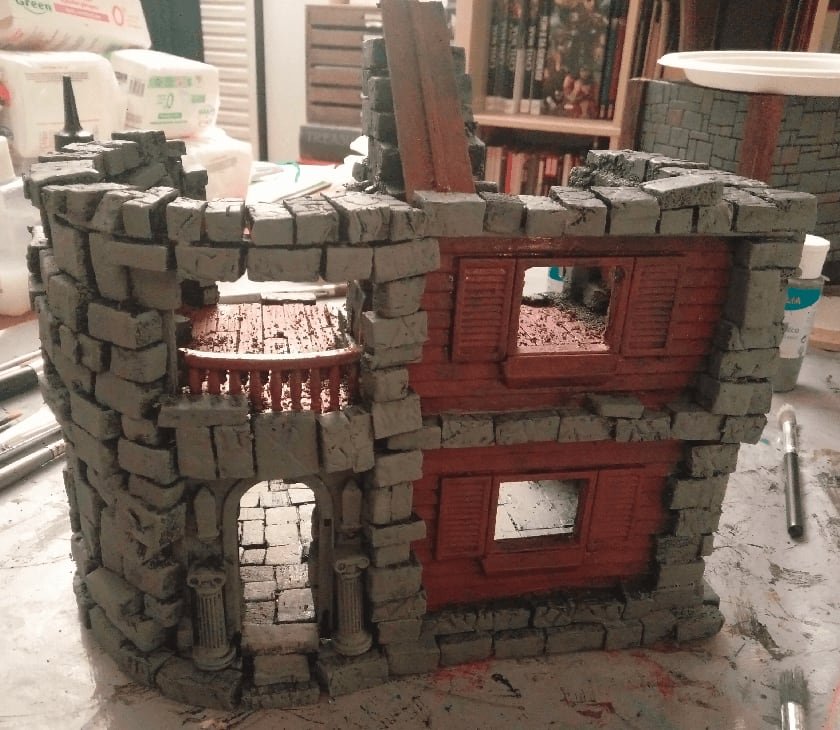
Hello Kitty Ruined House

I recycled a second-hand Hello Kitty toy into this ruined house, ready for Mordheim.

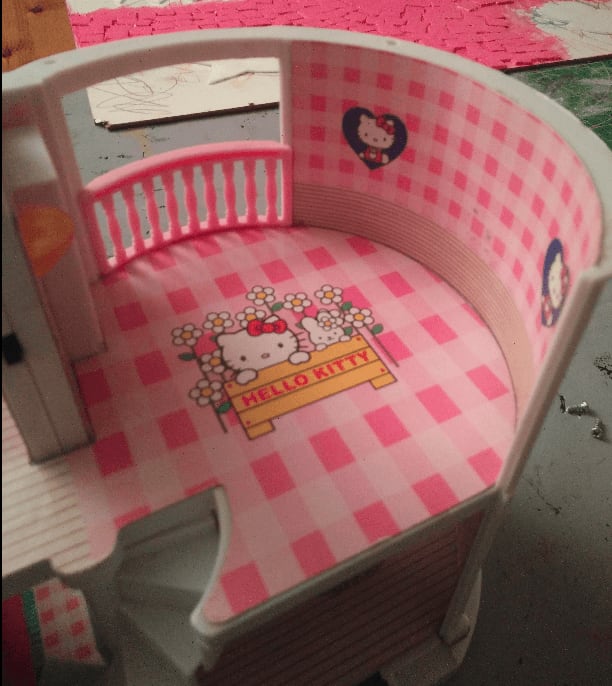
This is the toy as I originally found it. Very pink.

The interior is split on two levels. The fact that it's open on the back make me think that I could make it into a ruined house, where the back wall has collapsed (and because it also make accessing the miniatures inside easier).

I started by removing the roof. I will add my own destroyed roof to it.

The lighting system inside still worked. I will try to incorporate it into my final design.
So much pink.

I then removed the moving parts. I thought it would make painting it easier.

I added some wood plank on the first floor from ice cream sticks, and stone tiles on the ground floor. Left part are made of foam, right from tiles of an old board game.

I also cut the window rail and glued it back, to make it slightly less tall, and better fit with the miniature scale.

Green zombie monster in the Hello Kitty room.

Next stop was adding bricks on the walls.

More and more bricks, and covering the floors with black mod podge. This was a long process I had to split on several evenings as I couldn't paint/glue all sides at once because I still needed to hold the structure in my hands.

I also added some wood around the windows, and textured the inner walls with filling paste.

The view from the front. I kept most of the original facade, I only added a stone contour to it.

The same, after the initial coat.

Now the painting can start!

Whoops, actually nope, I forgot to add more stones at the bottom, to hide the plastic base.
Blocking the wood colors first.

Then the floors and walls.
And now the stones.
This is a very rough overbrush, I use makeup brushes for that (as you can see on the right), and sloppily apply gray paint on the stones. I purposefully don't go into all recesses, to keep them dark, but I still try to cover most surfaces.

Painted some stones in different colors for more variation: dark orange, dark red, and lighter gray.

Same for the interior.

Now adding a light gray drybrush on all the stones to tone down the colors.

I also started working on the roof. I glued some wooden sticks together to give the illusion of a broken roof skeleton.

I added another drybrush on the stone, and washed some stones with highly diluted paints. I must say that the final effect from the wash is much better than the one with the stones painted individually. The more I build houses like this, the more I improve my techniques.
So, as the time of writing, my favorite way is:
- Black undercoat
- Dark gray overbrush
- Light gray drybrush
- Individual stones with highly diluted paint
- One last tan drybrush

With everything painted, I started adding some flocking here and there to double down on the disheveled look.

Same on the inside. I like the small tufts lodged between cracks of the tiles.

And the final shots.
Ready to be dropped into any Mordheim game.
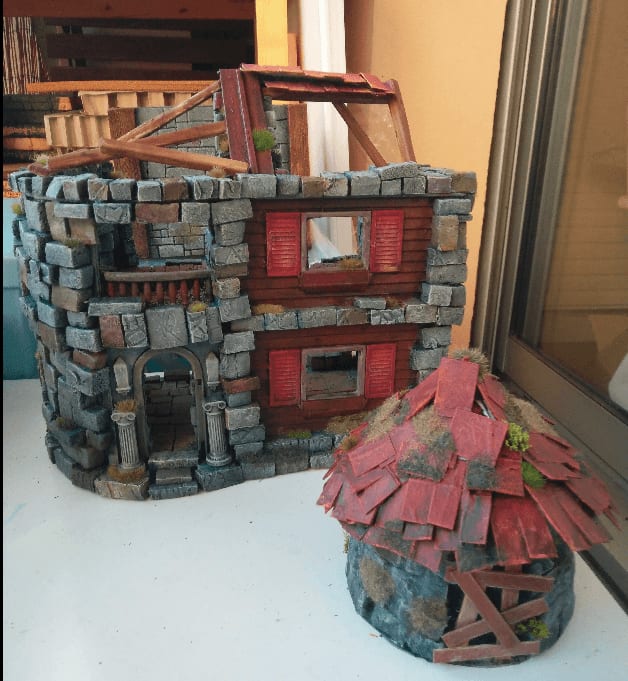
Family shot, with the little Sour Cream Hut.
Disney Toy House
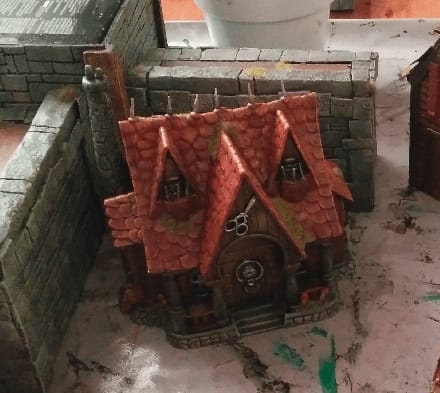
I repainted a Disney toy into a house suitable for the Old World.
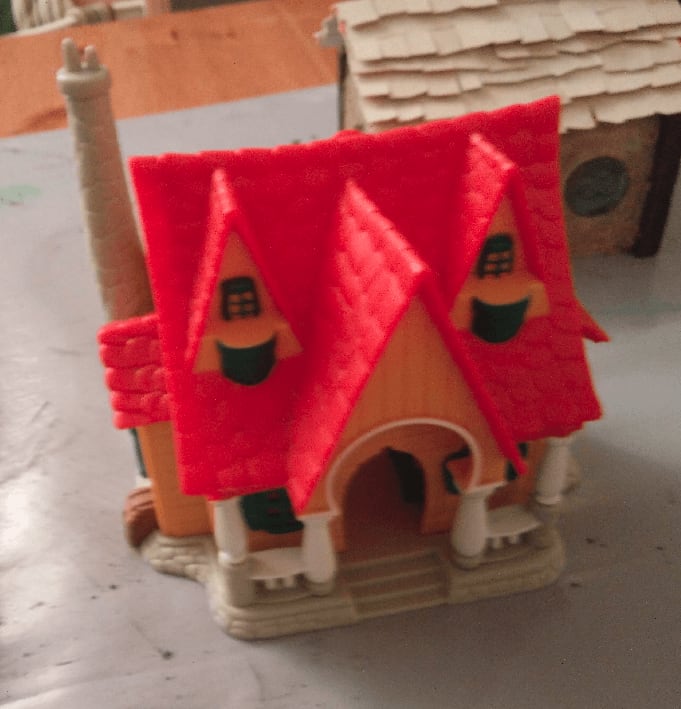
This is the toy, as I original found it in a second hand shop. It is not the right scale for miniatures (a bit too short), but it definitely has this weird fantasy crooked look I like.
I coated it black with the usual black mod podge mixture.
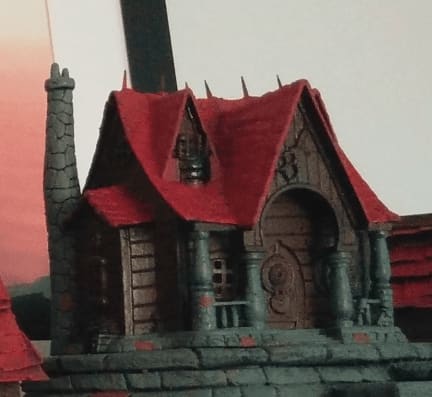
And I blocked the main colors. Grey for the stone (with some brown variation), brown for the wood, and red for the roof.
I added some pikes on the roof (made from toothpicks) to better fit the Warhammer Old World feel, as well as some earing decoration on the main door.
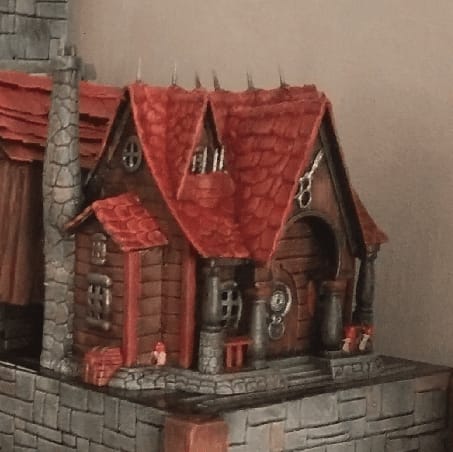
More drybrush and details added later.
And a final shot after all the flocking was added.
I'm sorry I don't have better pictures; I had some picture sync issue between my phone and computer and looks like I lost some data here...
Scratch Pads Hedges
This is a set of hedges I made for my Zombicide Green Horde game.
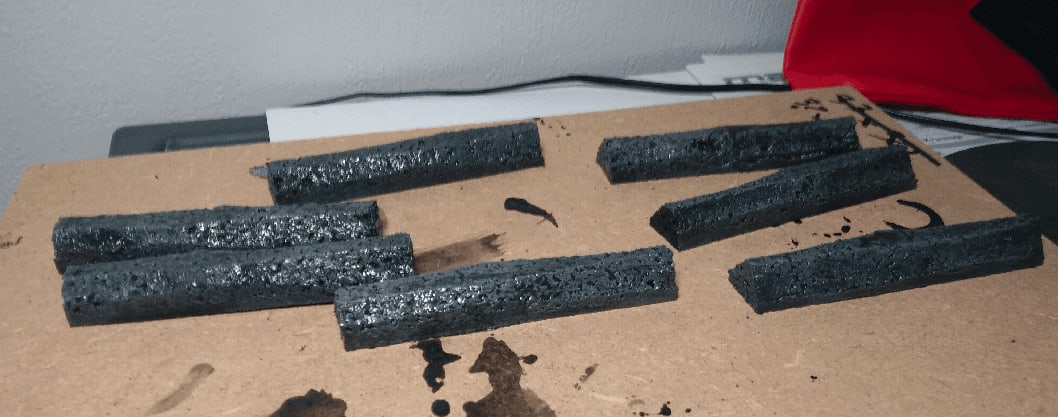
My first implementation was pretty rough. I started by cutting strips of cork to act as bases. I painted them black, dry brushed gray and applied a wash, for the usual stone texture.
I then glued scratch pads on it. I tried to cut the pads in an irregular fashion, but I think it looks pretty weird.
Functional, but not very pretty.
To make them look a bit more realistic, I sprayed glue on them with a glue spray I had. This was very messy and did not smell good. I do not recommend that.
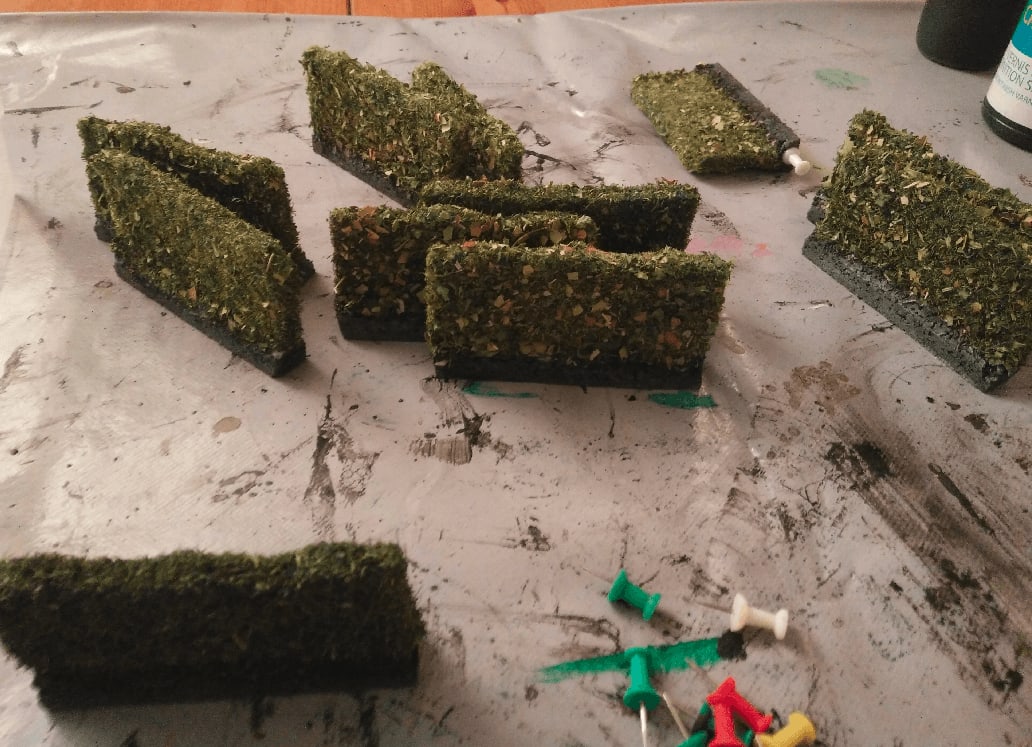
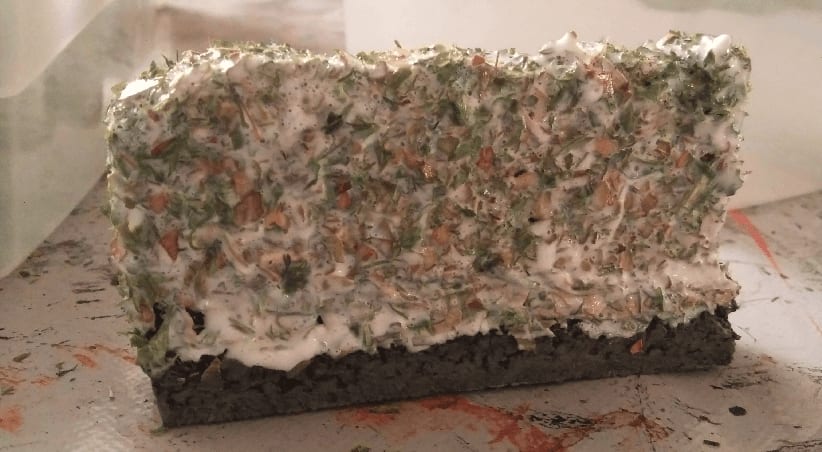
I then sprinkled a mix of leftover flocking and various cooking herbs on them.
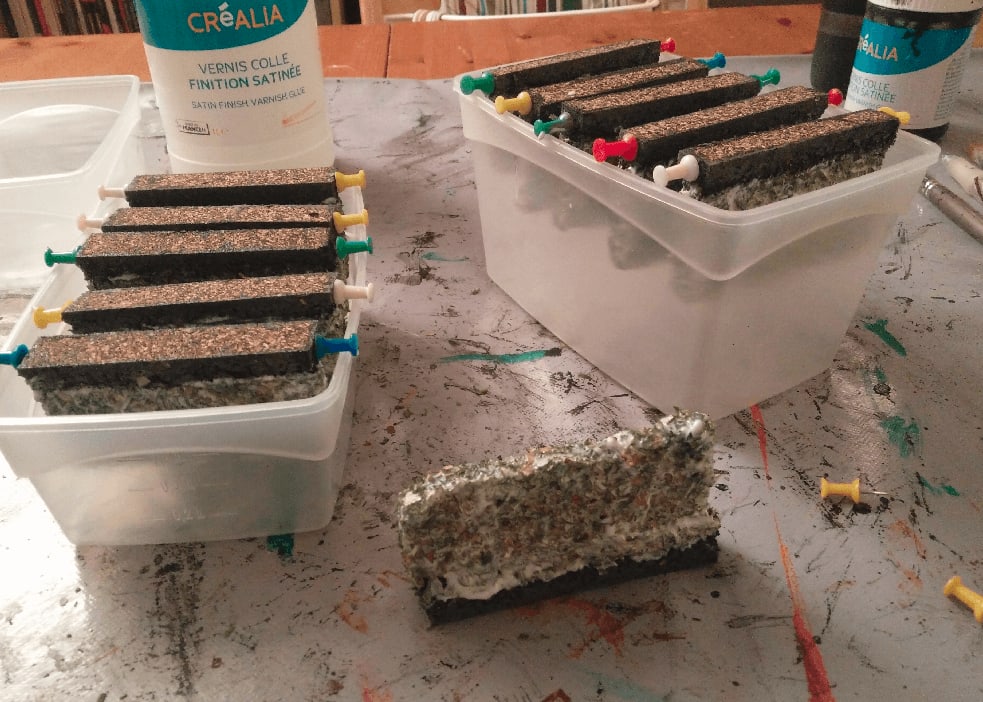
I waited for them to dry, then dipped them in modpodge to seal the herbs. When the modpodge cures, it stays invisible, but keep all the tiny herb pieces in place. I kept them upside down in various containers to have gravity spread the modpodge evenly. The upside down part wasn't even necessary as the thing stayed mostly in place.
No worries, this will be transparent once cured.
And the final result. This still does not look very good, but it's better than raw scratch pads. But more importantly, I won't be spreading cooking herbs everywhere when playing this them now.
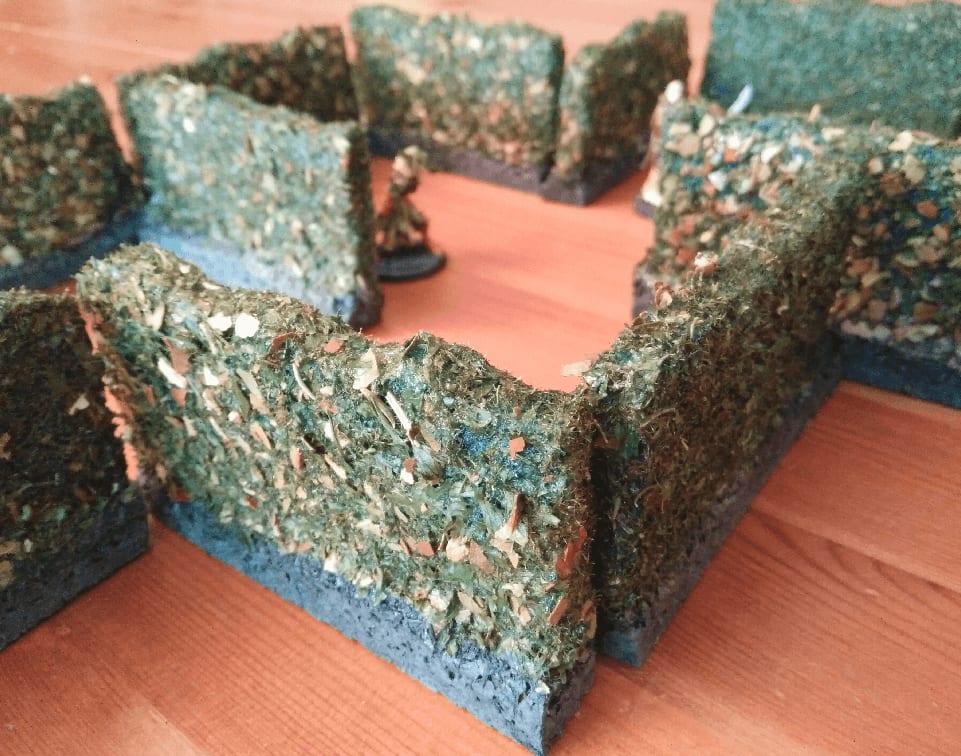
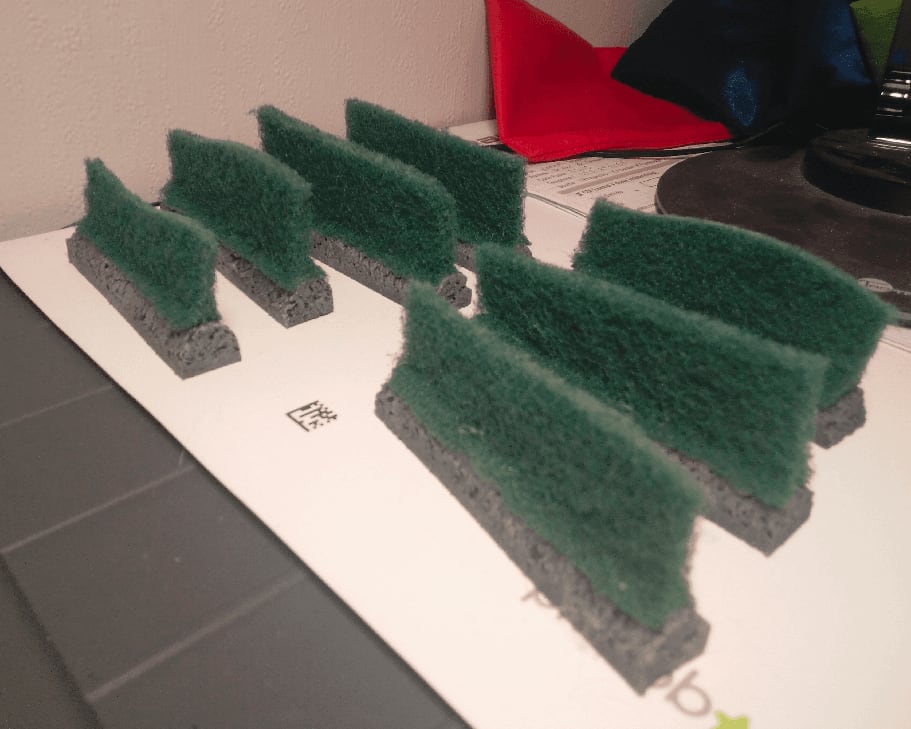
This size of this batch works well with the size of the miniatures.
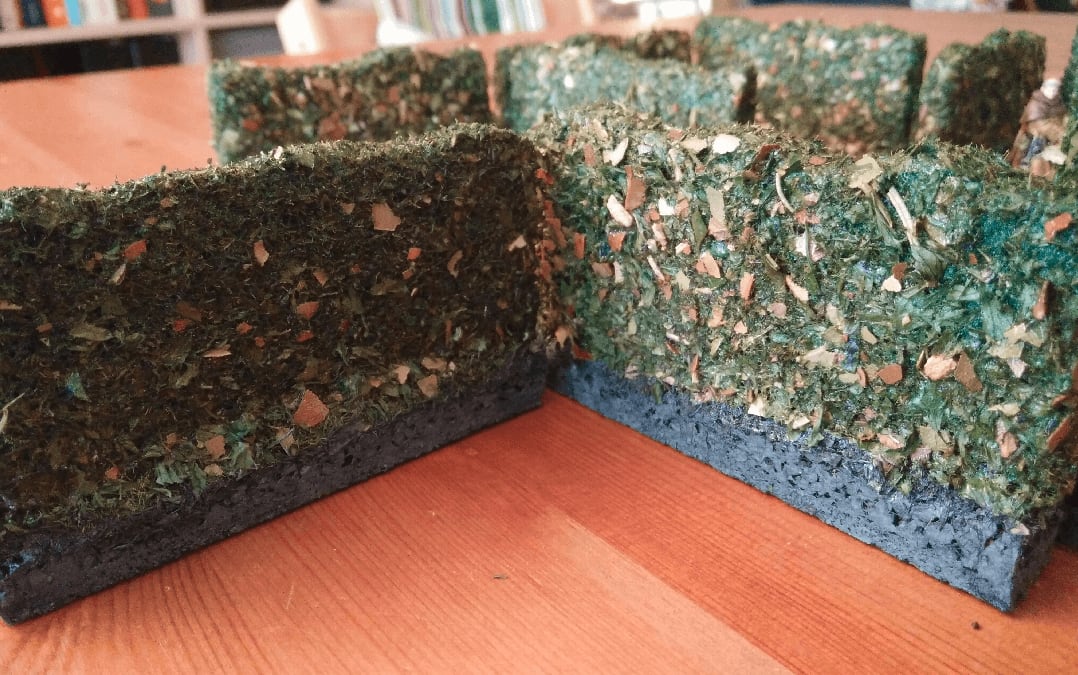
As you can see on those close up pictures, the original scratch pad can still be seen underneath. I wanted to add a black undercoat (or a very dark green), but couldn't find a reliable way to paint the pad.
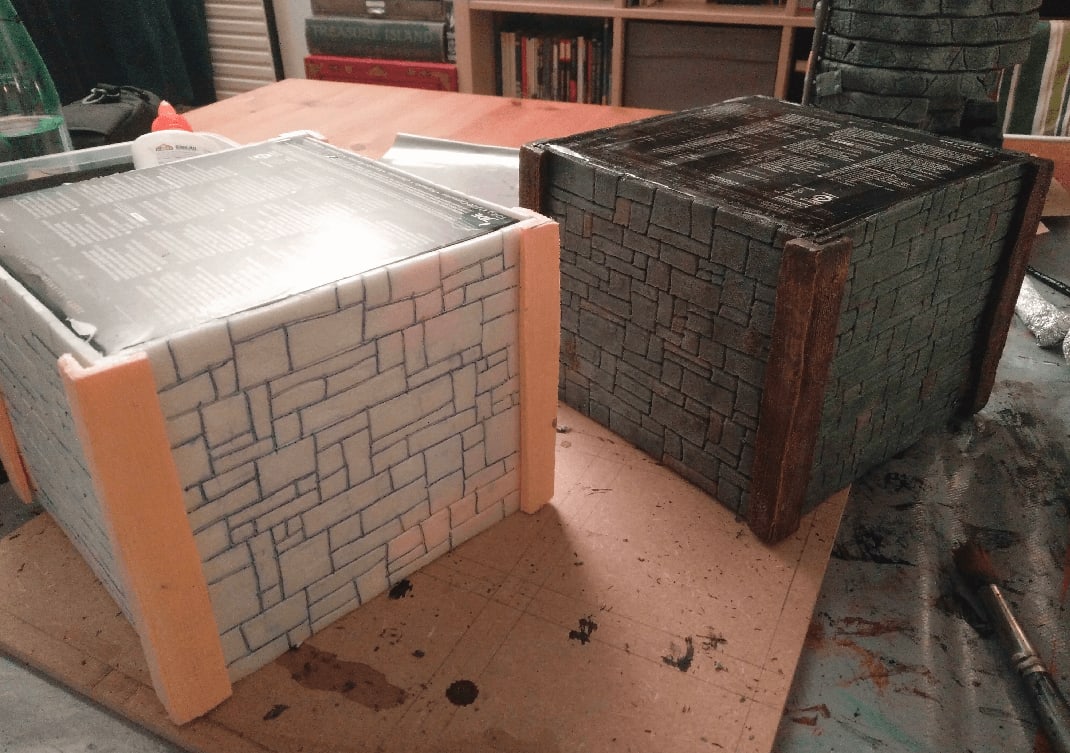
Zombicide Modular Walls

I needed my walls to be modular and stable. Modular so I could use them to represent streets in all the Zombicide configuration, and stable so they wouldn't fall on the table whenever we would bump into it.
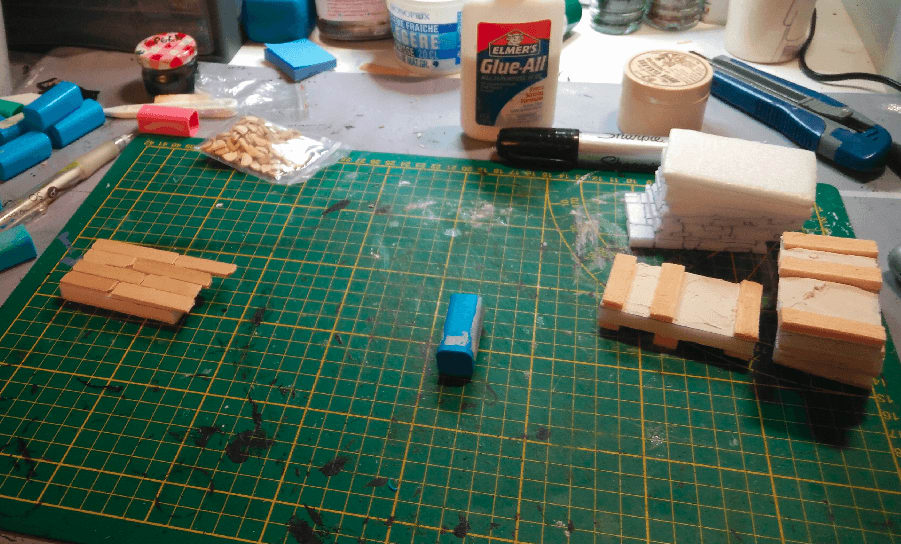
I wasn't sure of the final design, so I decided to craft several different designs at the same time.
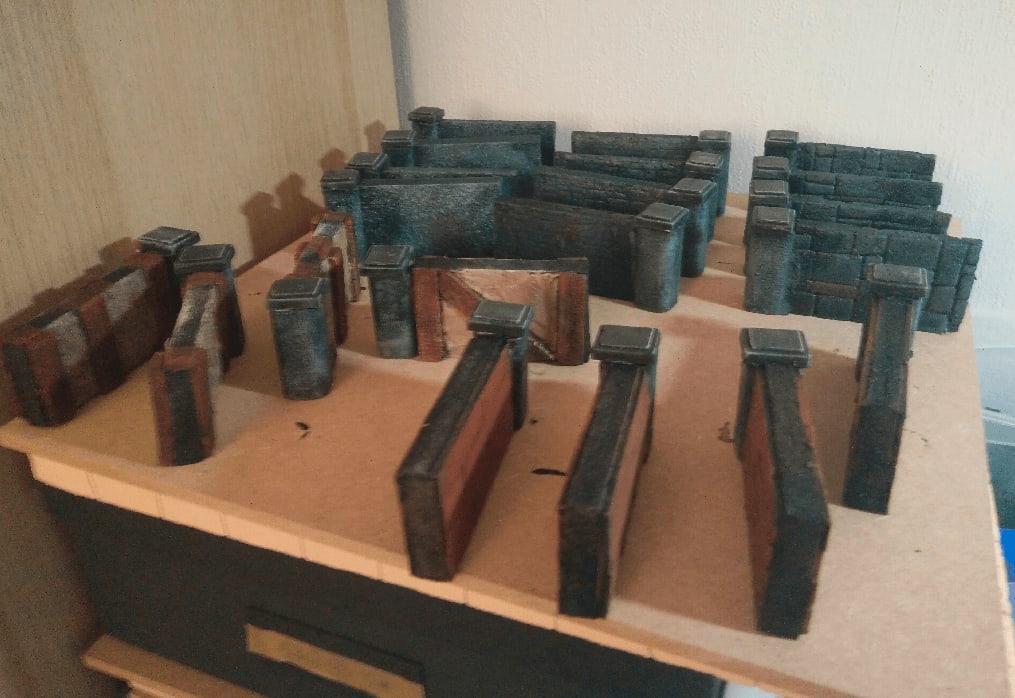
I started by cutting foam at the right dimension, and glued one of those medicine sticks at the end, to act both as a pillar, and to give some stability.
Some of them I covered in wooden planks. I didn't bother cutting at the exact right dimension. I glued the thing, and cut the excess afterwards.
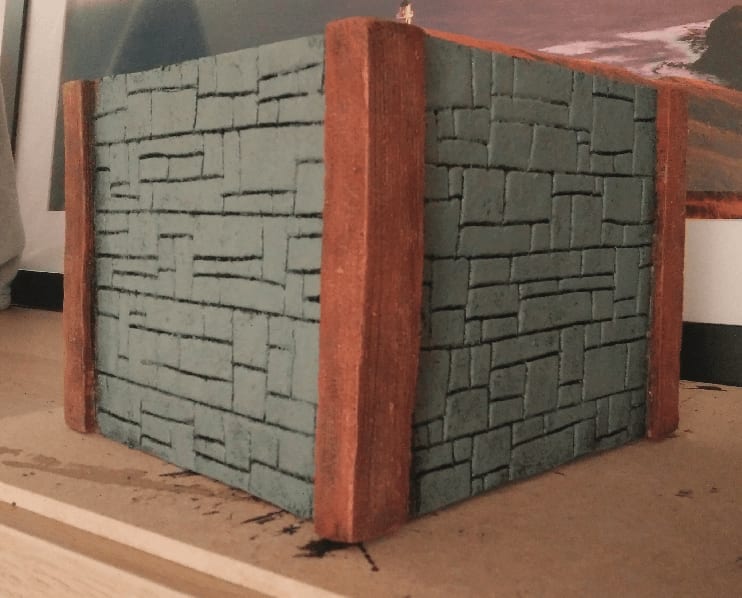
Other were etched with a stone pattern, or embedded with a roller, and finally the last one had some filling paste added to look like a plastered wall.
Oh, and I also tried another row with a texture spray paint bottle. This is supposed to be used to give the look of raw stone to any wall, but I tried it on my miniature walls.
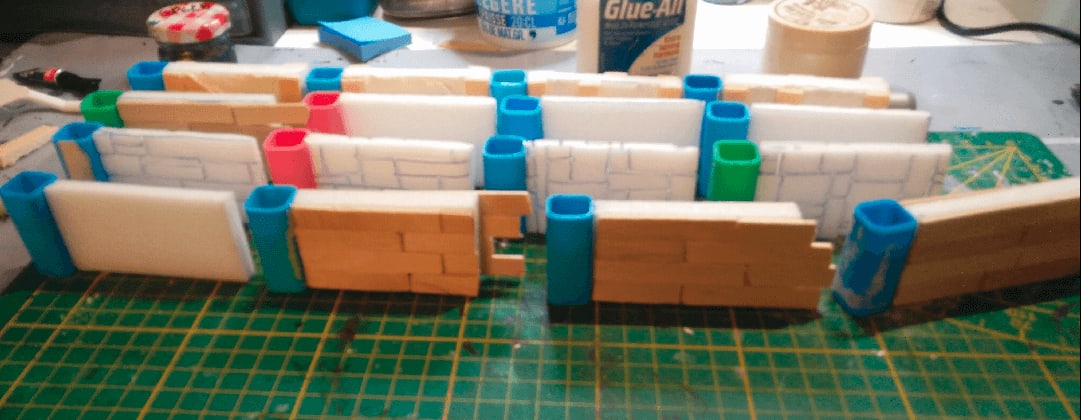
Here they are, in various state of painting.
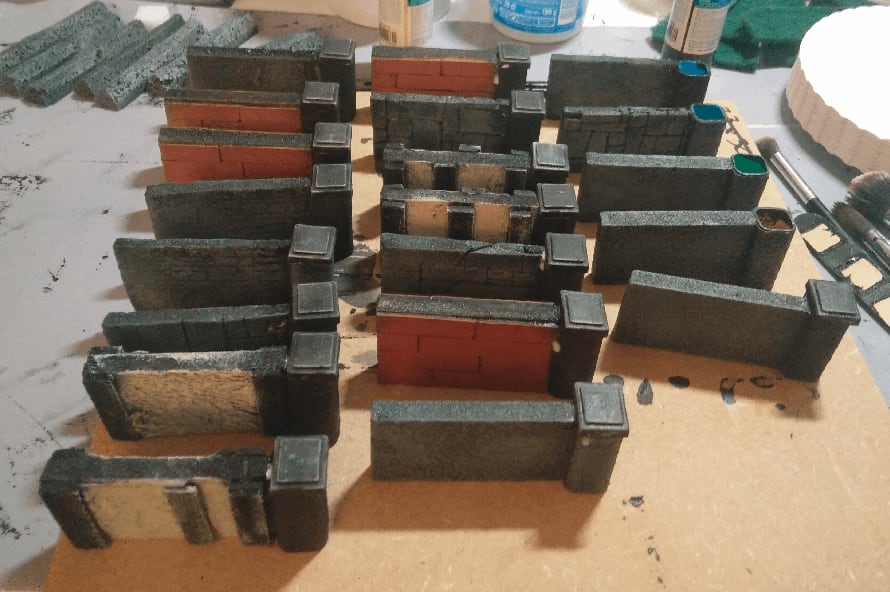
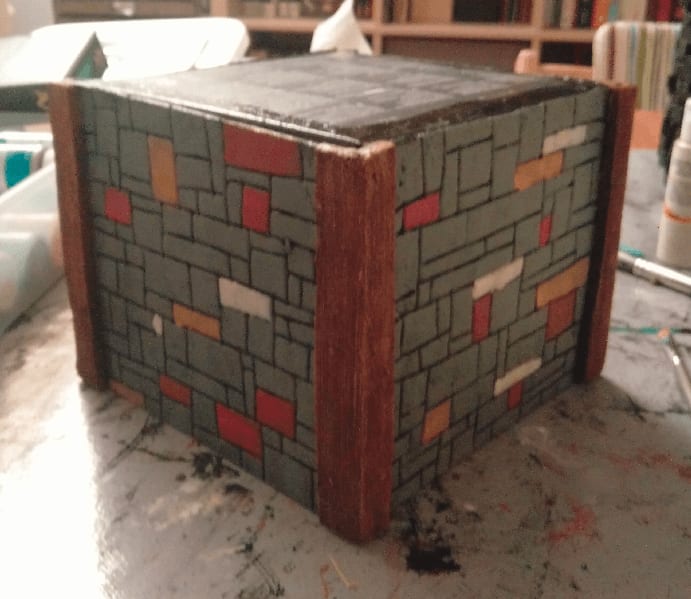
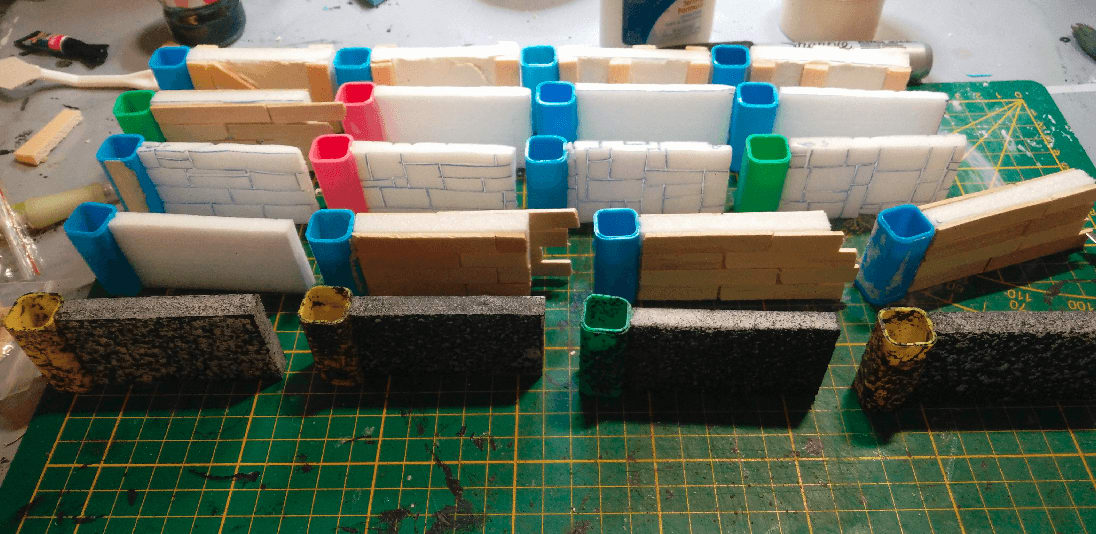
I topped the pillar with some plastic parts from an old board game and painted it black.

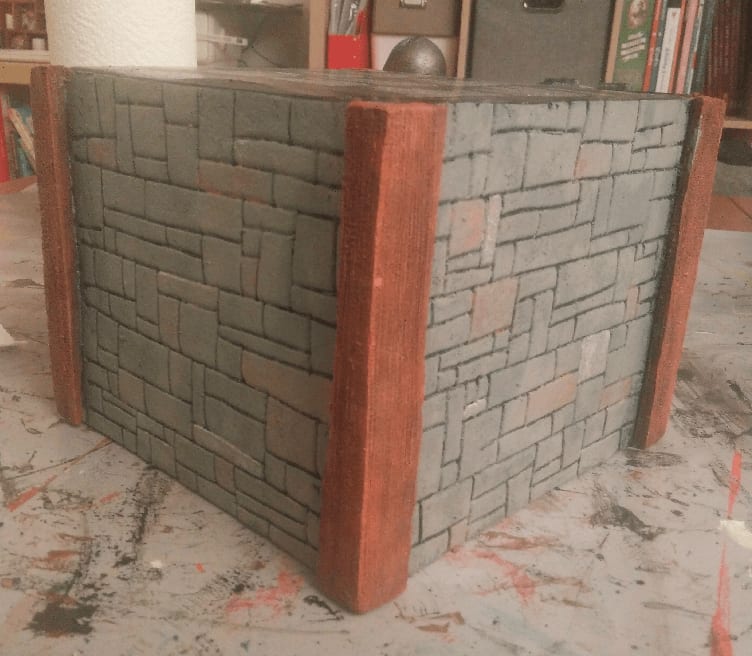
The painting is almost done, all the main colors are blocked, and the drybrush is set.
Now with a wash applied, it looks pretty nice. Overall I'm happy with how this project turned out.
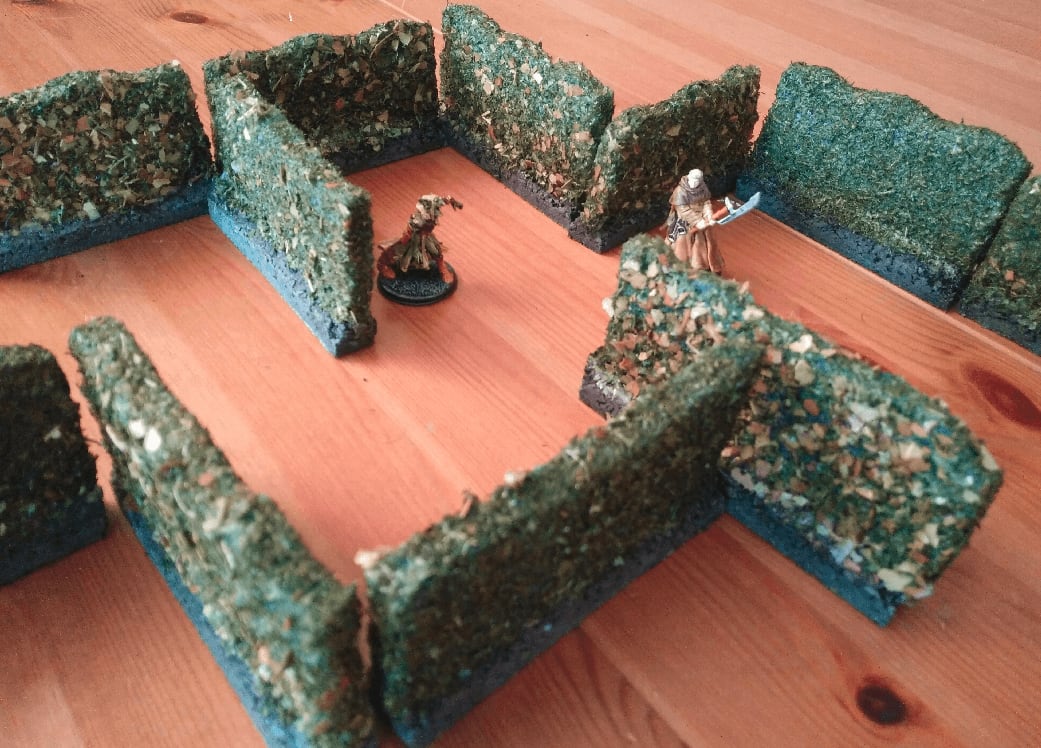
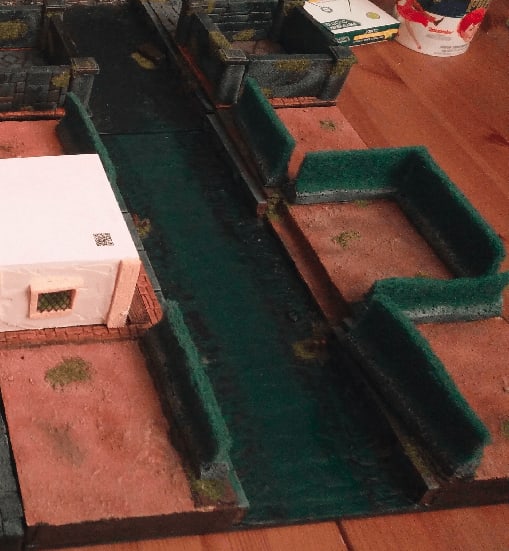
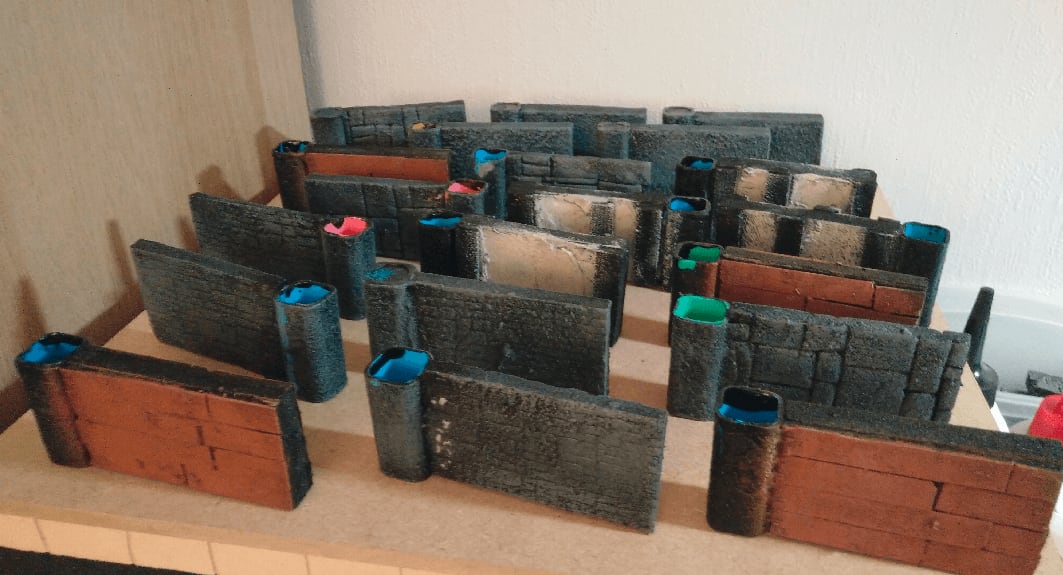
I then added some flocking on it, and you can see how it looks on the Zombicide board. The dimensions are perfect for a houses that span only one tile. For the larger one I had to use pillars I crafted before to fill the gaps.
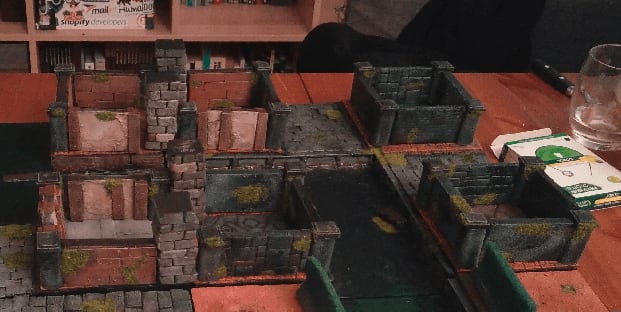
View from the other side. The overall look is great, but the playability not so much. They still are not that stable, and more importantly, they're all individual pieces, they don't clip or stay together.
If I were to redo another batch, I would try to find a way to have them stick together, maybe with magnets, so I could create the shapes, and have them stay in place.
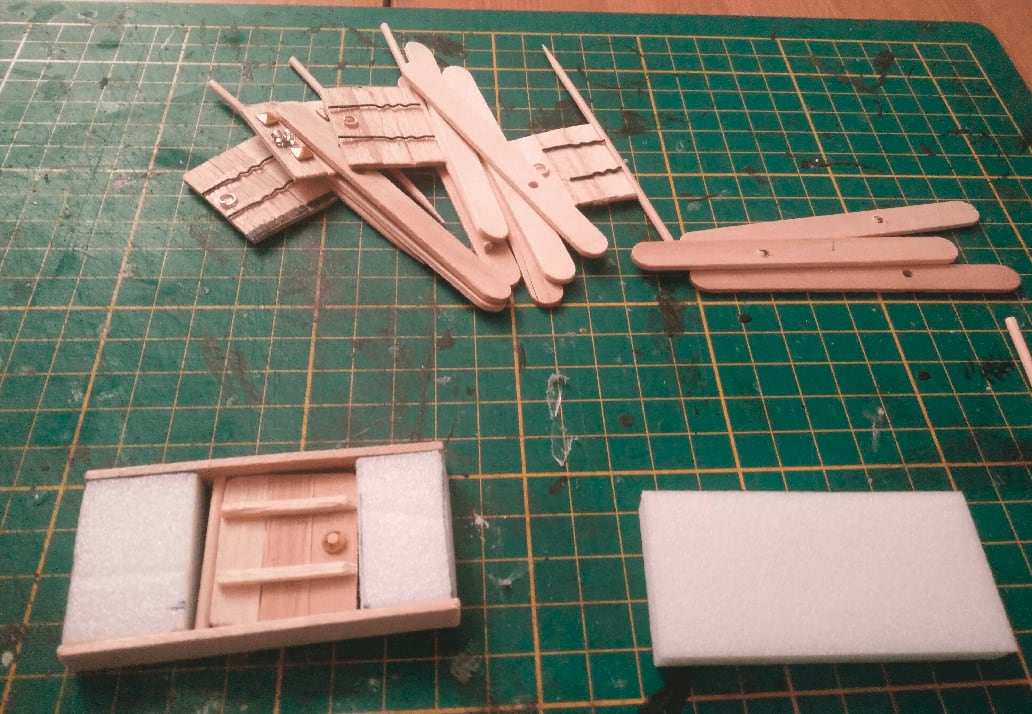
I also tried to make some with (working) doors. Zombicide has a rule mechanism around doors, and it is important to materialize where doors are, and if they are opened or closed.
I kept the same design as a the normal wall, but added an ice cream handle on top and bottom, drilled a small all in it, and used toothpicks or barbecue skewers for the door hinges.
I lost a lot of pictures from the crafting of those doors, because I went through 2 different designs and crafted around 15 total. They look good (enough), but suffer the same issues as the regular walls: not stable enough on the game table.
Thick cardboard houses
I tried to make a few timber houses from cardboard.

It all started with this thick cardboard box I found in the trash. It's easy to find lightweight cardboard; the kind you usually receive packages in. But it also wraps quickly as soon as you apply glue or paint. Thick cardboard is much better for crafting, but harder to find.
I cut four strips in it, that would be the walls of my house.
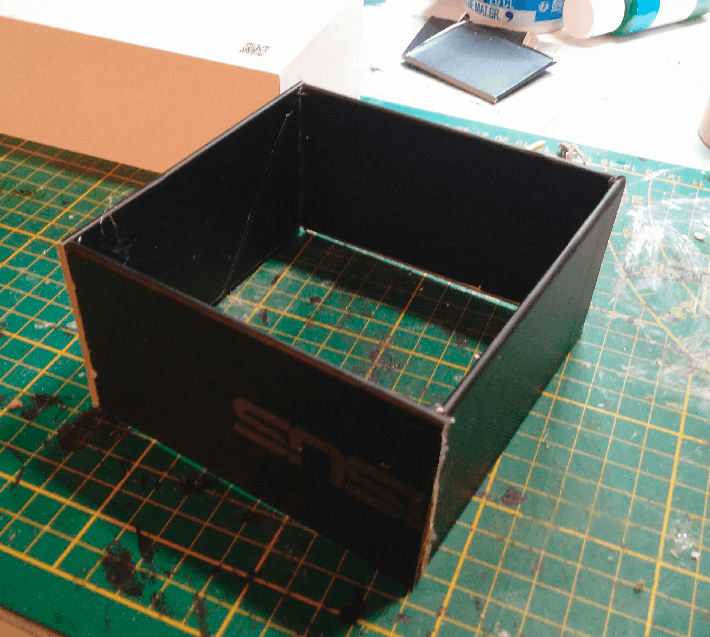
Gluing them together with hot glue for the generic frame.
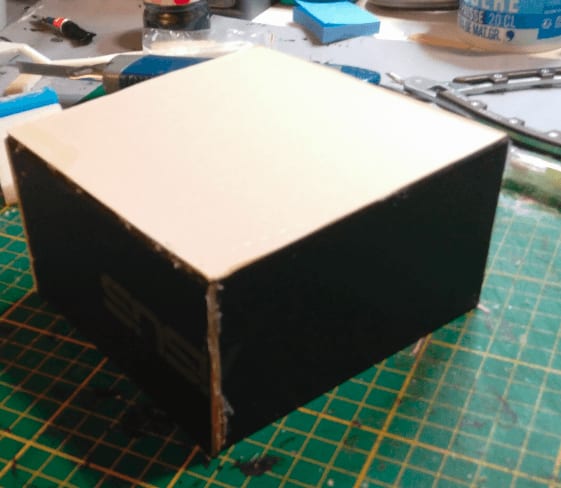
Then glued lighter cardboard on the roof. I used the current construction as a template to cut the roof to shape.
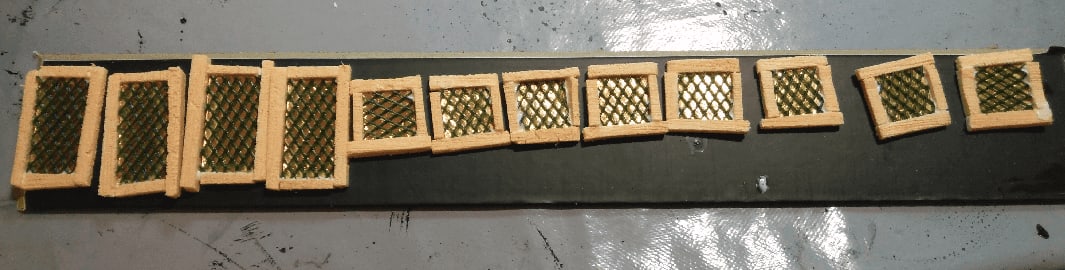
I made a bunch of windows from foam strips, golden cardboard and gardening mesh.
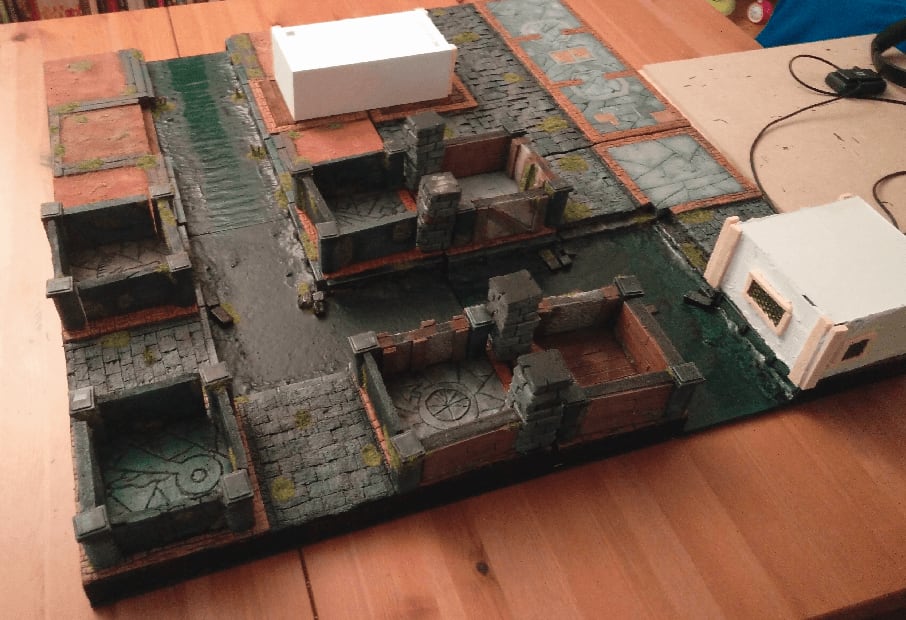
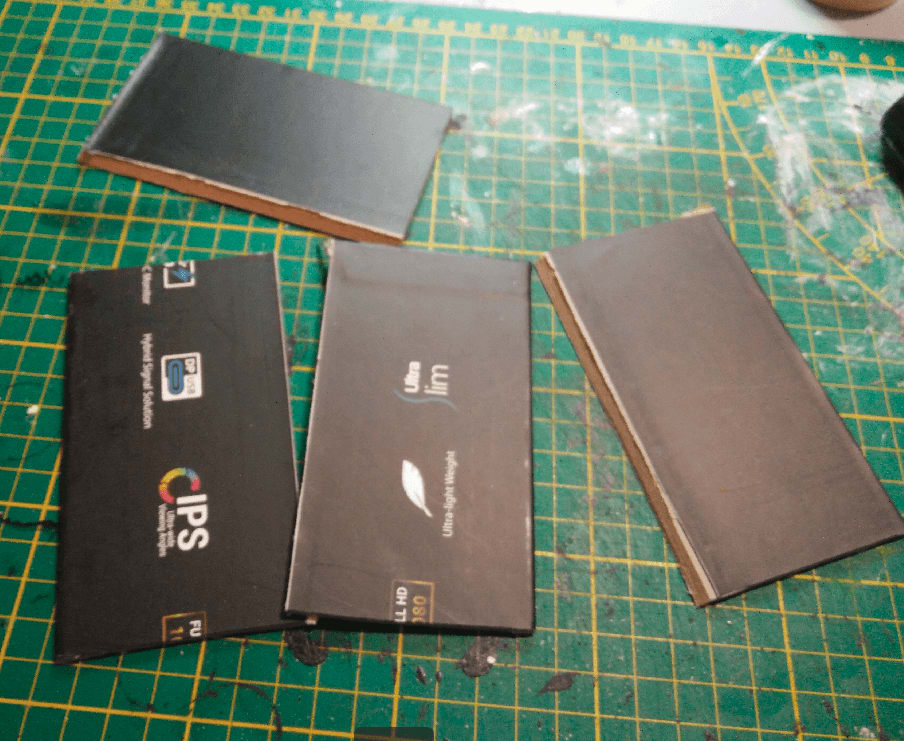
I also started working on a second house, from an old phone cardboard box. I wanted to have them in dimensions roughly compatible with the Zombicide board I was working on.
Same, but with a different angle. The dimensions are not quite right, but it's also because my Zombicide board itself does not have perfect dimensions.
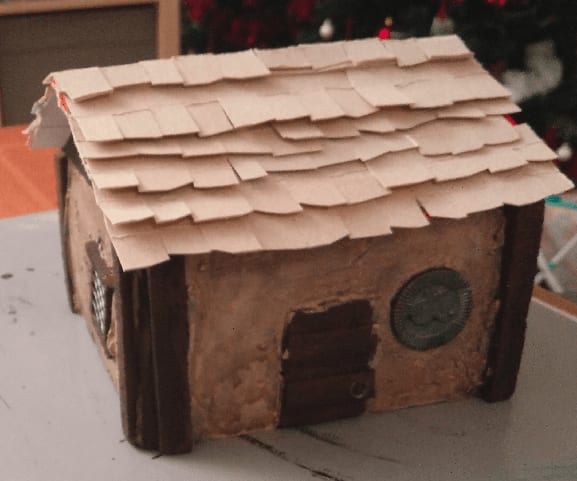
And then, it magically had a roof, timber frame, doors and windows. Well, it seems that I actually forgot to take pictures of the whole process in between.
Let's just say the timber is foam textured with a metal brush, doors are coffee stirrers, the roof is cardboard and the walls are plastered with filling paste.
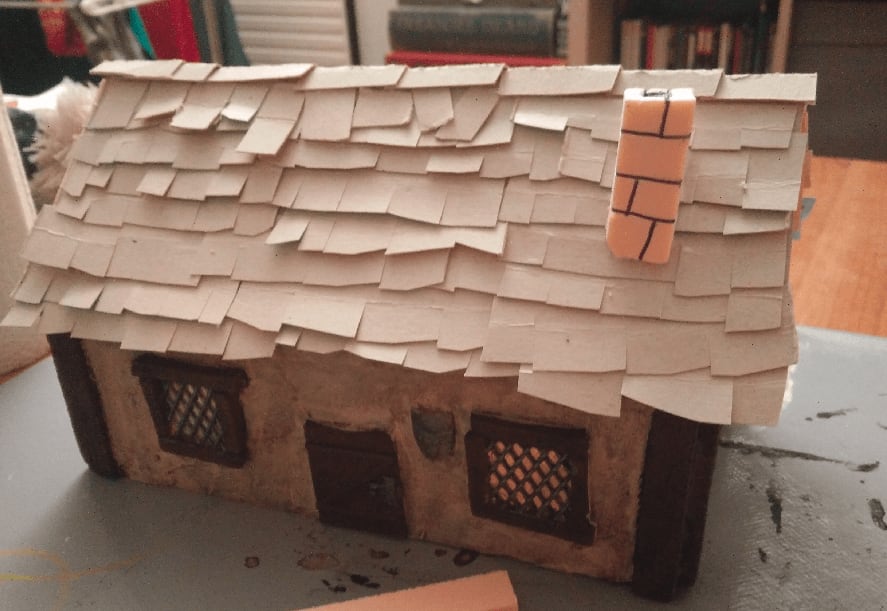
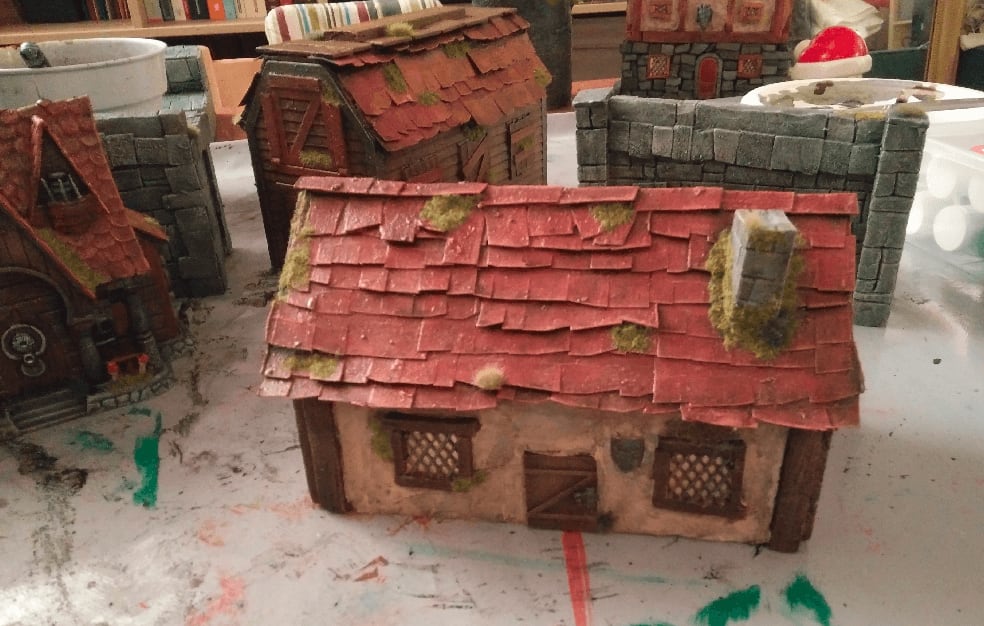
On the long house, I also added a foam chimney, glued directly on top of the shingles.
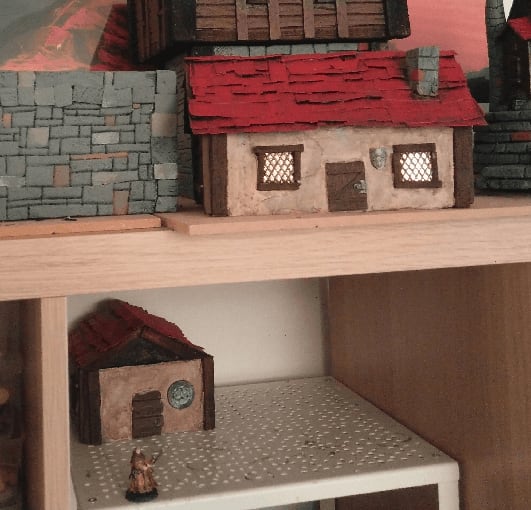
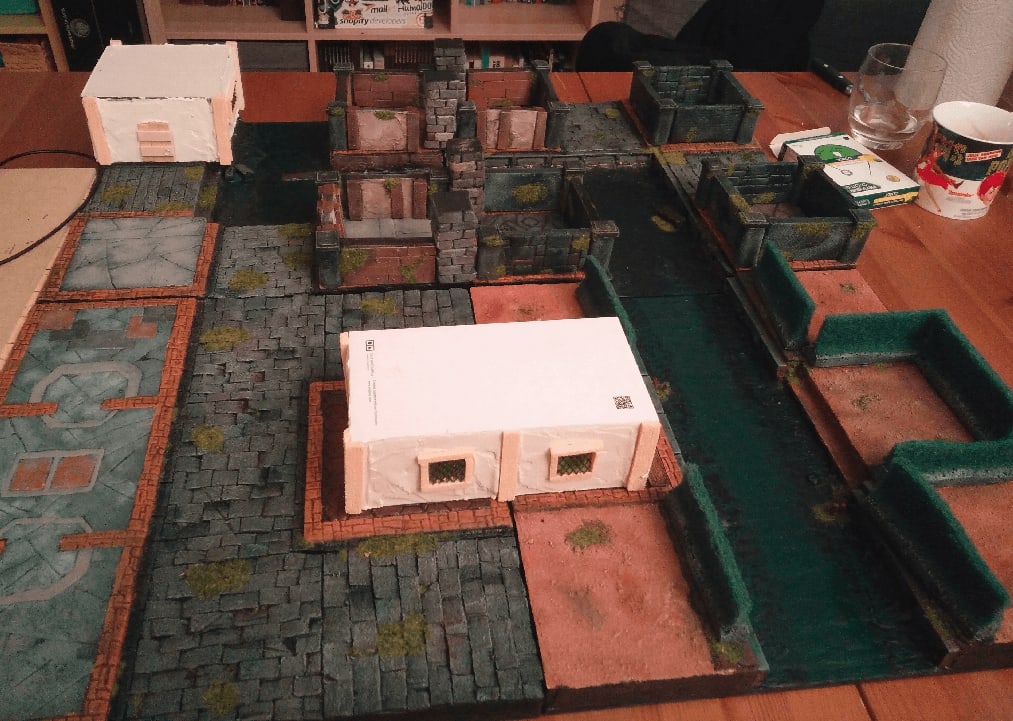
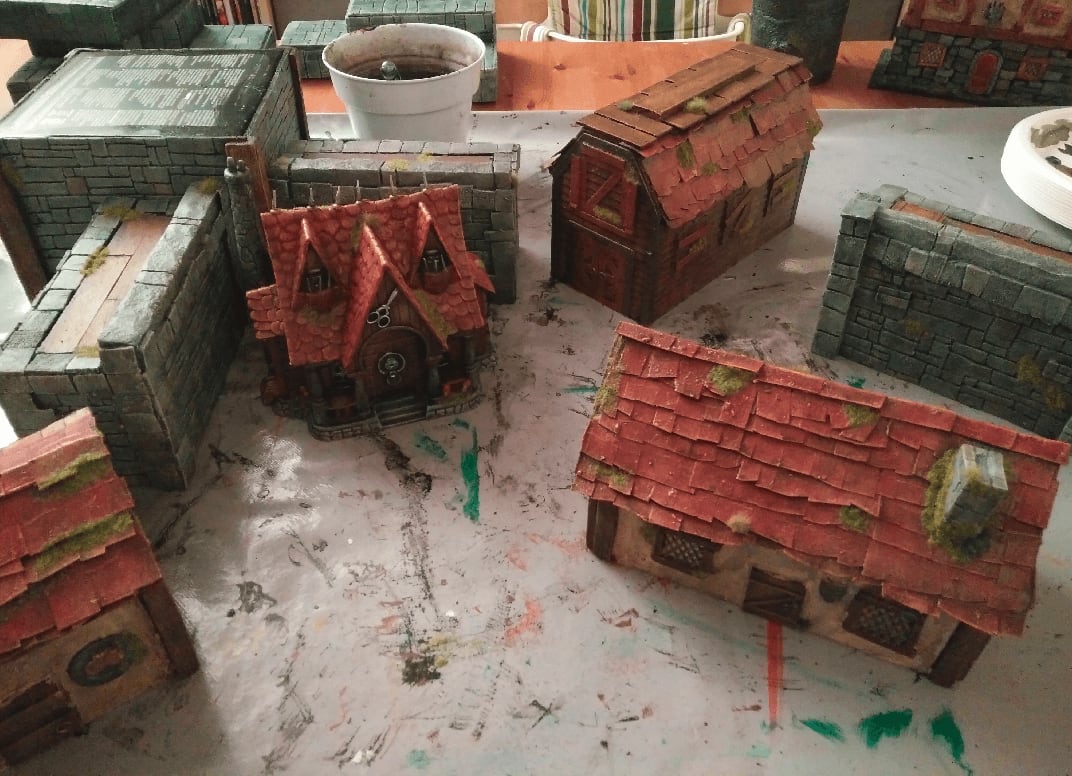
I don't have many pictures of the house by itself, so this are group shot with other projects I was working on at that time.
This is a better shot at the long house, once the flocking was added. I only had one flocking color at the time, but it already greatly enhance the model.
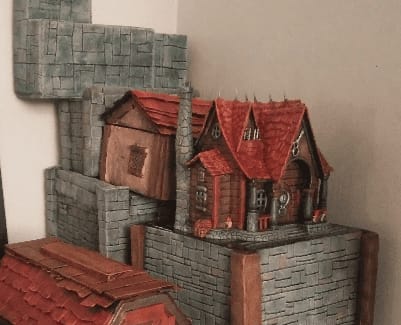
Another group shot, just for fun.