Heap of clothing
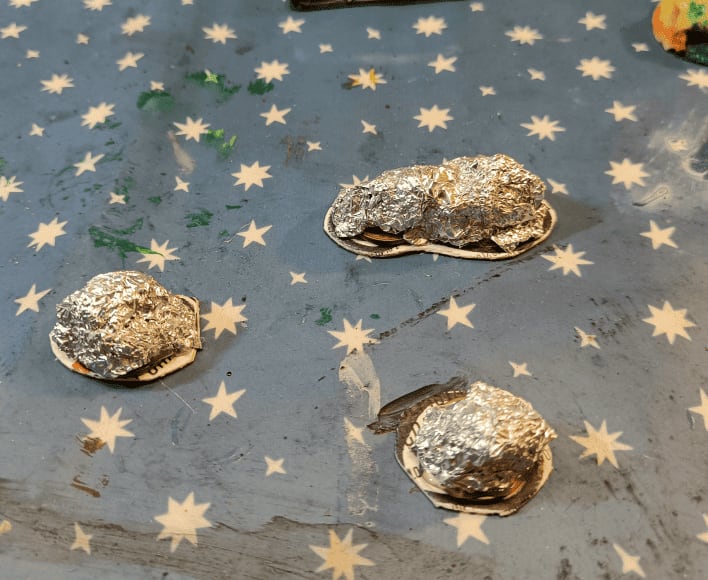
Another scatter terrain for the asylum scenario. Players start in an old laundry room where staff used to wash everyone's clothes. I needed to create some piles of laundry for the scene, so here's what I did: I glued crumpled aluminum foil onto cardboard bases to give it some volume and height. Next step is to add material on top that actually looks like clothing to finish it off.
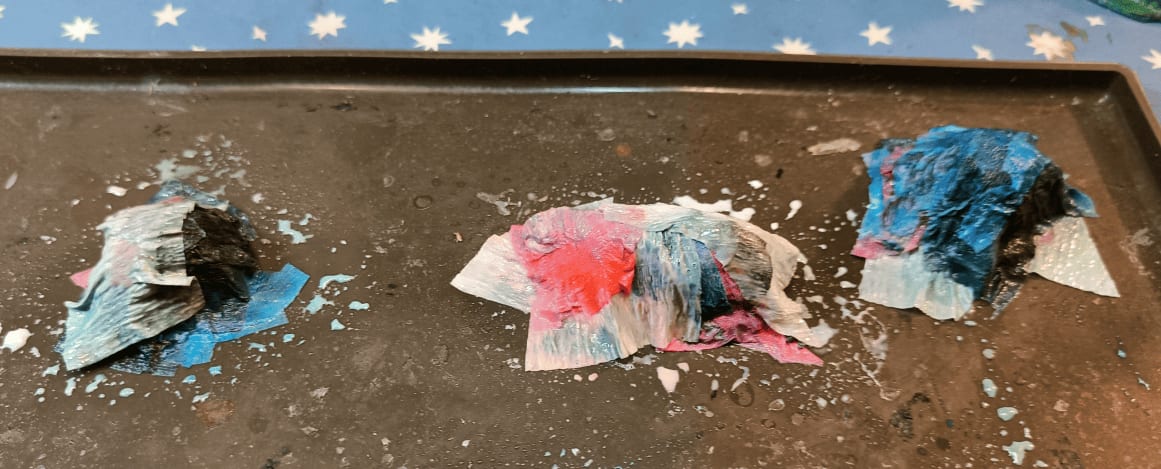
I cut pieces of crepe paper in different colors and glued them onto the main form with a hot glue gun. The issue was that crepe paper is pretty stiff, so I sprayed a water and PVA glue mixture on them to make the paper conform better to the aluminum shape underneath.
The downside is that all the colors completely discolored and bled into each other, creating a big mixed mess of colors. So looking back, cutting different colored sheets wasn't really worth the effort since they all blended together anyway.
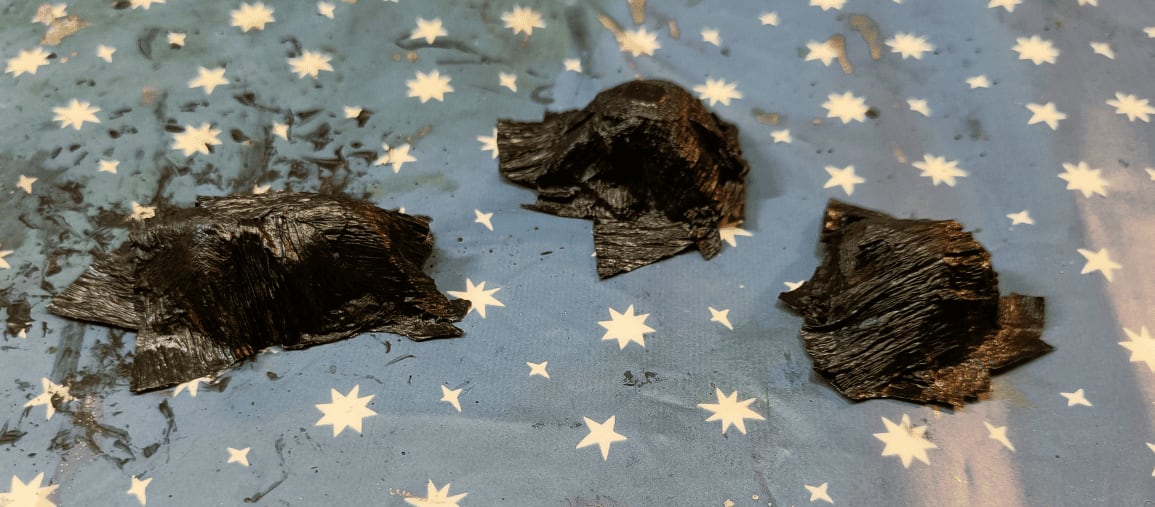
This is even more true since the next step is to cover everything with black modpodge, so my choice of different colors at the start was completely pointless.
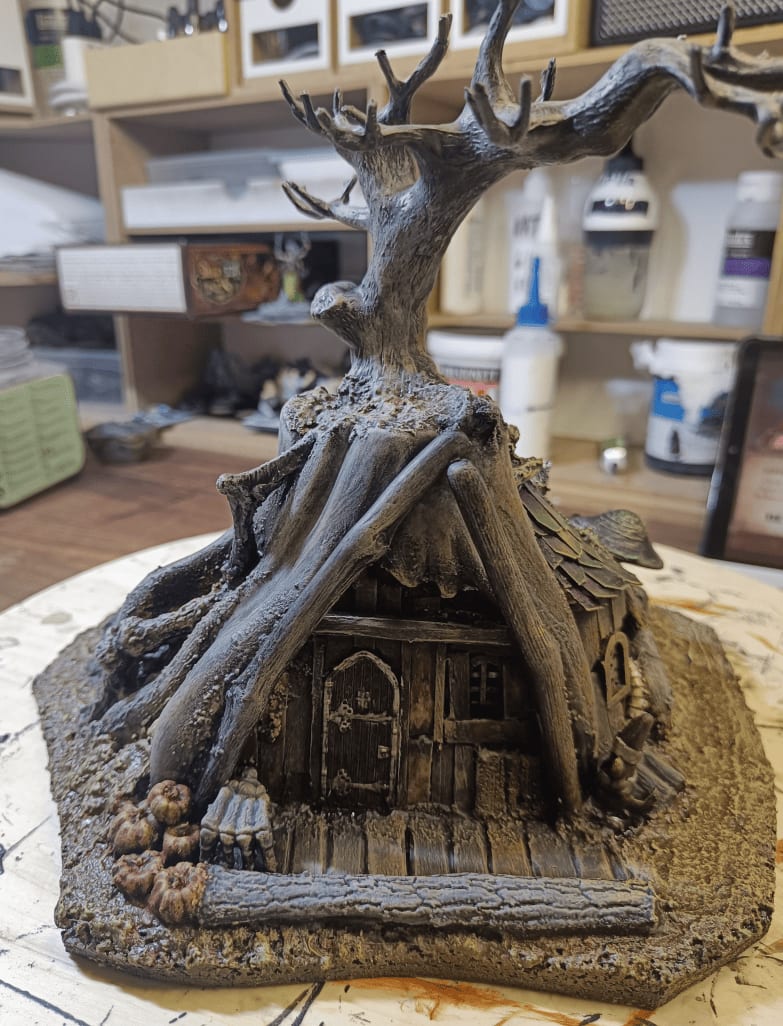
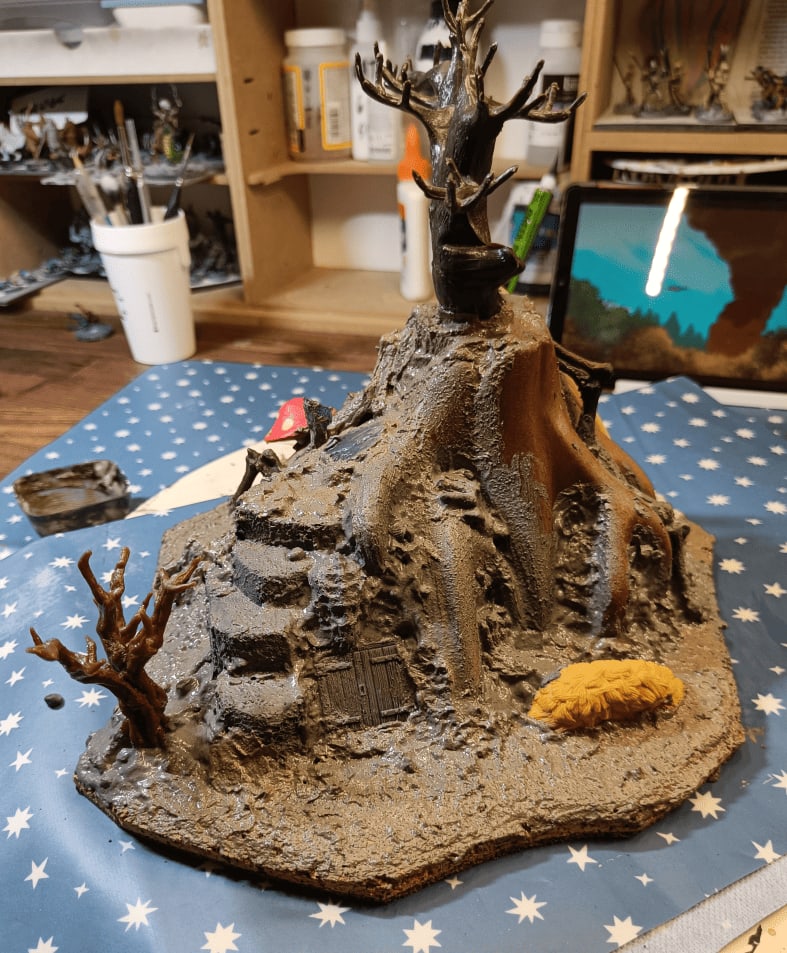
Witch Hut
I think it's time I documented this build. I started it two years ago and it's been sitting on my shelf ever since - still not finished.
I know I'll finish it one day though! I've learned some new techniques since then. I think it needs some flocking and a bit of color to break things up. Then it'll finally be something interesting to look at.
Right now it's not completely finished, but I still think it's worth documenting how I got to this stage.
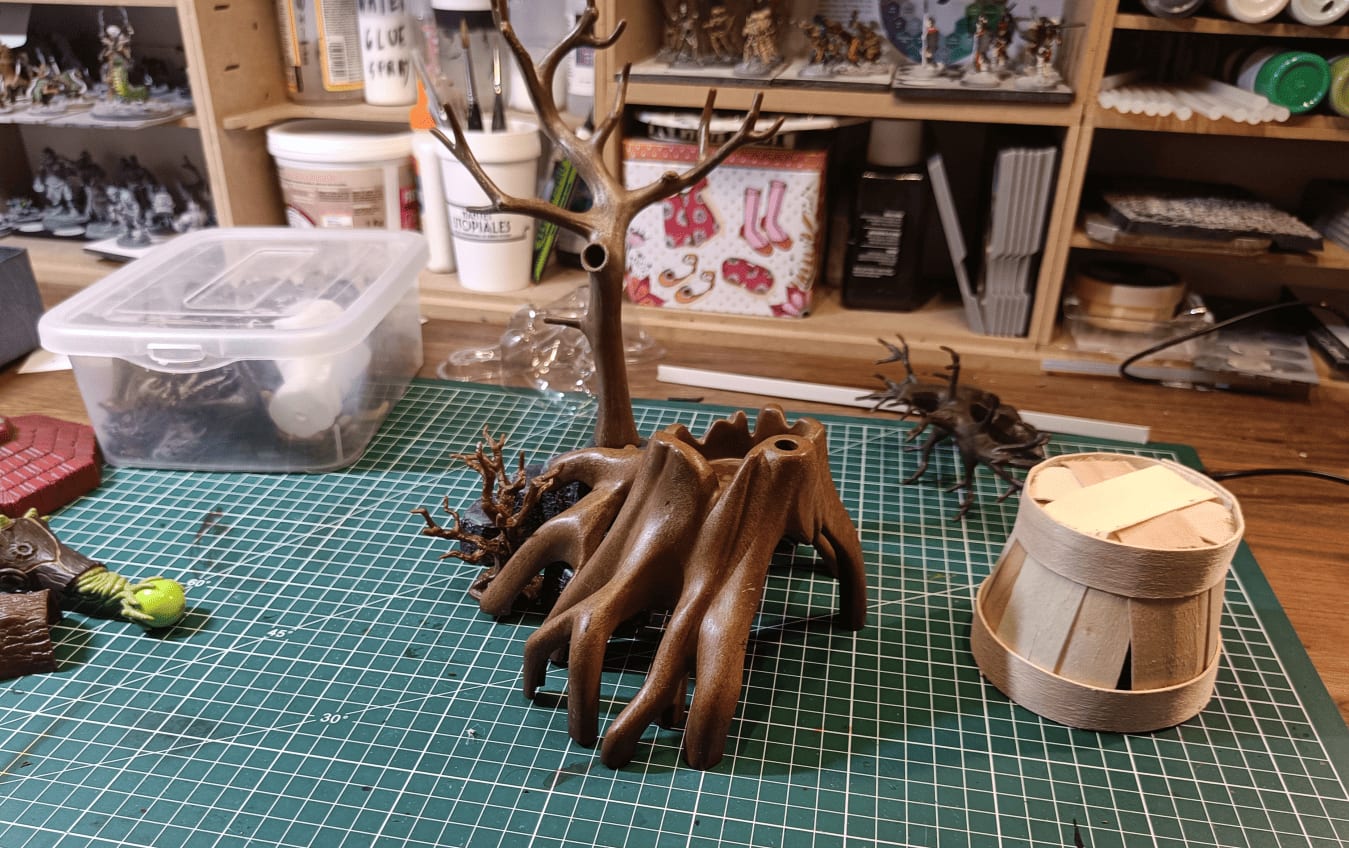
So that's where it all starts - at the very base. I can't remember if I bought it myself at a flea market or if it was part of the pieces we got for my daughter that I ended up keeping. But these big knotty roots - I thought there was a way to do something cool with them. Especially with some of the trees.
I also grabbed a fake plastic bonsai from a store's trash. It has this really knotty tree shape and I got it for super cheap.
I started laying things out on a cork board and positioning different elements to try to get the general shape roughly right. Once it seemed correct to me, I drew the final shape on the cork that I needed.

I added quite a few pieces of foil to fill the holes and give some real structure to everything. Glued different pieces together to fill it all in properly.
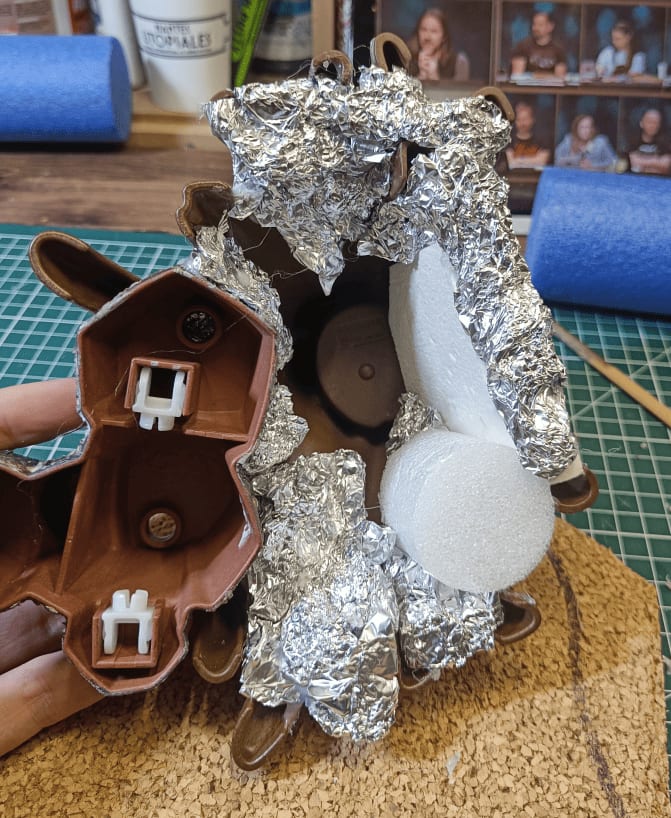
Here's a view from below the build. What's nice is that the Playmobil piece is hollow, so I can really push the aluminum foil inside properly to fill it up as much as possible.
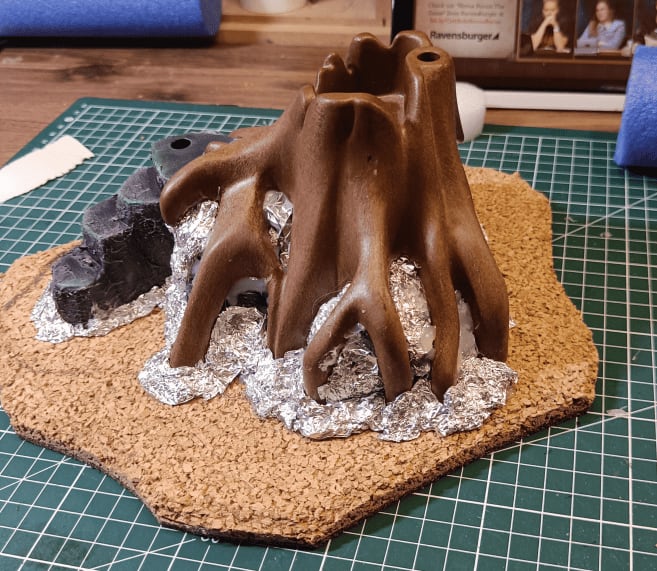
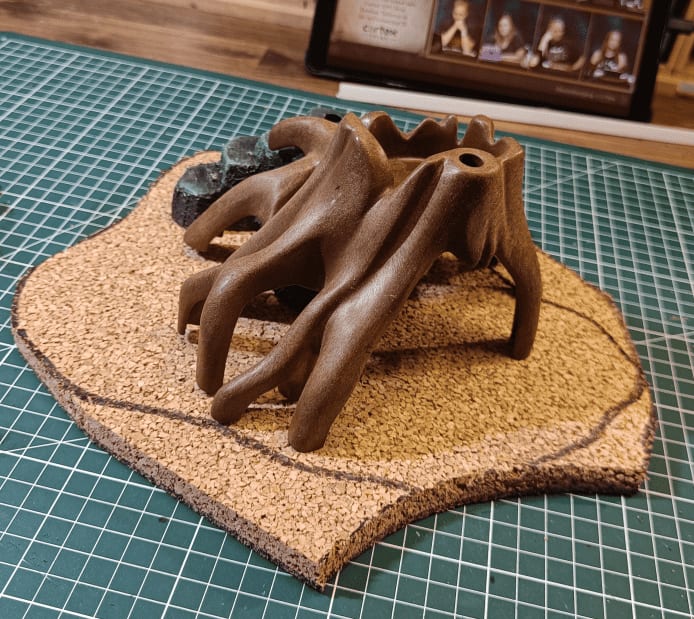
I glued the entire structure onto the cork, then continued adding aluminum foil all around to smooth out the transition between the structure and the ground.
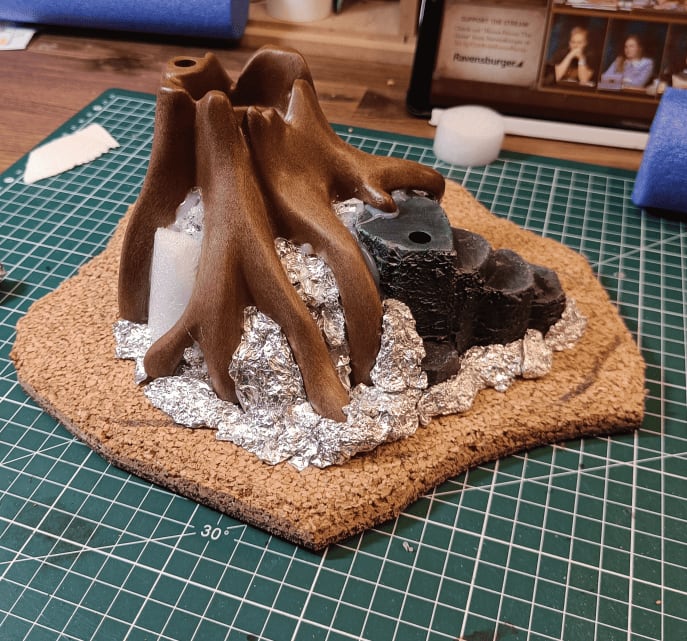
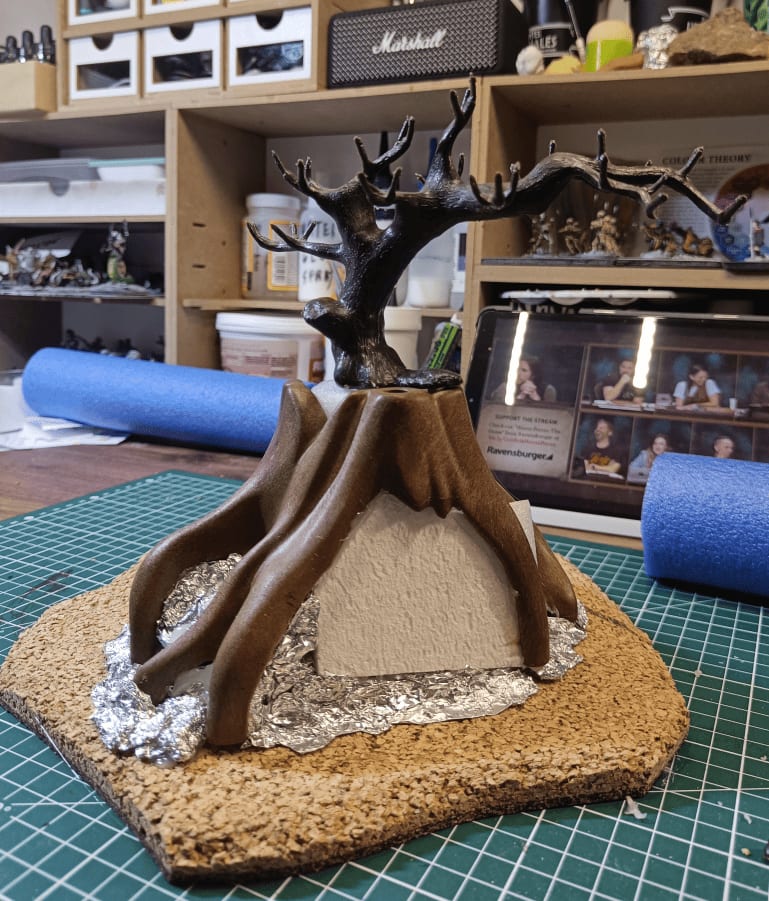
I pushed a large piece of polystyrene into the hollow at the top and added the plastic bonsai I found. It's going to be this super tall tree towering above everything.
Also added a piece of polystyrene standing upright on the facade. That's going to be the entrance to the witch's dwelling.
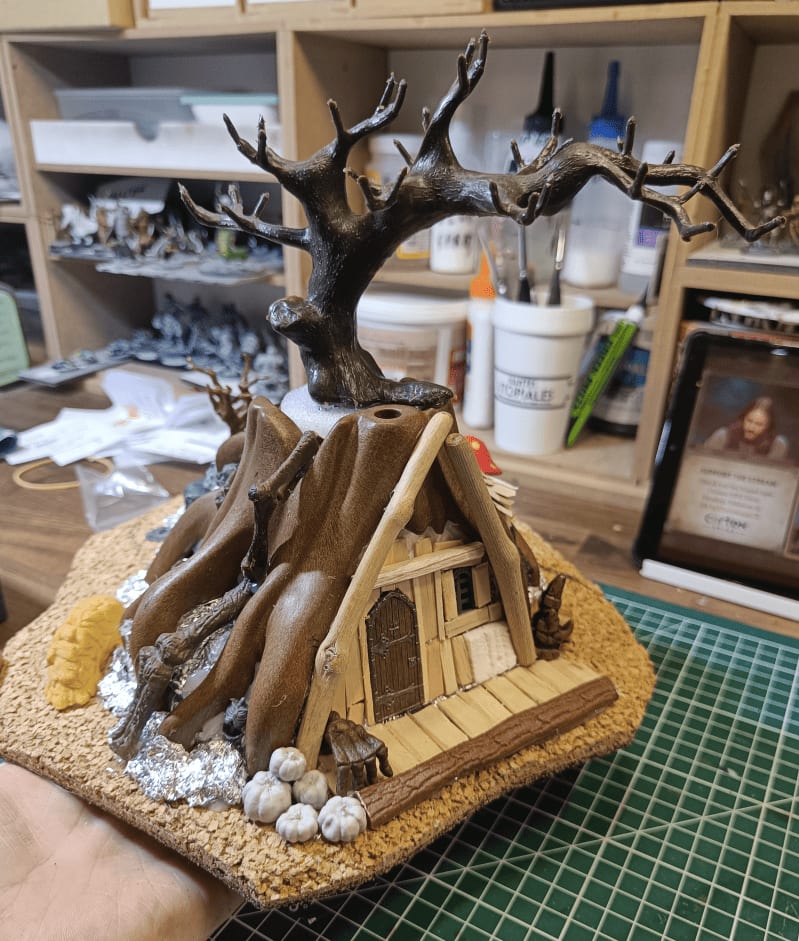
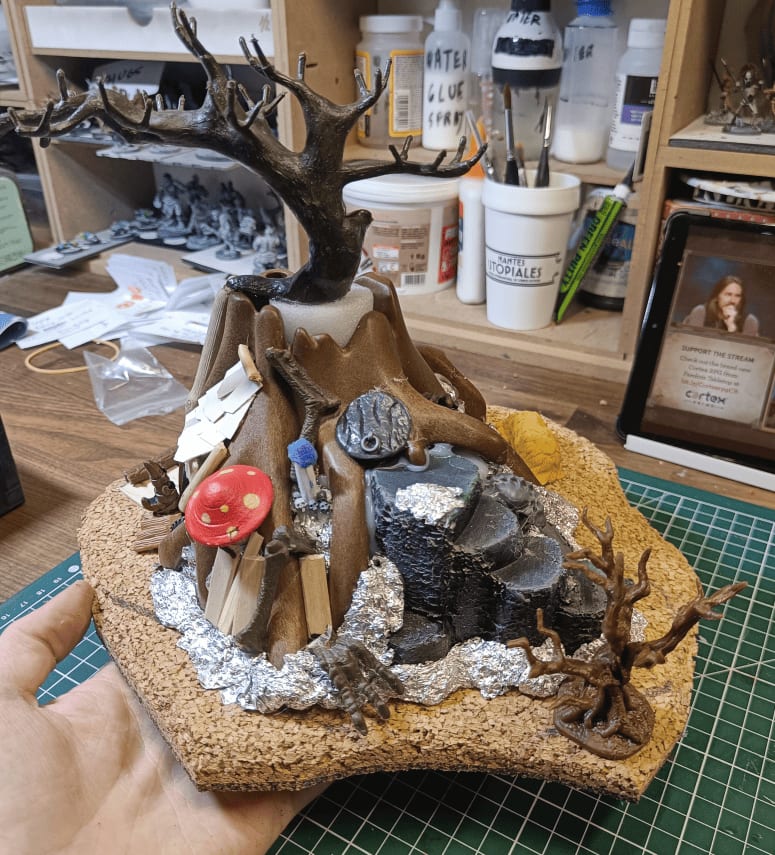
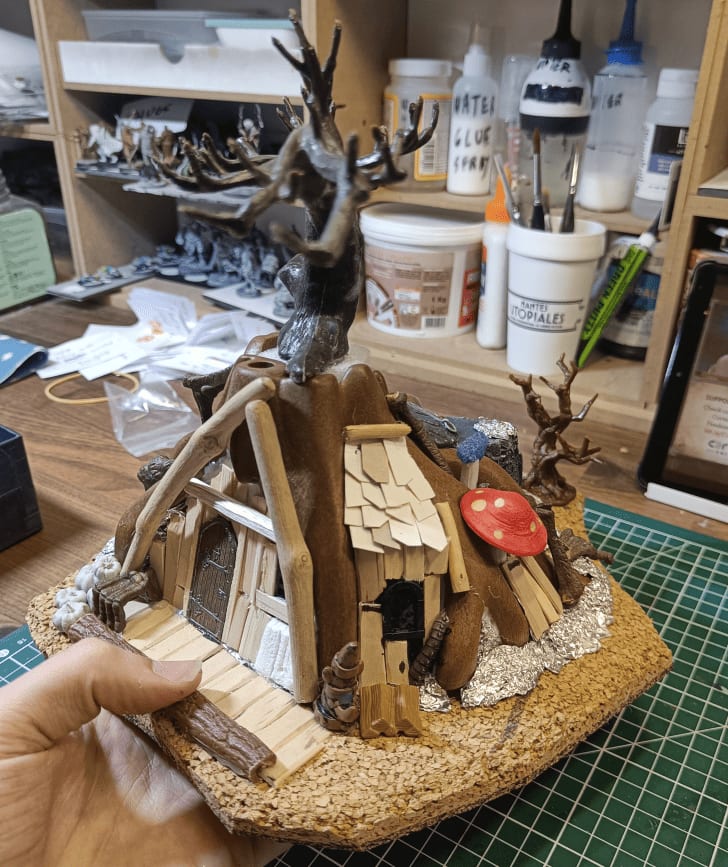
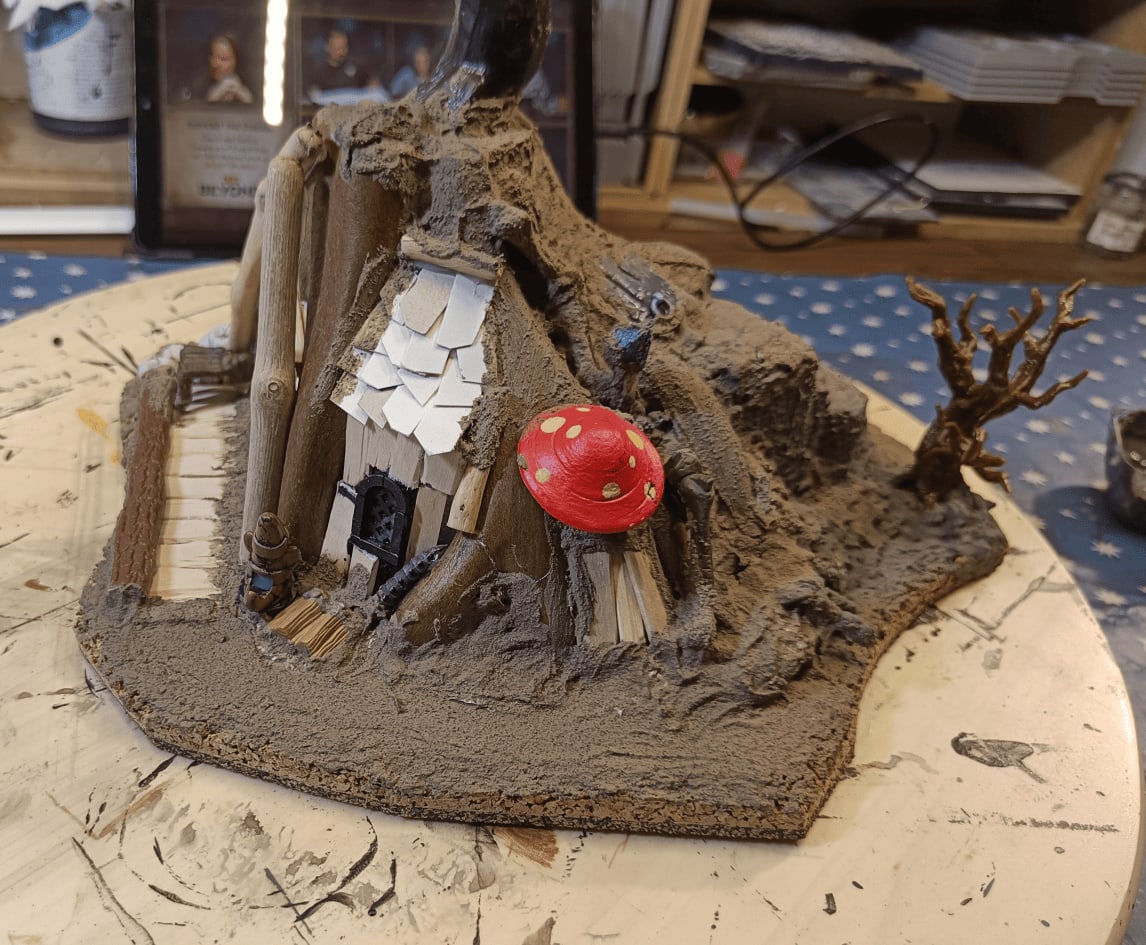
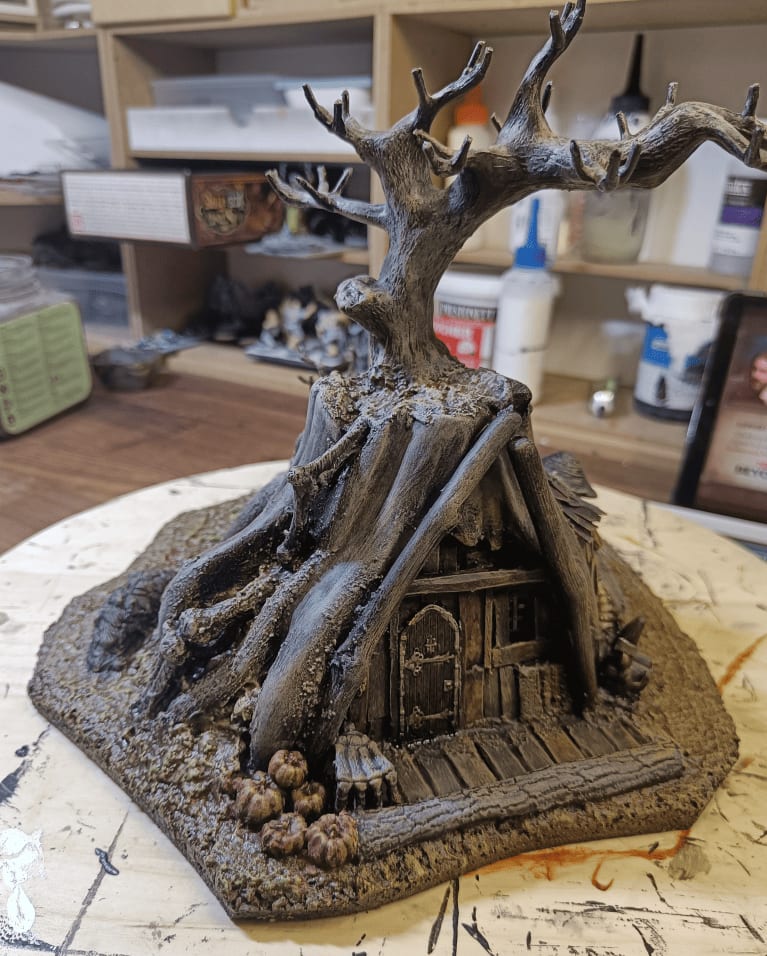
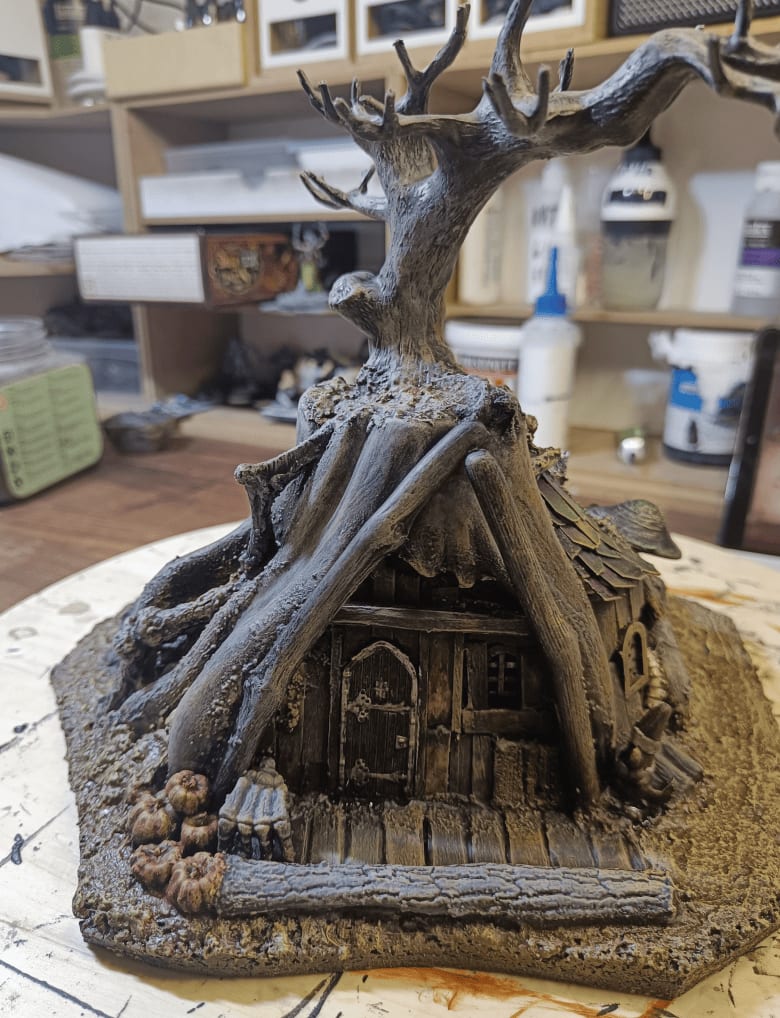
I then added a bunch of details to the build! Started with the facade, glued on a door, then built up the area around it with different sized planks. Used matches, coffee stirrers, and popsicle stick pieces. For the triangle around the entrance, I went with larger sticks I found outside.
Added lots of little touches throughout. One cool idea I had was using plastic bones from an old dinosaur model kit and placing them around the piece. Once painted, they should blend in with the roots to create this roots-and-bones vibe.
Put a trapdoor in the back for another entry point, added some small stairs going up the tree, threw in some mushrooms, and made a little tiled roof. Scattered more details here and there.
Next step is to unify everything with paint!
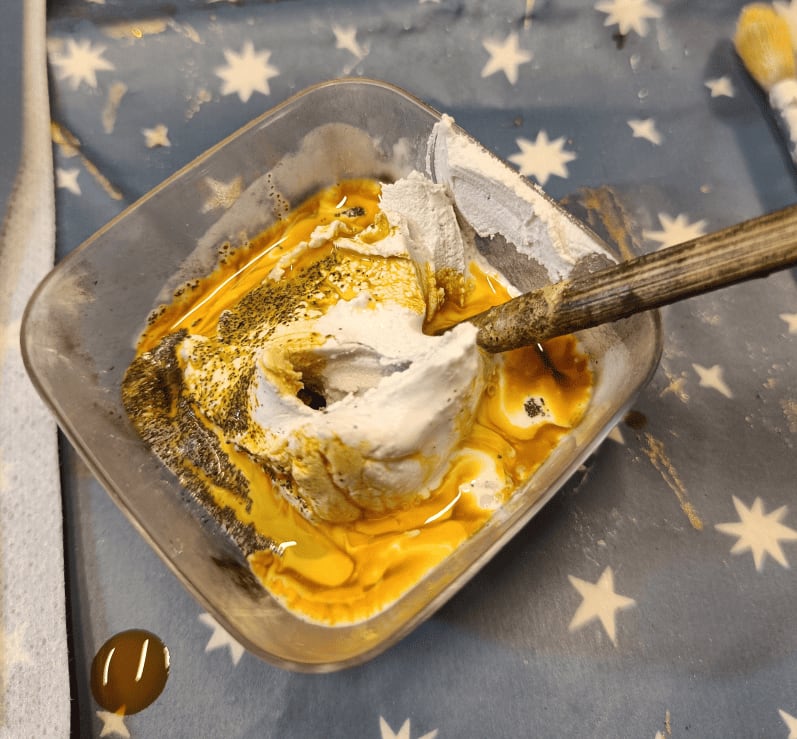
I made a filler paste mixture with a bit of sand to give it some grittiness. Added a little brown ink to it as well - helps me see where I've applied it properly, and if I miss a spot it won't be as noticeable as white would be.
I applied it pretty much everywhere to get better adhesion between all the different parts. It helps bring out the cork grain more clearly, fully covers the aluminum, and gives a more uniform look to all the pieces I glued together.
Once it was dry, I applied a second coat to the areas that needed a bit more coverage.
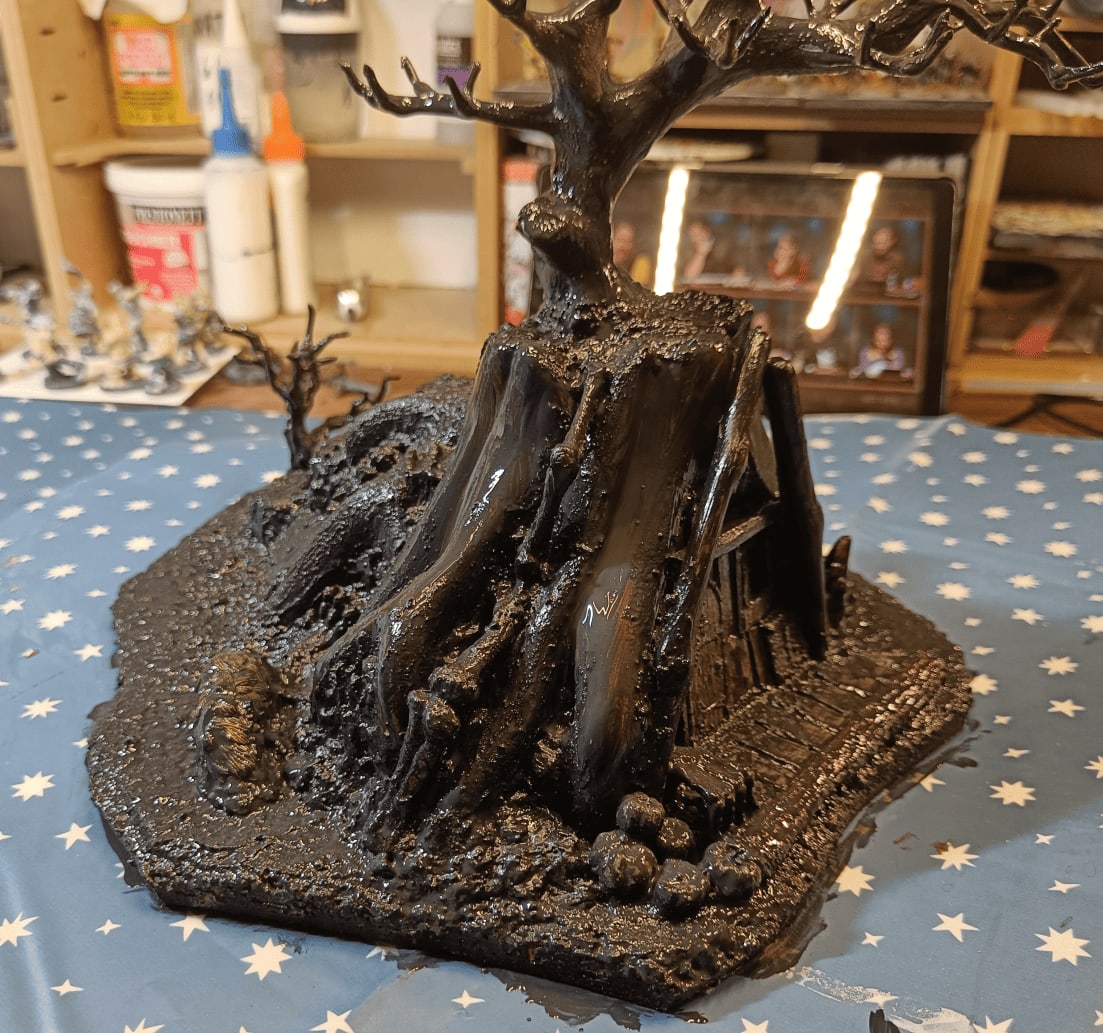
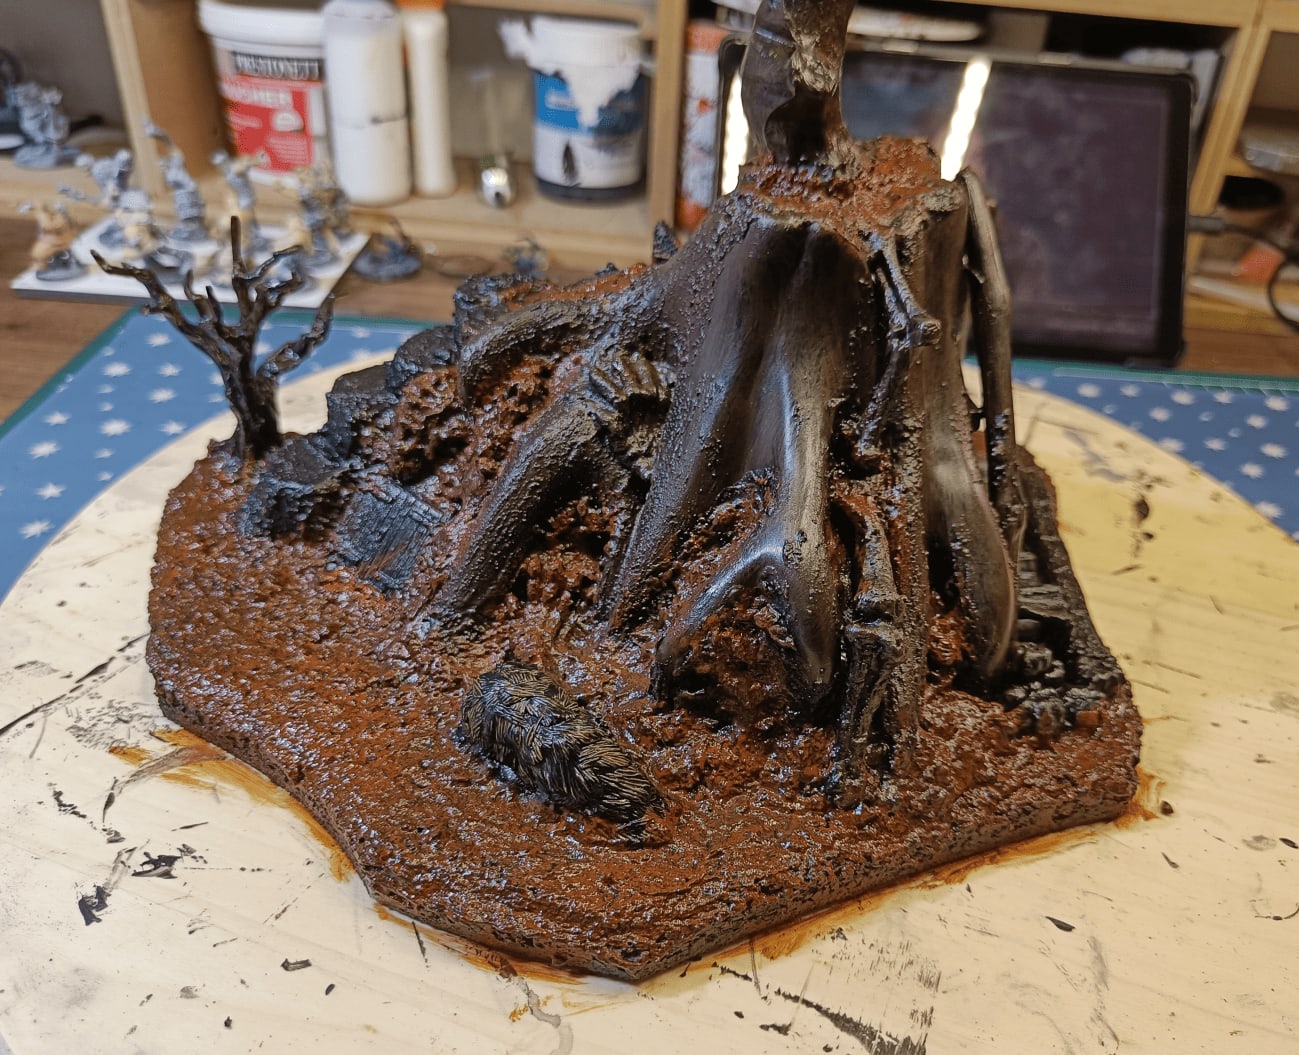

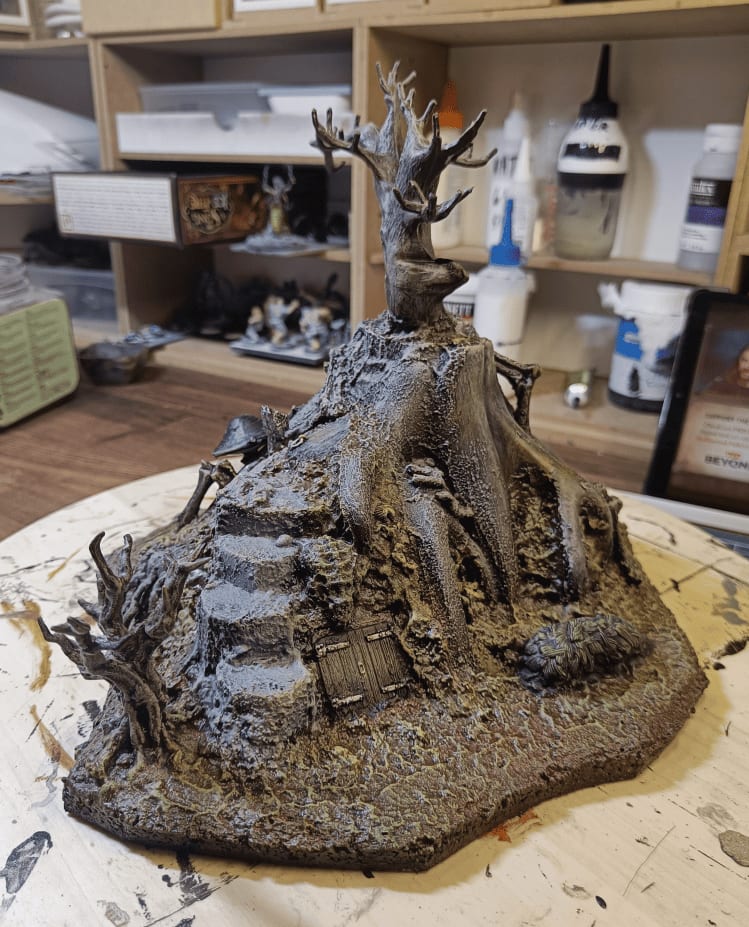
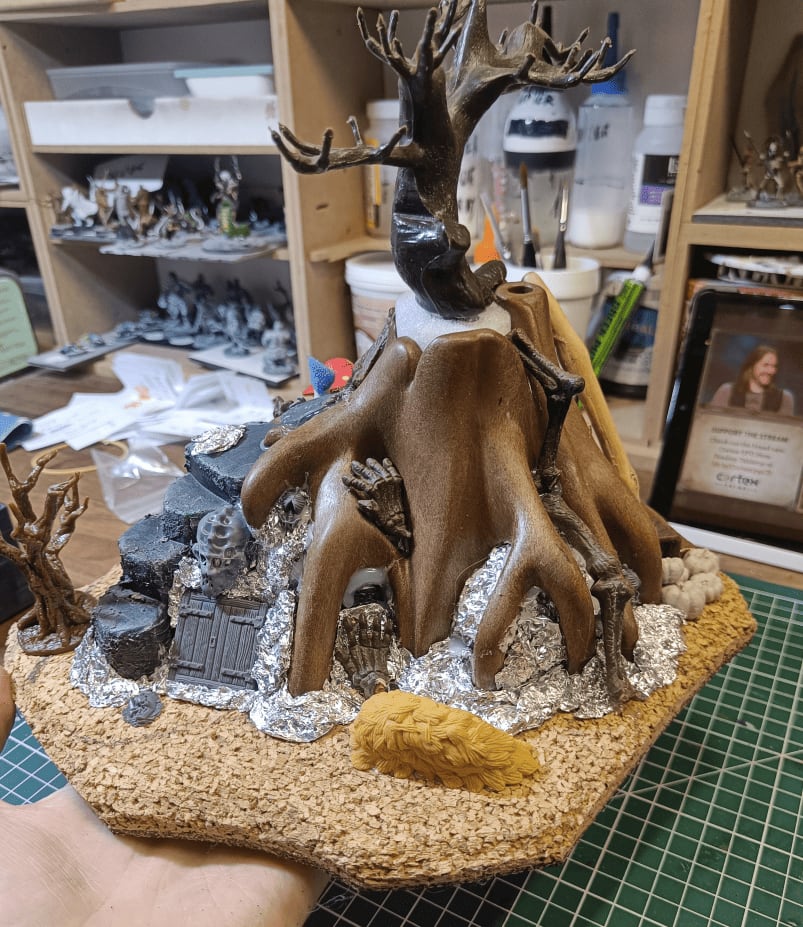
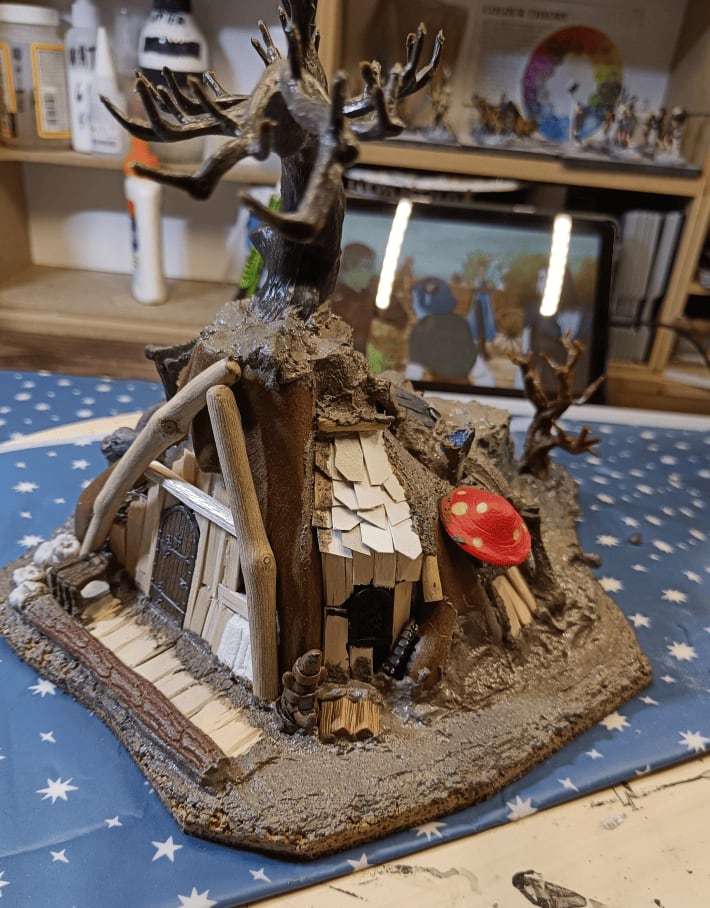
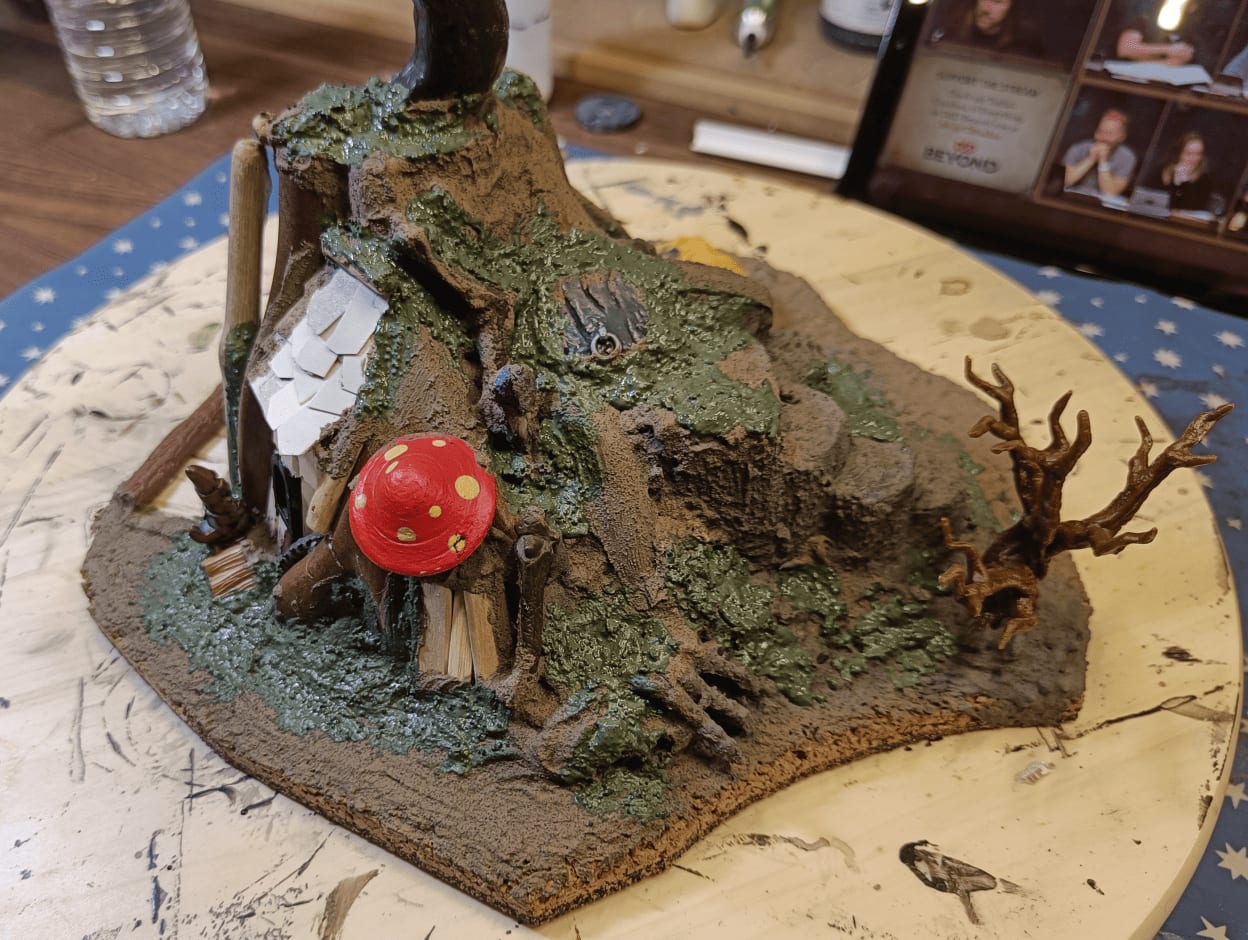
So I moved on to painting. First I covered everything in black to make the different pieces easier to paint later. Then I started blocking in all the brown earth sections, the tree itself in another color, and anything that needed to be lighter in white for now. I also did some dry brushing on the stone exterior.
But honestly, this is where I kind of lost motivation for the project. While I had a super clear vision for the structure and I was really excited about this witch's house nestled in the roots of a giant tree, I didn't really have a plan for the colors. Everything is dark, swampy, and just ends up being brown and grey. I tried adding color with the mushrooms, roof, and pumpkins, but it's not enough.
When I get back to painting this, I think I need certain elements to really pop color-wise. The pumpkins definitely need to stand out. The bone pieces probably should too. Maybe the mushrooms as well. And I'll need to add some interesting flocking.
I'm also unsure about the tree itself. Should I add Spanish moss hanging down? A rope? It already has this nice abandoned look going for it, but I'm not sure how to paint it exactly. That's where I'm kind of stuck on what to do next.
Wall of Fire
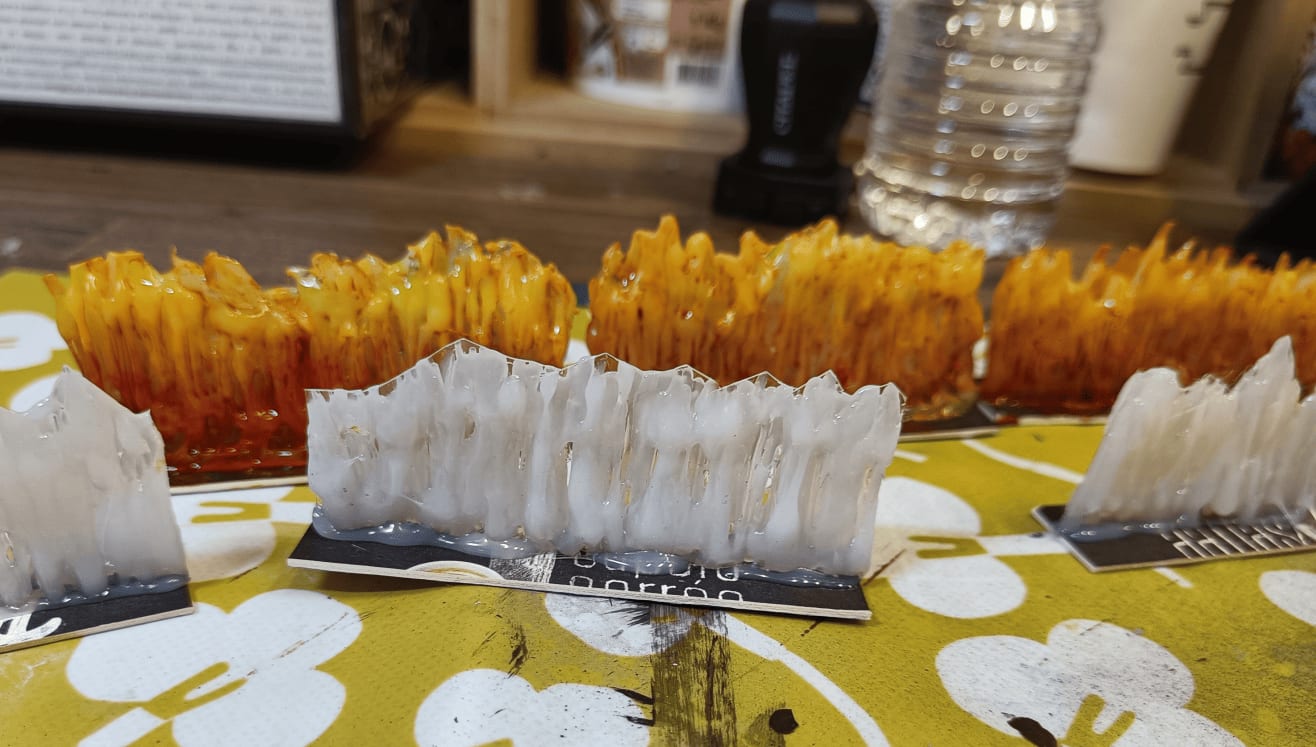
Quick post to document how I made some firewall effects for a scenario I was working on.
I took a sheet of transparent plastic - didn't buy it, just recovered packaging from a blister pack that came with something from a store.
Then I used a hot glue gun to put little flames/lines of glue next to each other on one side. Let it dry, then did the same thing on the other side. Once dry, I cut roughly between the two layers.
Finally, I glued that vertically on a piece of cardboard and done!
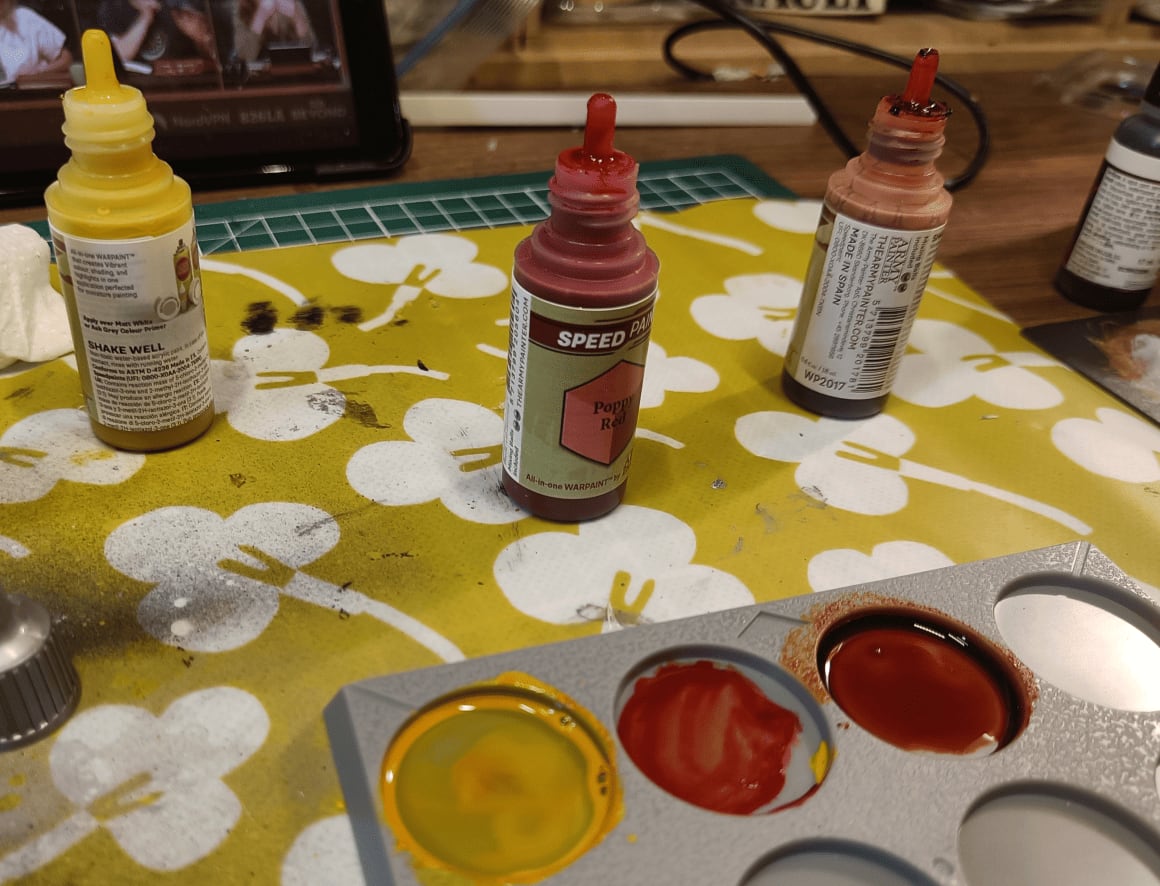
For the painting, I did something really rough. I did it with speed paints because they're quite liquid and seep well into the holes.
I started doing one block at a time. First, I covered absolutely everything from top to bottom in yellow. Then while the paint was still wet, I covered the bottom two-thirds in orange, mixing it vaguely so you can still see some yellow showing through.
After that, I took red and only did the bottom third with it. Same approach - not really mixing, just painting poorly over it. The idea is that you can see the successive layers of orange, yellow and red.
I think at the very end, I even added a little bit of black on the extremities at the top.
Ma' Graul

There is an amazing scenario in Rise of the Runelords, in the Hook Mountain Massacre book. Players have to rescue some rangers who've been captured by a family of hill giants (or maybe ogres, I can't quite remember) led by a matriarch. The whole family is hilariously dumb, but also morbidly grim, which makes for such a fun atmosphere.
I've never managed to get my players far enough in this adventure path to actually run this encounter, but I really want to use it somehow. I'm thinking of dropping it into another campaign.
To prep for that, I wanted to create a full roster of all the members of the Graul family that appear in that scenario. So I dug through my collection of ogre and hill giant miniatures to see what I have available to represent the whole family.
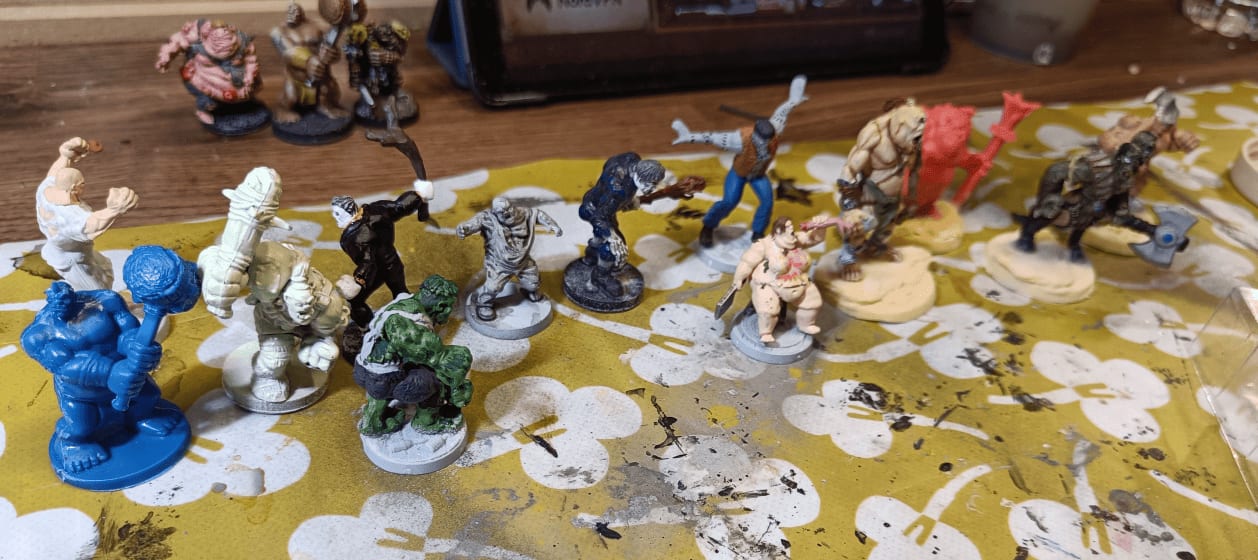
The first figurine you see at the top is a Heroclix figurine with its arms raised in the air. I believe it's supposed to represent a brute that escaped from psychiatric ward. The second one in blue is an ogre figurine that comes from the World of Warcraft board game.
The next three minis also come from Heroclix. The pale green one is from their fantasy range with the somewhat deformed characters. The one carrying a piece of wood comes from their horror range. And the big green one is obviously Hulk.
The gray one is a zombie from some board game similar to Zombicide, but not actually Zombicide. The next one holding a staff is a Frankenstein-type figure from the Heroclix Horror range. The one behind with arms outstretched, looking like it's about to fly, is also a Frankenstein from Heroclix, though I can't remember which specific range.
The obese figurine sitting down eating an arm with a cleaver in hand comes from the Heroclix Horror range. It's the perfect representation of the matriarch of the group.
The Cyclops behind her is a plastic toy, that one can buy in regular toy shop. The red one is also coming from a board game, but I can't remember the name (I have other such miniatures, in other colors).
Finally, the green double headed thing is coming from Heroclix as well. And the one at the very far end is probably worth a fortune as it's a metal miniature of Thrudd the Barbarian, a very early (1982, I wasn't even born!) Games Workshop mini.
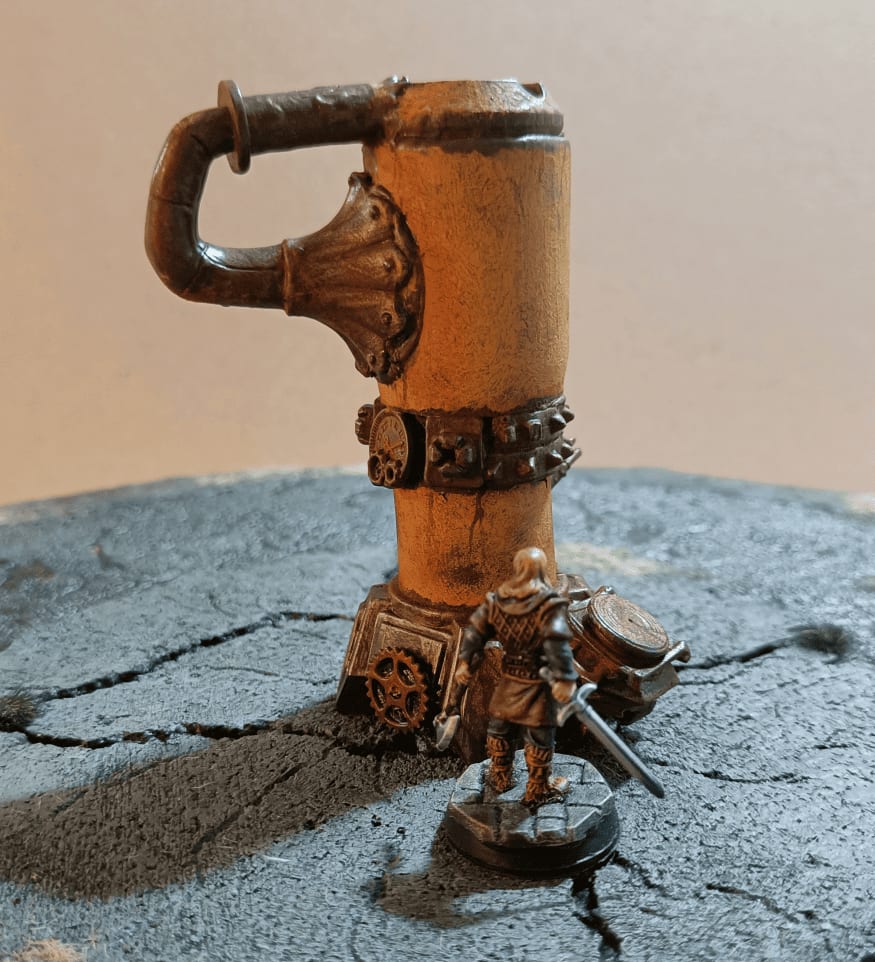
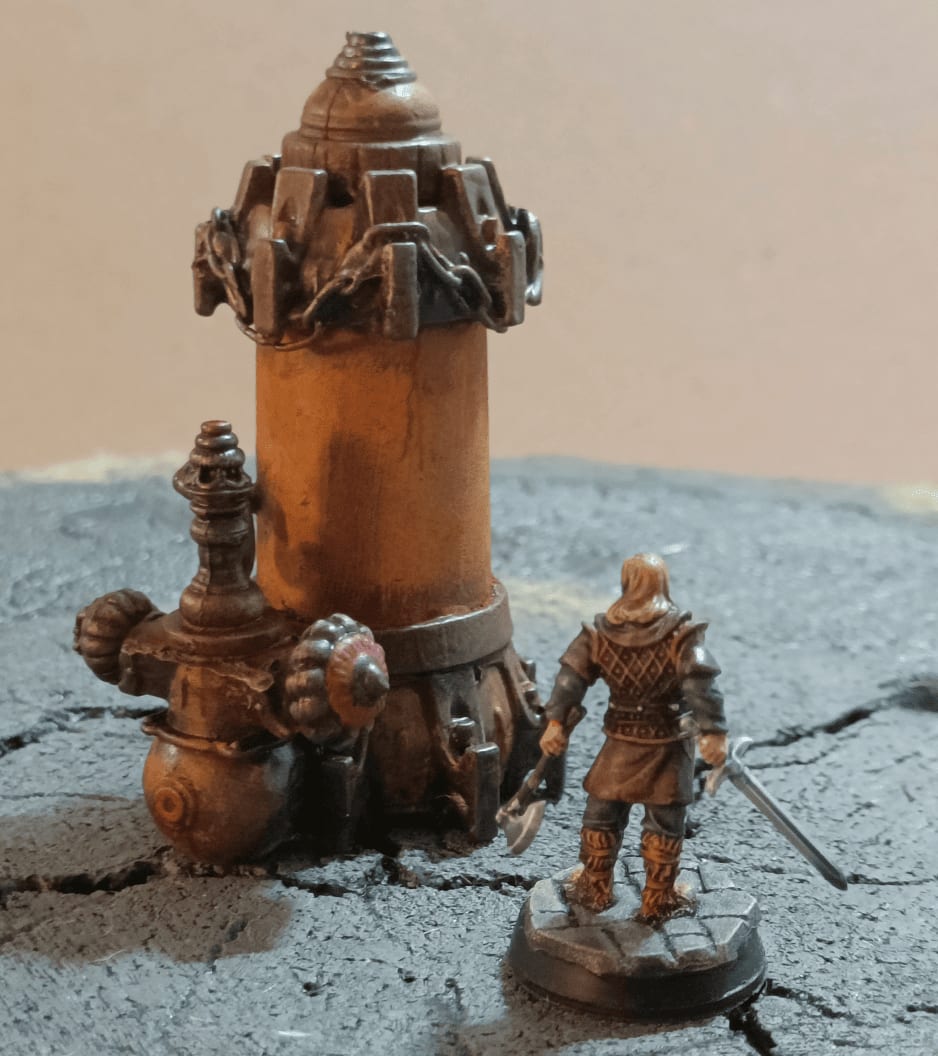
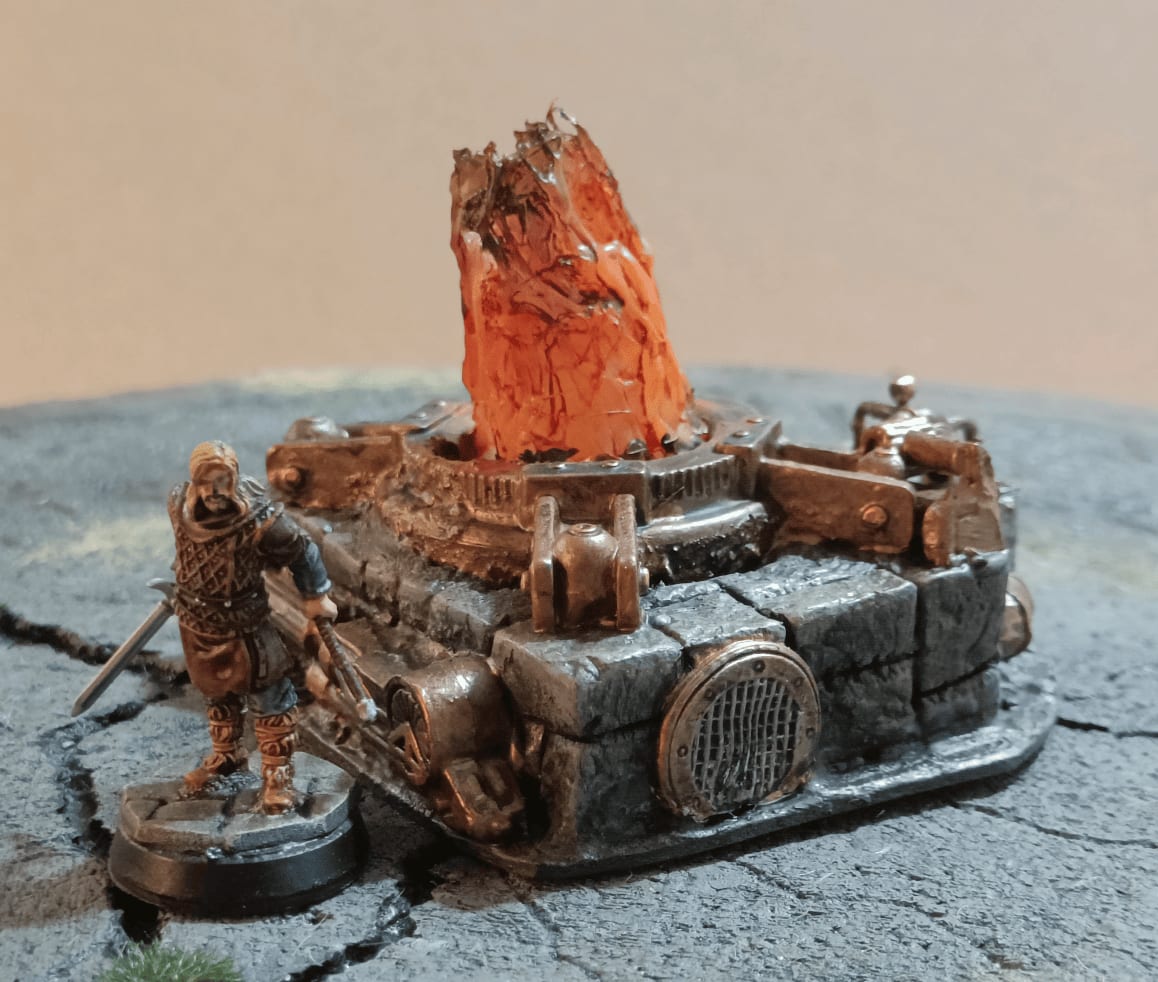
Furnaces

These are furnaces (or boilers), I needed for the basement of the first Strange Aeons adventure.
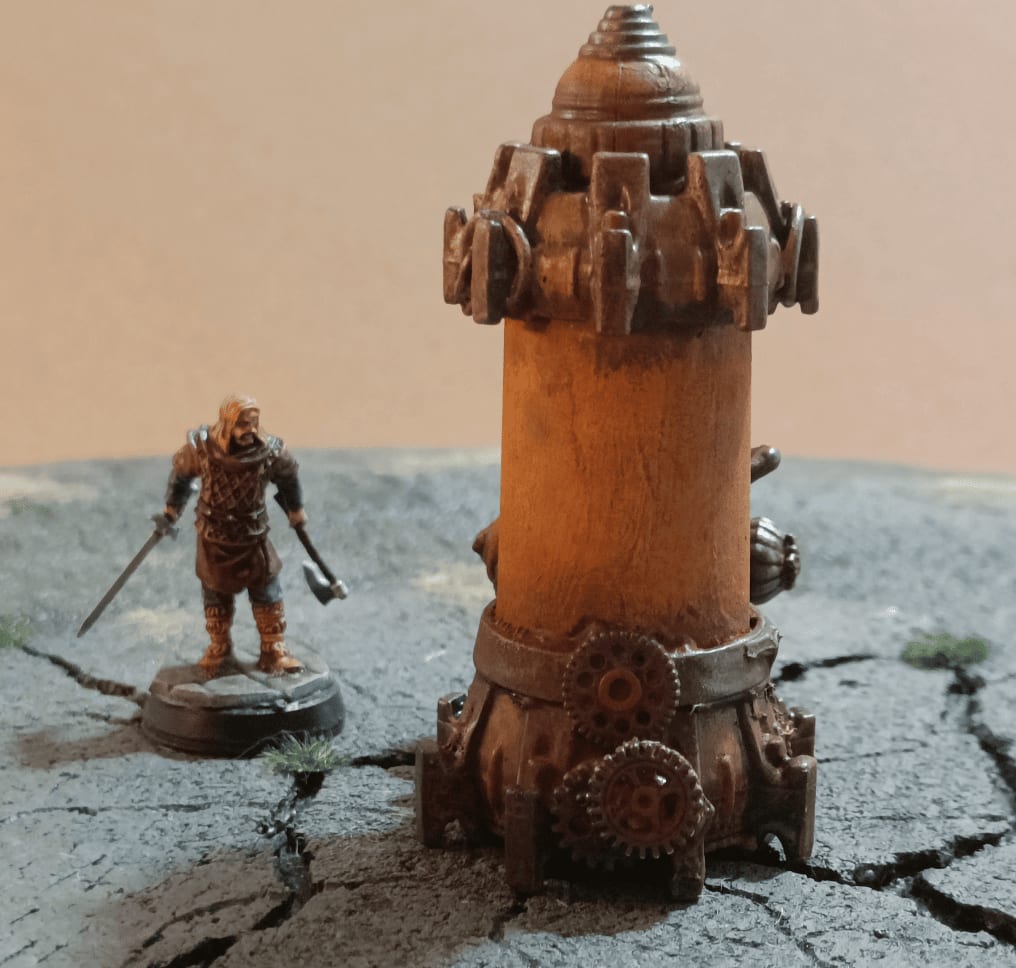
I made the base using a Skylander toy and added lots of small elements to give it a steampunk look. There are tons of little gears that come from steampunk beads, plus bits of toys I found here and there. On the left side, the top is a Games Workshop paint pot (I think it's a Nuln Oil) turned upside down and added on top to serve as a reservoir.
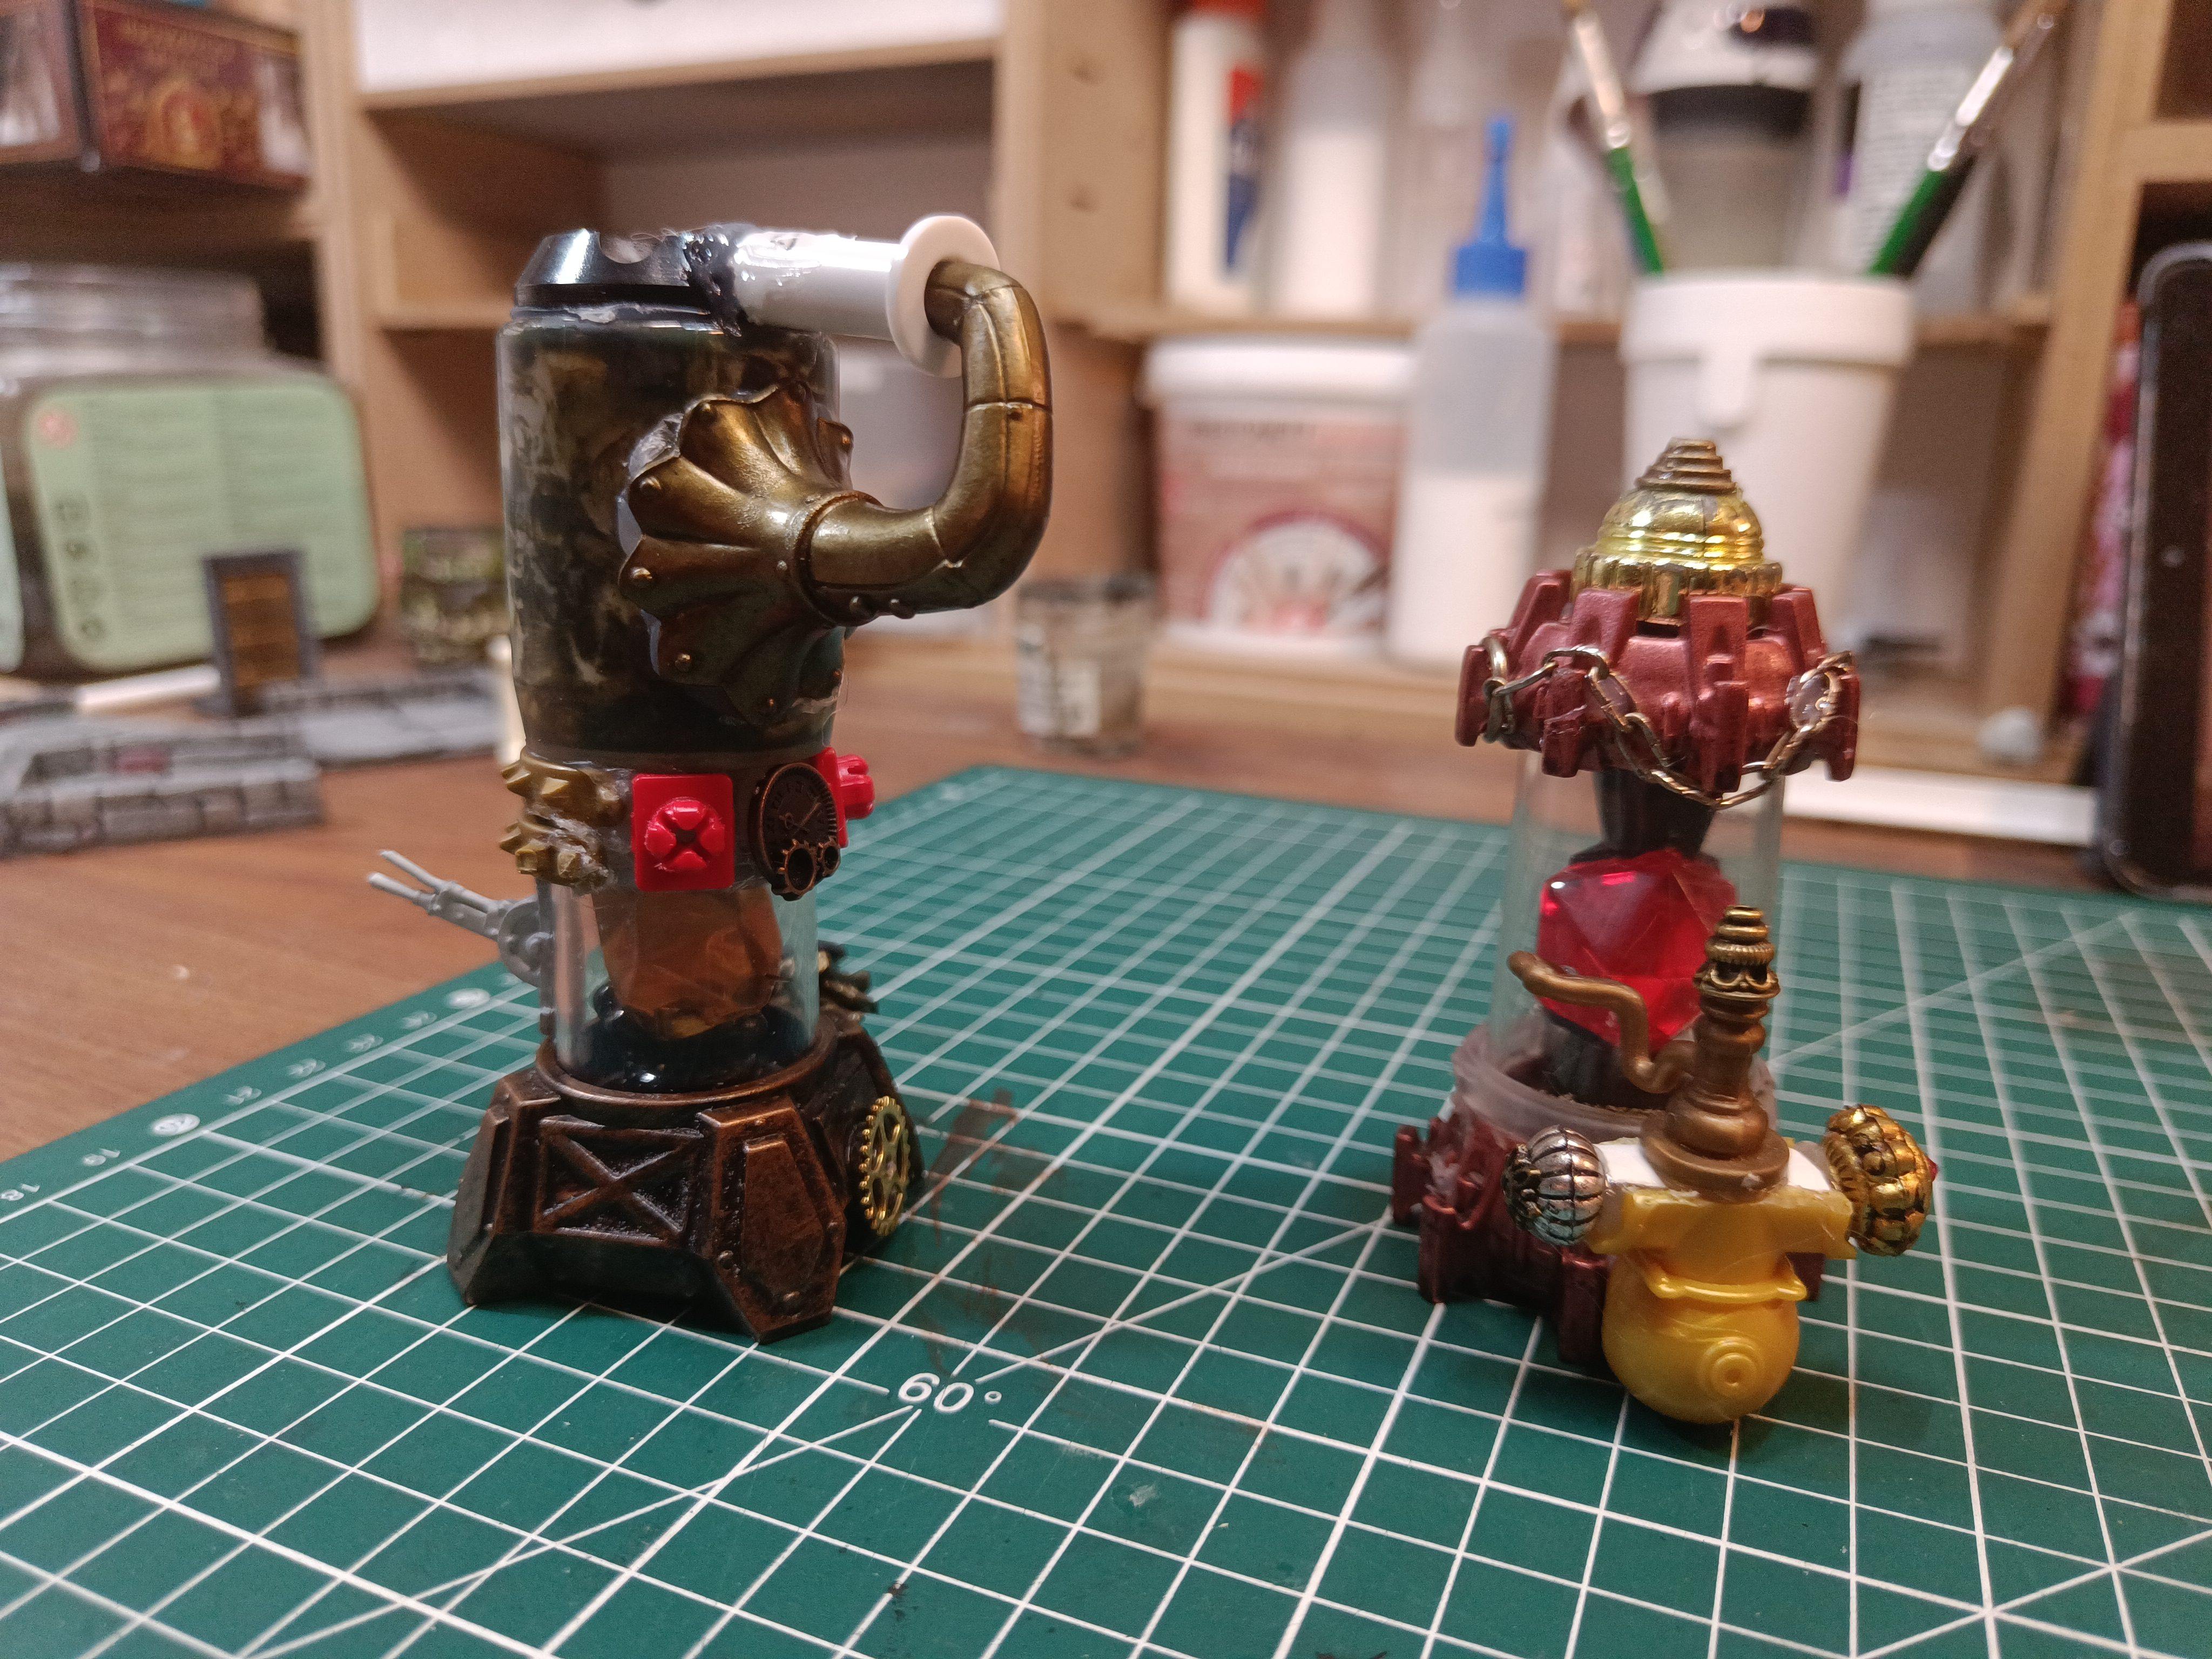
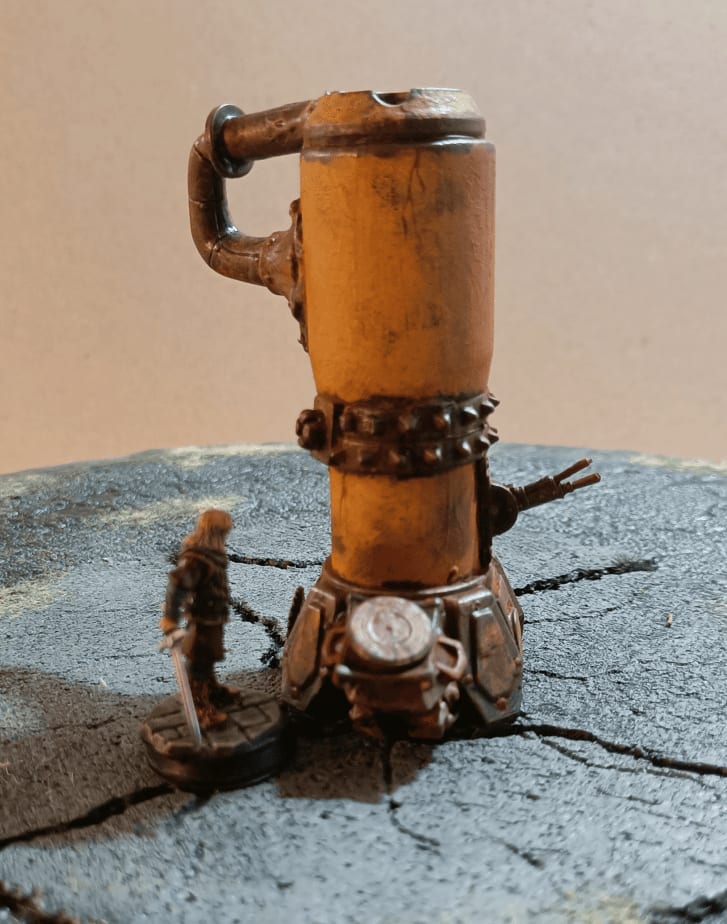
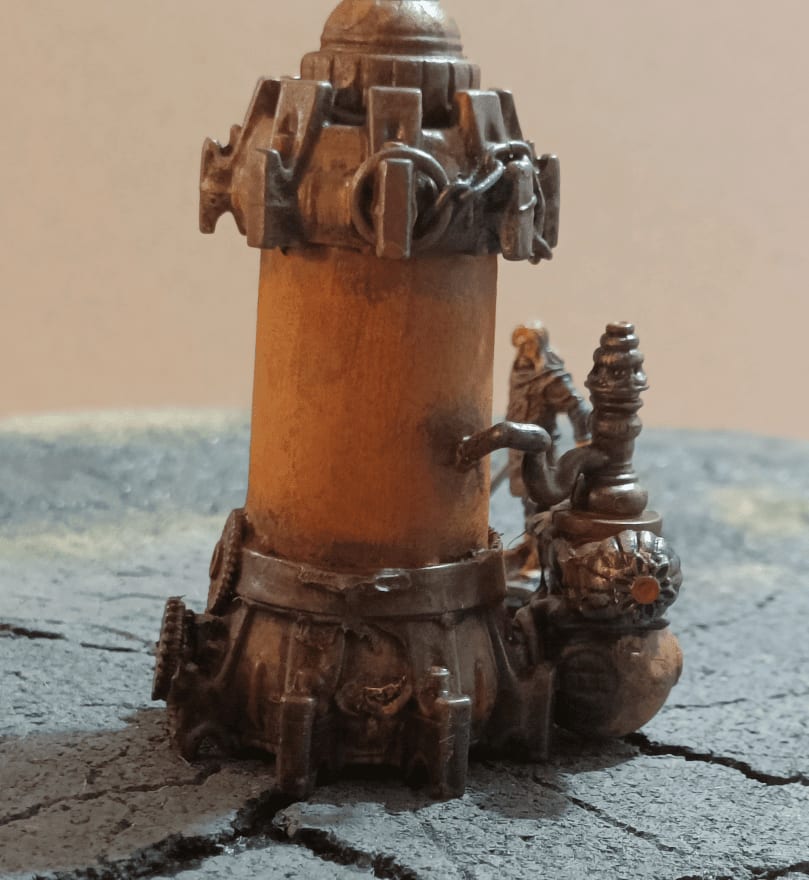
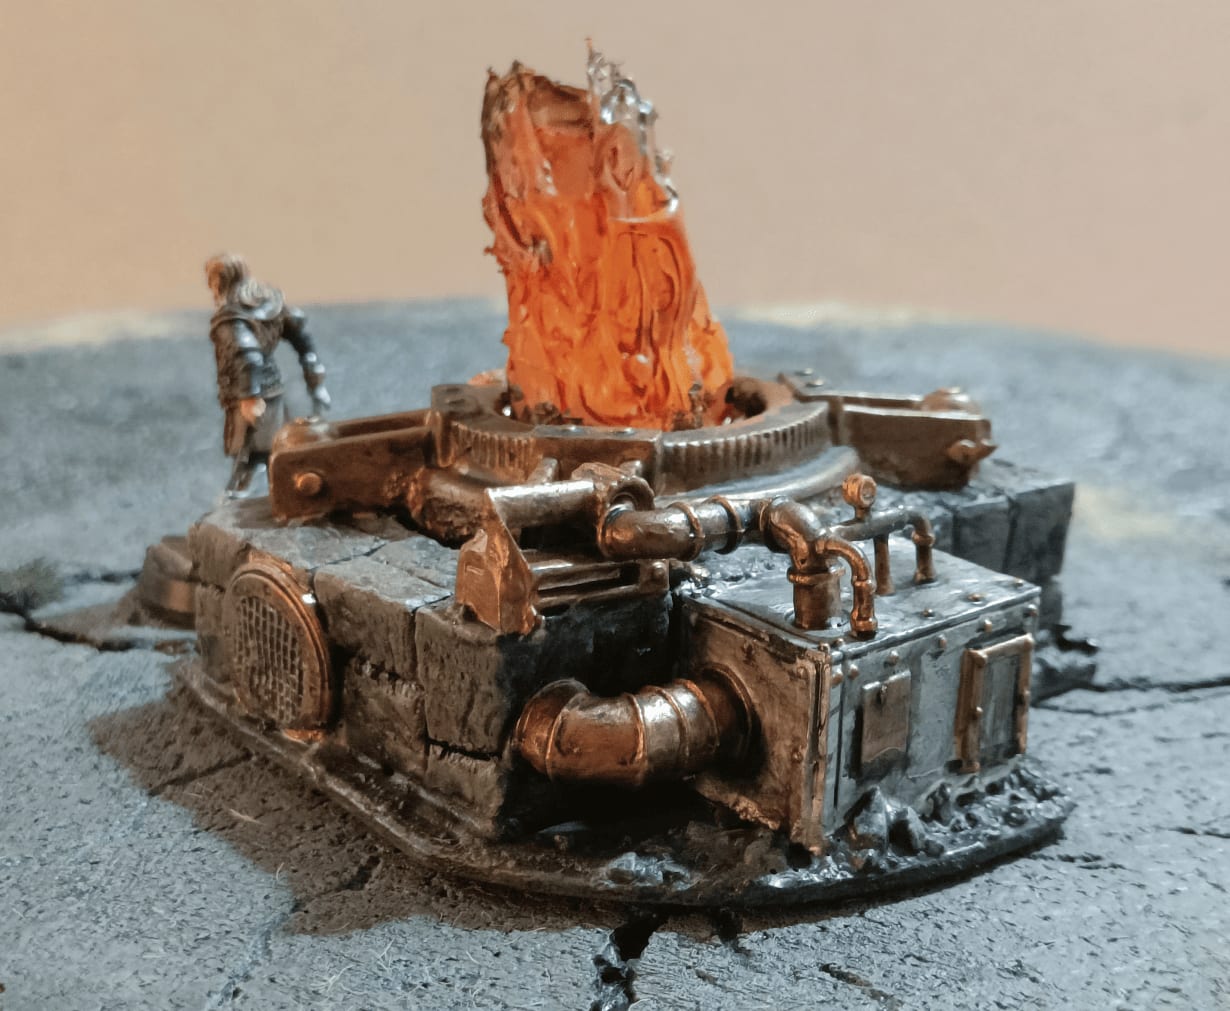
Here's the view from the other side!
The large pipe is made with a gramophone mouthpiece that I salvaged from another Skylander toy - turned upside down and glued with a syringe tip on top of a button.
The small red pieces are tips from Playmobil toys.
On the right one, I salvaged a diving helmet head from another toy that I put upside down at the bottom.
There are small beads placed on the sides and different elements. I think there are pieces that come from other Playmobil toys that I "borrowed" from my daughter.
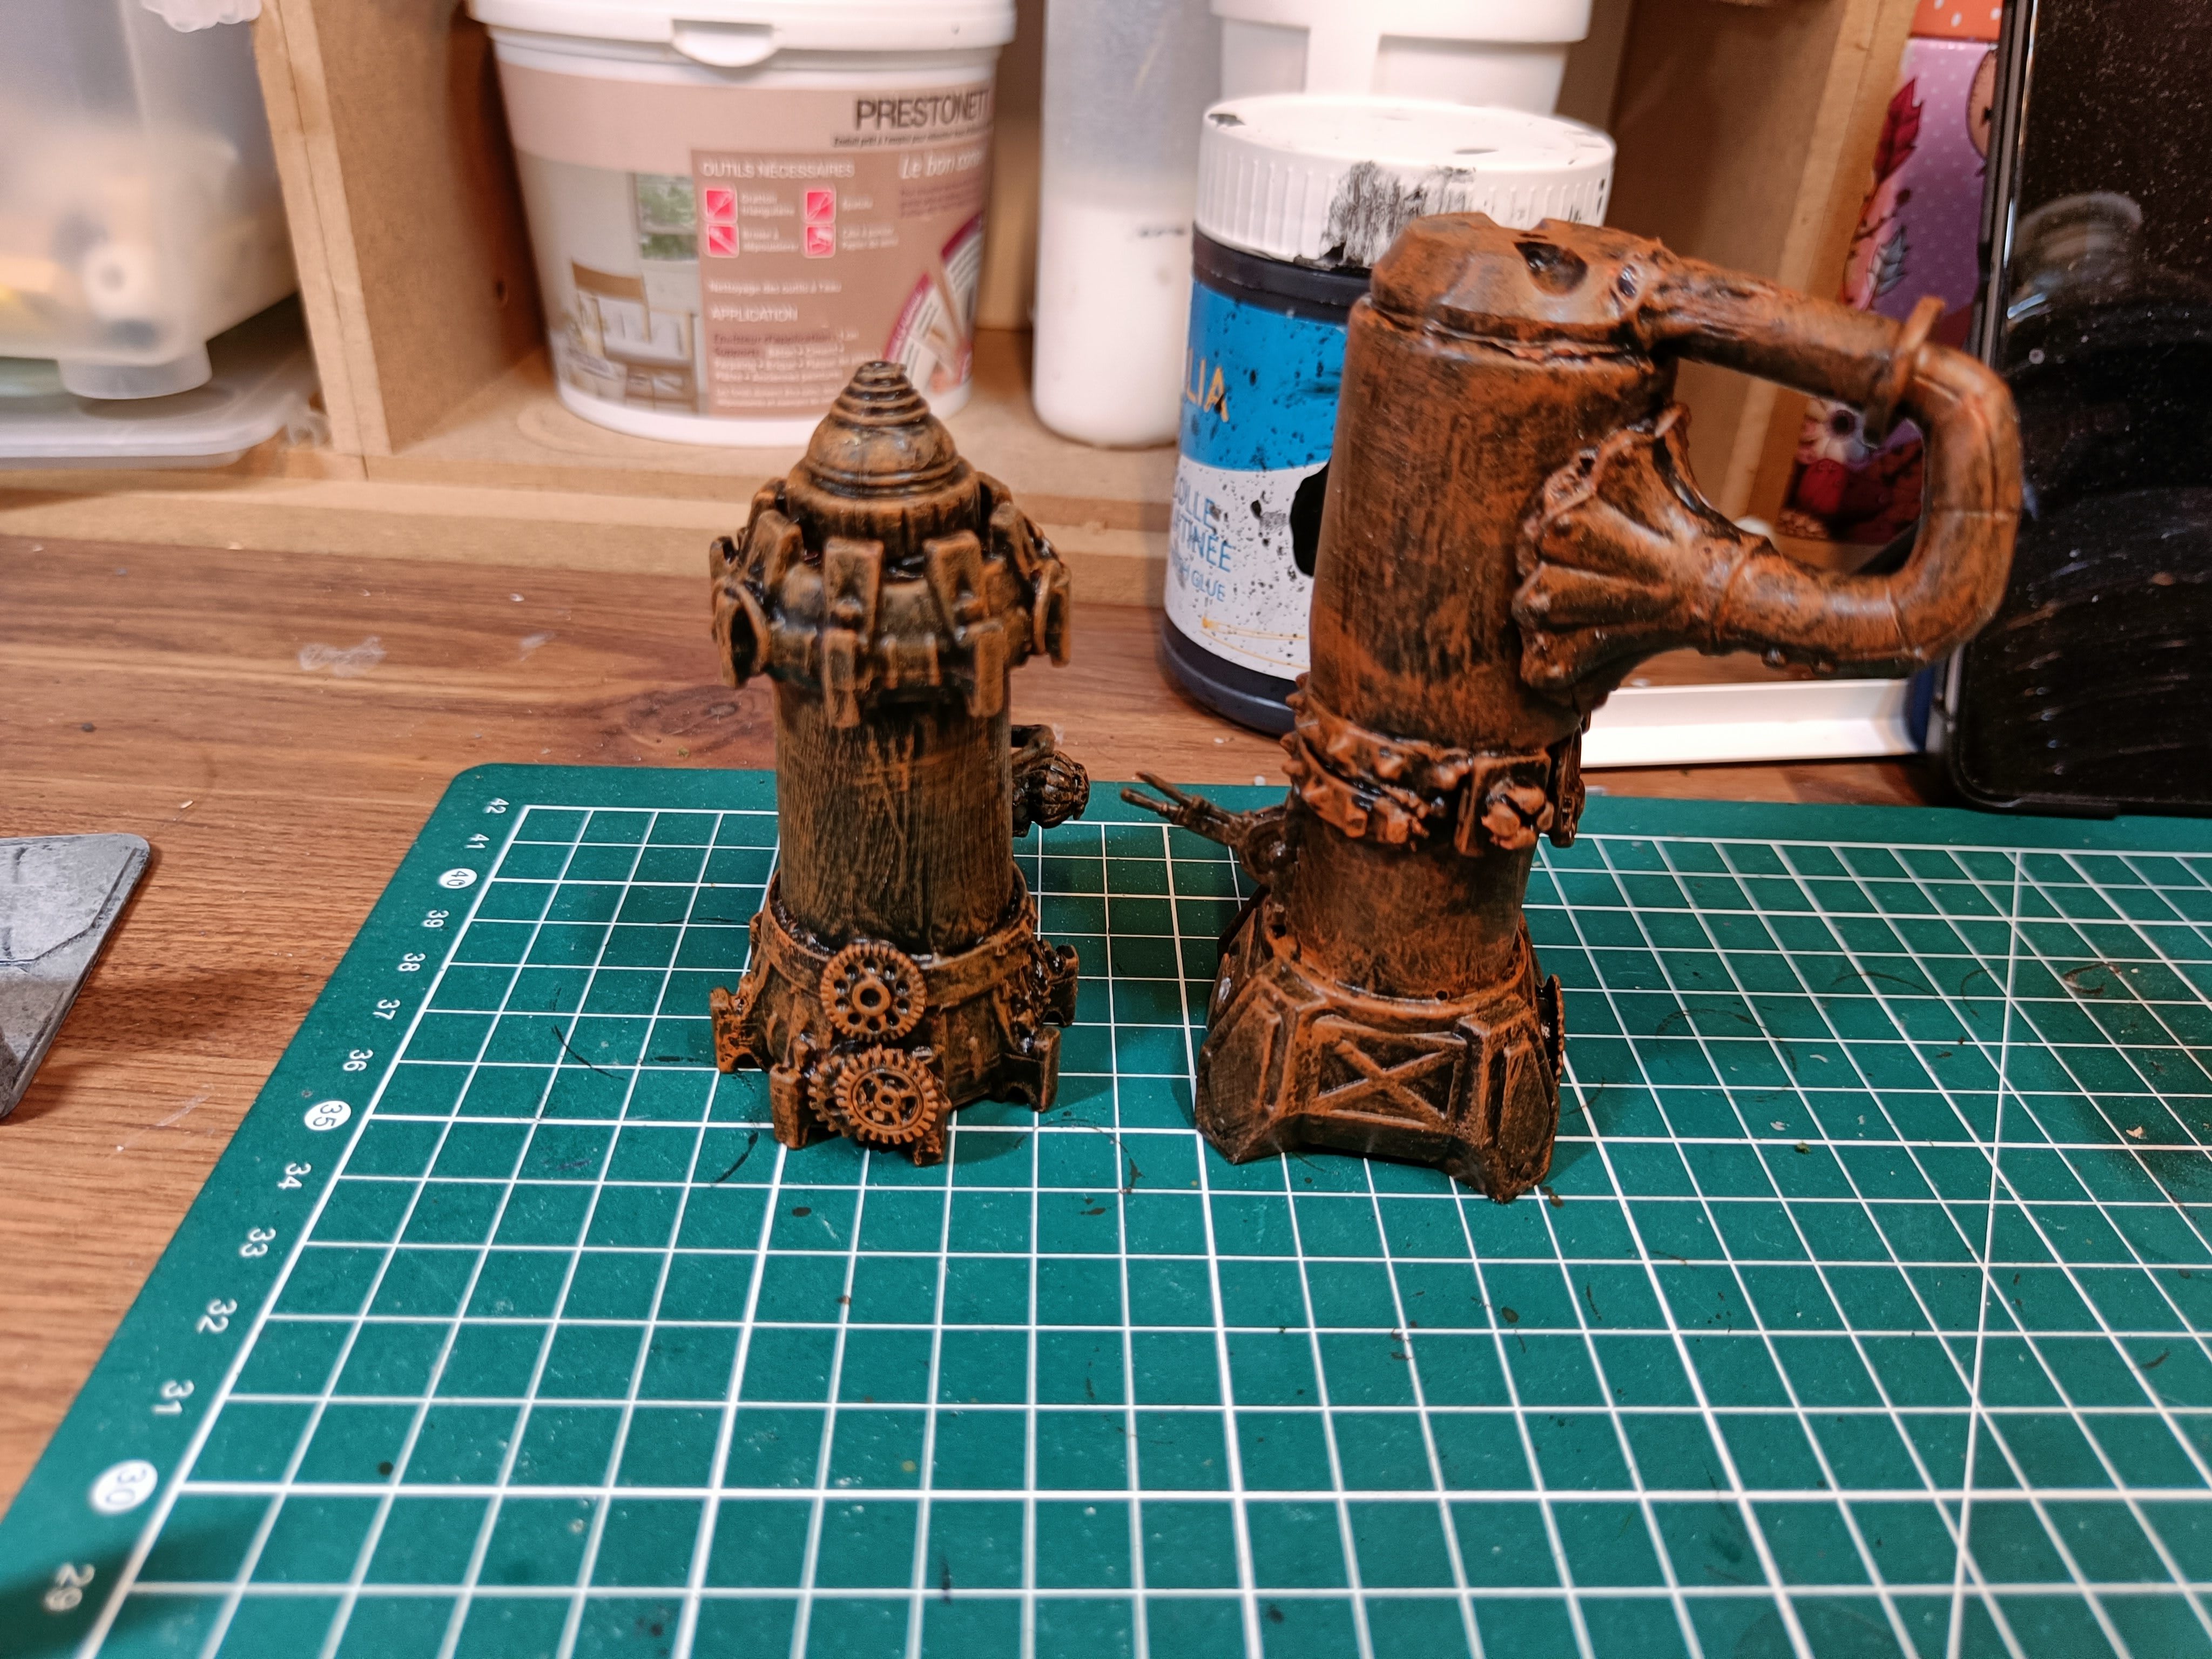
I used my usual mix of Mod Podge and black paint to help stick all the elements together properly. I didn't mind if there was a bit of texture on top since it was supposed to look like old, weathered stuff.
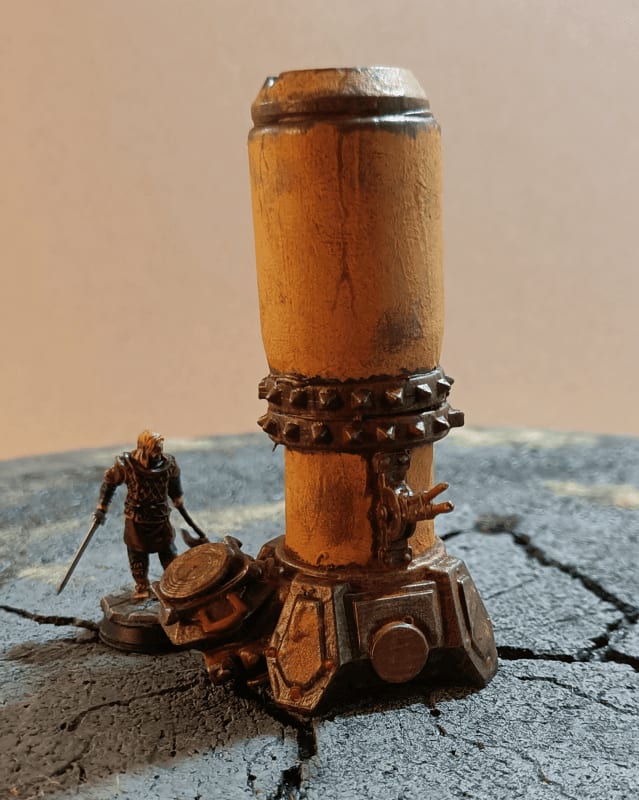
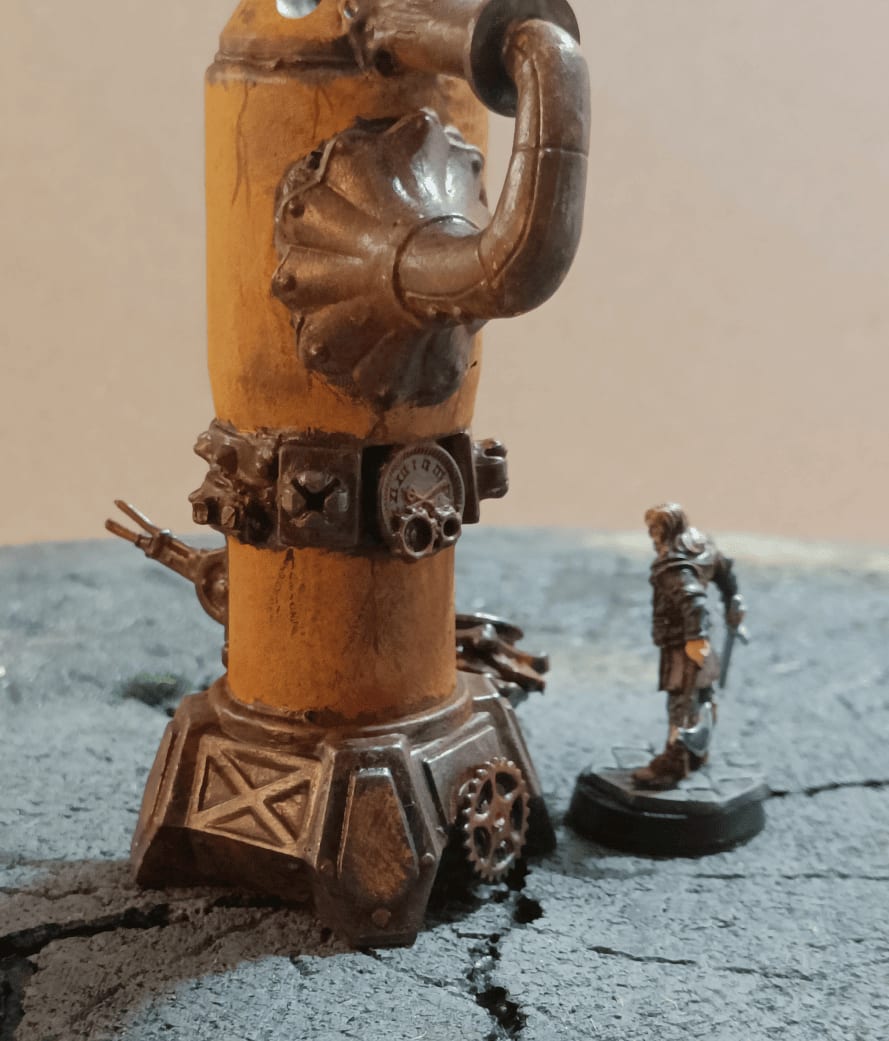
Then for the dry brushing, I think I went straight to orange. I have Ryza Rust (the technical paint from Games Workshop) but honestly I don't really see the difference between that and regular orange paint. So yeah, just did a dry brushing with orange there.
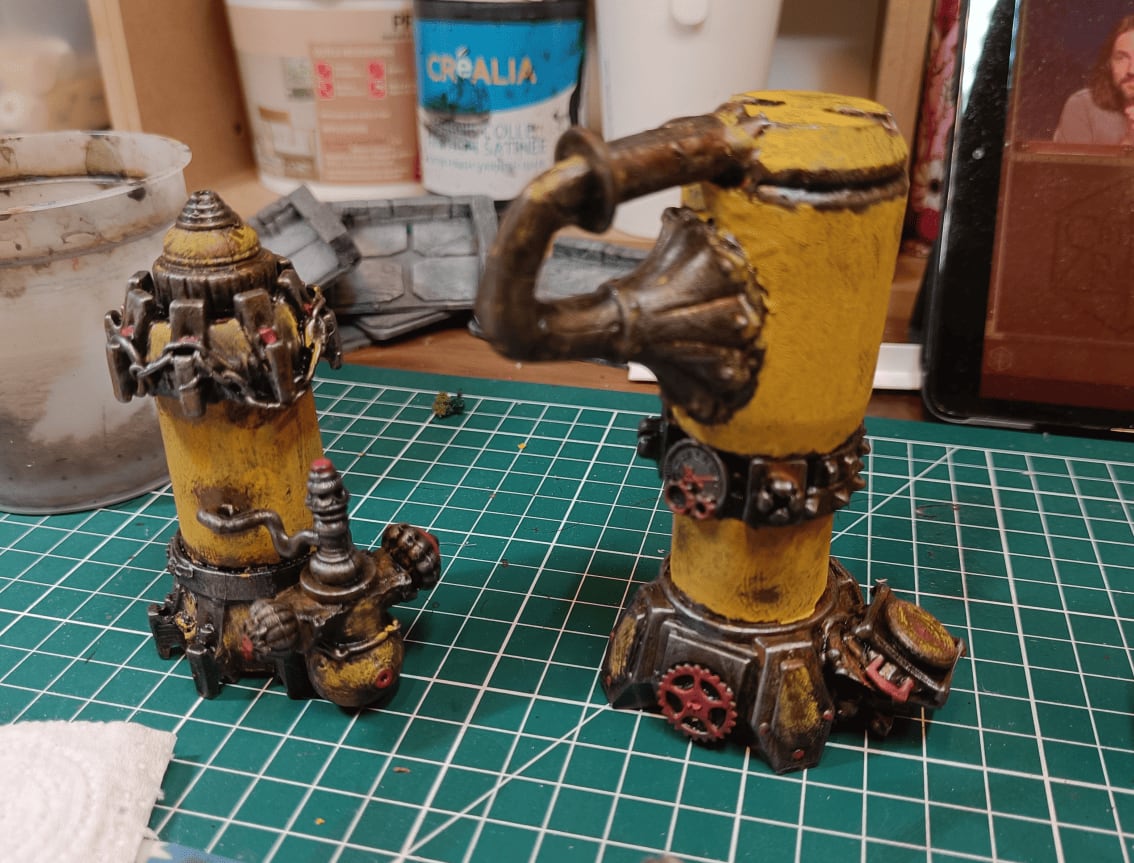
I added a bit of color, and I really went for the yellow side because the King in Yellow is an important character in the scenario.
To create an effect like rusted paint that you can see through, I dabbed the paint on with my brush instead of covering everything smoothly. I also added little red elements to break up the uniformity.
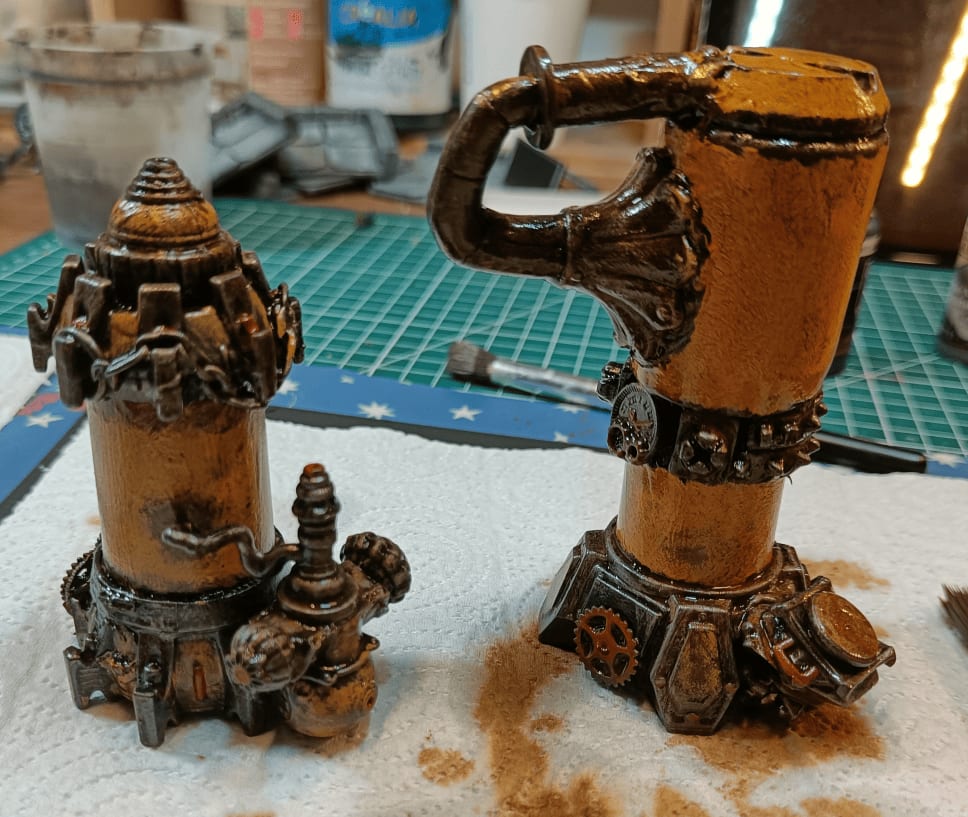
I then added a good thick oil wash, a bit brown, to make it all a little more grungy.
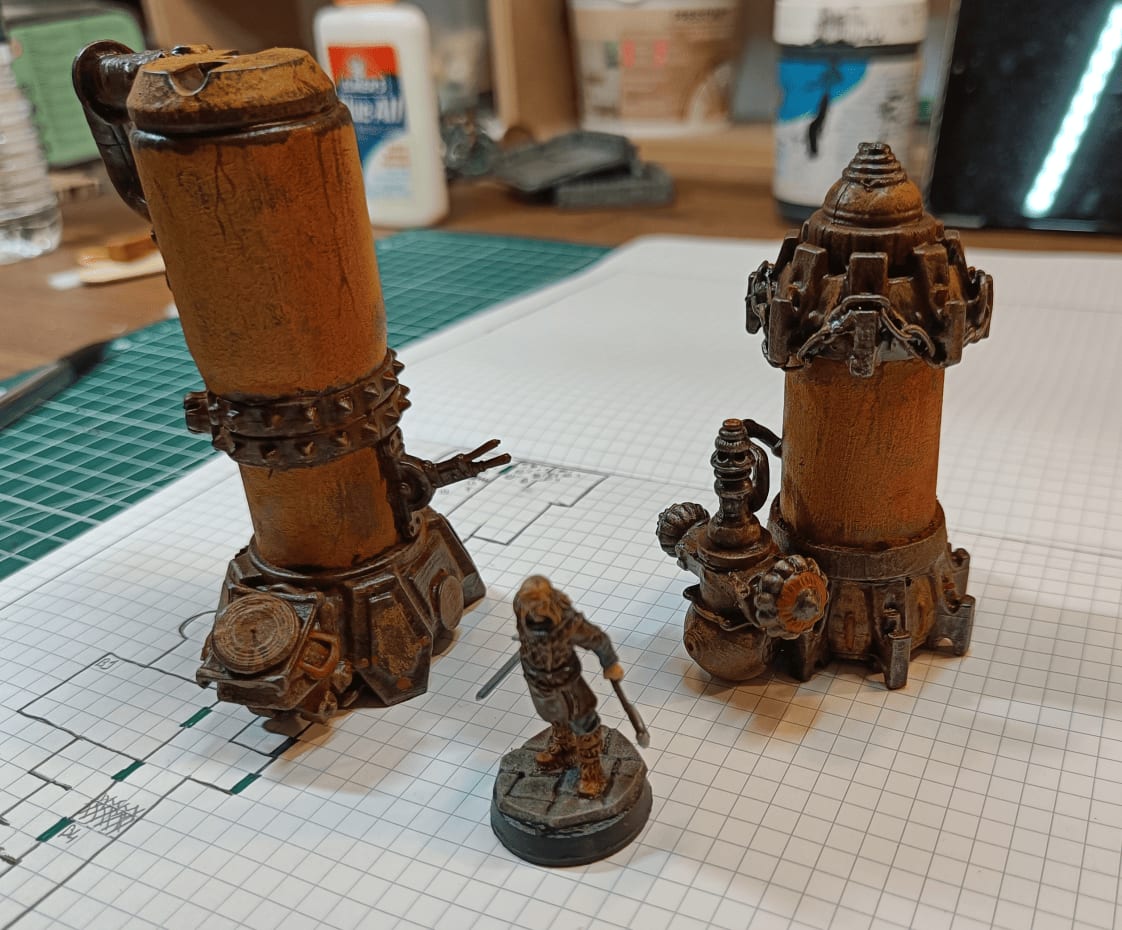
And here's what it looks like once painted. These are sets I'm quite happy with in the end because they're pretty original. We don't really know what they are but we can tell they're somewhat mechanical. You can sense it's something for conducting strange experiments. But it remains quite solid because the base of the toy is a Skylander toy. So I like those ones.
Flame Contraption
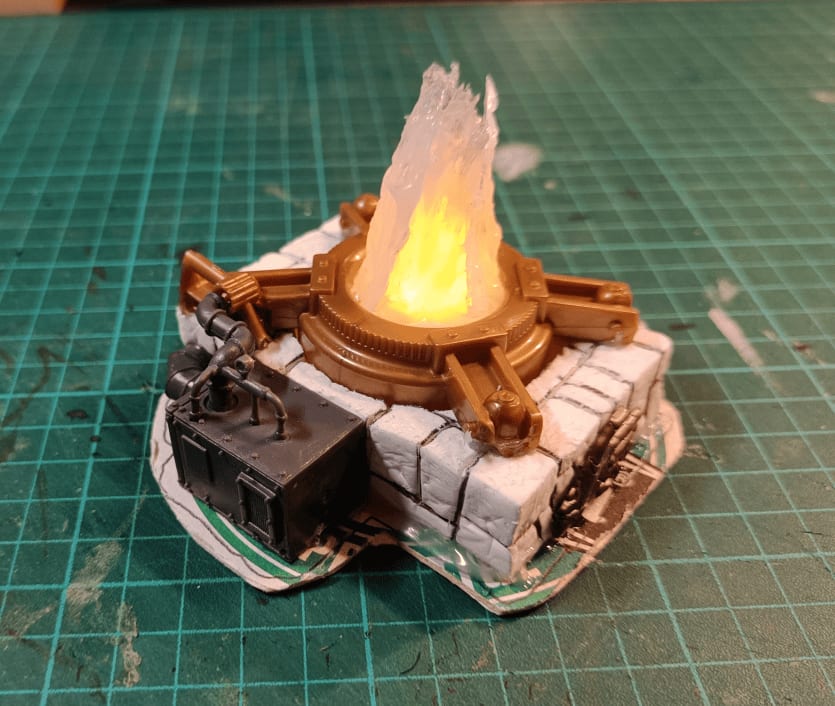
I made this thing and honestly I wasn't even sure what it was supposed to be while I was working on it. It's kind of in the same vein as the furnace and boiler I did recently.
Here's what I did: I took a piece of think foam and carved out a hole in the middle for a fake LED candle. Put everything on a cardboard base with a coaster. Cut a hole underneath so I could reach the switch to turn the candle on and off.
Then I grabbed some random parts from my bits box. That big orange piece you see is super low quality plastic that literally crumbles every time I touch it. I salvaged it from some flea market game I can't even remember the name of.
The piece on the side is from Mantic Crate scenery. It's normally for WWII skirmish games, but since I do fantasy, I just laid it on its side and lined up the pipe so it fits into the pipe of the other plastic part.
For the flame effects, I used hot glue gun glue and built it up around the plastic flame that was already on the fake candle.
Experiments with basing texture
I've been looking for a technique to texture miniature bases really quickly and keep them consistent across all my minis. Did some experiments recently, that I'm documenting here.
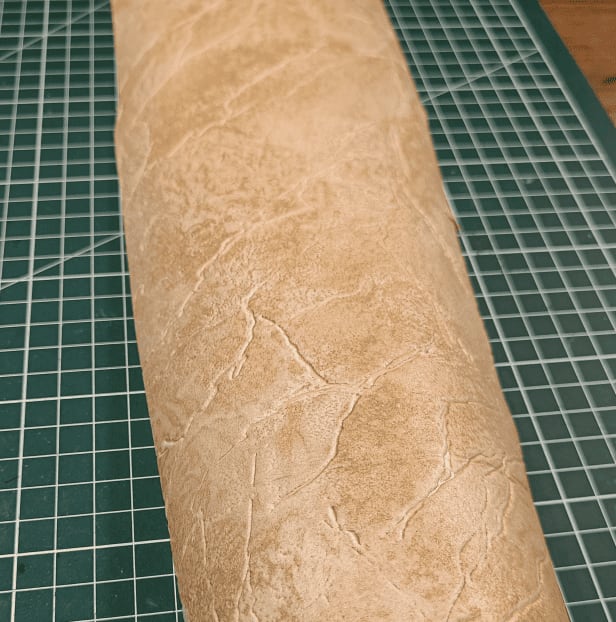
First one was with linoleum wallpaper - the kind I've used before for scenery. What's great about it is the texture is actually raised, about 1-2mm thick, with these nice cracks in relief. Thought it might work well for bases.
Unfortunately, the material comes into rolls, and so doesn't stay flat on large pieces. What I did was to put the texture upside down on a foam board and pin it there. The foam is key because it lets the pins actually hold.
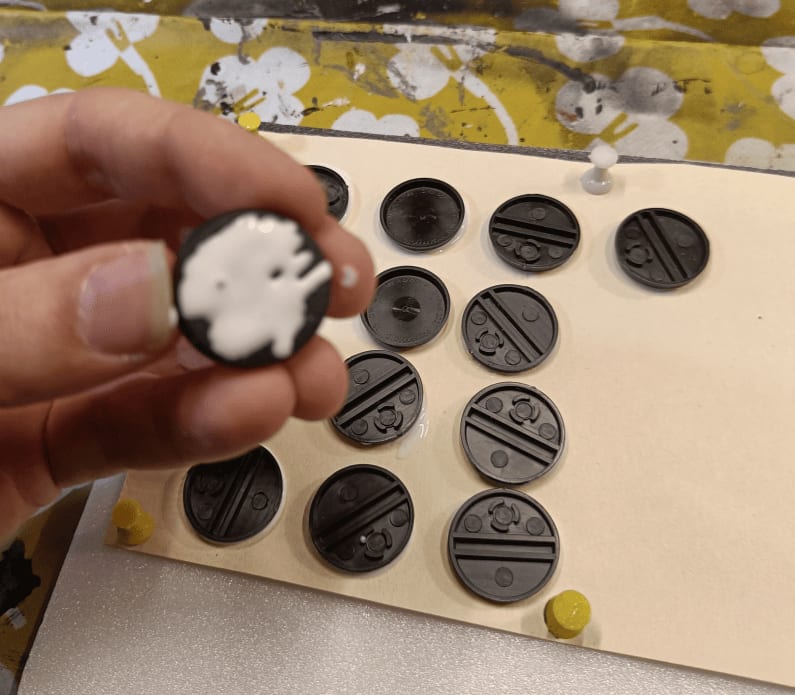
I then glued multiple bases upside down on it. My idea was to then just cut around each base with a cutter or scissors, and get perfectly textured bases ready to go. Saves a ton of time when you're doing a bunch at once.
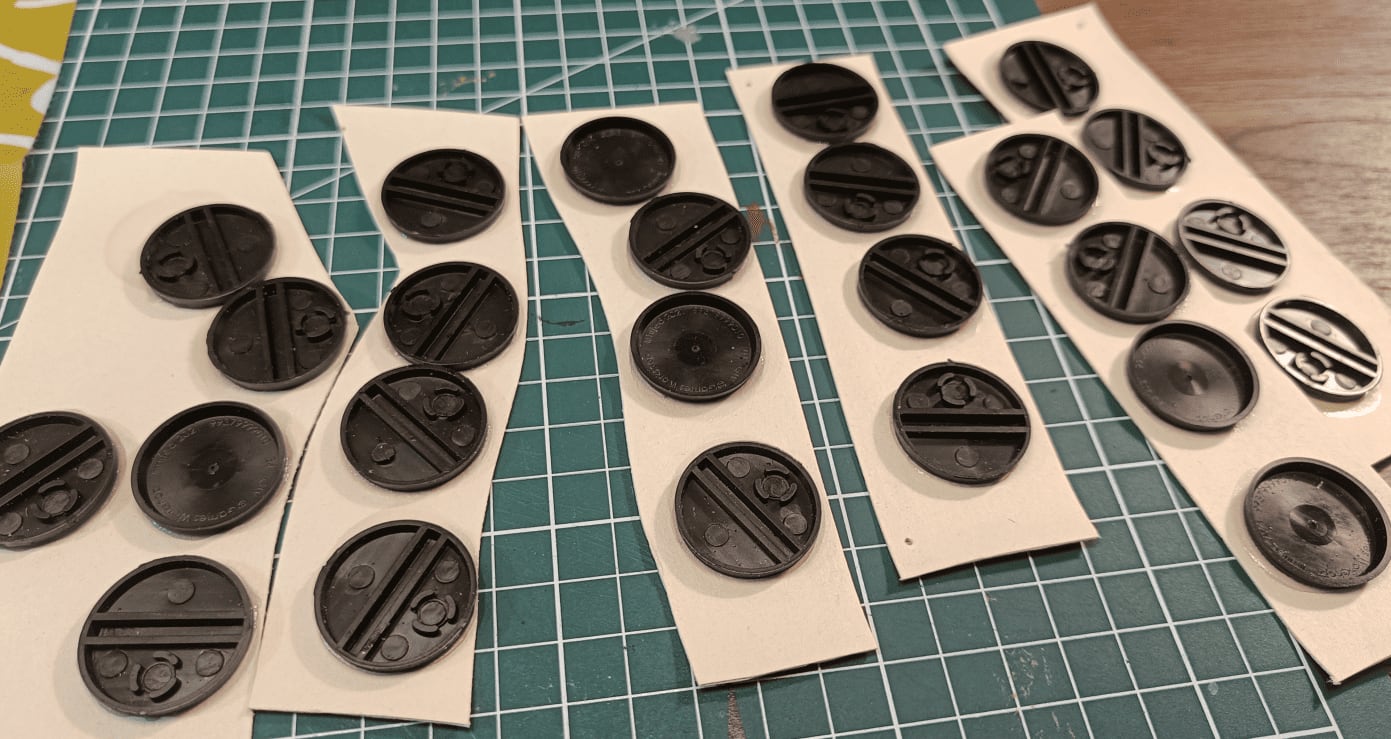
I let it dry well so the glue would hold properly, then I started making strips like that and cutting all around each of the bases.

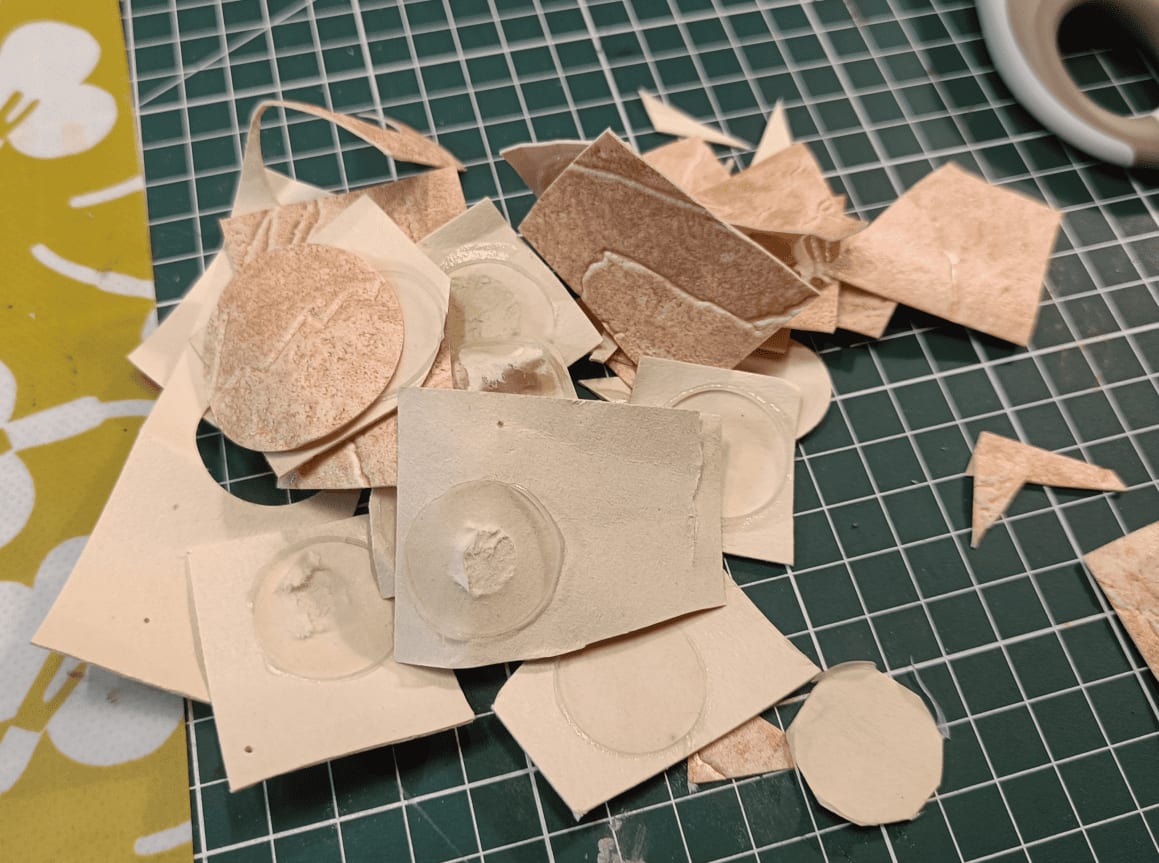
Unfortunately it didn't work at all. Even after letting it dry for a very long time, the glue didn't stick between the bases and the material. It was a complete failure.
Maybe it would have worked better with a different type of glue, but I'm not sure what. I didn't want to use super glue because I would have needed a lot of it. So I ended up abandoning this experiment.
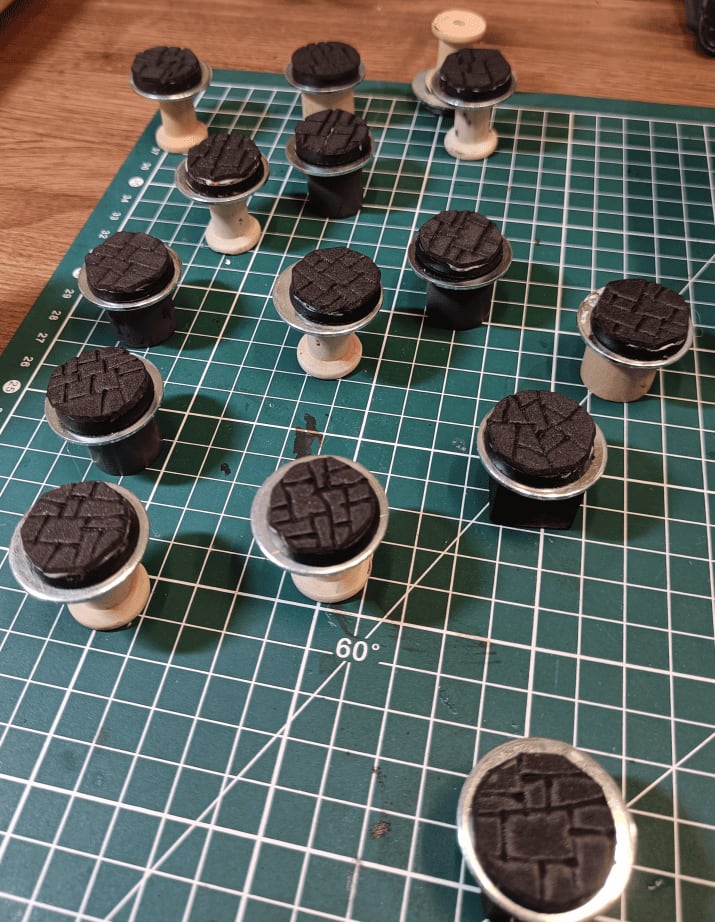
So instead I tried something different - I used these soft foam sheets. You know, like the foam craft sheets kids use sometimes? They cut really easily. I grabbed a black one and did basically the same technique as before.
I made a circular template in the right width, cut out a bunch of pieces, and glued them onto each base. The cool thing is since the foam is full of little holes, the glue soaked right in and held super well.
Then I used a pyrography pen (maybe a bit too hot actually) to carve out the individual paving stones on top.
The final result is very good! It's a technique I'd potentially reuse later.
The main difficulty is cutting round shapes that have exactly the same diameter as the base underneath. Since I cut with scissors in a not-very-clean way, the edges are a bit rough at times.
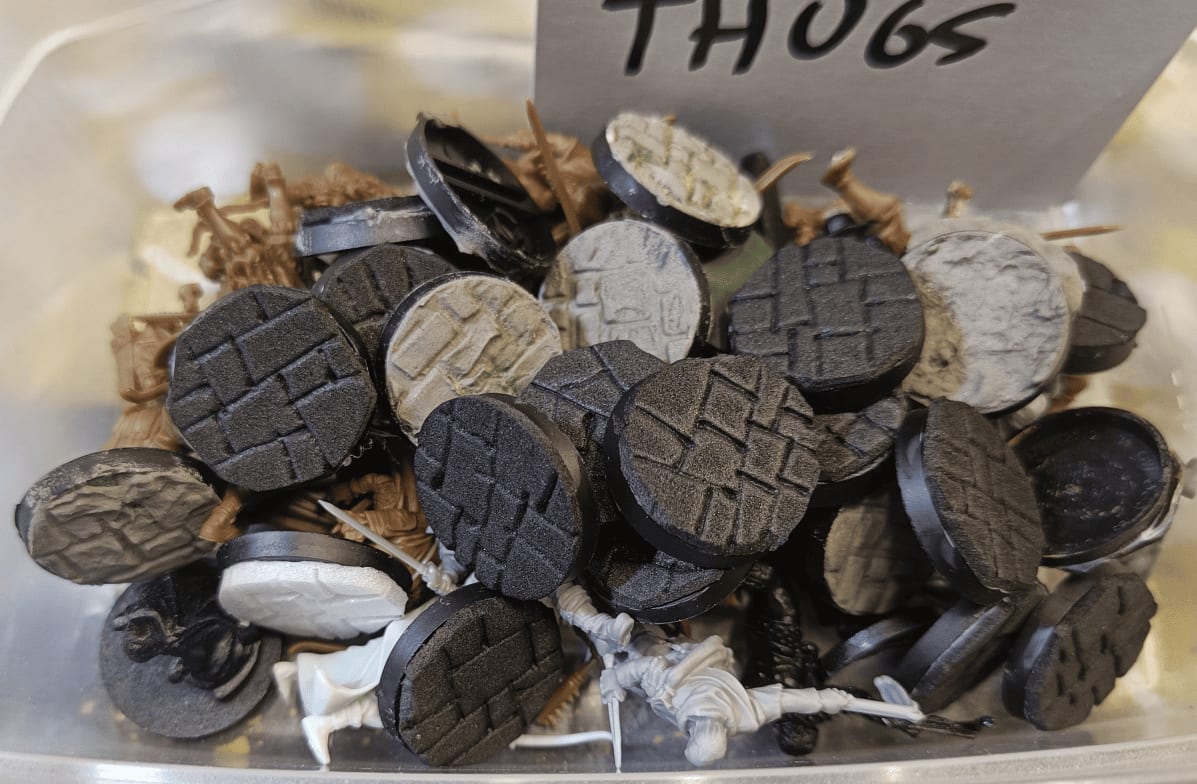
The base remains soft afterwards, even once painted. It's still very soft foam full of holes - even with paint, glue, and varnish, it stays soft. So what happens is that the miniatures just break if you only glue them. It happened to me several times - had to repair miniatures because they detach when dropped. The attachment point between the two isn't super strong.
If I do this again, I'd probably need to insert small metal strips under the miniatures' feet to properly anchor them inside the base. Which might be a bit too much work compared to what I'm doing now. So maybe I need to find a better way to glue them together.
It holds well to the base this time, but not excessively well to the characters' feet.
But the effect works very well and it's super fast and super easy to carve flagstones like that.
Doors
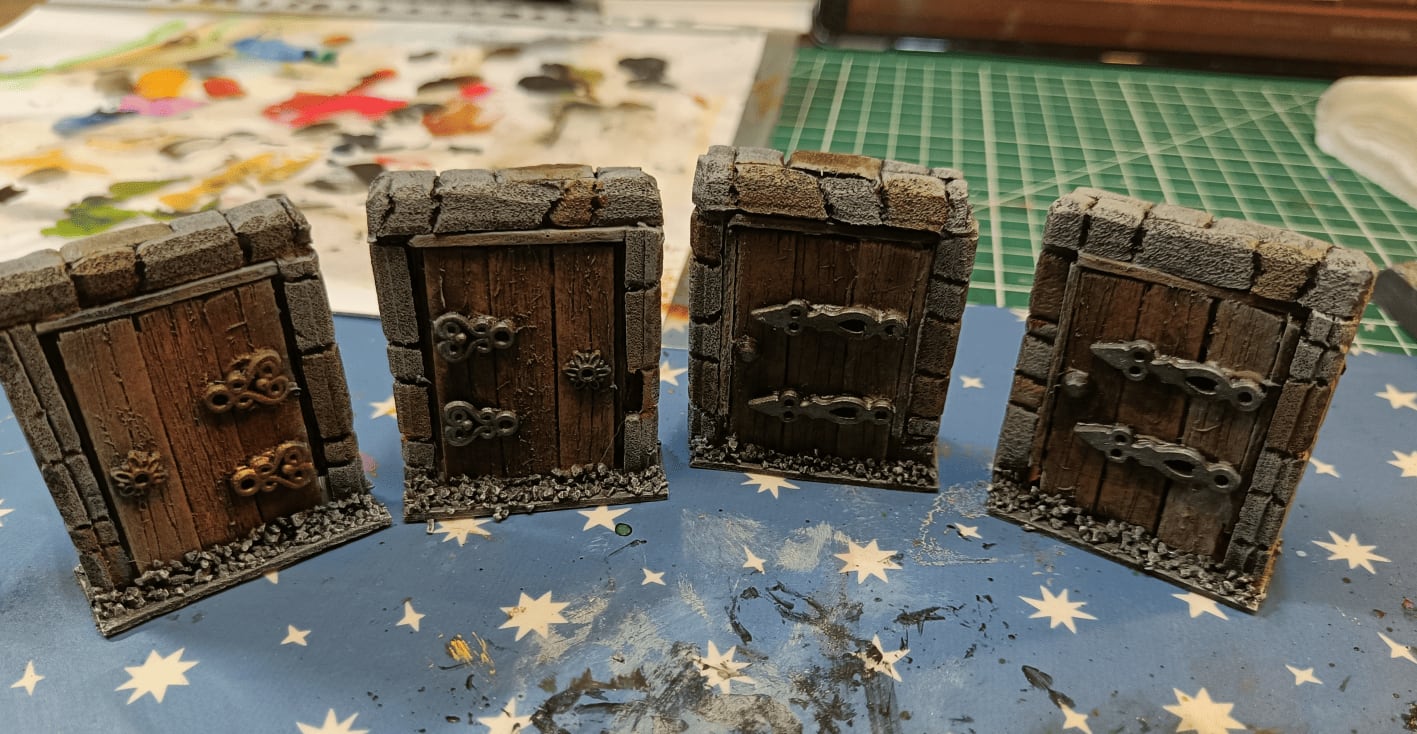
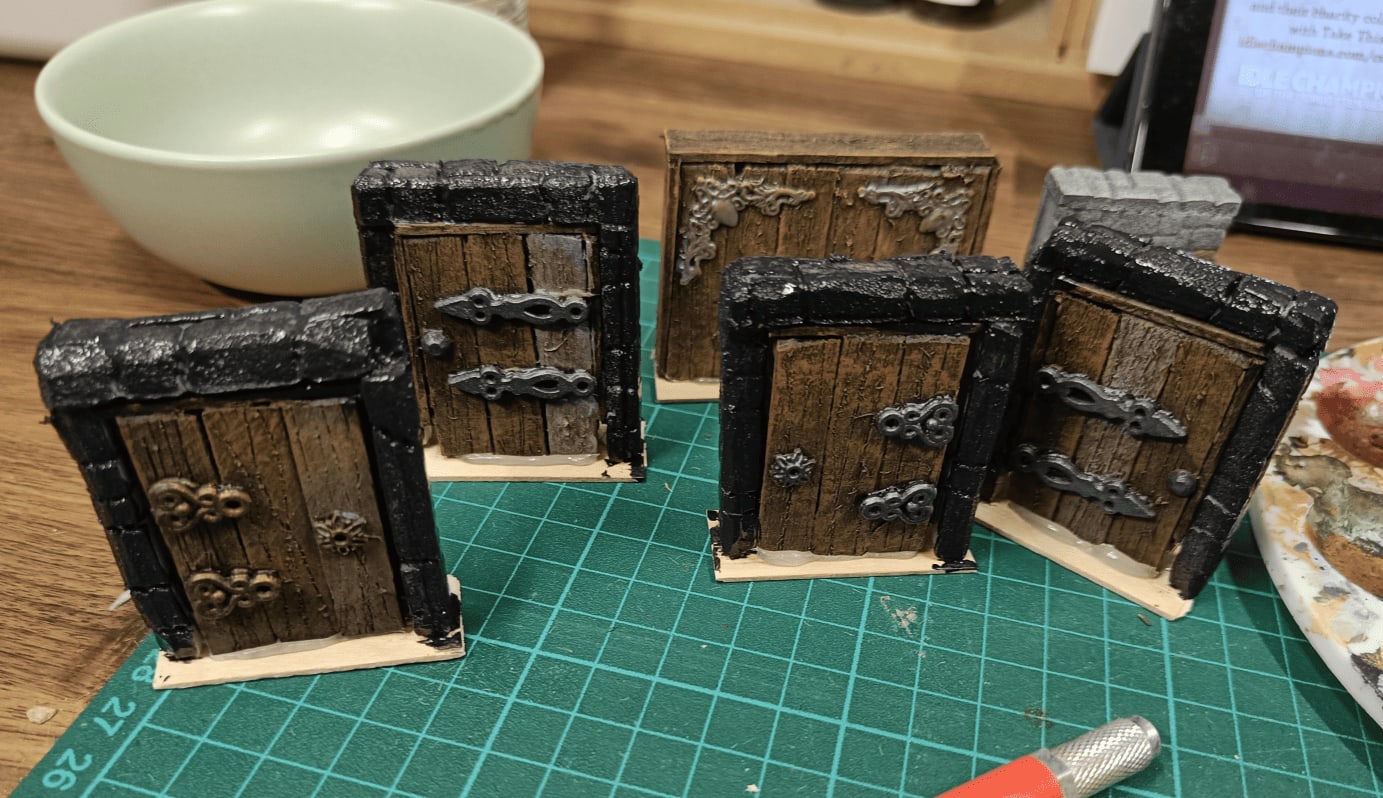
Quick post about my DIY doors that I still use today! They're not the prettiest and they don't actually open, but they're solid and you can tell immediately what they are.
For the main frame, I used some wood pieces I found (I think they were Kapla or something similar) and glued them vertically. That adds some nice weight to the structure.
Then I took popsicle sticks and engraved wood grain grooves into them using a Swiss Army knife. I glued three of these planks vertically on the front, back, top and sides.
Added some small steampunk beads for hinges and a lock detail. Painted everything brown with dry brushing - did a lighter brown layer and then beige on top. The metal pieces got silver paint.
I also made a frame around the whole thing using polystyrene. I engraved it with a pen and mechanical pencil to create brick shapes, then glued it onto another popsicle stick for a solid base.
They're definitely not perfect but they've held up really well over the years. The photo I'm sharing was taken before I finished painting the stone frame, but I'm still using these doors to this day.
Camping Beds

I started by collecting cardboard - mainly beer coasters that I use as a base. Once I had the right dimensions, I made a template on a coaster and divided it into six equal-sized sections. These will be the base elements that I'll wrap the cover material around.

There you go, I have a lot of them. Each one of these I'm going to transform into a different bed.

I glued crepe paper directly above each piece of cardboard, letting it stick out a little on each side since I'll need to fold it over afterwards. The nice thing about crepe paper is that it has that naturally wrinkled look, so it should give me the slightly fabric-like texture I'm going for.

Once I tucked in the sheets by gluing the crepe paper underneath, I glued half of a cigarette filter at the head level. Cut it in two to try to roughly make the shape of a pillow.

I added a second piece of cardboard on top to simulate how the cover will be raised a bit at the torso level, where the characters are lying down. This shows the idea of having two layers.

Now, I'm going to glue a second piece of crepe paper on top.

I sprayed everything with a mixture of water and flow aid, then dropped a water and glue mixture on top. The idea is that the water and glue mixed with the flow aid will completely seep into all the fibers of the crepe paper. Once the glue solidifies, it'll give it a much more solid appearance.

I took advantage of everything still being wet to fold it underneath, hoping it would solidify in that shape with the sides properly tucked underneath.

Then we cover all that with Black Mod Podge so it seeps well into all the holes and solidifies it a bit more.
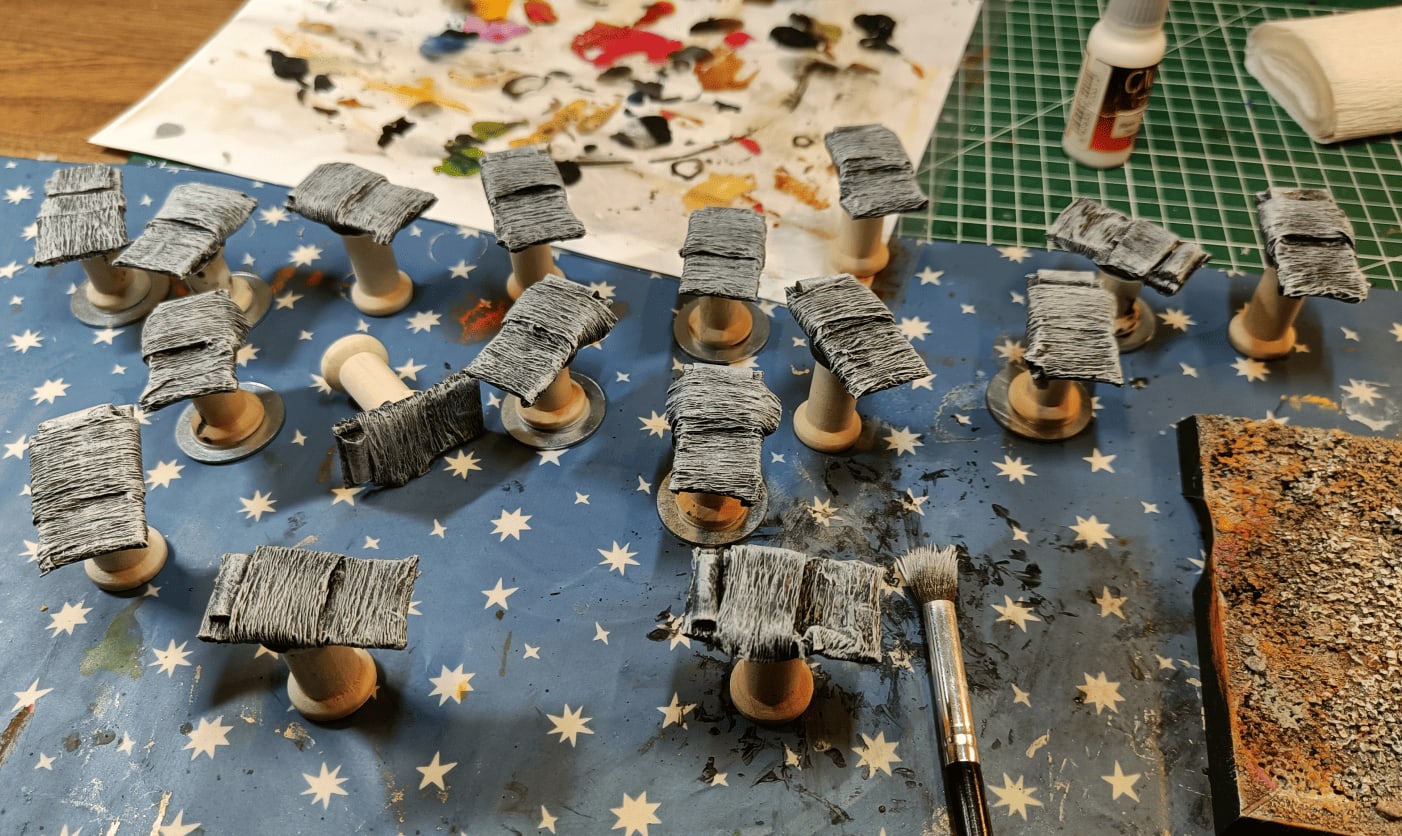
Here's a picture of the camp beds - they look like they're straight out of summer camp. I just did a white dry brush over them so the speed paints work better than on black.
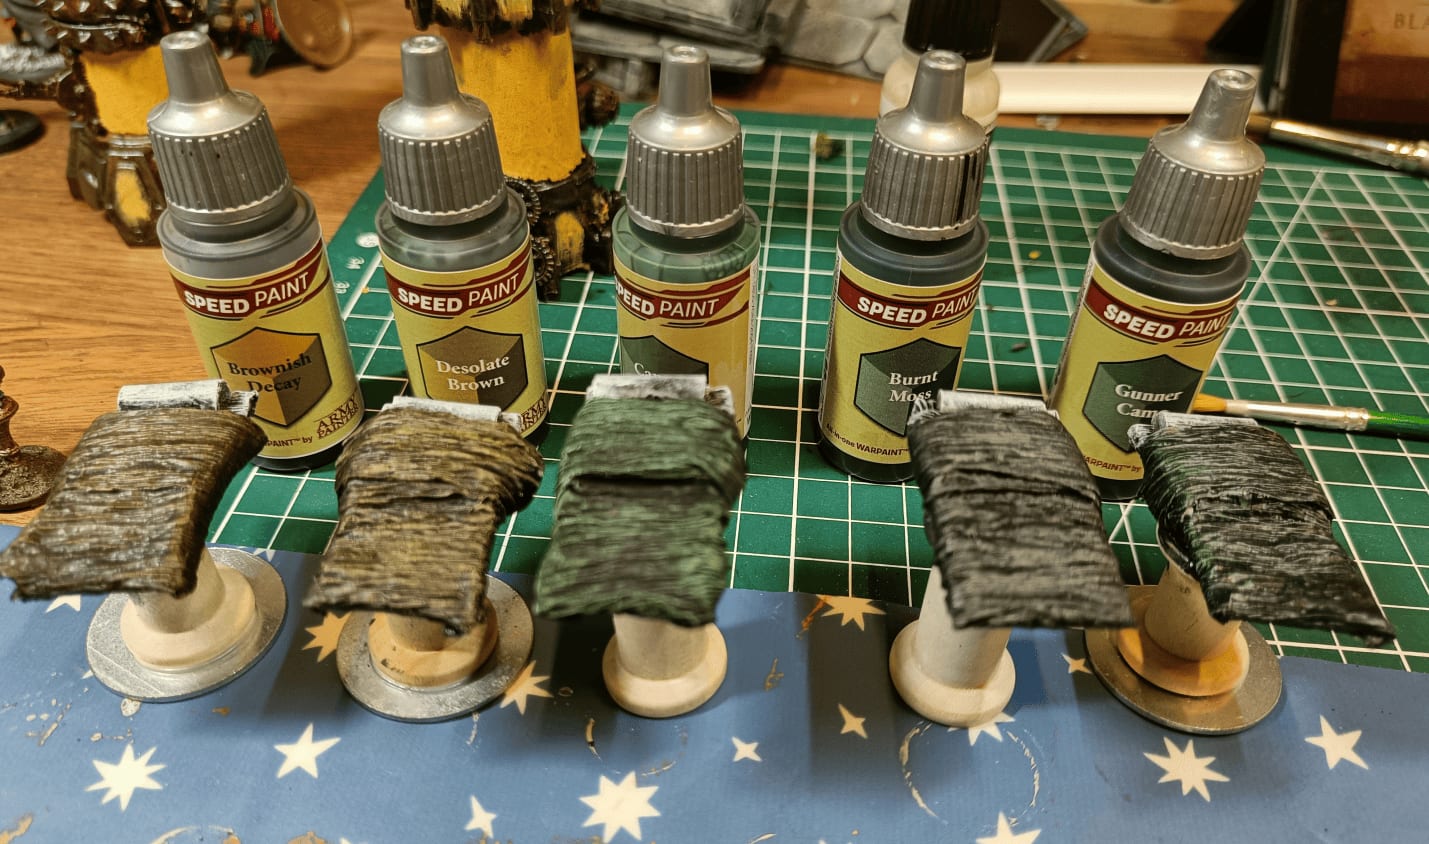
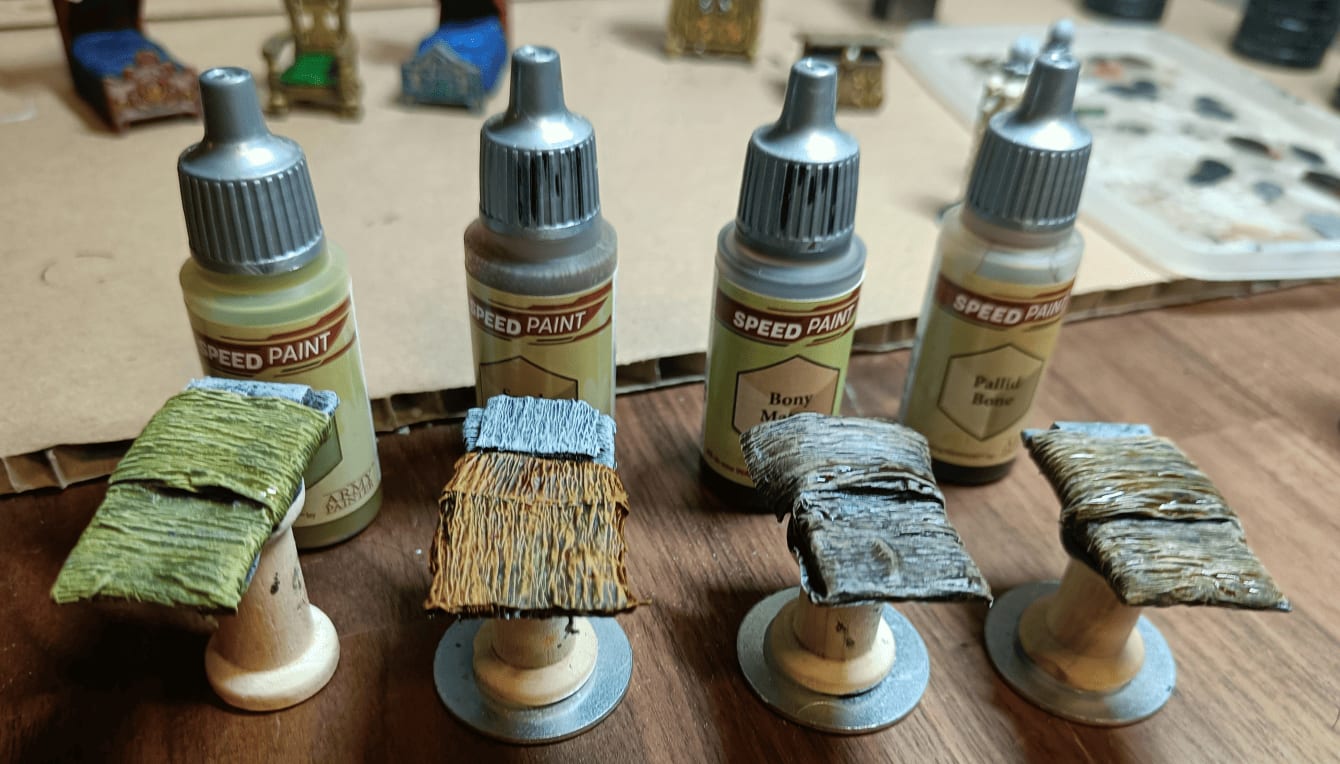
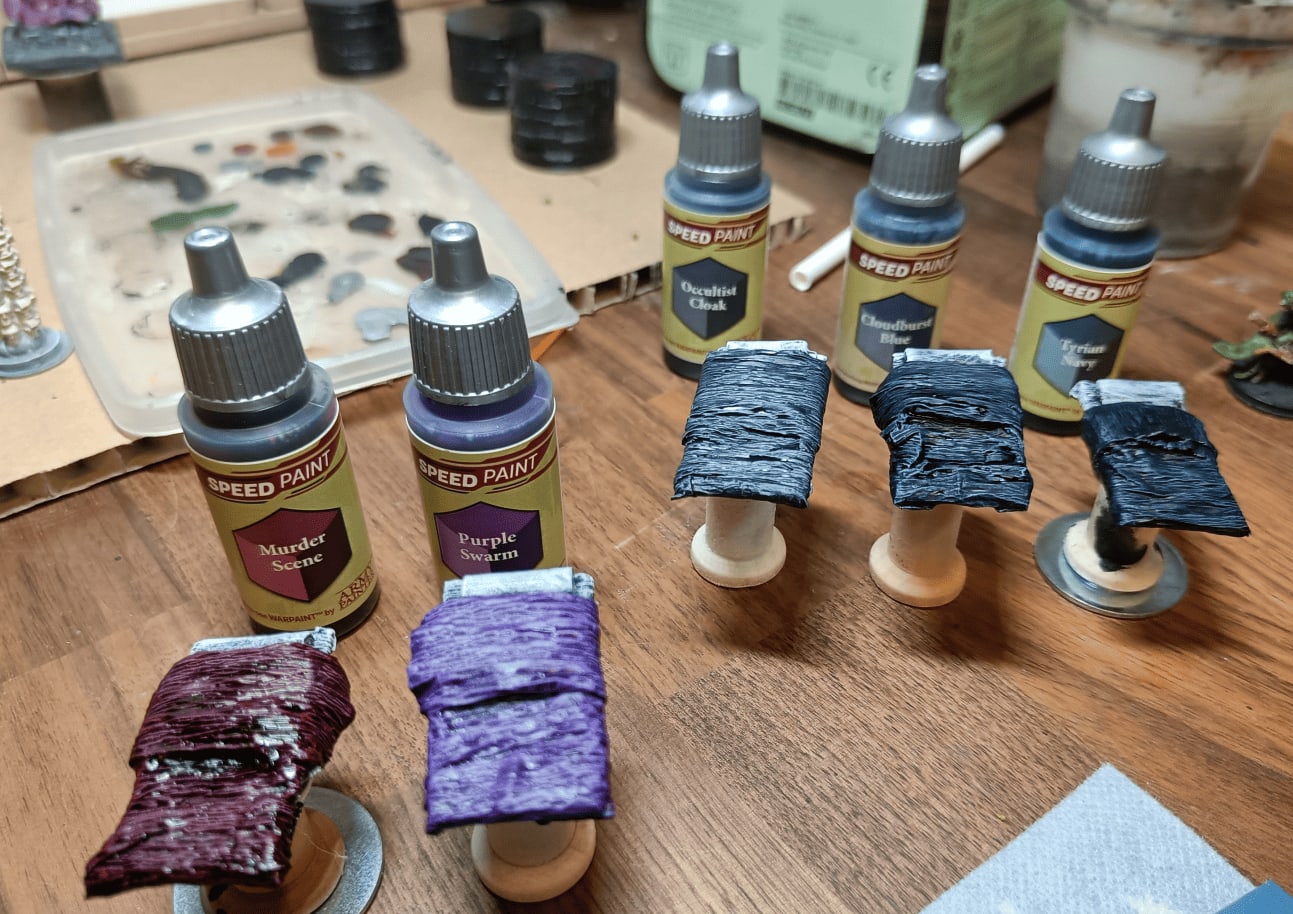
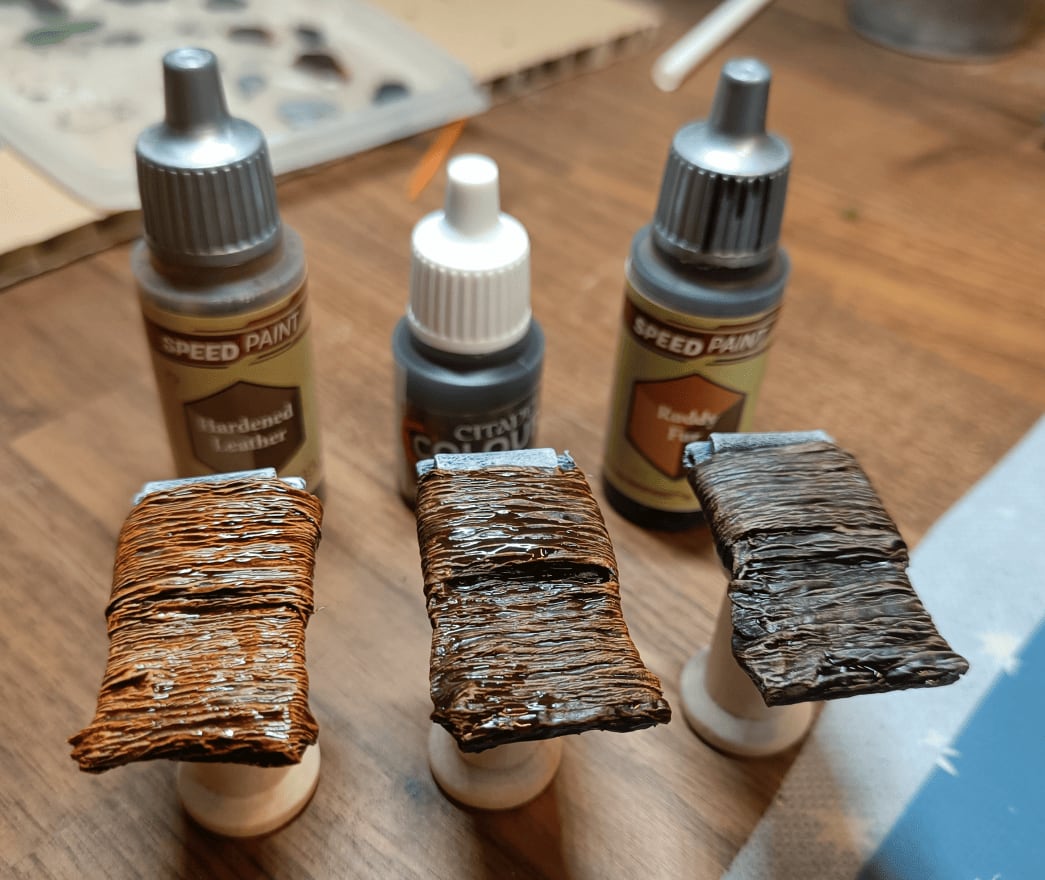
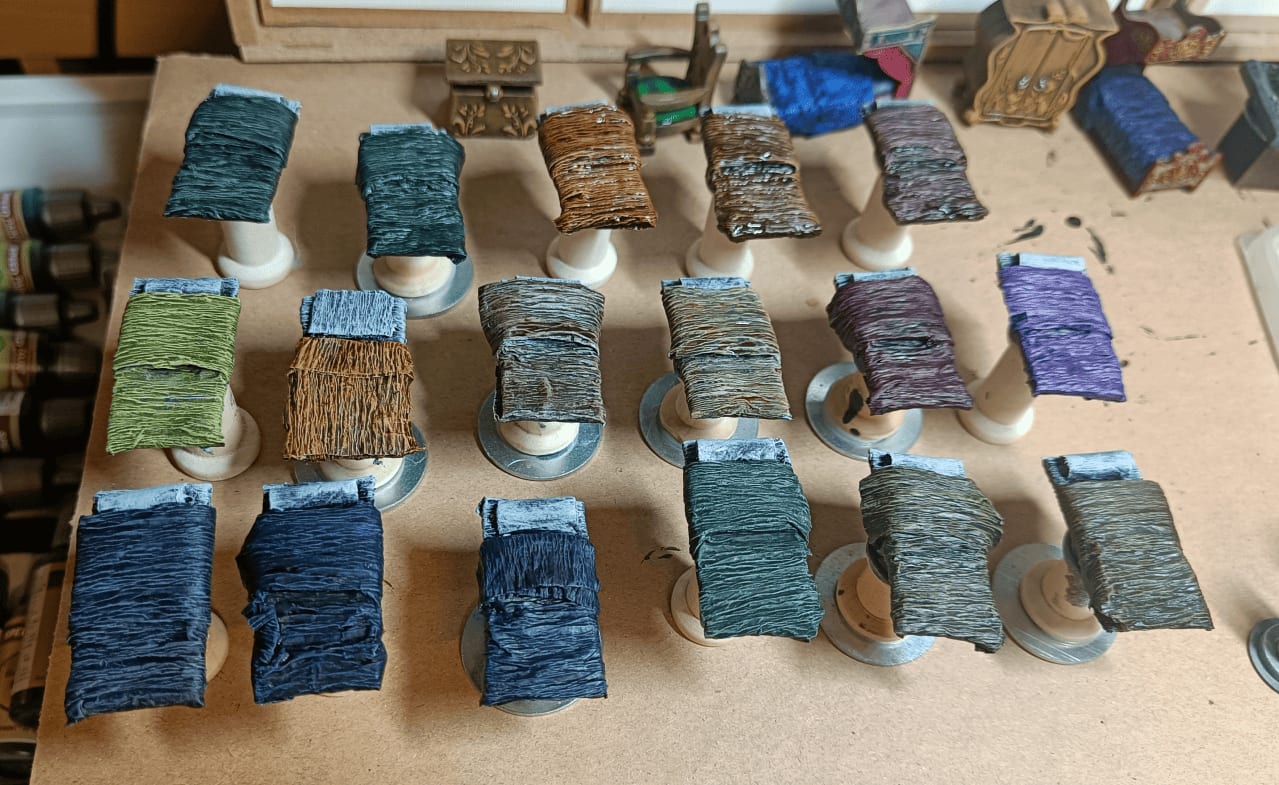
When I did this project, I had just received my box of speedpaints. I took the opportunity to test different speedpaints on different bases to see what they would look like and check out the color differences.
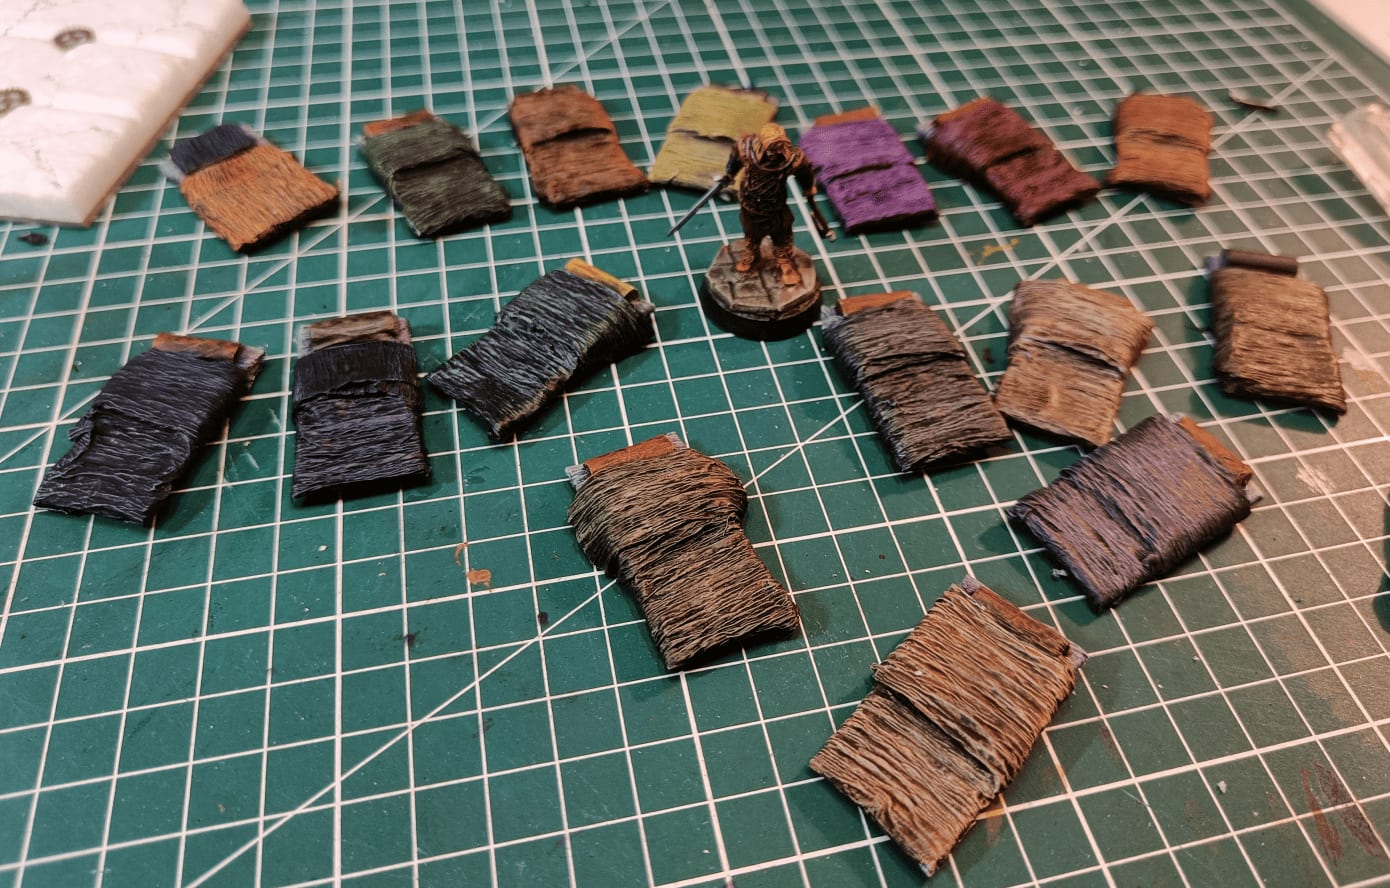
I also changed up the pillow colors each time to add some variety.
Angel Fountain
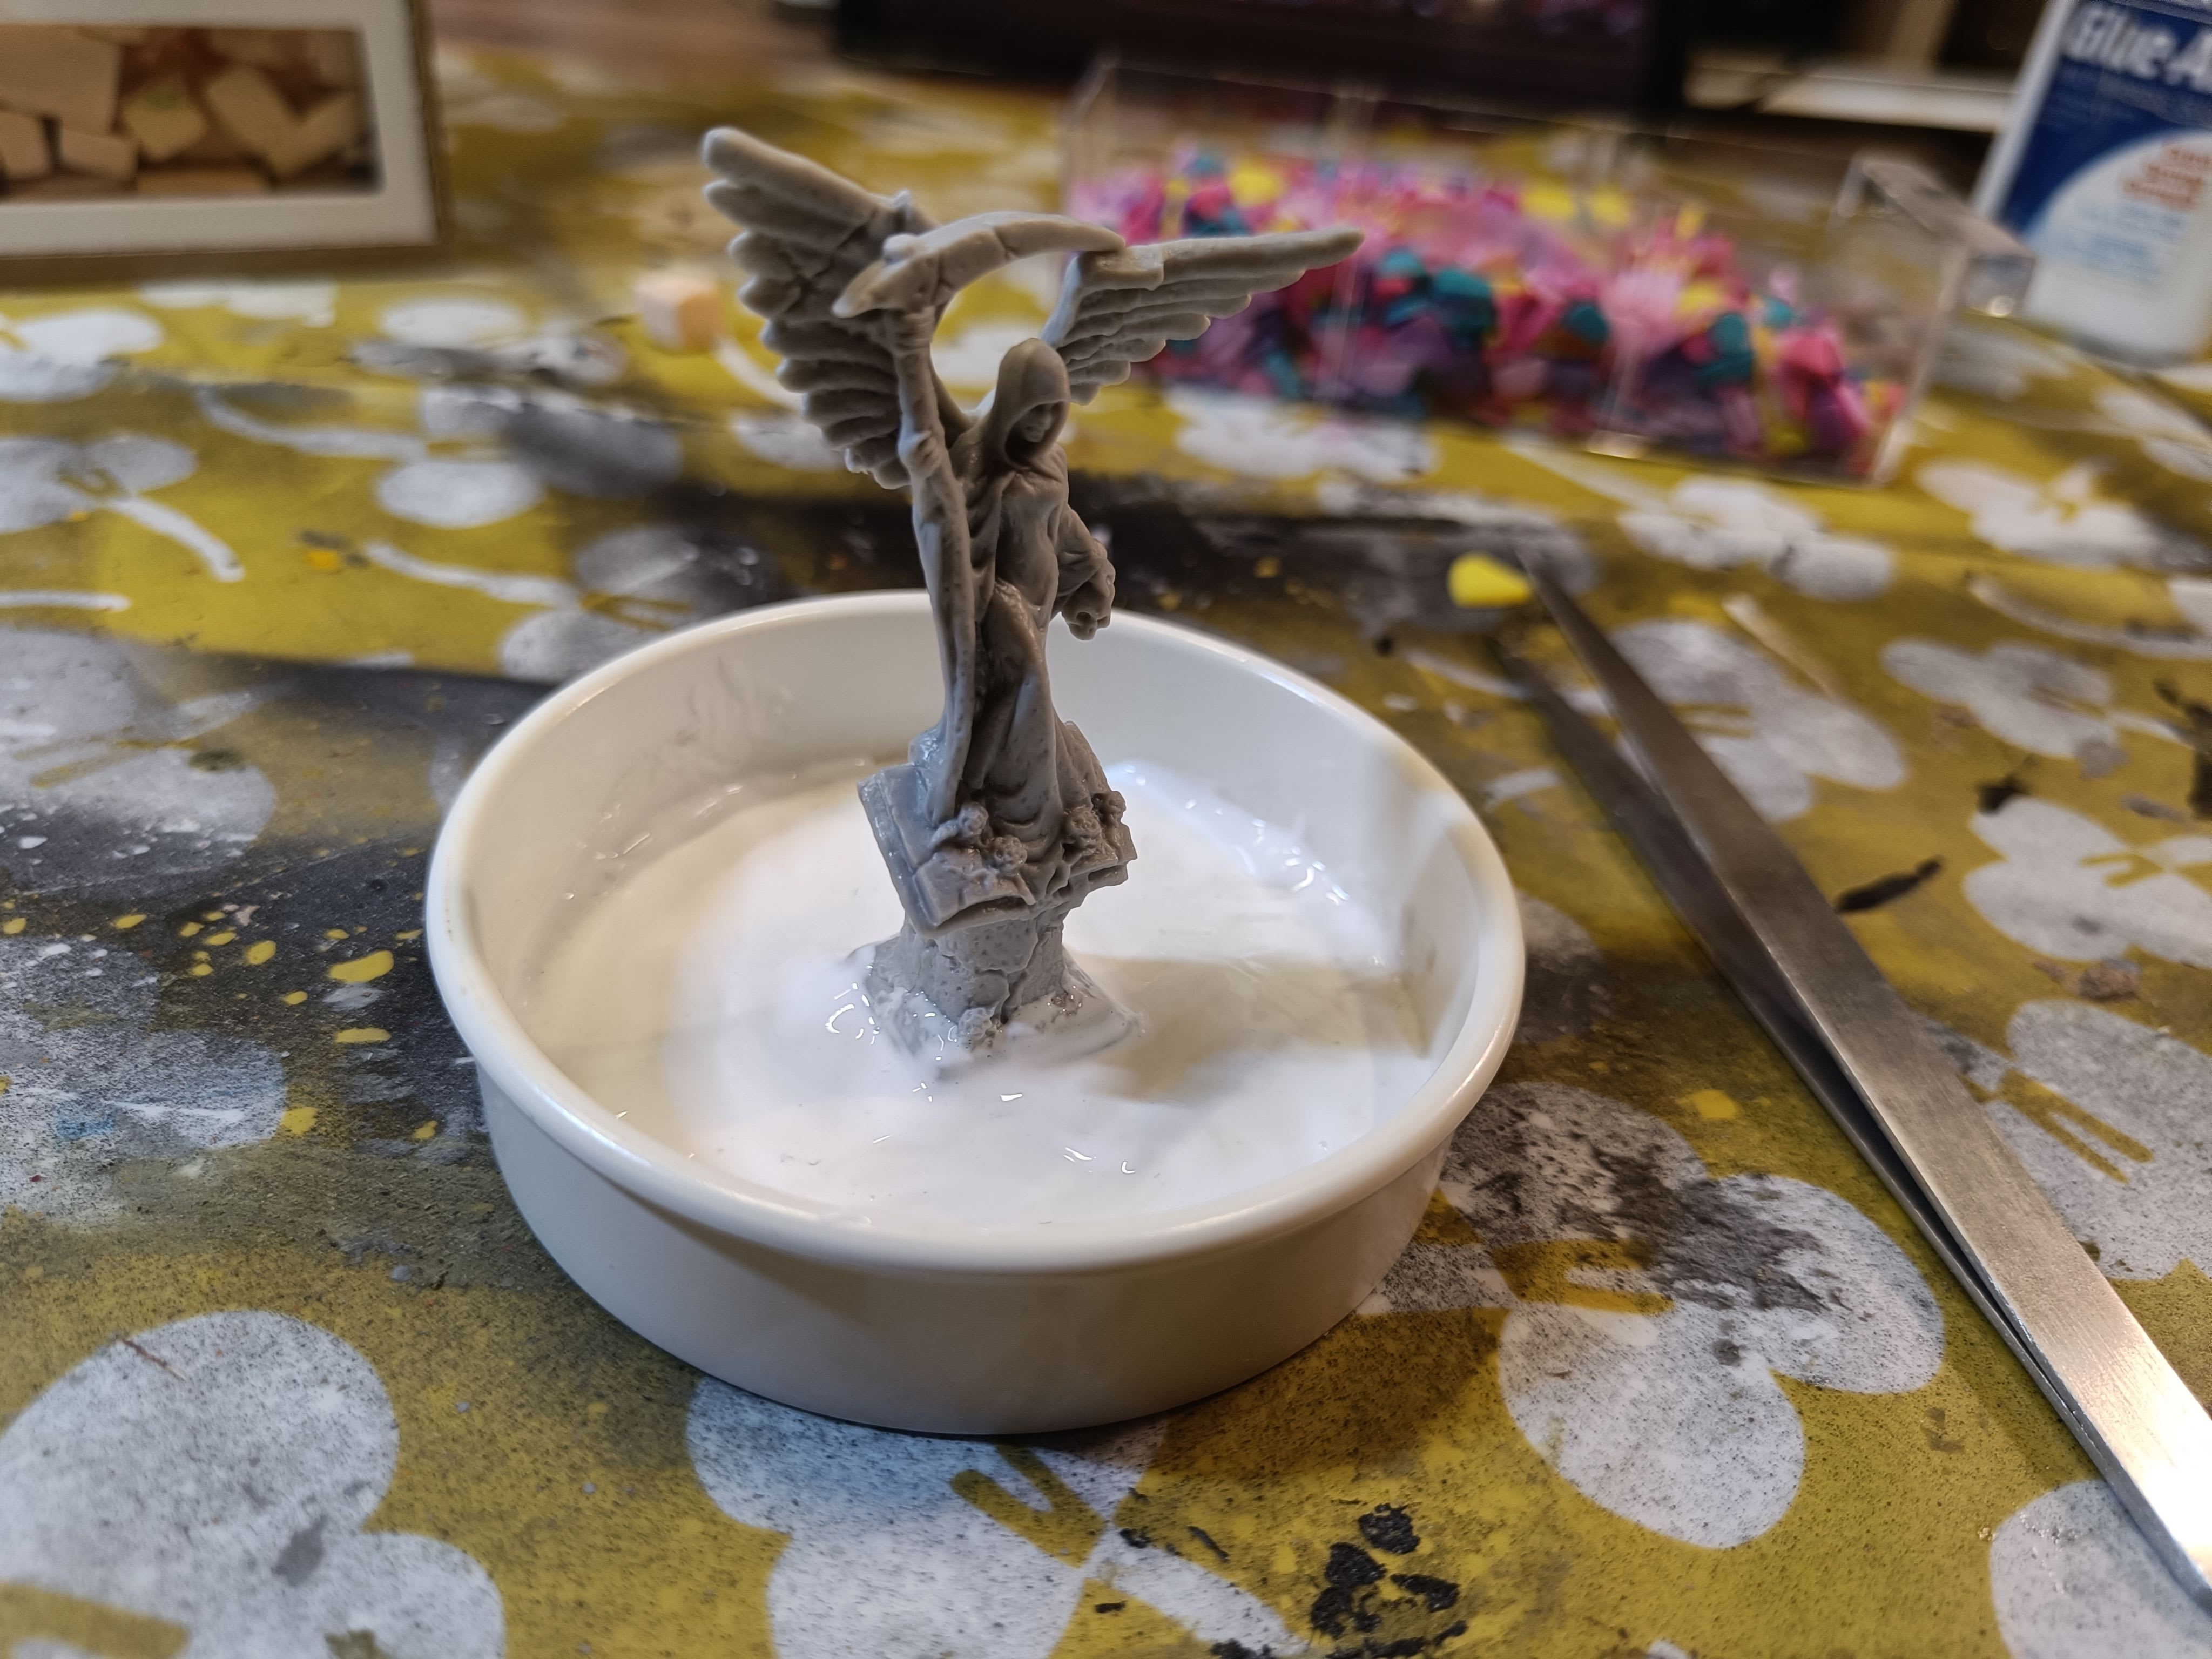
I started working on this craft without really having a specific idea at first. The tray underneath is actually a little Playmobil pool that came in a toy pack for my daughter. She didn't want it, but I thought it looked perfect. It seemed about the right size and it's solid, so it could be a good base if I ever wanted to make a fountain in the middle of a village scene.
I also salvaged the main sculpture, which I think is a Reaper Bones figure. I don't remember exactly where I got it, probably from some secondhand thing. I know I would never use the miniature just as a basic statue on a miniature base, but would incorporate it into a bigger build, so why not make a fountain out of it?

I wanted to try something with these little plastic pieces. They come from another creative game my daughter had when she was little - the kind where you make drawings with blocks of different colors.
I thought these elements had a pretty nice shape and that I might be able to use them to represent pebbles on the ground or cobblestones. So I covered the bottom with PVA glue and positioned these different little pavers on top.
Spoiler: at the end of the build we don't see them at all anymore.
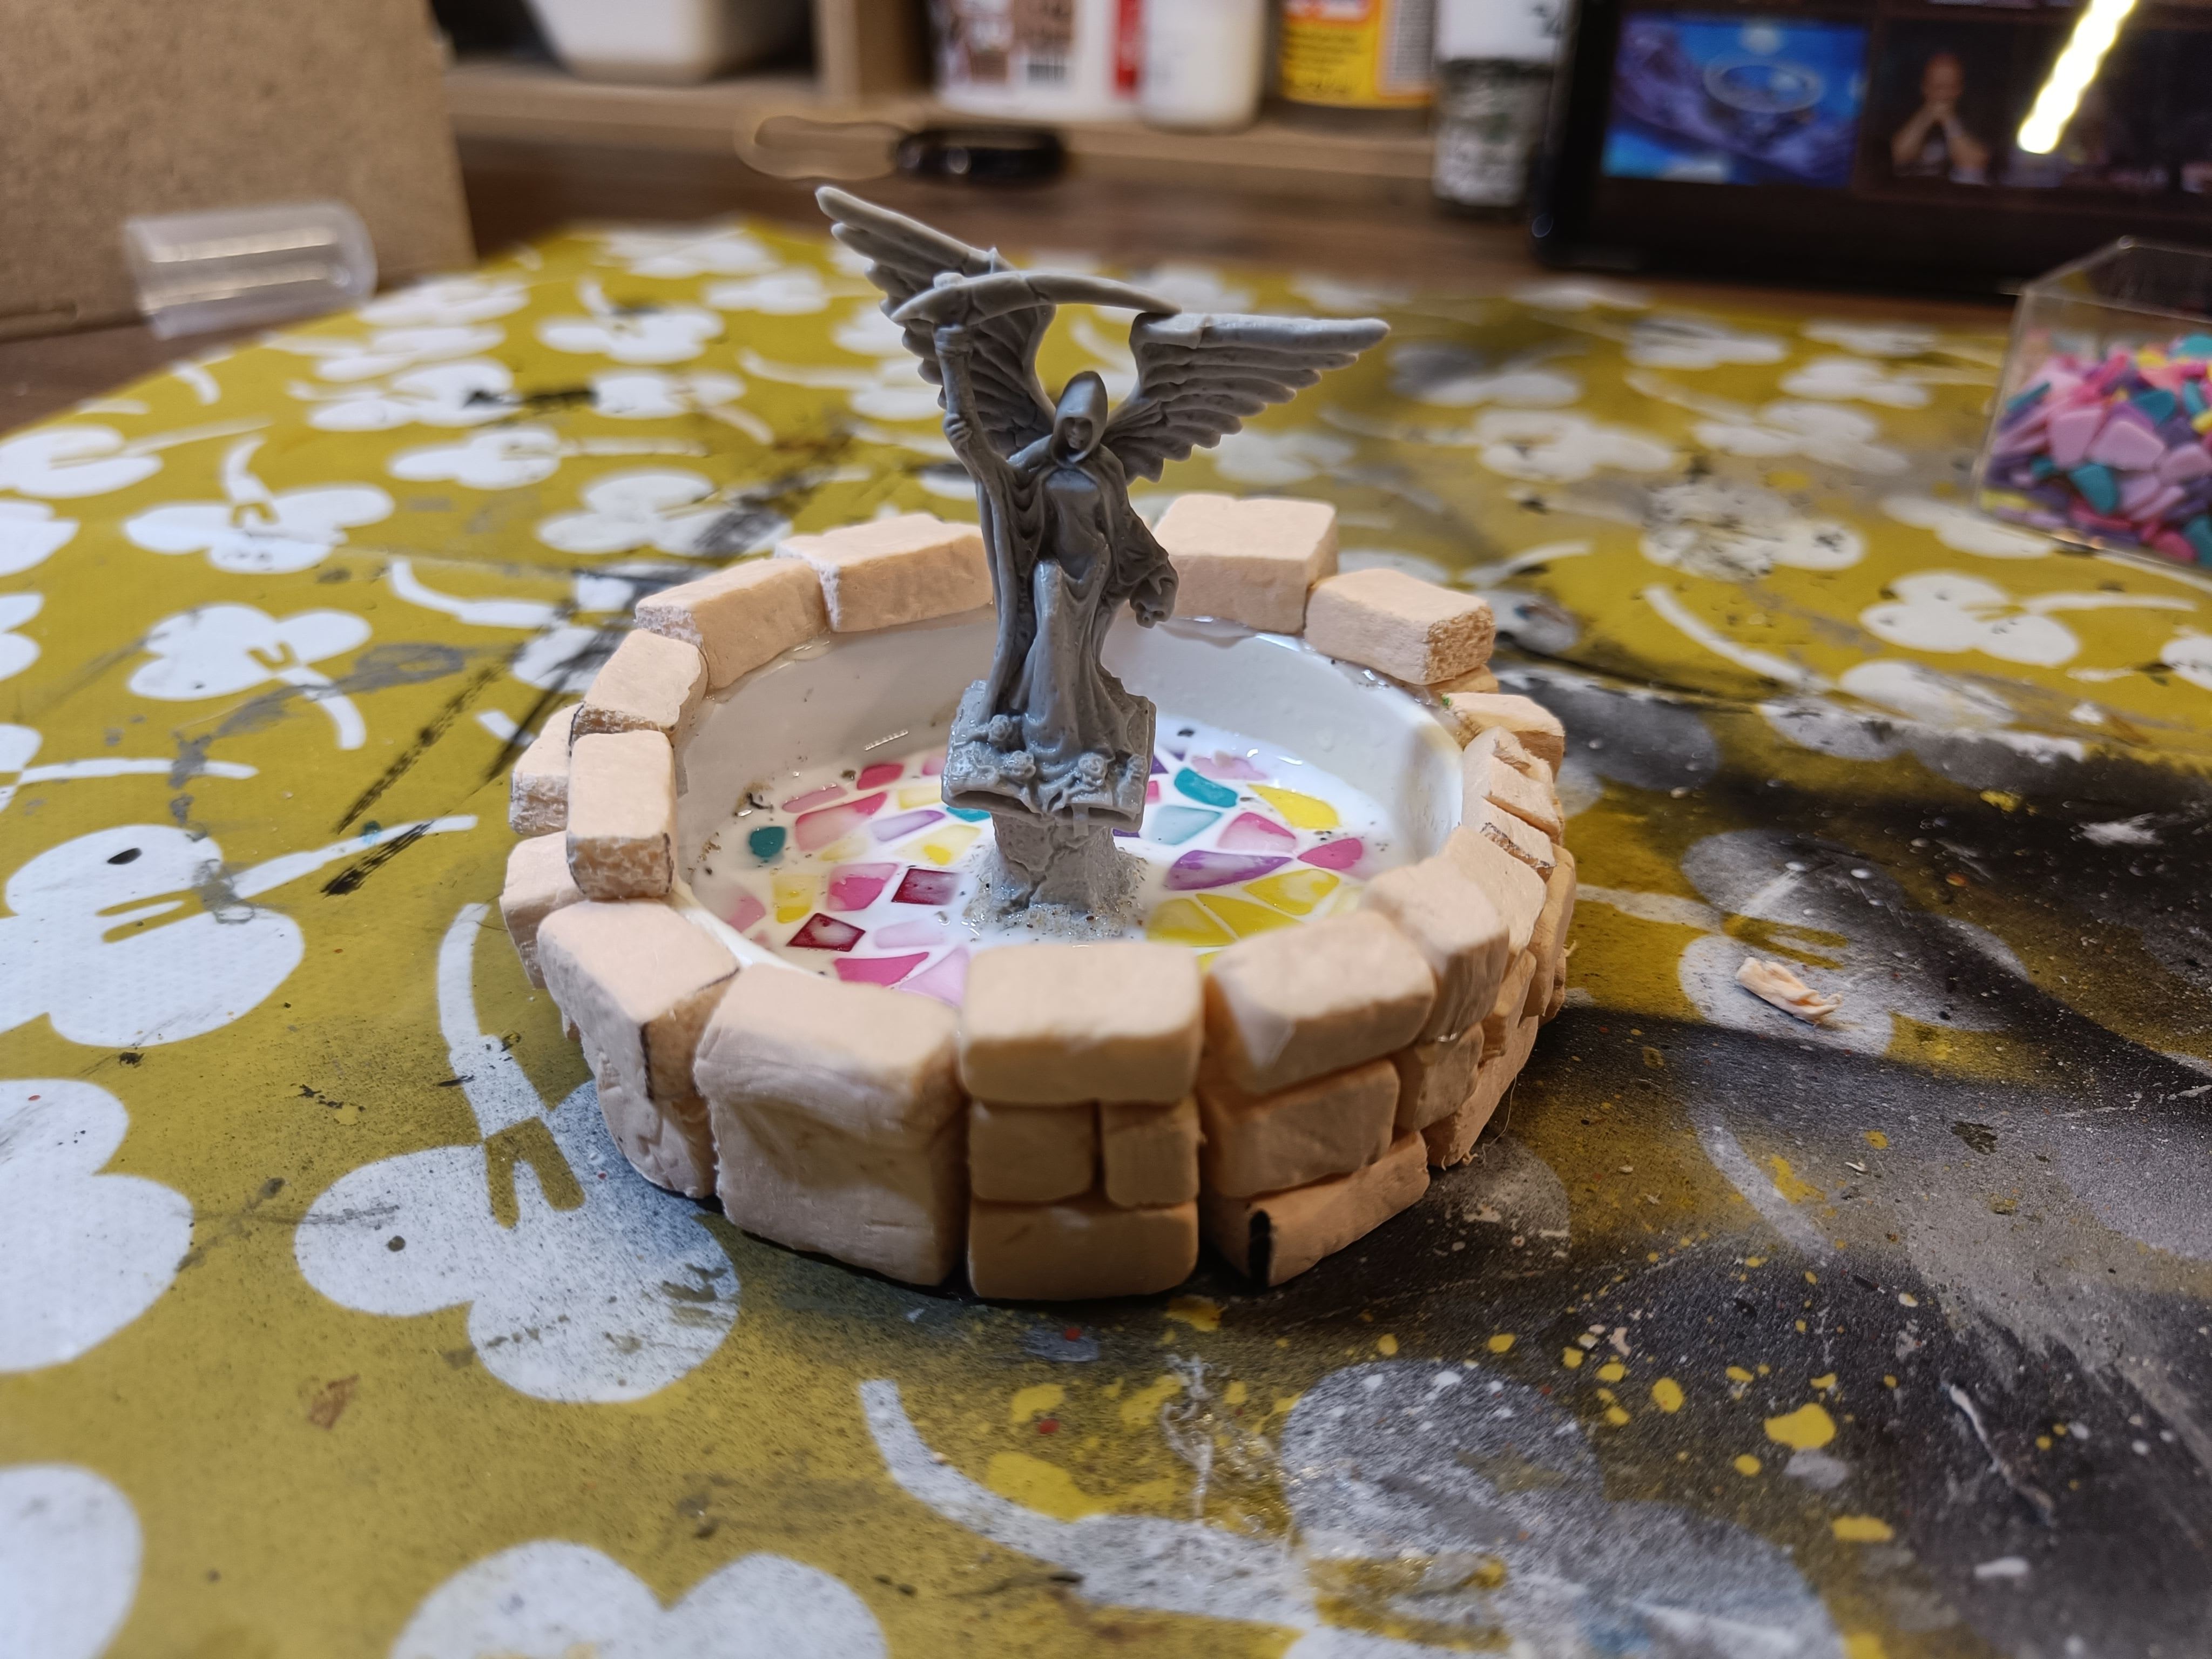
I went around the element with lots of regular foam bricks

I mixed some filler compound with a bit of water and a tiny bit of paint to give it some color and make it more spreadable. Then I spread it all over the surface.
The idea is that when I run my finger over it, the compound goes into all the recesses and fills them up like mortar would. After that, I just wipe off whatever's left on the surface with a paper towel.
In the end, this should help tie all the different bricks together visually, so they look less like foam blocks glued next to each other and more like an actual wall with real mortar holding it together.

I painted it black with the modpodge thing, and added a drybrush on everything. I honestly don't remember if I did one drybrush or several different shades at that point.
You can see on the front that some bricks are too well aligned. If I'd done this better, I wouldn't have ended up with three bricks creating that groove right down the middle. They just aligned that way unfortunately.
I have to say, I didn't have much inspiration for this build. I just thought "I should be able to do something with these miniature pieces I have, let's give it a shot." So I just moved forward using techniques I already know, but the creative spark wasn't really there for this one.
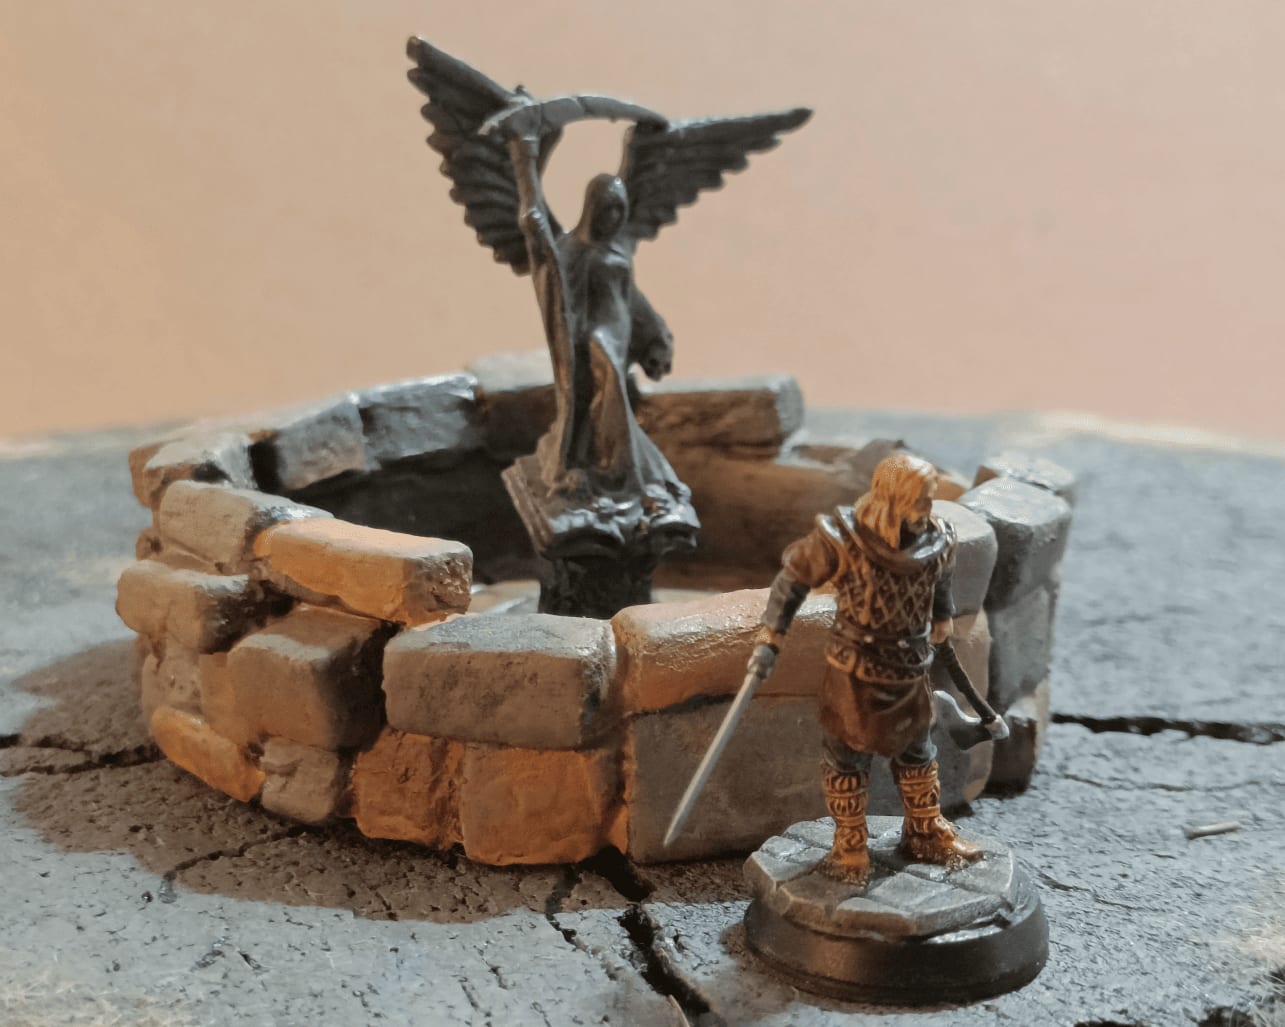
I painted the different bricks after that, but honestly the quality isn't great. I lost interest in this scenery piece so I didn't put much effort into the painting. It's been sitting on my shelf unfinished for almost a year now.
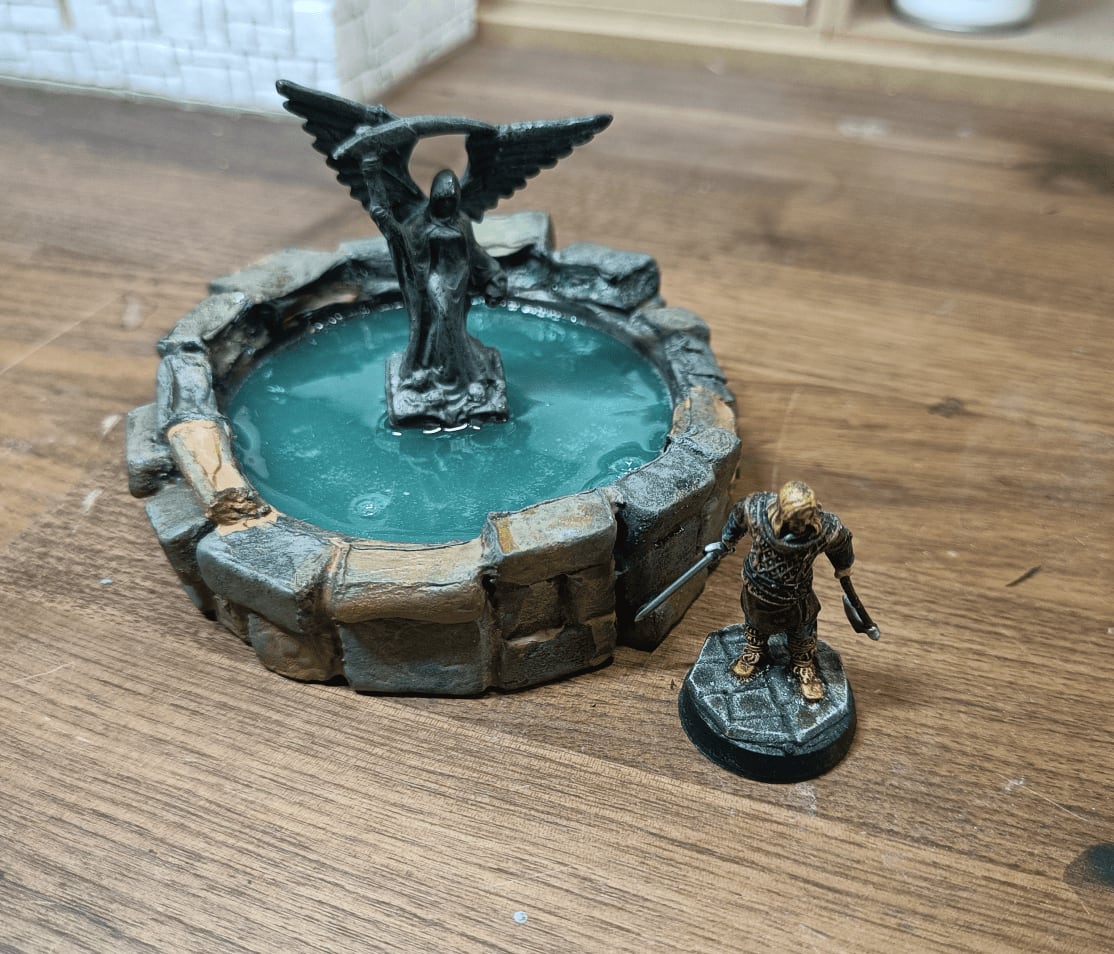
Years later, I ended up pouring resin inside to fill the basin. I wanted to color it to make it a little bit blue, but it's no longer transparent at all now and you can't see the work I did at the bottom on the different tiles.
To prevent bubbles in the resin, I tried heating it with a hair dryer. Apparently I placed it way too close to my sculpture and it melted the foam bricks. That's why the bricks have a really weird shape and it didn't even make the bubbles disappear because there are some that are very visible on the surface.
So this is really a piece of terrain that I tried to make without too much inspiration, with plenty of mistakes, but at least it exists.